Welcome to day 10 of the Advent CAL 2023 – the 10 Gift Bags of Christmas!
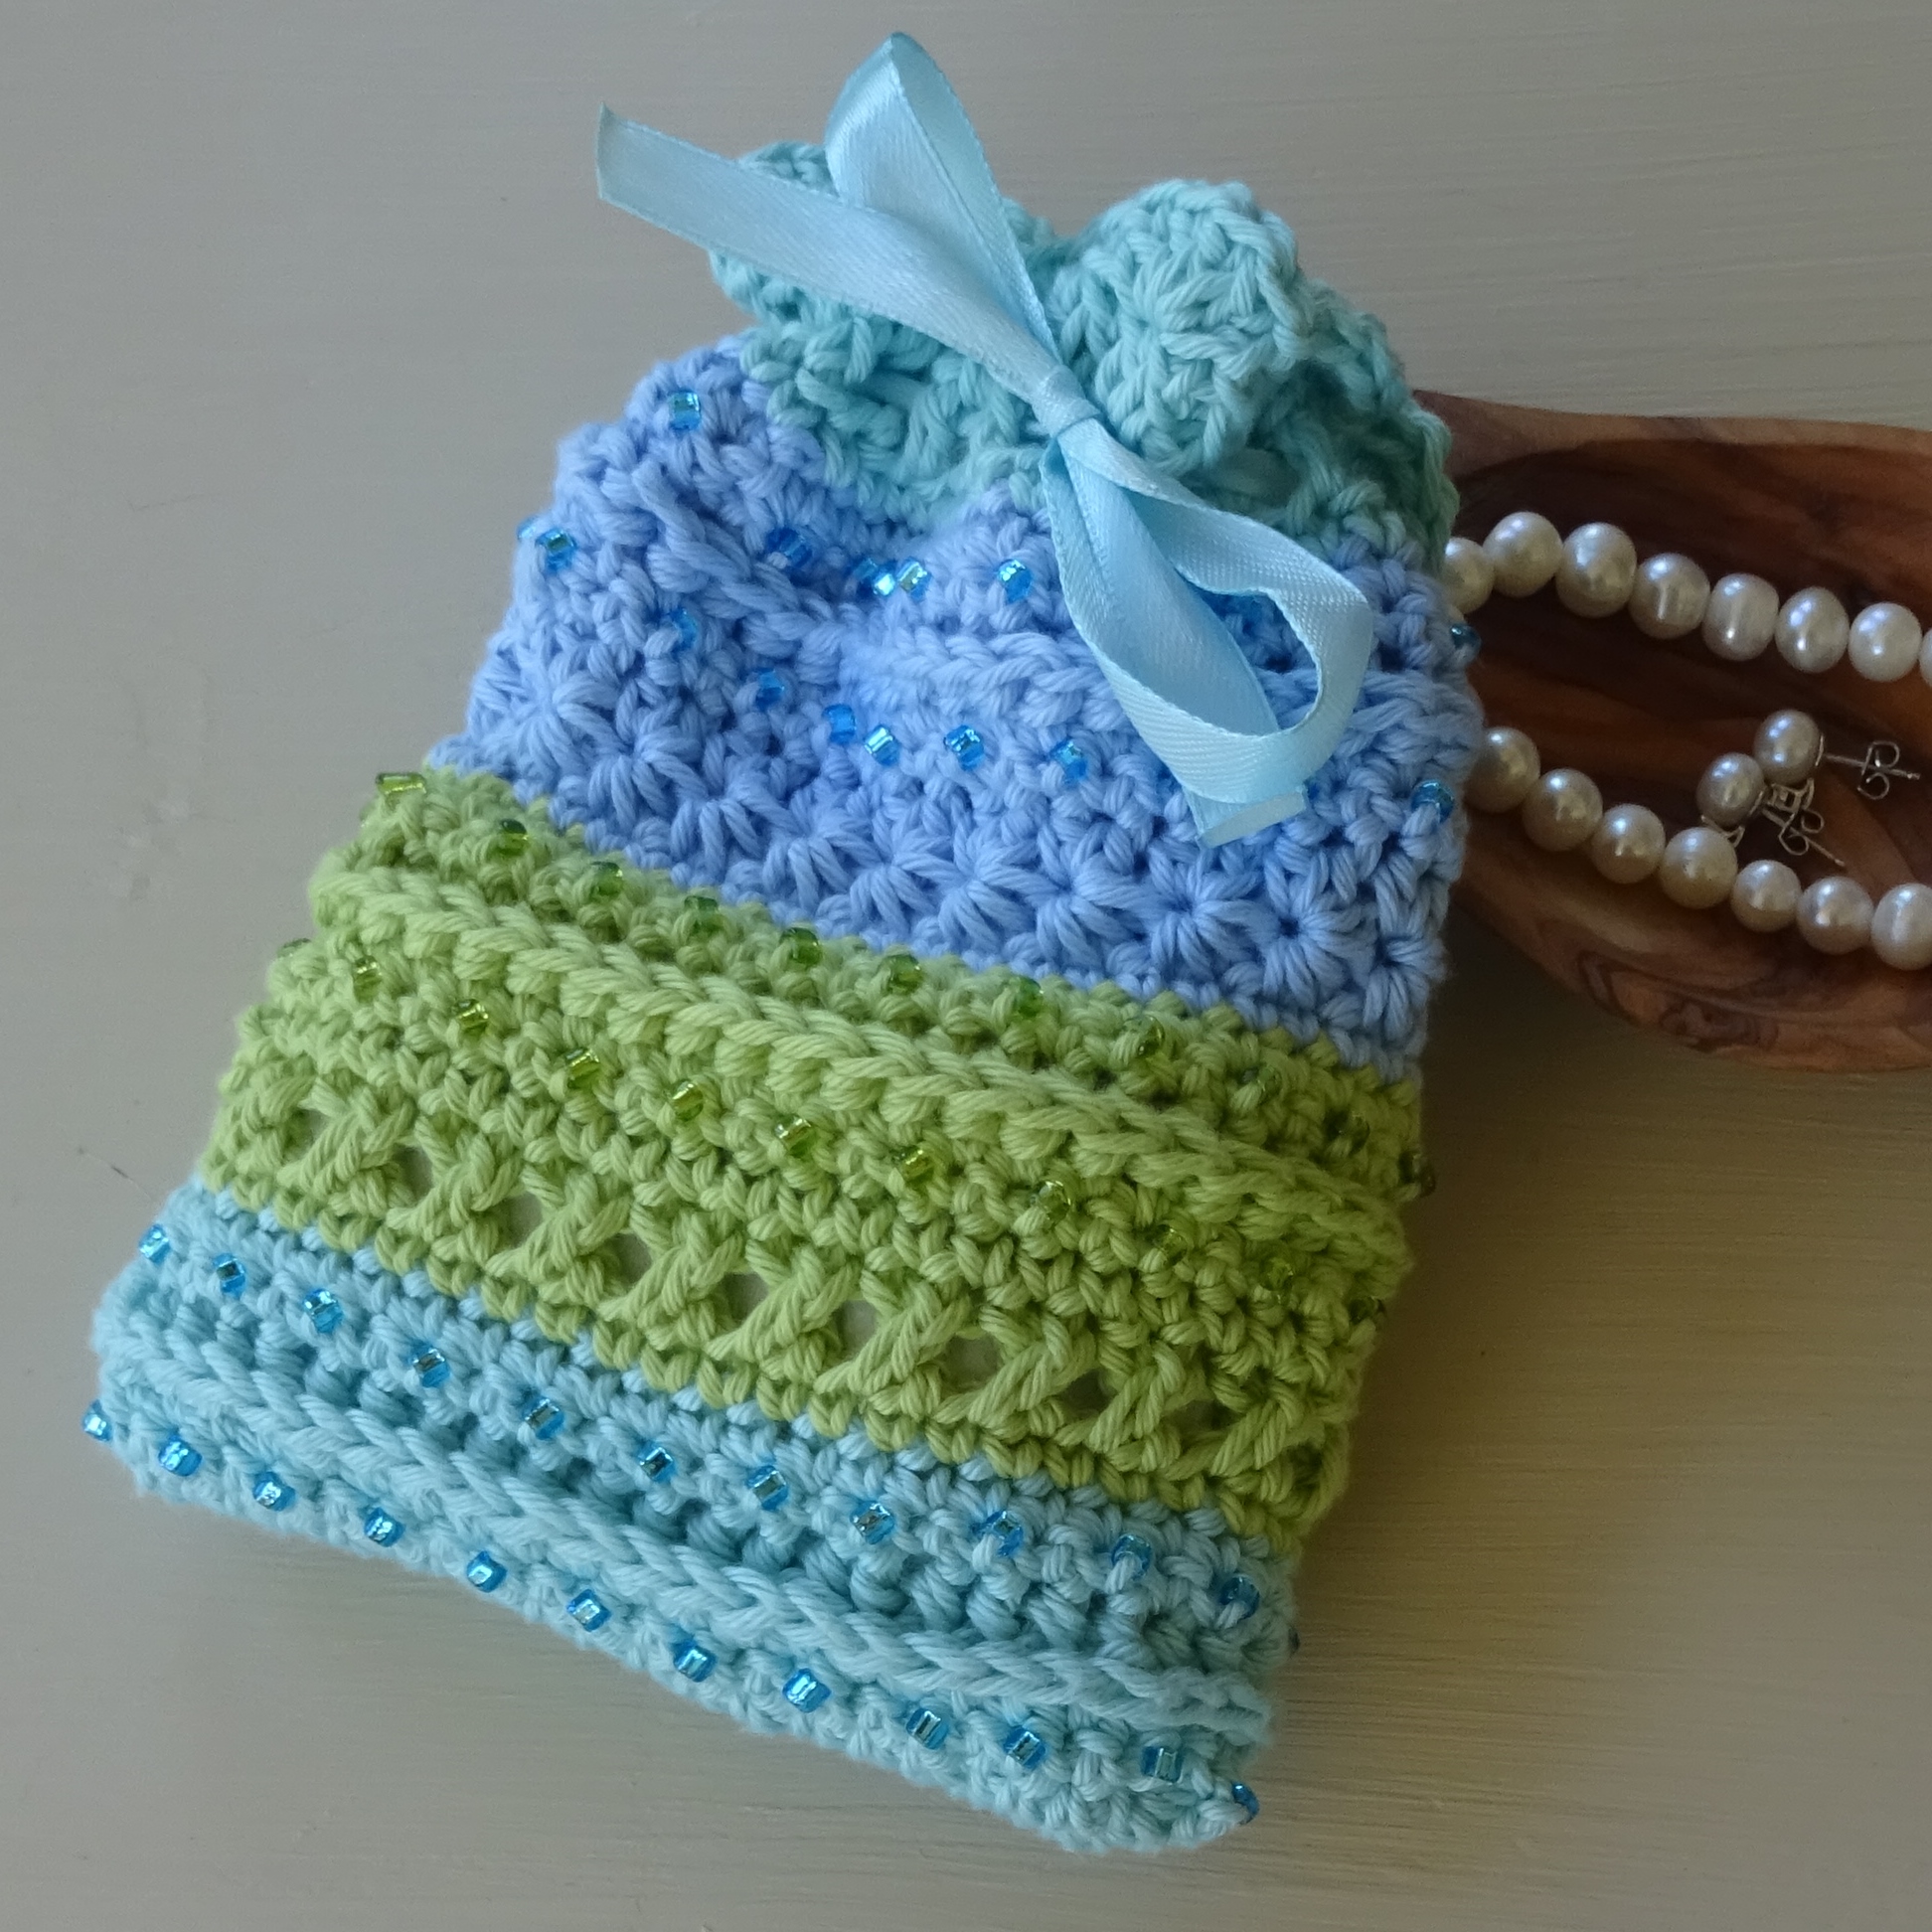
This is the last pattern in the CAL and is my first ever beaded crochet gift bag – published 9 years ago! It is another little beauty and I have made it several times. It is called the Beaded Crochet Pouch, not a very original name!
The pattern is available here and is free provided you use the code BEADS on purchase. All the patterns in the CAL will be available free for the duration of the CAL, until midnight GMT tomorrow 13th December 2023.
Welcome to day 8 of the Advent CAL 2023 – the 10 Gift Bags of Christmas!
The eight bag is a new design, a little like the V stitch but a square shape and using a linen stitch. I find it quick to make up. It is called the Square Linen Stitch Bag.
The pattern is available here and is free provided you use the code LINEN on purchase. All the patterns in the CAL will be available free for the duration of the CAL, until midnight GMT 13th December 2023.
Welcome to day 4 of the Advent CAL 2023 – the 10 Gift Bags of Christmas!
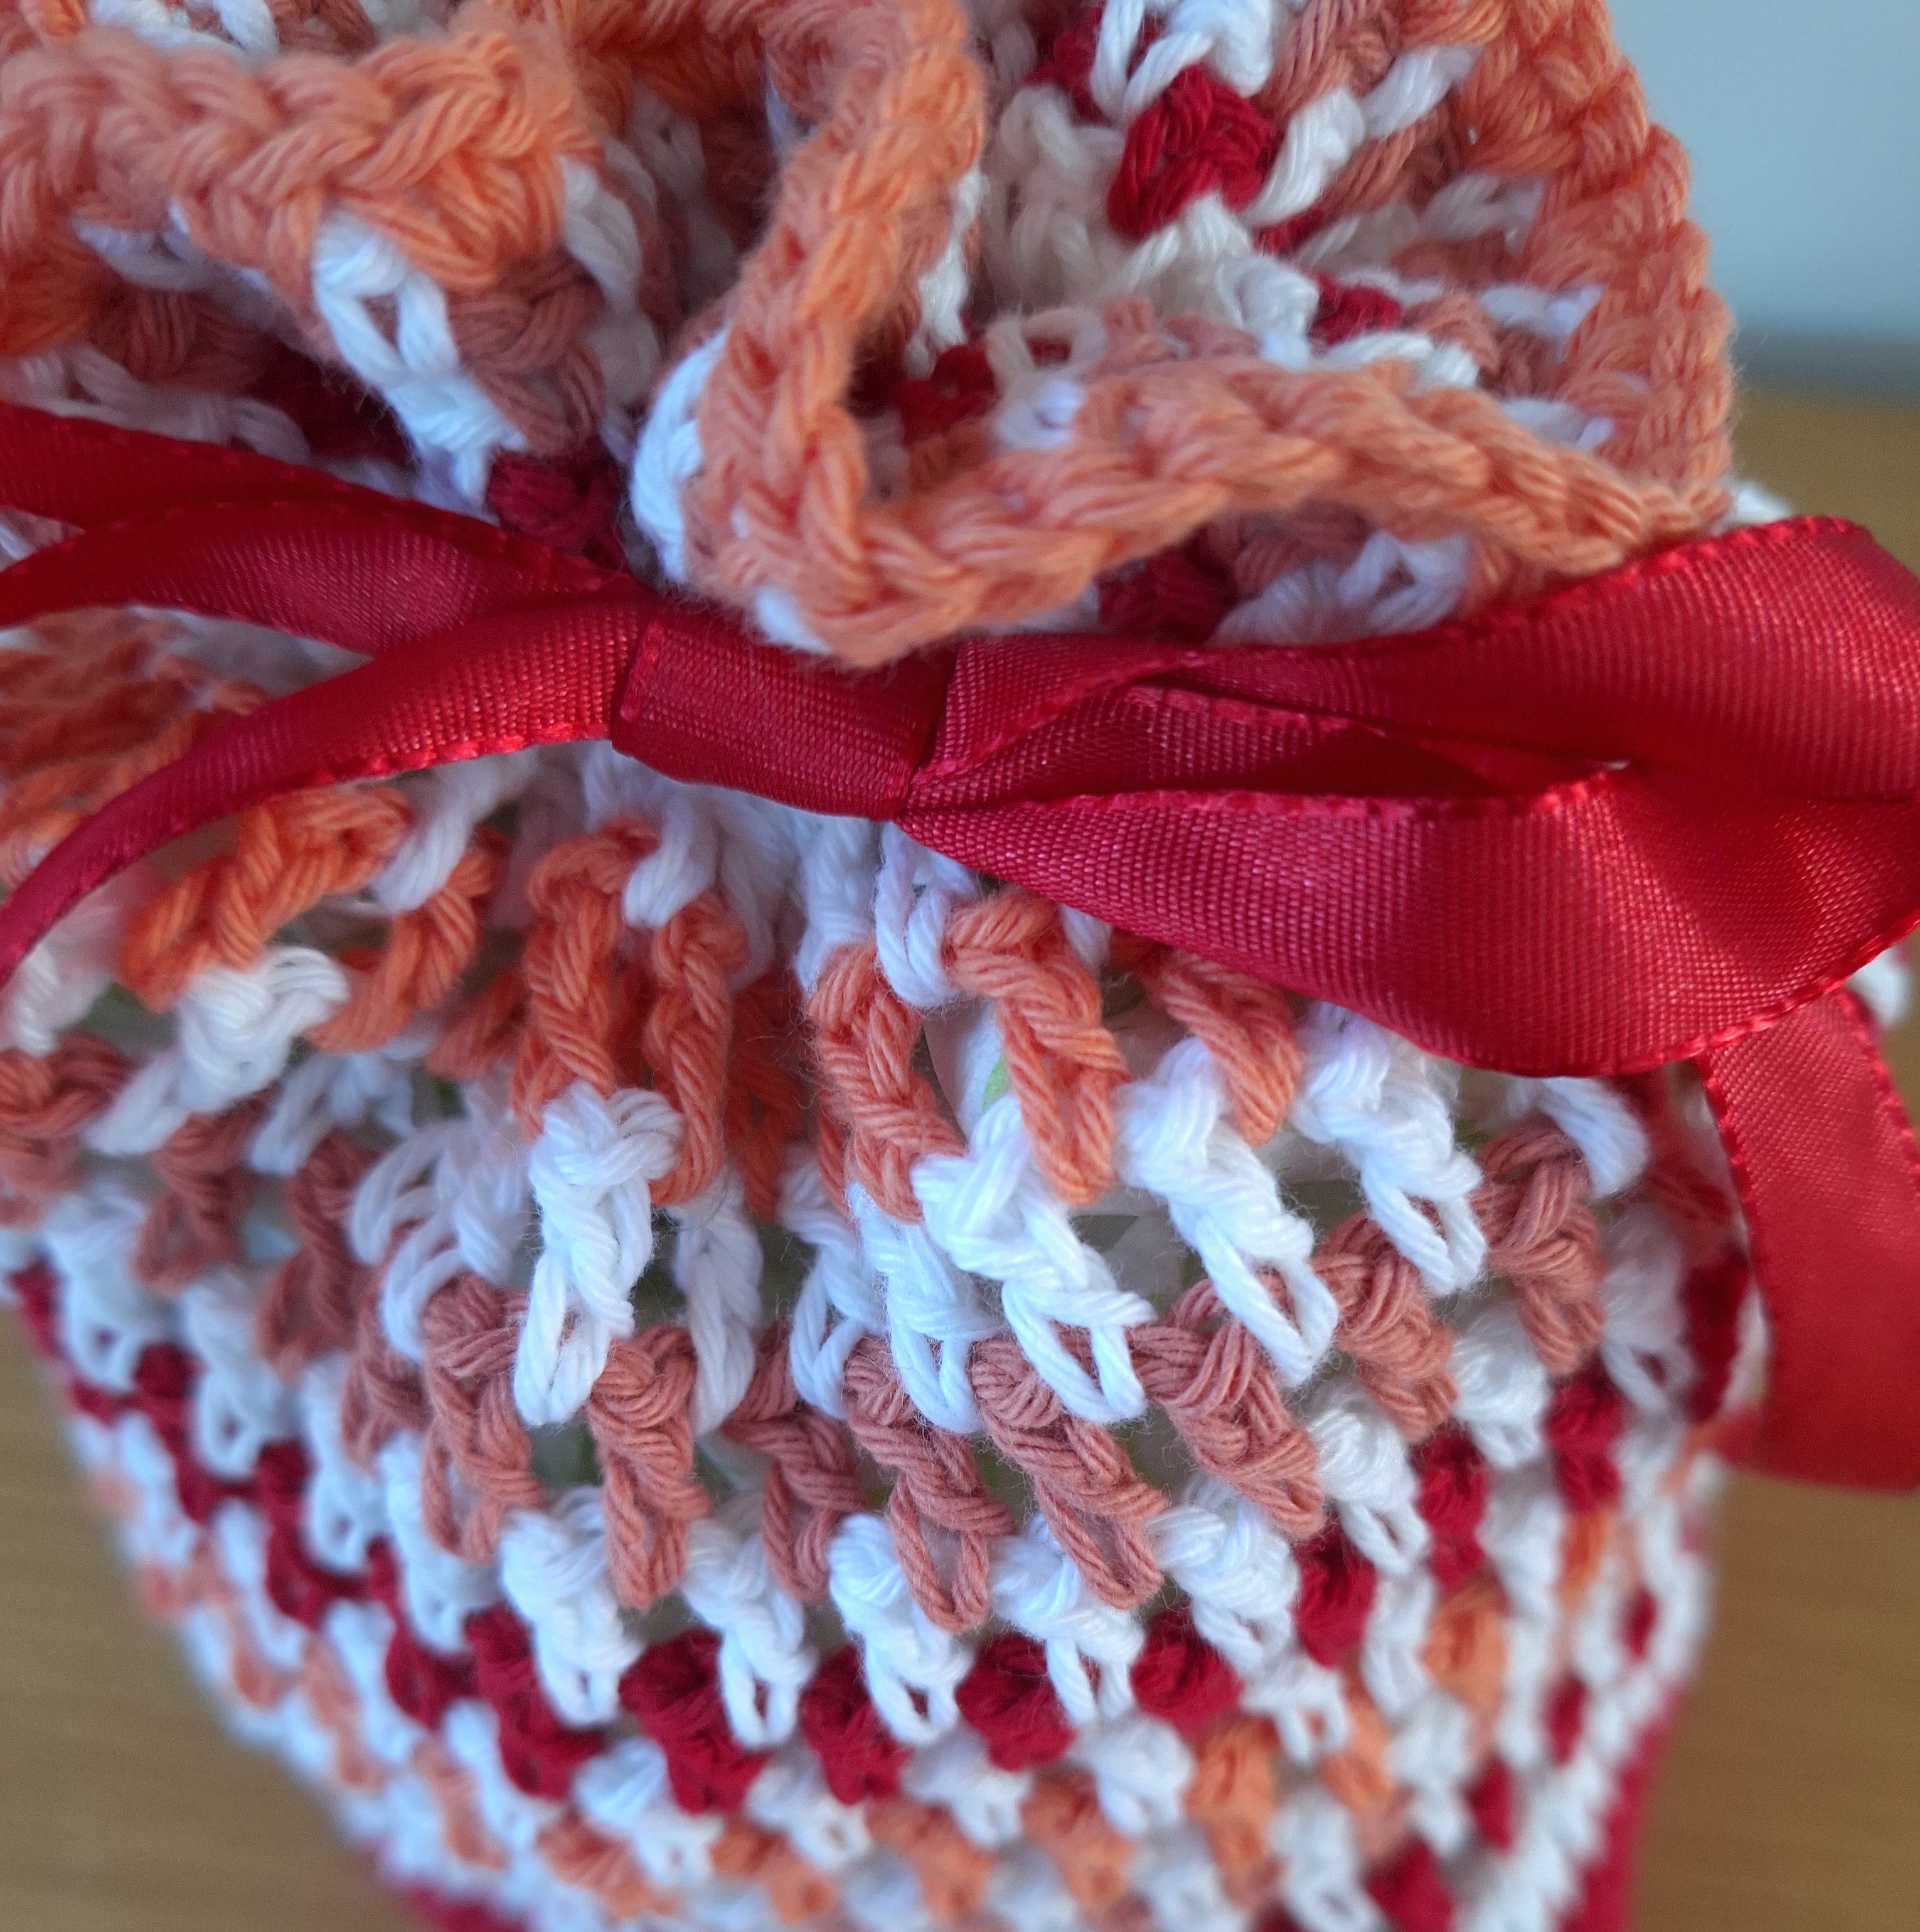
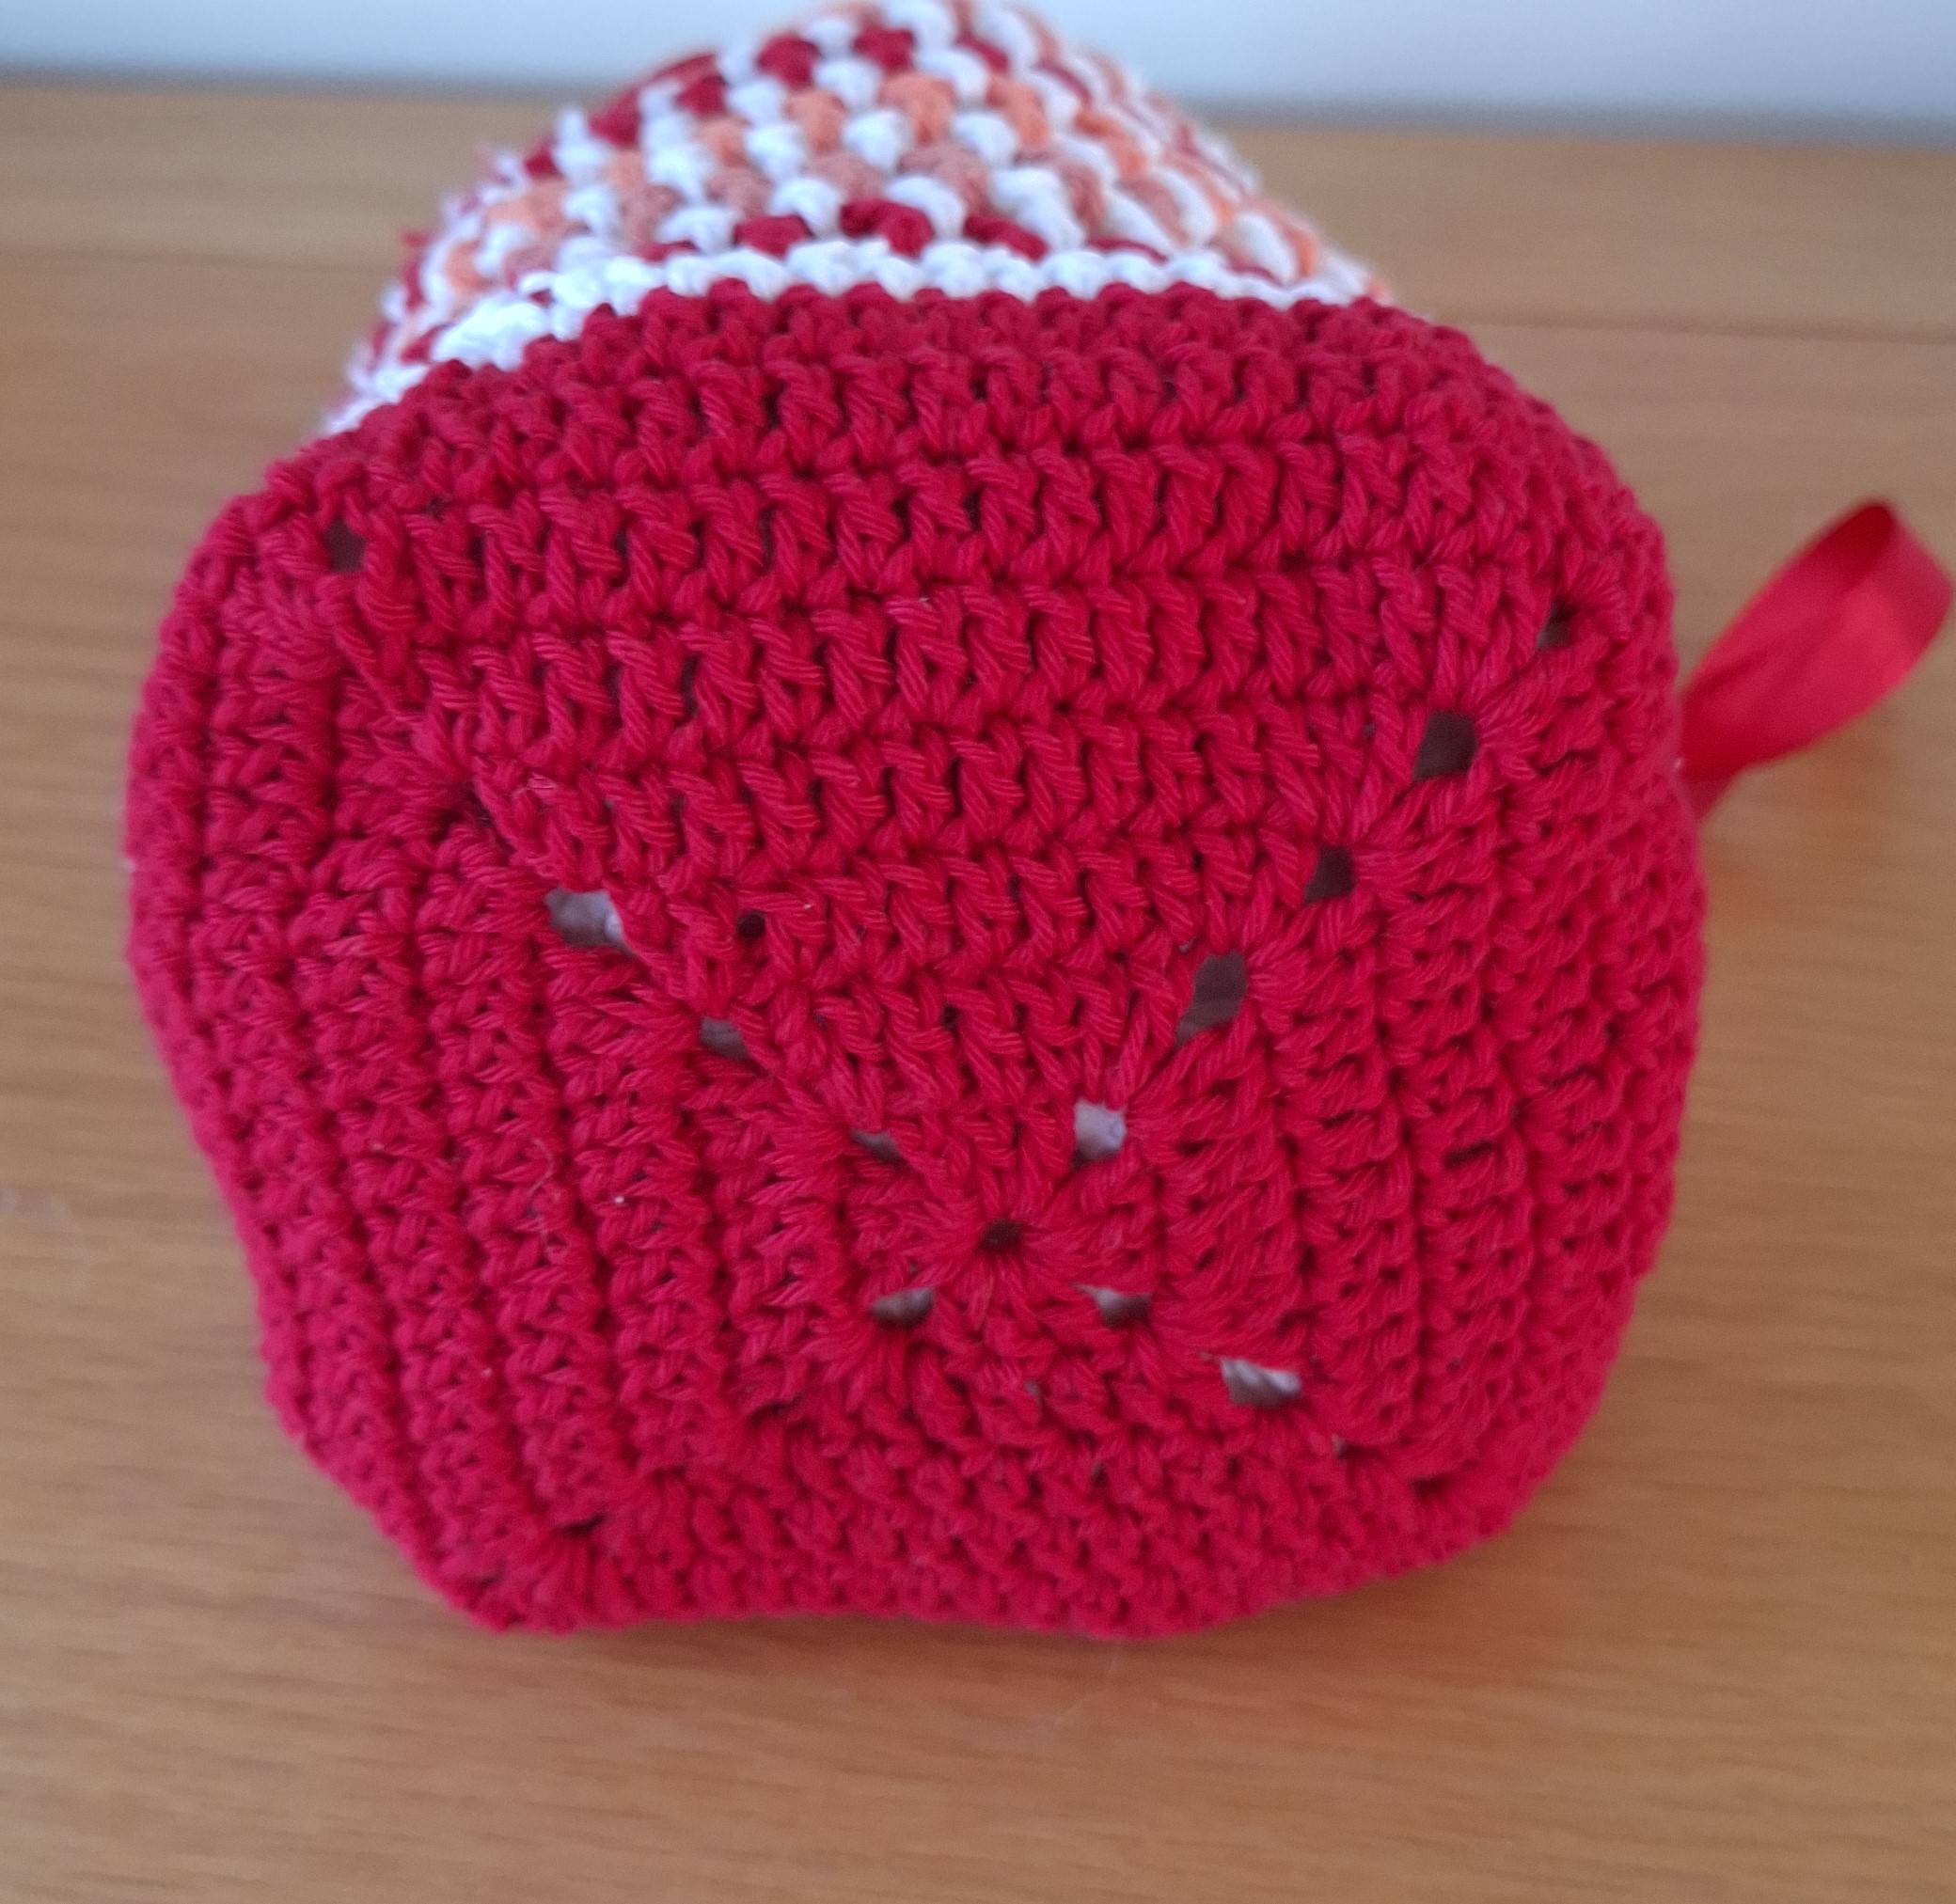
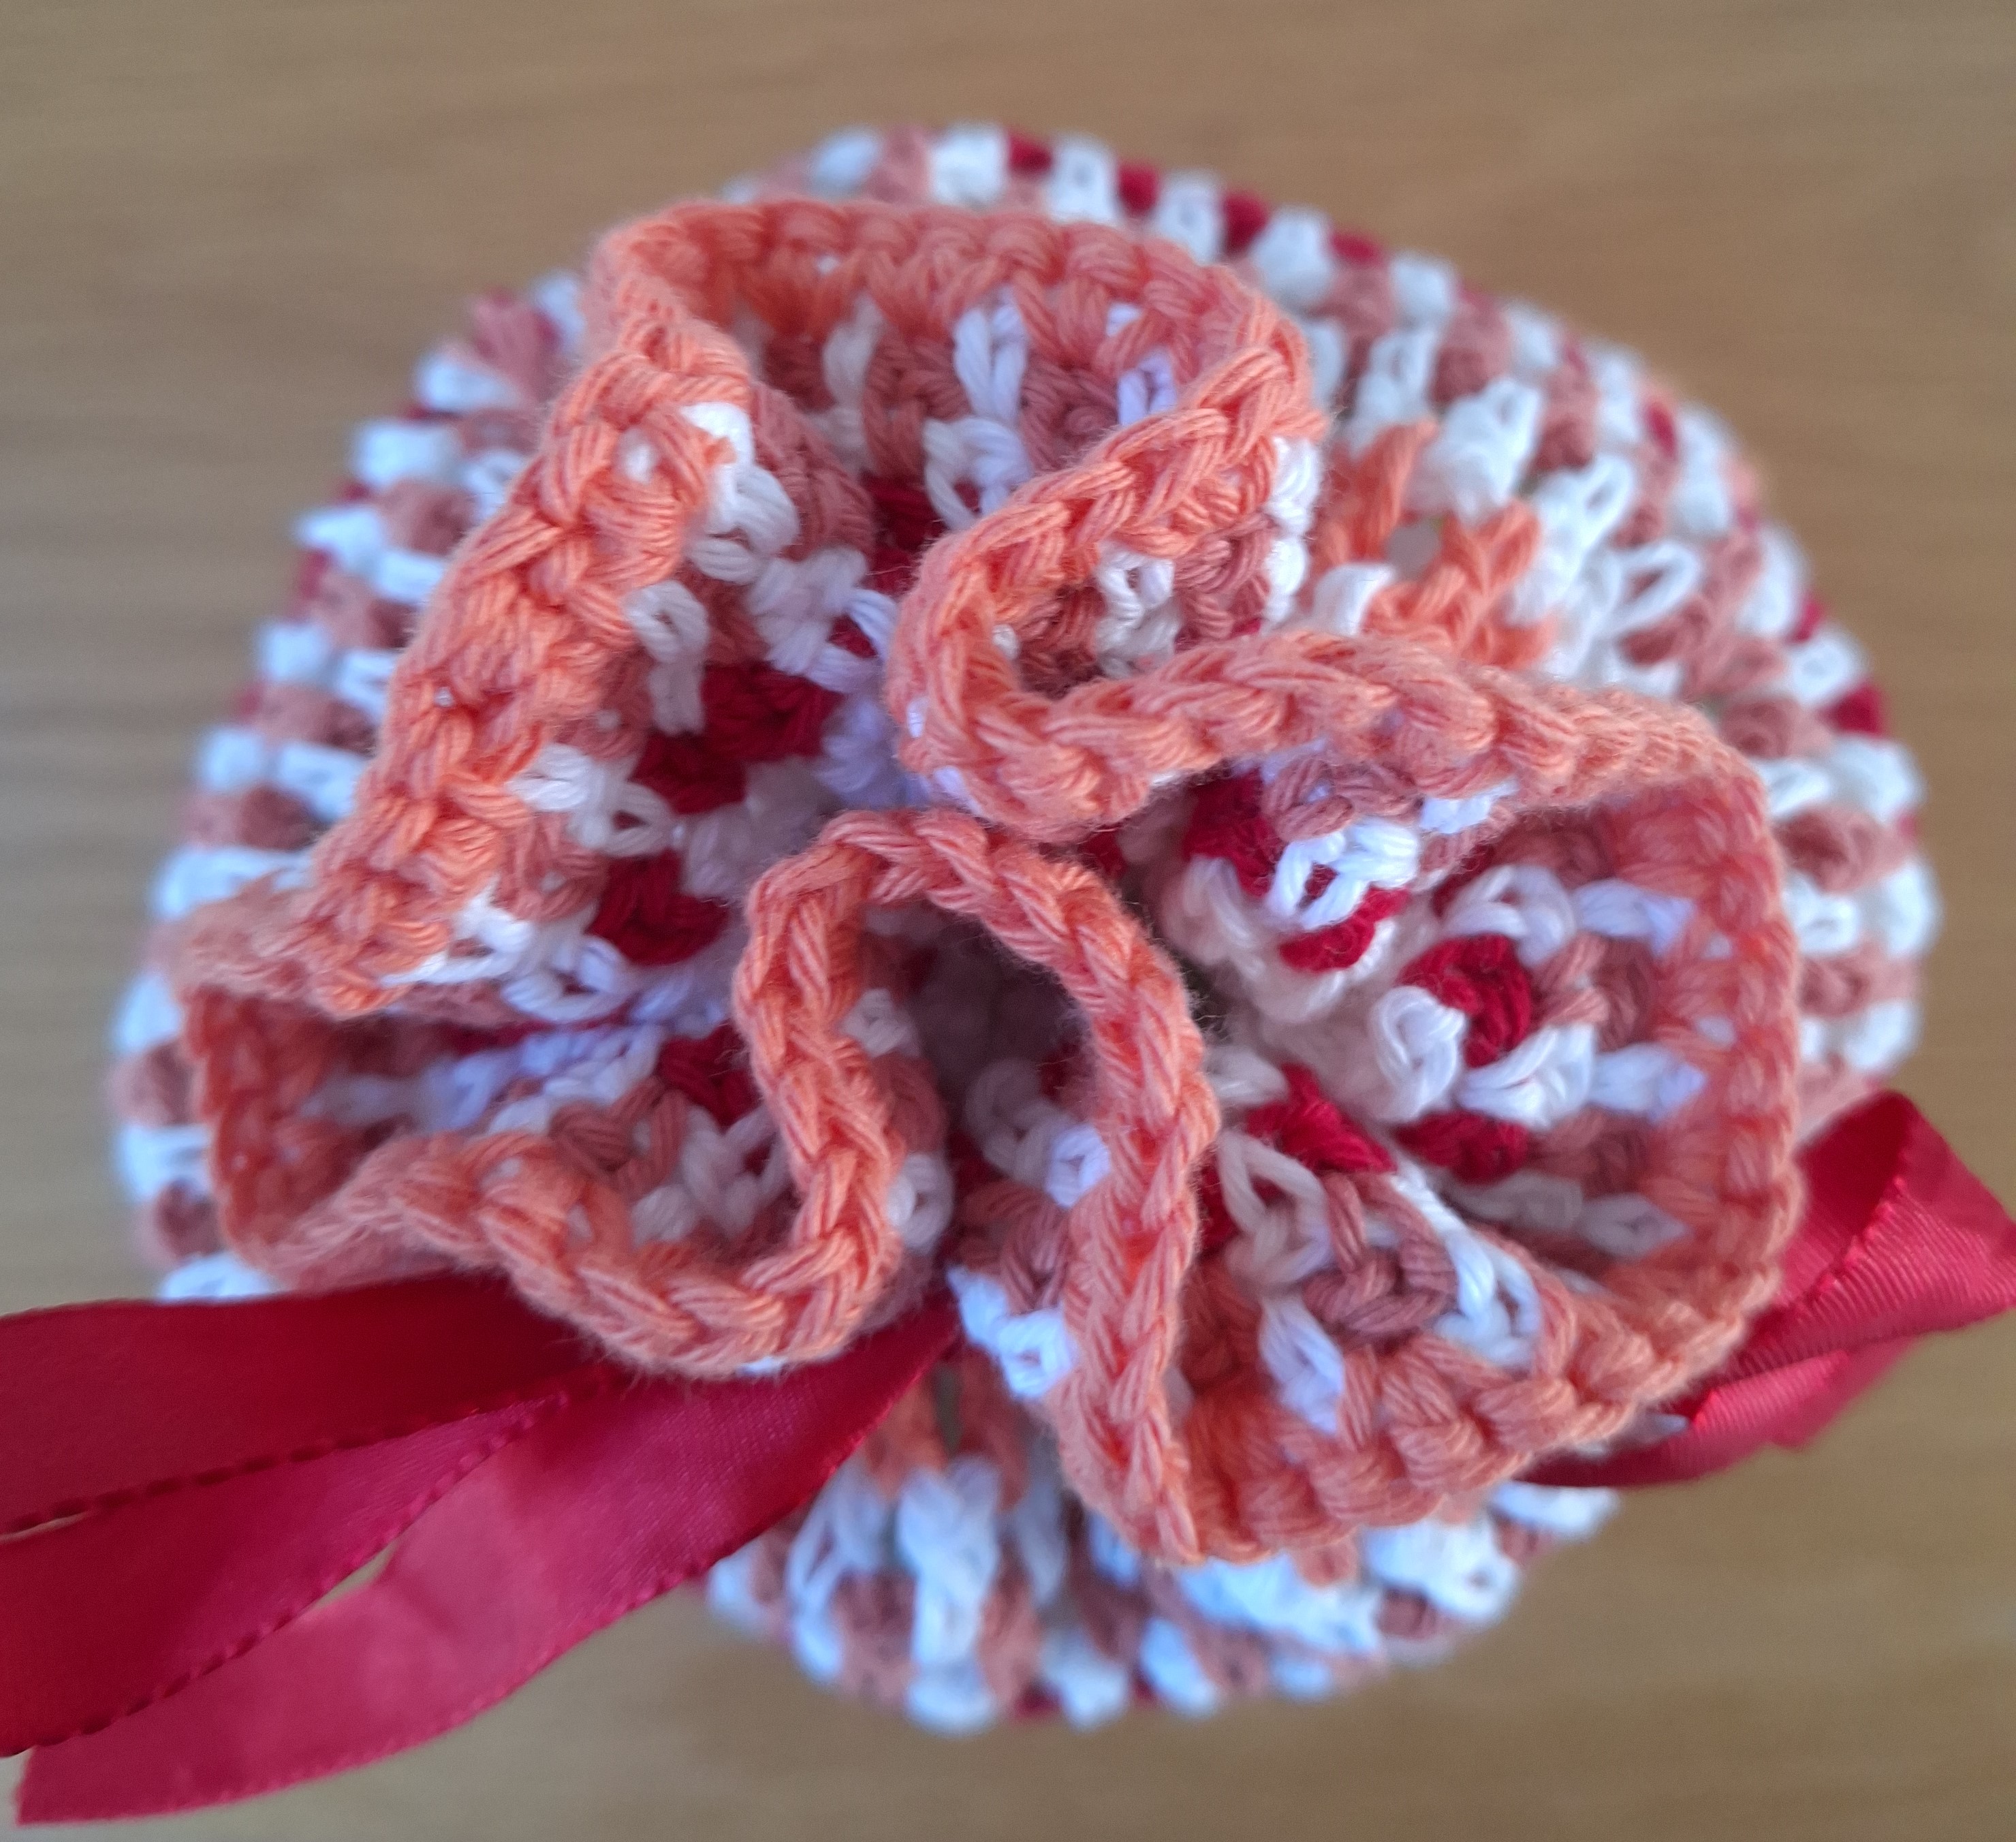
The fourth bag is again based on granny squares and I designed it specifically for a present of a bar of luxury soap (plus a washcloth, oops did I make a present?). So I called it the Soap Gift Bag. Granny squares are extremely versatile and can be joined together to make a larger shape and 3D shapes. Small granny squares are also great for using up leftover yarn and are more versatile when creating 3D shapes. So this is a perfect stashbusting gift bag.
The pattern includes a diagram of how you join the grannies to make the bag. Once you’ve mastered the joining then you could make all shapes of bags with grannies.
The pattern is available here and is free provided you use the code SOAP on purchase. All the patterns in the CAL will be available free for the duration of the CAL, until midnight GMT 13th December 2023.
Welcome to day 3 of the Advent CAL 2023 – the 10 Gift Bags of Christmas!
The third bag is one I published several years ago and is perfect for jewellery, in fact so pretty it could be a gift itself!
It takes a little longer than some bags as you need to add beads (did I ever tell you I love to add beads to bags?) but it is oh so pretty and worth the effort.
The pattern is called Precious Gift Bag and is available here, it is free provided you use the code PRECIOUS on purchase. All the patterns in the CAL will be available free for the duration of the CAL, until midnight GMT 13th December 2023.
I hope you enjoy making this gift bag. Please share progress on Ravelry, Facebook or instagram.
It is now the latter half of August and many of the usual UK summer festivals are over, but there are still a few to go and just enough time for you to make yourself something retro to take with you. To inspire you here is my quick make festival bag:
When I was making it I thought wouldn’t it be fun if people who visit the Cheshire Fibre Festival could come wearing some festival garments or accessories. Summer will be over by the time of CFF but we could brighten it up couldn’t we? So are you up for it? It could simply be a bag like this, or anything else you want to wear/make. I’m happy to bring my bag and I may wear some flowers in my hair!
To help you – here’s my recipe for the bag.
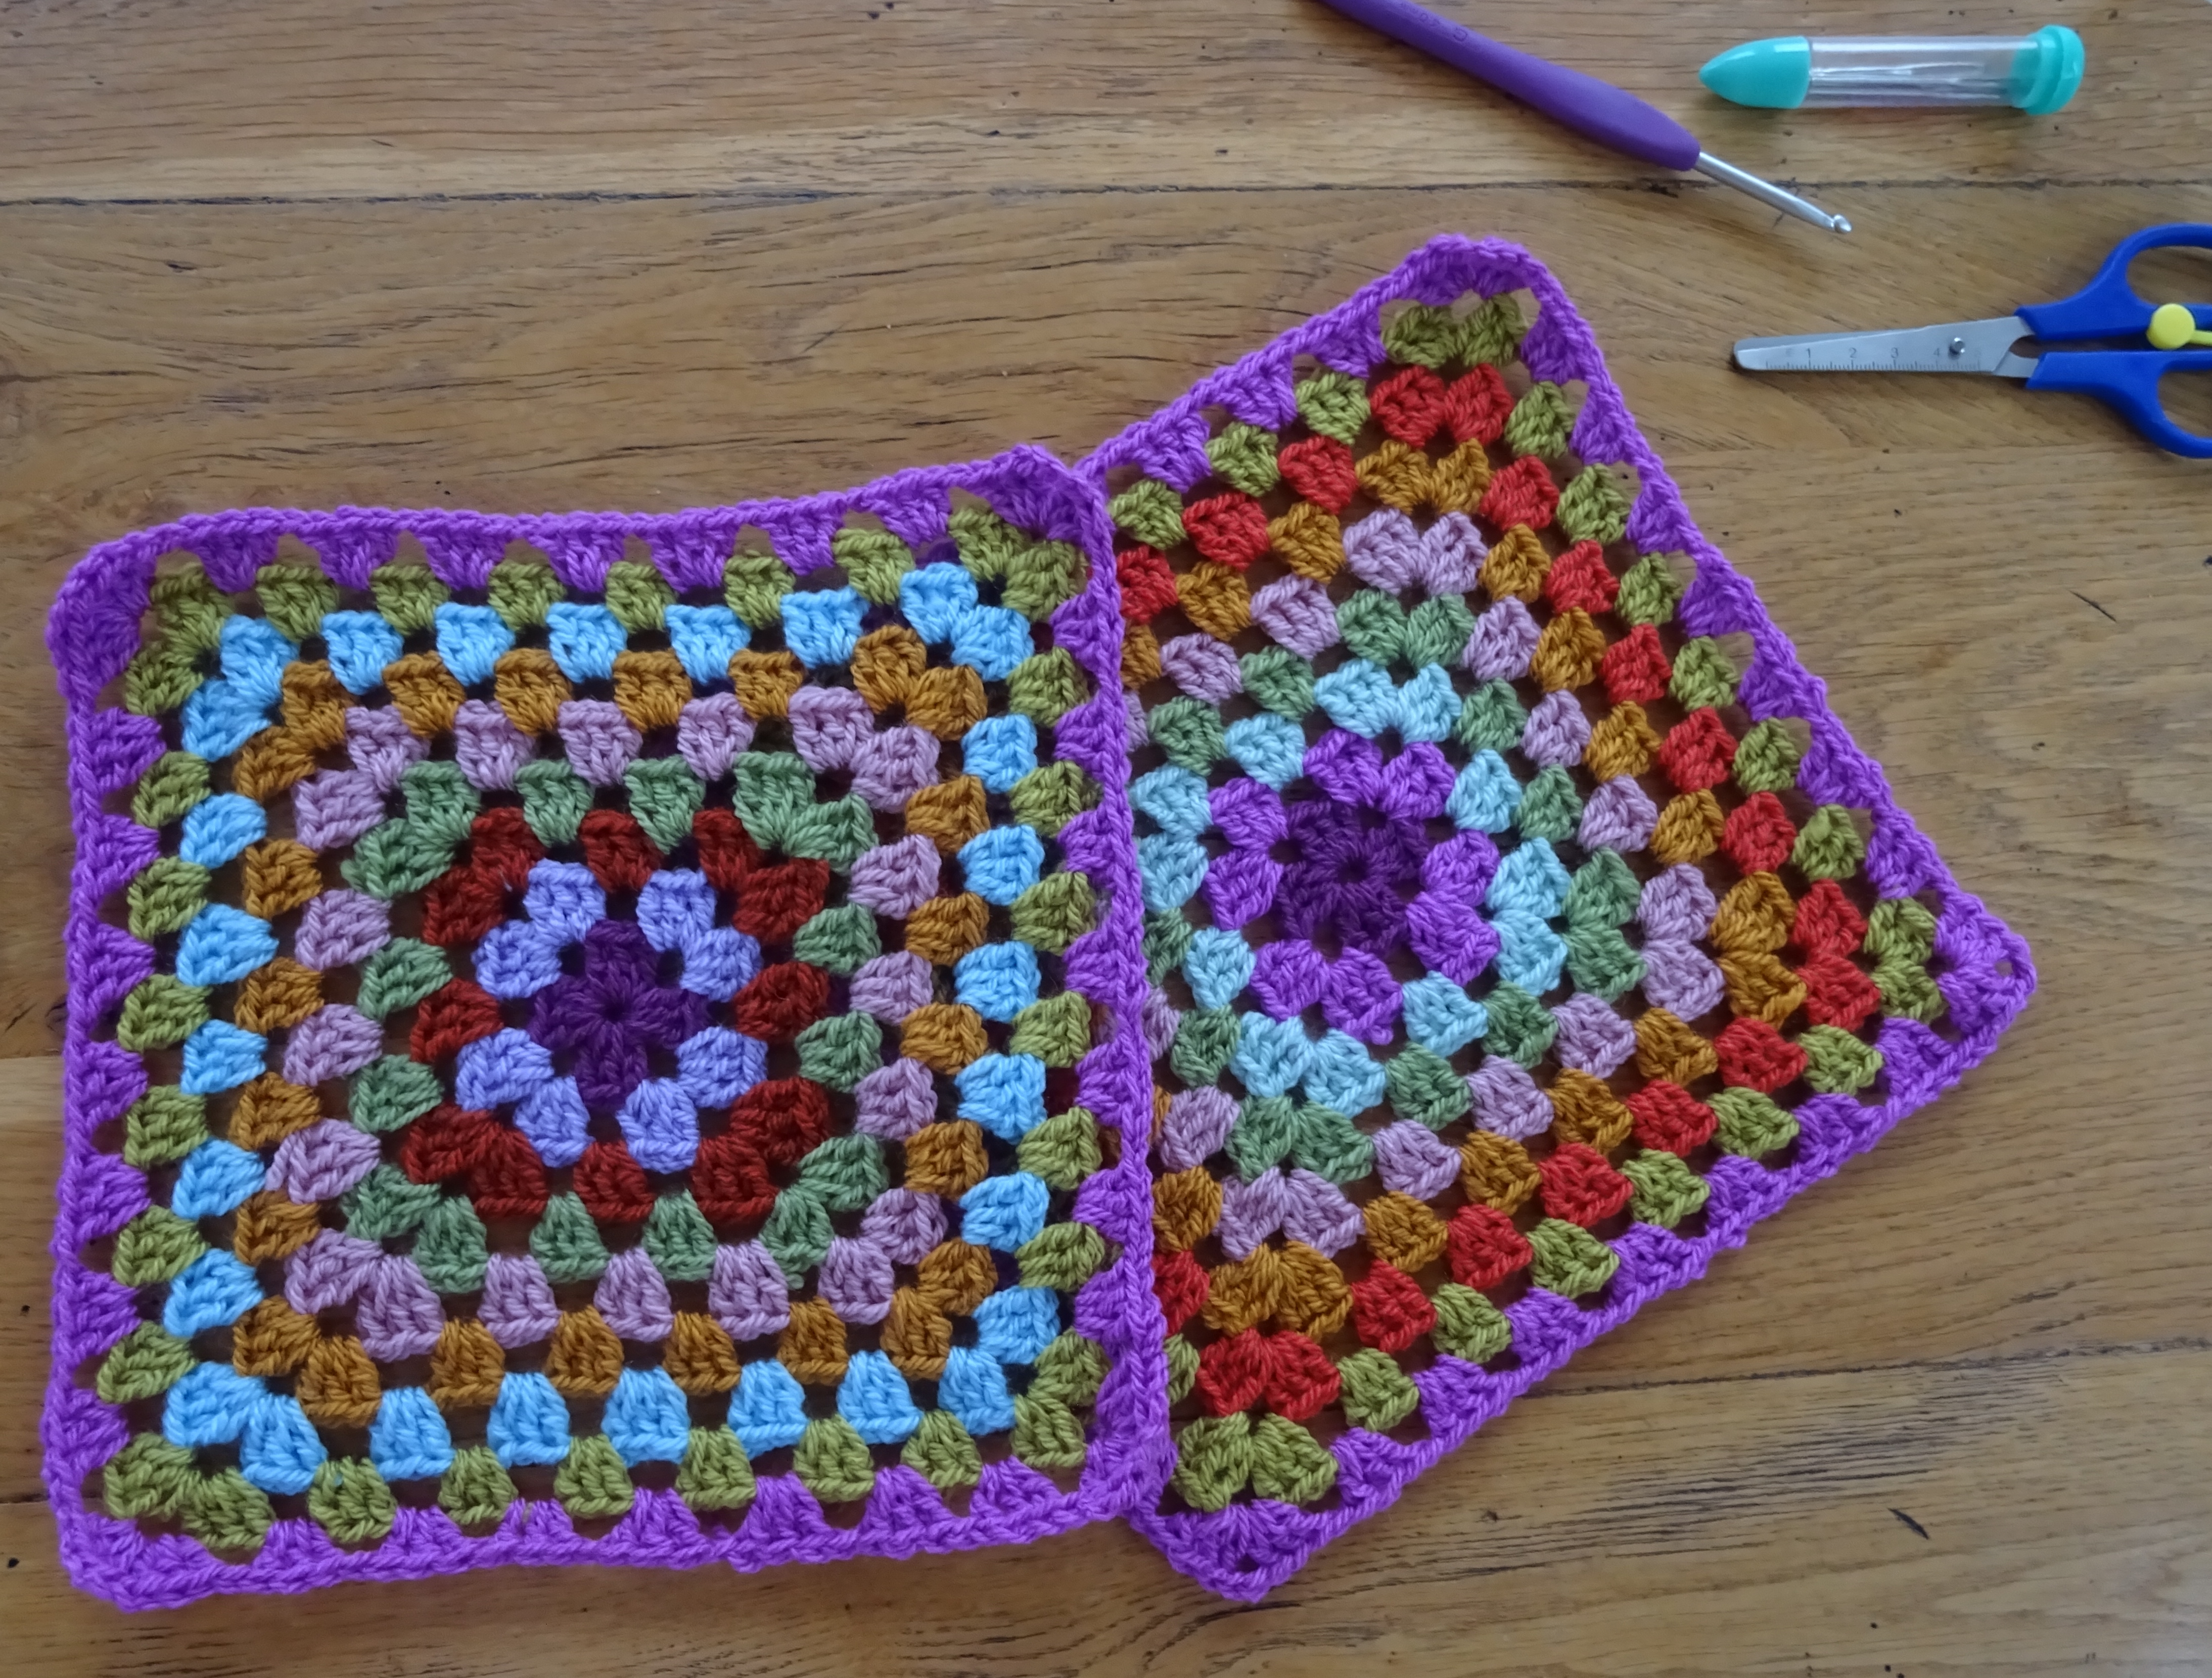
It is made from scraps of DK yarn (Stylecraft Special DK) and based on 2 granny squares. I made two 9 round grannies in slightly different colours, and the bag ended up approx. 24cm square excluding the pompom trim and handle. But you can make it any size you like. Mine used a total of 70g of yarn, but the blue edging and handle was the most – probably about 30g (but this isn’t accurate, just my guesstimate).
Abbreviations :
St (s) = stitch (es)
Sp = space
Ch = chain
Dc= double crochet
Tr = treble
Ss = slip stitch
Start with a couple of granny squares.
Then using the colour for the joining, edging and handle (blue in my case), work dc all the way around 3 sides of the first square, I did 1dc per st or sp along the edge, and (1dc, 1ch, 1dc) in the corner sps. Do not break the yarn but carry on and work dc similarly around 3 sides of the other granny, your grannies will be joined at one point.
Now put the grannies wrong sides together and join by working dc through both granny edges all around the 3 sides.
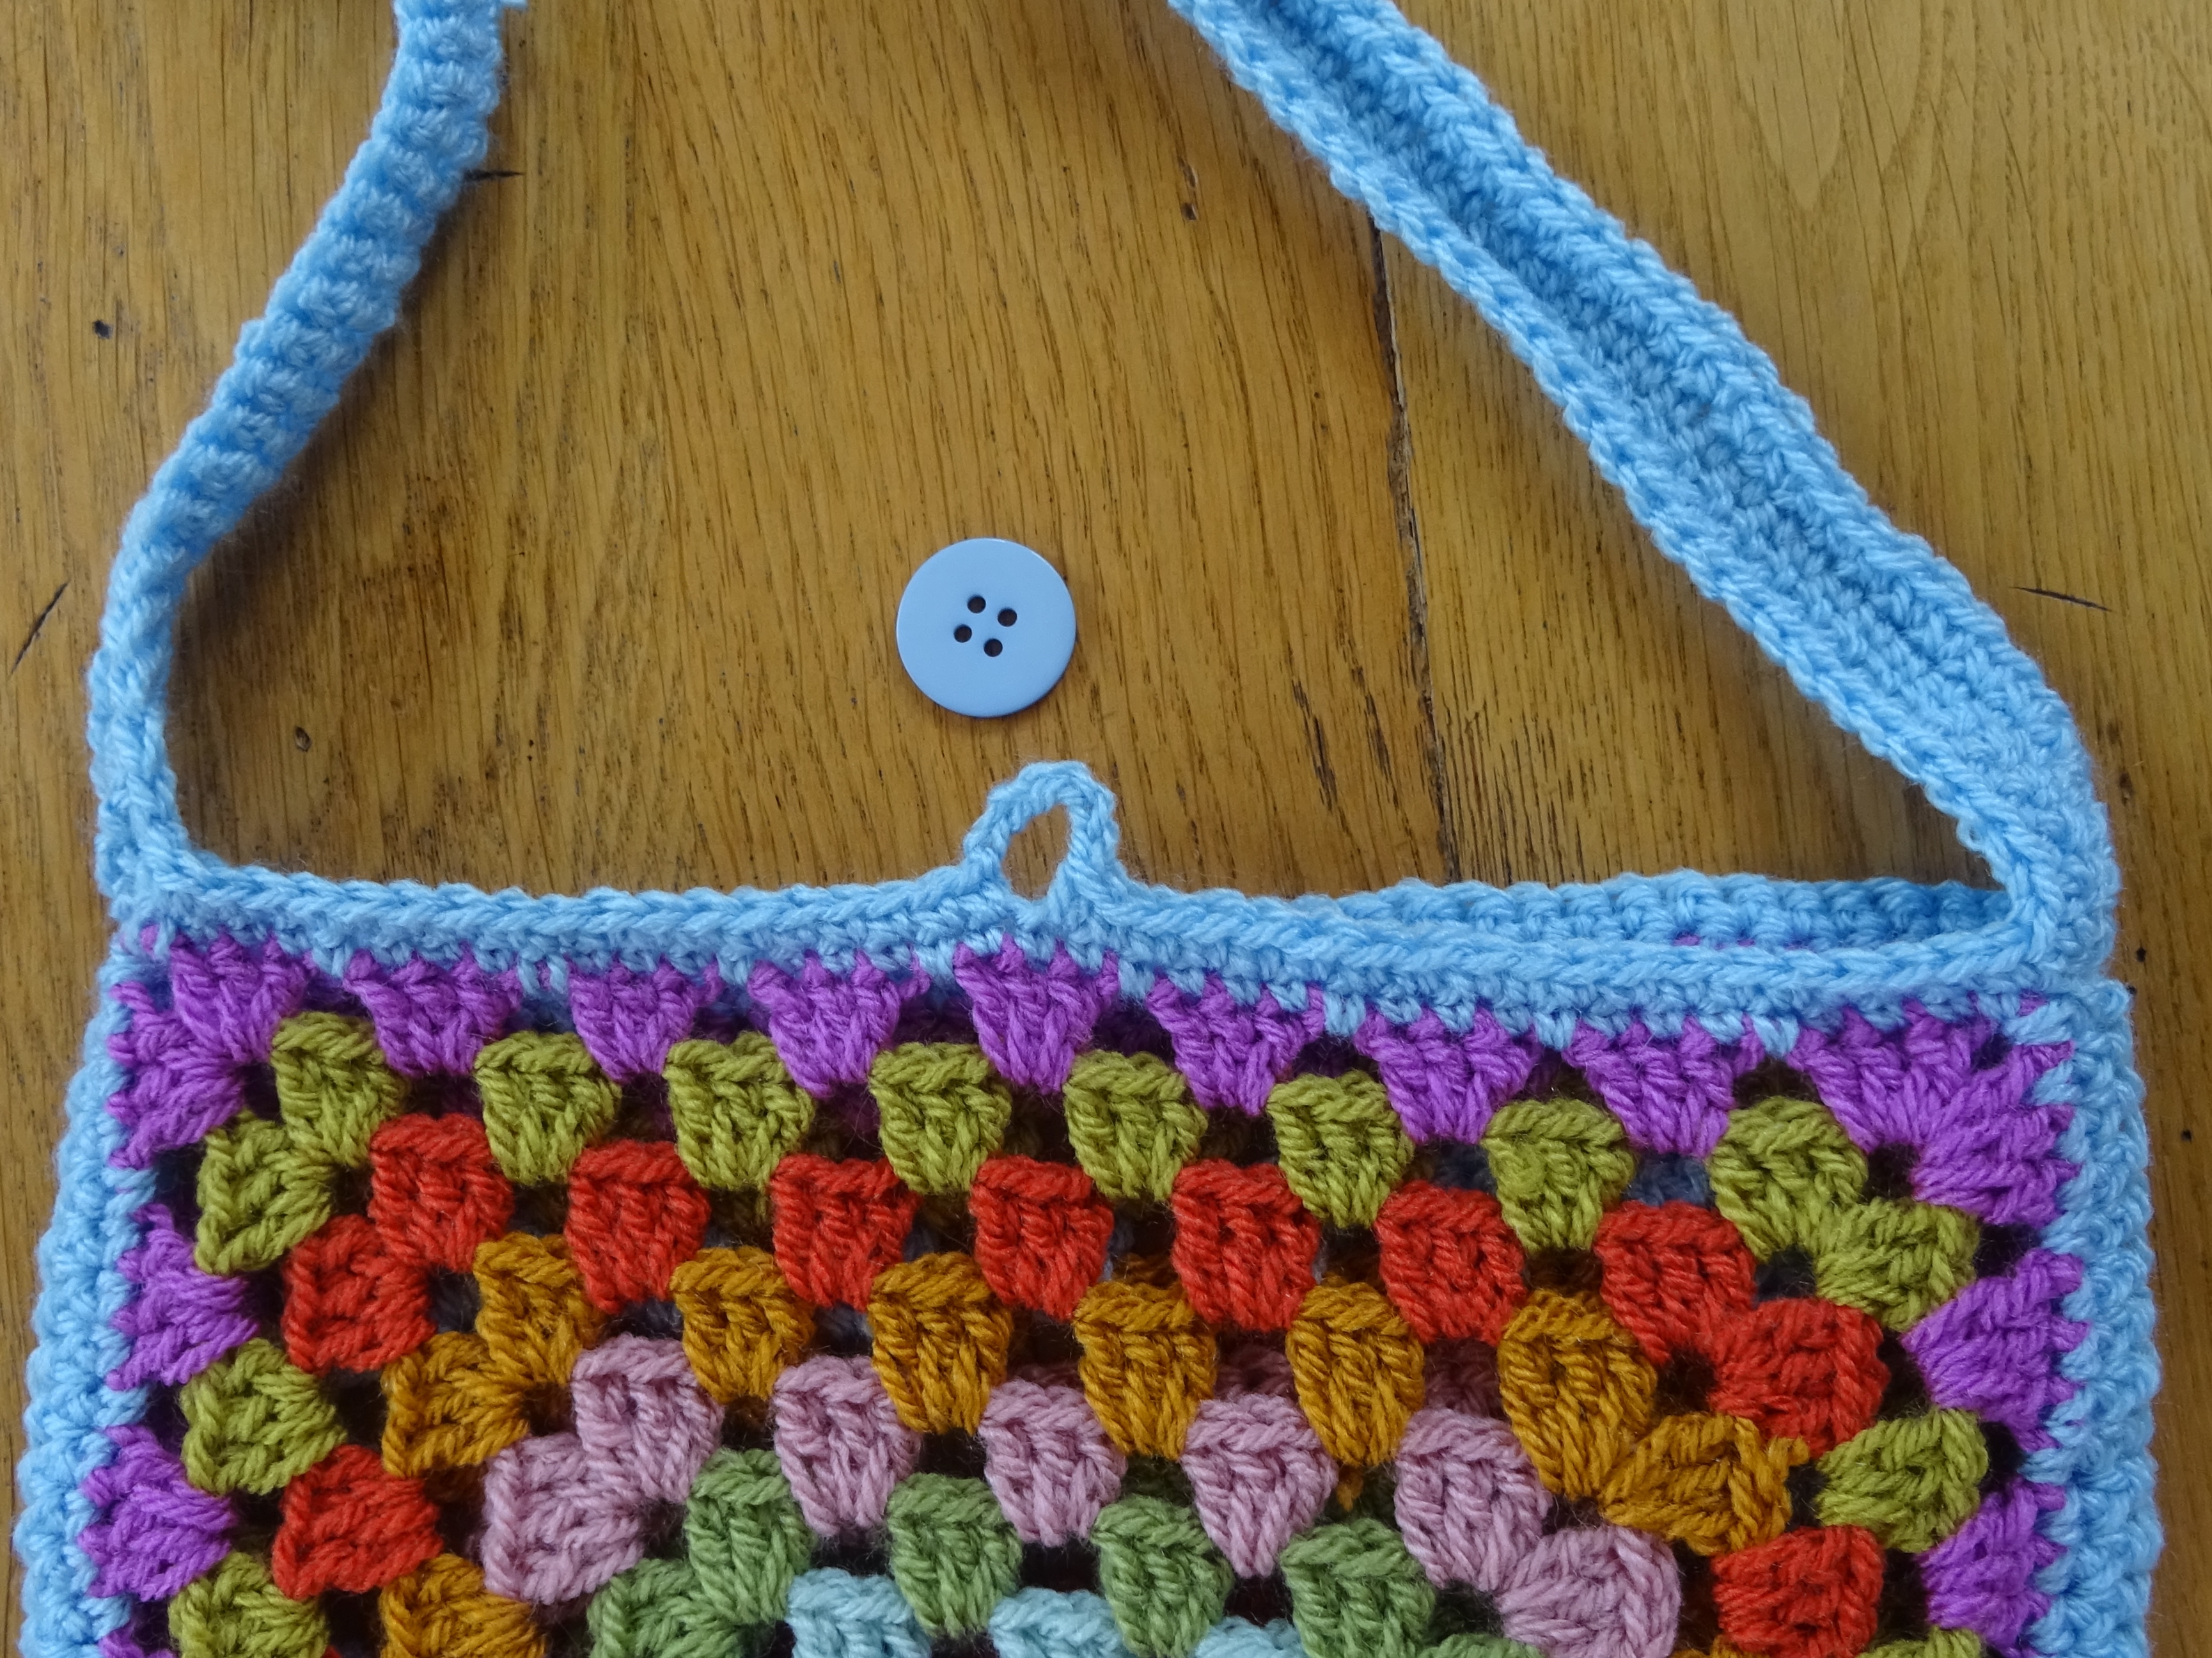
Do not break the yarn but make a chain the length of the handle (I did 100) and join to the other edge of the bag with a ss.
Now turn and work a round of dc all along the handle and then around the top of one side of the bag. Do another round of dc along the handle and the same top. Break yarn and finish off.
Rejoin yarn to the underside of the foundation ch of the handle and repeat 2 rounds of dc along this side and the other top of the bag, on the last round when you reach the centre of the top of the bag make a ch loop to fit a button – I did 8ch.
If you make a bigger bag you may want a wider handle, if so just do more rounds of dc either side of the handle.
Sew the button to the other side of the bag and make a tassel and attach to the button loop.
You could finish there but I wanted an edging all around the sides and I opted for little crochet pompoms. You can find out how to do them here (beware it is in US crochet terms!). I made mine all the way around 3 sides, leaving a 3 st gap between each pompom chain. You could just do a fringe if you like.
When I photographed it on the bench I realised that I would make a sturdy outdoor blanket, so I expect plenty of use from it this spring.
The final part of the pattern for you is the border I used. But of course you may use any border you like.
The Border
I made the border a couple of weeks ago, in fact I made 3 borders. At first I tried a simple one, but I didn’t like it. Then I tried something more substantial, but that looked odd. So I had to frog it all back twice. I realised one of the reasons I didn’t like the border was the colours I used – originally blue and orange. The orange worked well next to the squares but the blue was totally wrong. So I looked at my remaining yarn scraps, chose some colours I preferred then ordered more yarn – no good trying to make do with what I had.
My border used a just under 4 balls of Drops Nepal (aran weight, 75m per 50g ball) – I used 2 of Goldenrod (yellow), 1 of Orange and 1 of Green.
Here’s the pattern:
ABBREVIATIONS
The pattern is written in English crochet terms.
St = stitch
Ch = chain
Tr = treble (US dc)
Htr = half treble (US hdc)
Dtr = double treble (US tr)
Ss = slip stitch
Sp = space
Ch-sp = chain space
Round 1 – using Orange, starting one stitch to the right of a corner, ss in the back loop of each stitch around, join the round with a ss. This gives a nice firm and crisp edge to work the rest of the border from.
Round 2 – again you should start this round one stitch to the right of a corner and ensure you work through the ss from round 1 and the back loop of each square for a good firm finish, *(1htr, 2ch) in this st, (1dtr, 2ch) in next st, then work (1htr, 1ch, miss 1 st) repeated along the side edge to the stitch just before the next corner; repeat from * until end of round, join the round with a ss to the top of your first st, break yarn and fasten off. NOTE: I had 85 htr and 84 1ch-sps along each side and (2ch-sp, 1dtr, 2ch-sp) in each corner.
Round 3 – using Yellow, work 1htr in each stitch around (counting each htr and ch as a st and working into the ch not the ch-sp), in the corners I worked (1tr, 2ch, 1tr) in the corner dtr st, join the round with a ss, break yarn and fasten off. (NOTE: I had 175 sts along each side and a 2ch-sp in each corner, ideally you should have a multiple of 6 sts plus 1 along each side).
Round 4 – using Green, start in the tr just to the right of a 2ch-sp corner, 1dc in tr, *(2tr, 2ch, 2tr) in 2ch-sp, 1dc in next tr, [miss 2 sts, (2tr, 2ch, 2tr) in next st, miss 2 sts, 1dc in next st] repeated to next corner 2ch-sp; repeat from * until end of round, join the round with a ss, break yarn and fasten off.
Round 5 – using Yellow, work (2tr, 2ch, 2tr) in each dc and 1 dc in each 2ch-sp around, join the round with a ss, break yarn and fasten off. Sew in all loose ends.
I blocked my blanket, taking up the most of the floor space in the spare room for a couple of days! With the border (which is about 6cm/2.5″), it ended up at about 140cm/55″ square.
I hope you have enjoyed this CAL. I have enjoyed sharing it with you 🙂
For me, most of the pleasure is in seeing your finished blanket, so please share a photo.
Do you remember the Christmas CAL 2014? It was a spontaneous CAL, I did not plan it in advance it just happened. And I enjoyed it so much!
My mind is now turning to blanket CALs again, and I am planning another. But before I share my plans with you I thought it would be good to show you some of the blankets that were made in the last CAL.
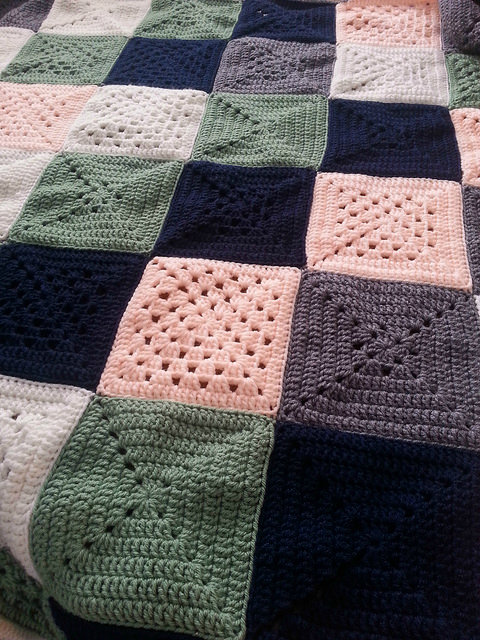
Here is Charita’s blanket. I love the subtle blue colour scheme. I love also the flower embellishments!
Charita’s blanket
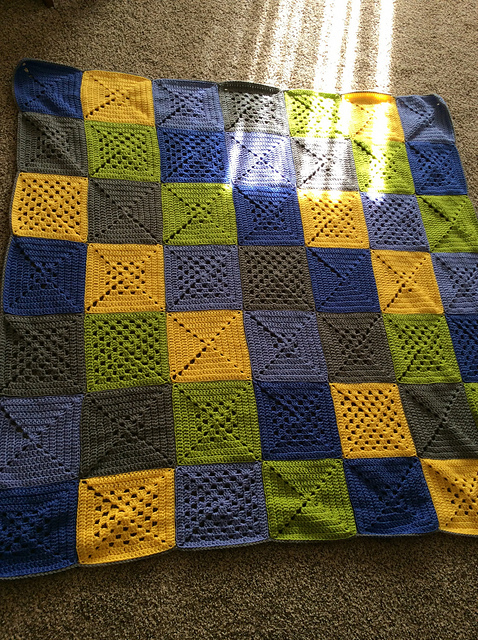
And this is Nona’s blanket. I love the bright zingy colours, and I was astonished to discover this was her first blanket!
Nona’s blanket
This is Jen’s blanket. Some lovely soft colours in this one and she made it in only 9 days! Well done Jen!
Jen’s blanket
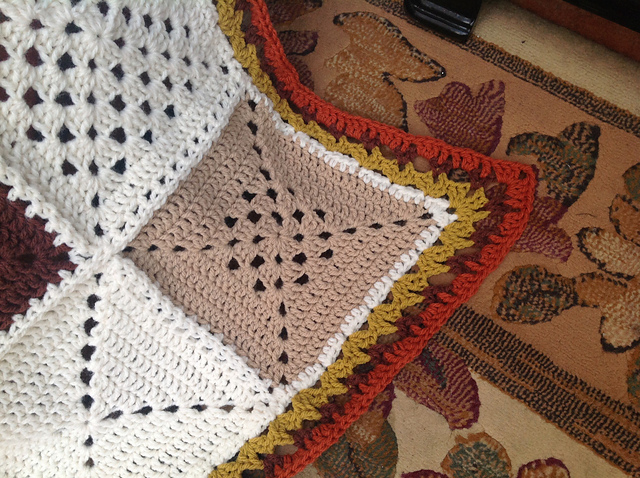
And this one is Vicky’s. She chose lovely autumnal colours.
Vicky’s blanket
And remember I did a very simple edging on my blanket? Well Vicky chose to do something prettier. Here’s her edge.
Vicky’s edge
What I love the most about this sort of CAL is, even though we all start with the same design, the colours, layouts and all types of variations mean no-one has an identical blanket. I thoroughly enjoyed seeing everyone’s progress and final blankets. And I look forward to a similar experience soon!
Thank you Charita, Nona, Jen and Vicky for letting me share your photos.
How are you all doing? Did you finish the motifs from part 1?
I didn’t do too much yesterday, I was far too busy eating and drinking! But I did have a flash of inspiration after all that excess, a little embellishment for the blanket – so this will be included in one of next week’s updates.
I have seen some progress on Ravelry, and I know some of you have completed 9 squares and therefore must be ready for this instalment. So here it is:
First a reminder of the ABBREVIATIONS:
The pattern is written in English crochet terms.
St = stitch
Ch = chain
Tr = treble (US dc)
Ss = slip stitch
Sp = space
Ch-sp =chain space
This is the second motif design, I am making 10, 2 in each of my chosen colours. I call it the FULL MOTIF 1:
FULL MOTIF 1
Foundation: Make a 4ch foundation ch and join into a ring with a ss
Round 1: 5ch (counts as 1tr, 2ch), (3tr, 2ch) 3 times into the ring, 2tr into the ring, join to 3rd st of first 5ch with a ss.
Round 2: ss into 2ch-sp, (note for this and each subsequent round: this ss is to position the start of the round in the right place) 5ch (counts as 1tr, 2ch), 2tr into the same 2ch-sp, 1tr into each tr along each side and (2tr, 2ch, 2tr) in each 2ch-sp on the corner, finish with 1tr in the first 2ch-sp and join to 3rd ch from start with a ss. You should have 7tr along each side and 2ch in each corner of your motif.
Rounds 3 to 6: Repeat Round 2. The number of tr along each side increases by 4 with each round. So after Round 3 you have 11tr, after Round 4 you have 15tr, after Round 5 you have 19tr and after Round 6 you have 23tr.
Break yarn and fasten off leaving a long tail about 3m long for sewing or crocheting together later.
Please share your progress on the discussion thread on my Ravelry Group here.
Stay tuned for the next instalment, which I aim to publish on Sunday……..
Happy crocheting xxx
Now for the legal stuff – I designed this, it’s all my own work and is copyright. Please feel free to make as many as you like, but not for commercial purposes, and please credit me with the design. Thank you!
A crochet blog where you will find free crochet patterns along with oodles of crochet inspiration. Featured in top 100 crochet blogs and also in Crochet Now Magazine