Just over 2 weeks ago I was pleased as punch when the Friends Around the World 3rd Anniversary Blanket CAL started and one of my squares was published first. When I was asked to design the squares (there are 2), I was given a brief for something with texture that could be done in one colour. At the time I was finalising the Wrapped in Memories Blanket CAL and I was using a favourite join which gave a lovely textured effect, so it seemed natural to incorporate it into the 2 squares for the Friends Around the World CAL.
Those who know my work will know that I like simple and elegant designs, some may even say I practice simple rhythmic (even mindful) crochet design but for me it’s a combination of wanting something gentle and pleasing to the eye with crochet that is equally gentle and relaxing. This means I use techniques which are fairly straightforward but every so often I throw in something a little more complex because the finished effect is just so lovely. And the join I used falls into this category.
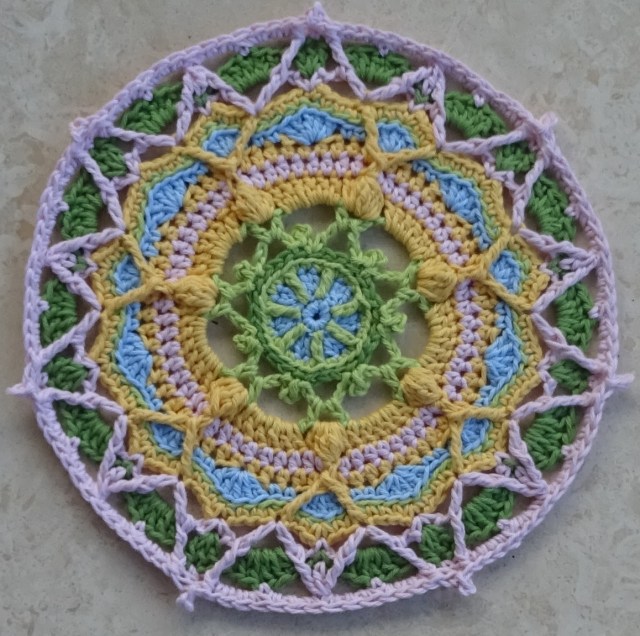
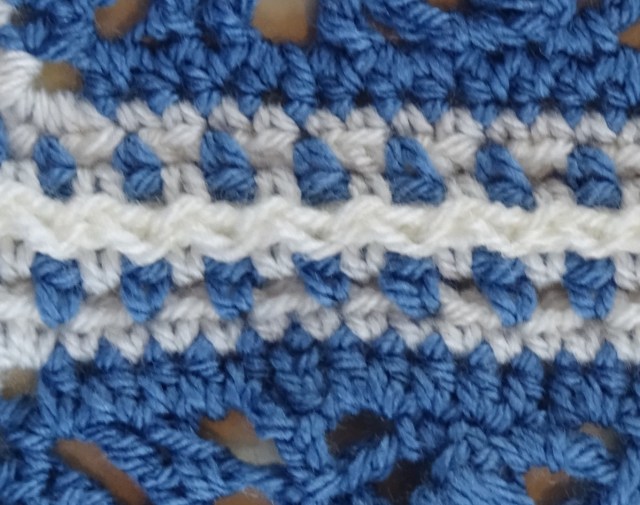
I don’t know if I invented this join, I do know that I haven’t seen it used anywhere before, but, as always with a craft that has been around for so long, it is highly likely that it has been used before. Maybe I stumbled upon a re-invention! I choose to call it the zigzag join because that is the effect – you can see it running through the middle here in Wrapped in Memories:
A number of people working on the Friends Around the World CAL have struggled with this join, so I’m adding information on the join technique to this blog to help (this information is extracted from Wrapped in Memories). This should be read in conjunction with the pattern – either Noughts or Crosses, both of which are free downloads from Ravelry.
The theory behind the technique is simple, the last round of each square has chain spaces, with one or more stitches inbetween, and you join by slip stitching into the chain spaces. This example has 1 chain spaces, with 1 double crochet (or single crochet in US terms) inbetween. Hold you squares side by side, the square you are crocheting is on the left, the square you are joining to is on the right. Your joining starts at a corner by a slip stitch into the right square’s corner chain space:

You then work a double crochet into the square on the left (this is the first one so it sits in the corner):
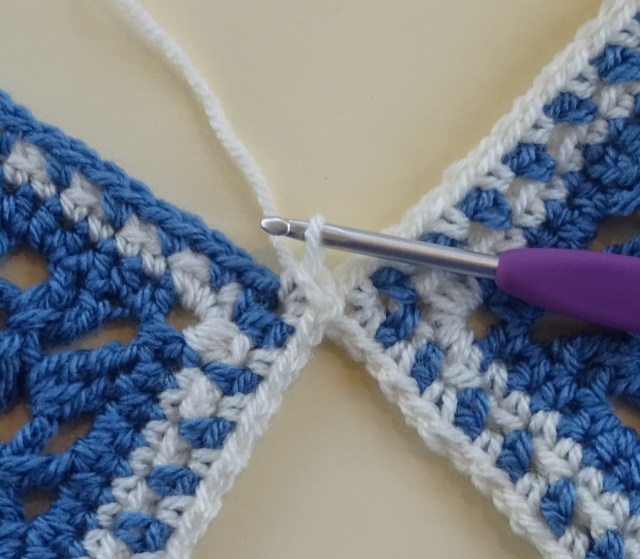
Now work a slip stitch into the right square:

Carry on in this way (double crochet into square on left, slip stitch into chain space on square on right) all along:

The final join is by slip stitch into the top corner on the right and double crochet into the top corner on the left.
And that is my zigzag join!
I hope this helps those of you who have struggled with the join.
Happy crocheting xxx
PS – don’t forget all words and photos in this blog are copyright!