I thoroughly enjoyed the Spring Blossom Blanket CAL. It is always inspiring seeing what colours people choose and how those colour choices and other tweaks (such as moving motifs around) can make a design look so different – one blanket design can result in so many different looks. I hope to share some finished photos with you in due course.
Another thing that I loved about the Spring Blossom Blanket CAL was the many compliments I received about the joining technique I used. It is second nature for me to join neatly and quickly but I know that joining can be very tricky for some people which is why I use methods that I think (hope!) are easy and effective. For blankets I tend to favour joins that lie flat partly because I don’t like the ridge that some joins produce (unless the ridge is a feature of the design) but mainly because, for me, a blanket should drape and a flat join aids this. So I thought I’d show you some of my favourite joining techniques.
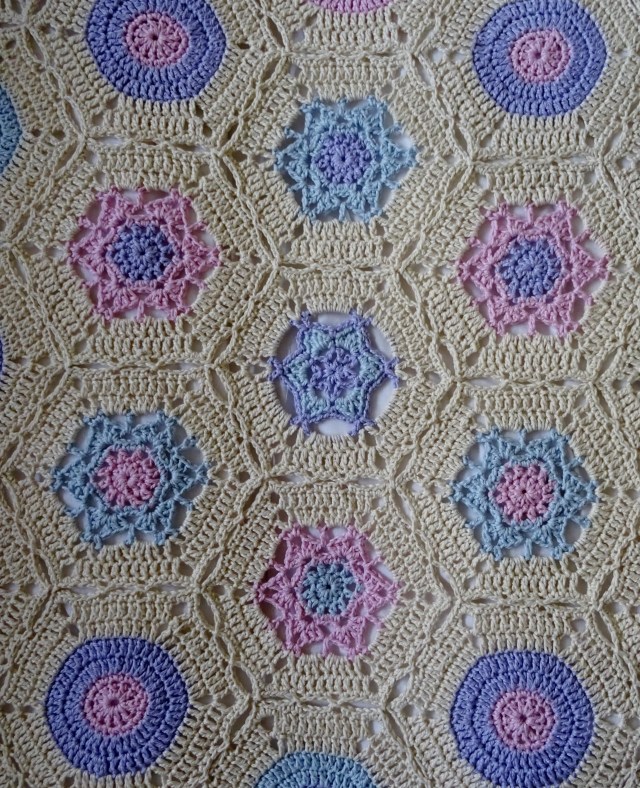
First let’s just have a look at the joined hexagons in Spring Blossom:


The technique was to join as you go (JAYG). I had never seen JAYG on ‘solid’ motifs, that’s not to say there aren’t any as I don’t spend my time looking for techniques! But I do know that joining hexagons can be a pain, there are so many angles that whatever you do it can prove difficult to get very neat joins where the corners of the hexagons meet. So I designed a simple JAYG which gives a slight lacy look to the joins but is also easy and consistent throughout the blanket, all joins look the same. This technique can be applied to any ‘solid’ motifs whatever their shape and I will definitely use it again (I have triangles in my mind as I type this!). And, of course, one of the joys of JAYG is that once you finish the last motif it only needs the border to finish!
JAYG is quite common in lacy motifs like my Summer Garden Throw:
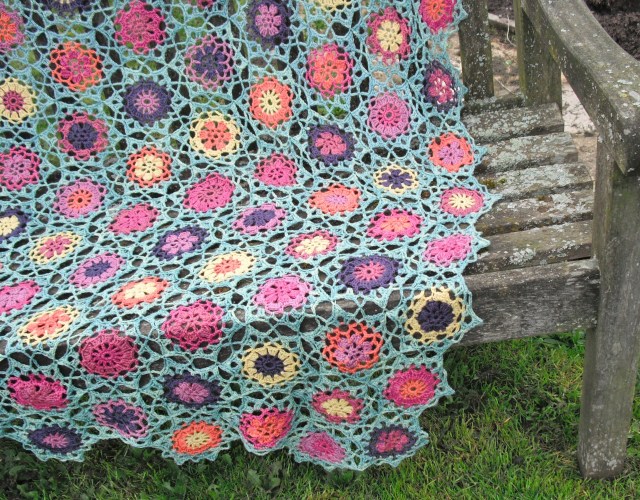
You can see that the lace motif works well with JAYG and not just on blankets, but all sorts of accessories and garments.
The next example is a join I use frequently, slip stitch through back loops on the reverse side of the motif – it gives a fairly flat join. Here’s some close ups of the finish and technique from the Christmas CAL 2014, I’ve used this in so many blankets that I’ve lost count!


I love the look of this, it makes the motifs look like they are just snuggling up against each other 🙂
Another method of joining is to use part of the design as a joining feature. This next example is a join I used in a couple of blanket designs – Teal Dreams and Poppet’s Blanket. I used the ‘diamond’ stitch pattern as a join, which gives consistency in the overall blanket design.


Again it gives a flat join. On the left is Poppet’s Blanket with the joining in red, and on the right is Teal Dreams with the joining in brown.
This last one is my favourite. I haven’t yet used it on a blanket but I used it on the Medina Cowl and several bags, like Ollerton:


It’s slip stitch through back loops only on the front of the design and provides a flat join. One of the advantages is that using a different colour you can highlight or define the edges of the motif. The Ollerton join is in a pale grey (Dove) and the Medina join varies according to the edges of the motifs it joins.
I hope I haven’t bombarded you with too many photos of joins! Do you have any favourite joining techniques? Please tell me about them.
Happy crocheting xxx