It is a selection of mandalas. This is a new obsession for me. But I didn’t realise just how many people are also obsessed or at least love mandalas; that is until I saw my facebook hits – they rocketed off the scale!
So I thought I should at least tell you more about the mandalas in the photo (and yes, test how far my blog hits go!).
In no particular order – there is the Sunshine Mandala which I published the pattern for a few weeks ago, the two I designed on my Knitaway holiday, one which was a bit of a test (or what I call a crochet doodle!) and a couple I designed very recently that will feature in a new workshop (design your own mandala). You see I love designing these so much that I thought I should share how I do it 🙂
Towards the end of February this year something interesting popped into my twitter feed – rent a sheep through the Meadow Farm Wool Project. It grabbed my interest straightaway and I popped over to the website. Within minutes I was renting a sheep!
In due course I will receive yarn spun from the fleece of the sheep (well maybe not the exact one I am renting, but from the same flock). I am not an expert on fleece but I know Jacob will be strong and probably good for hardwearing items. This is a great project, with excellent provenance for the wool – grown in Somerset and spun in Yorkshire – British through and through, and by renting a sheep I am also supporting 2 excellent charities – The Teenage Cancer Trust and Headway.
The project will have ideas on patterns for the yarn in due course. But I am impatient! So I decided I should design a crochet motif for the yarn, and not just for me. I think Jane and Annie (who established the project) would appreciate some pattern support, and I think their project is extremely worthwhile – so the design is for them. They will be sending out the motif to all sheep renters.
Here’s a sneaky peek:
Meadow Farm Motif
I can’t wait to receive my yarn, I think I will be making some lovely cushion covers with my motif.
I have a few more little joys to share with you from my Buxton holiday!
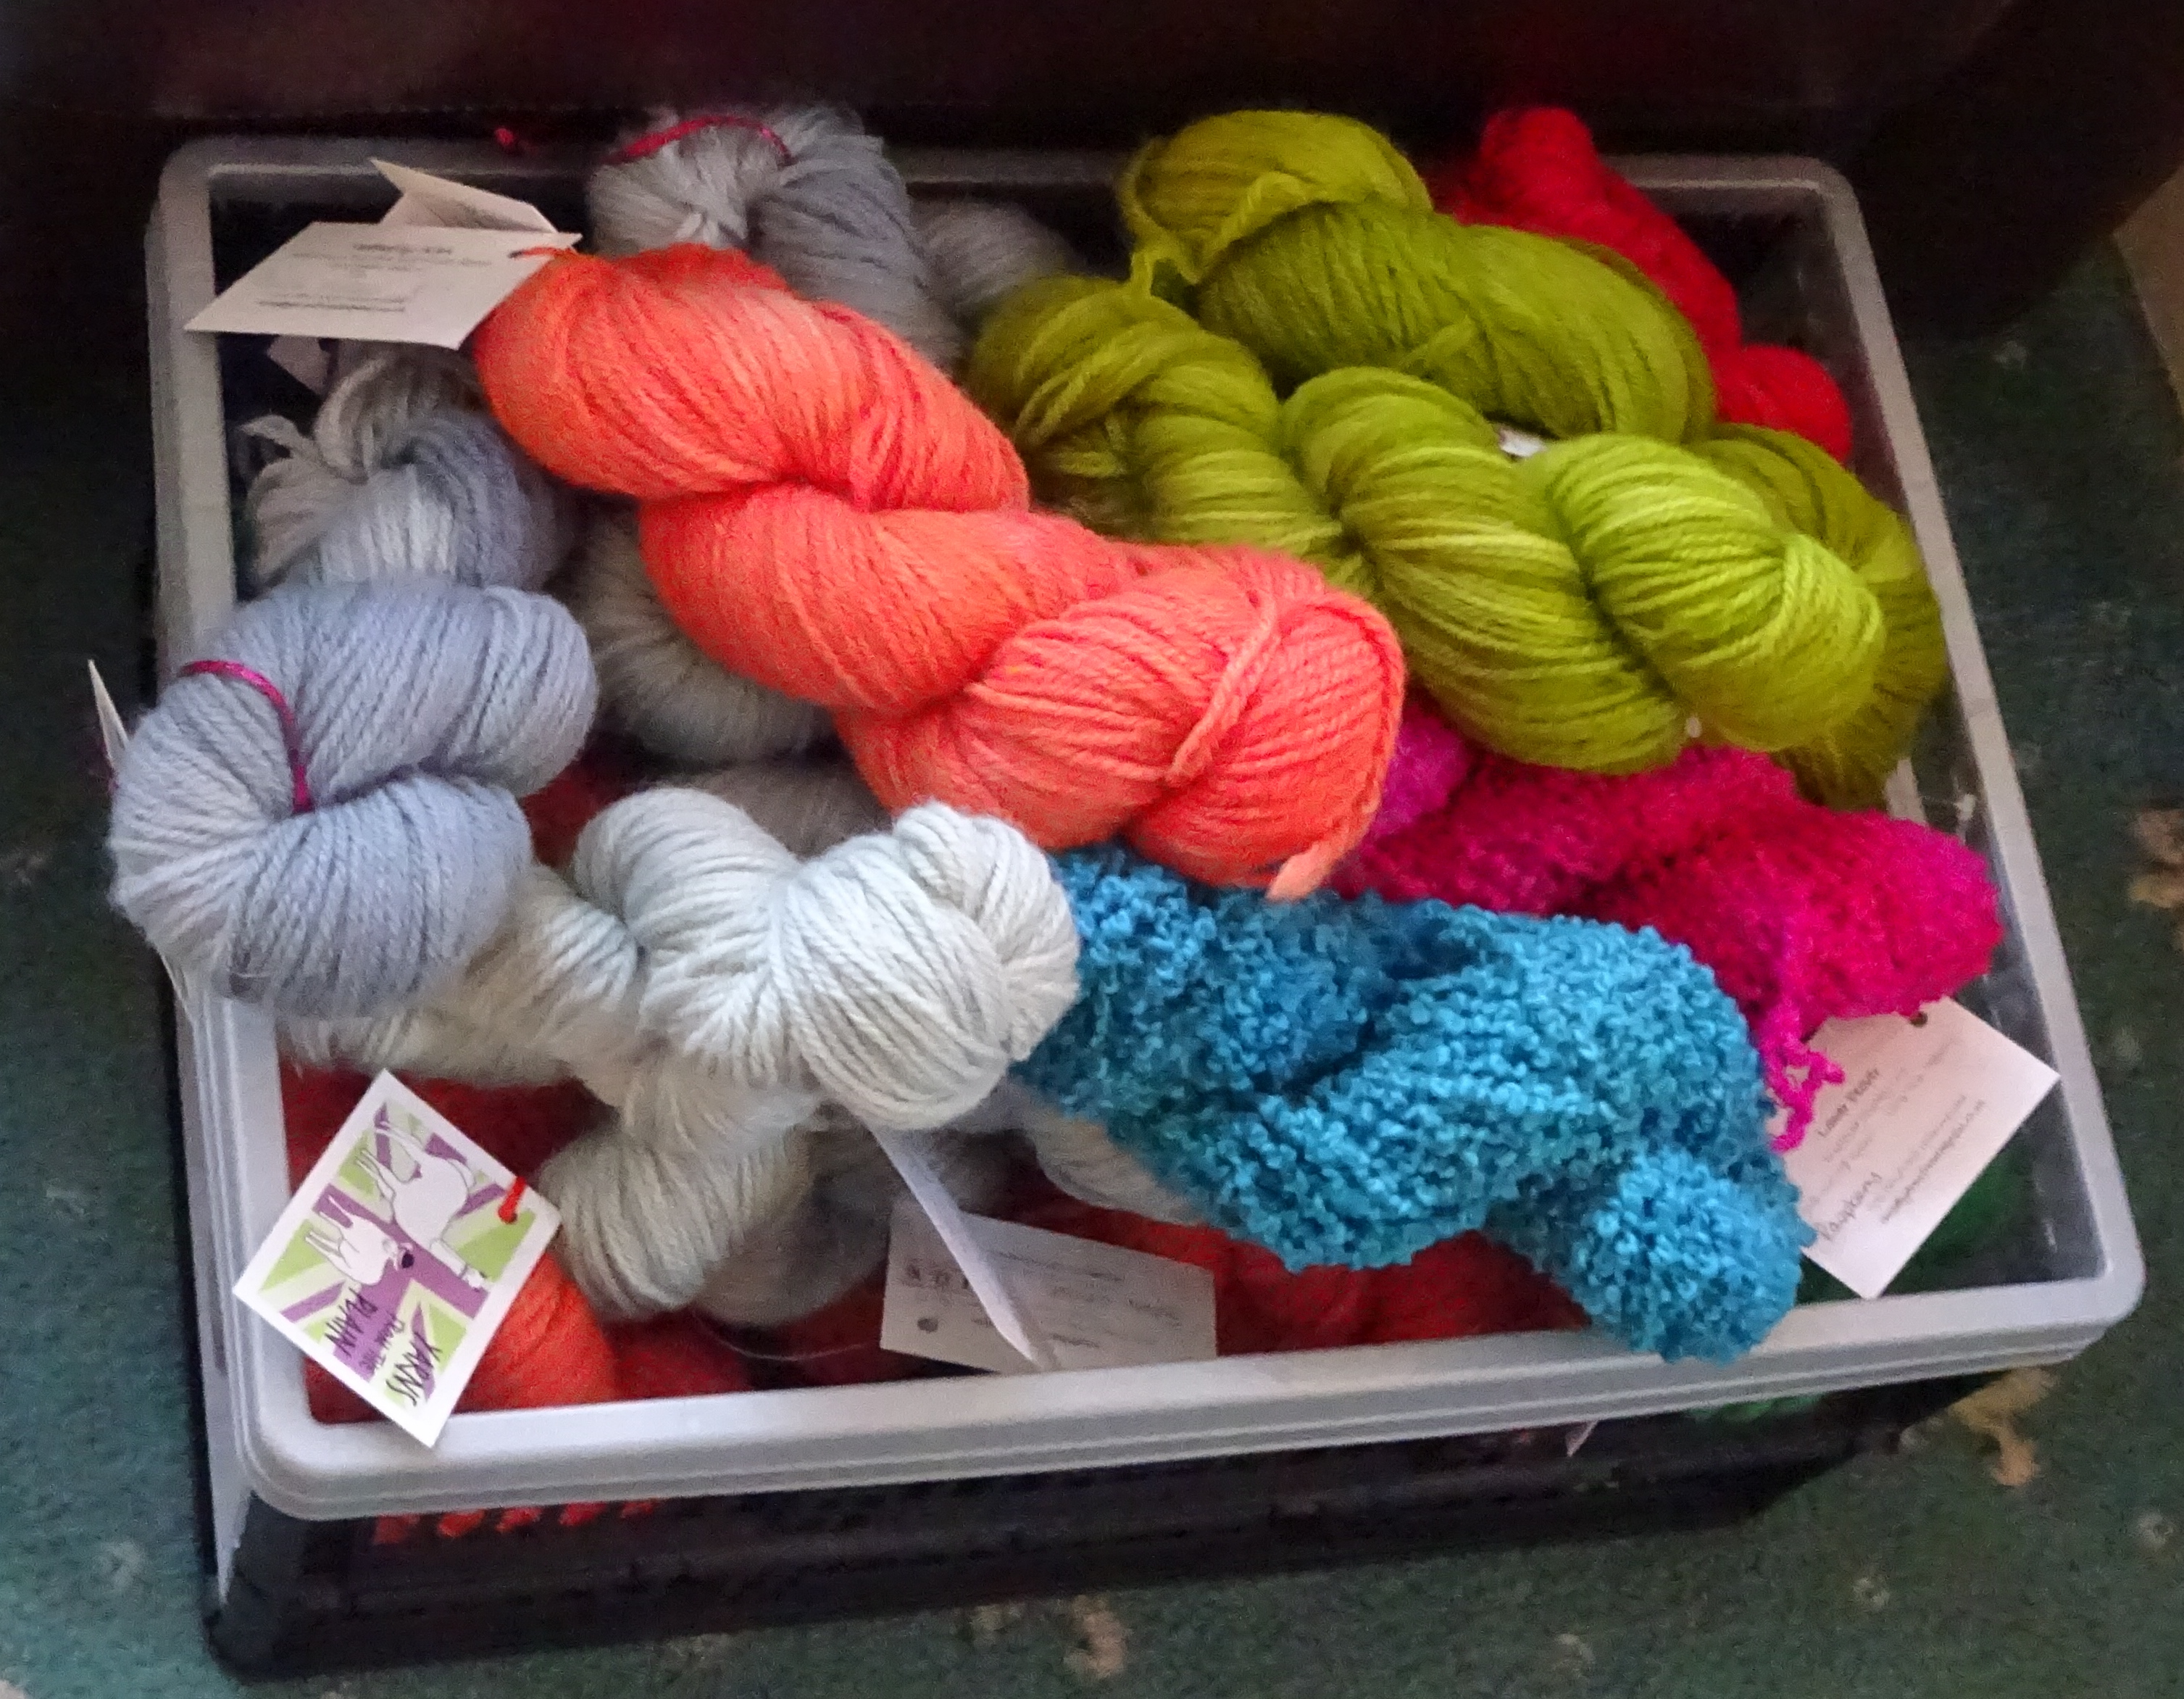
First the visit from Nic who is YarnsfromthePlain, she brought a sweet shop full of yarn to Buxton. Yes, I know I mentioned this before – but I didn’t show you which sweets I bought! So here they are:
Plumley
They are both the same yarn base called Plumley – a single spun yarn, 100% Blue Faced Leicester Roving DK, approx 200m per 100g skein.
Have I ever told you I love single spun yarn? It is so smooth to work with. So I was overjoyed to see Nic had started dyeing some. I will be back for more!
The second Buxton ‘extra’ is my mandala obsession – I did some crochet ‘doodling’ and designed 2 new ones! Here’s a sneaky peek:
Buxton mandalas
I will share more when the designs are more advanced, or closer to publishing. My mandala obsession is only just beginning!
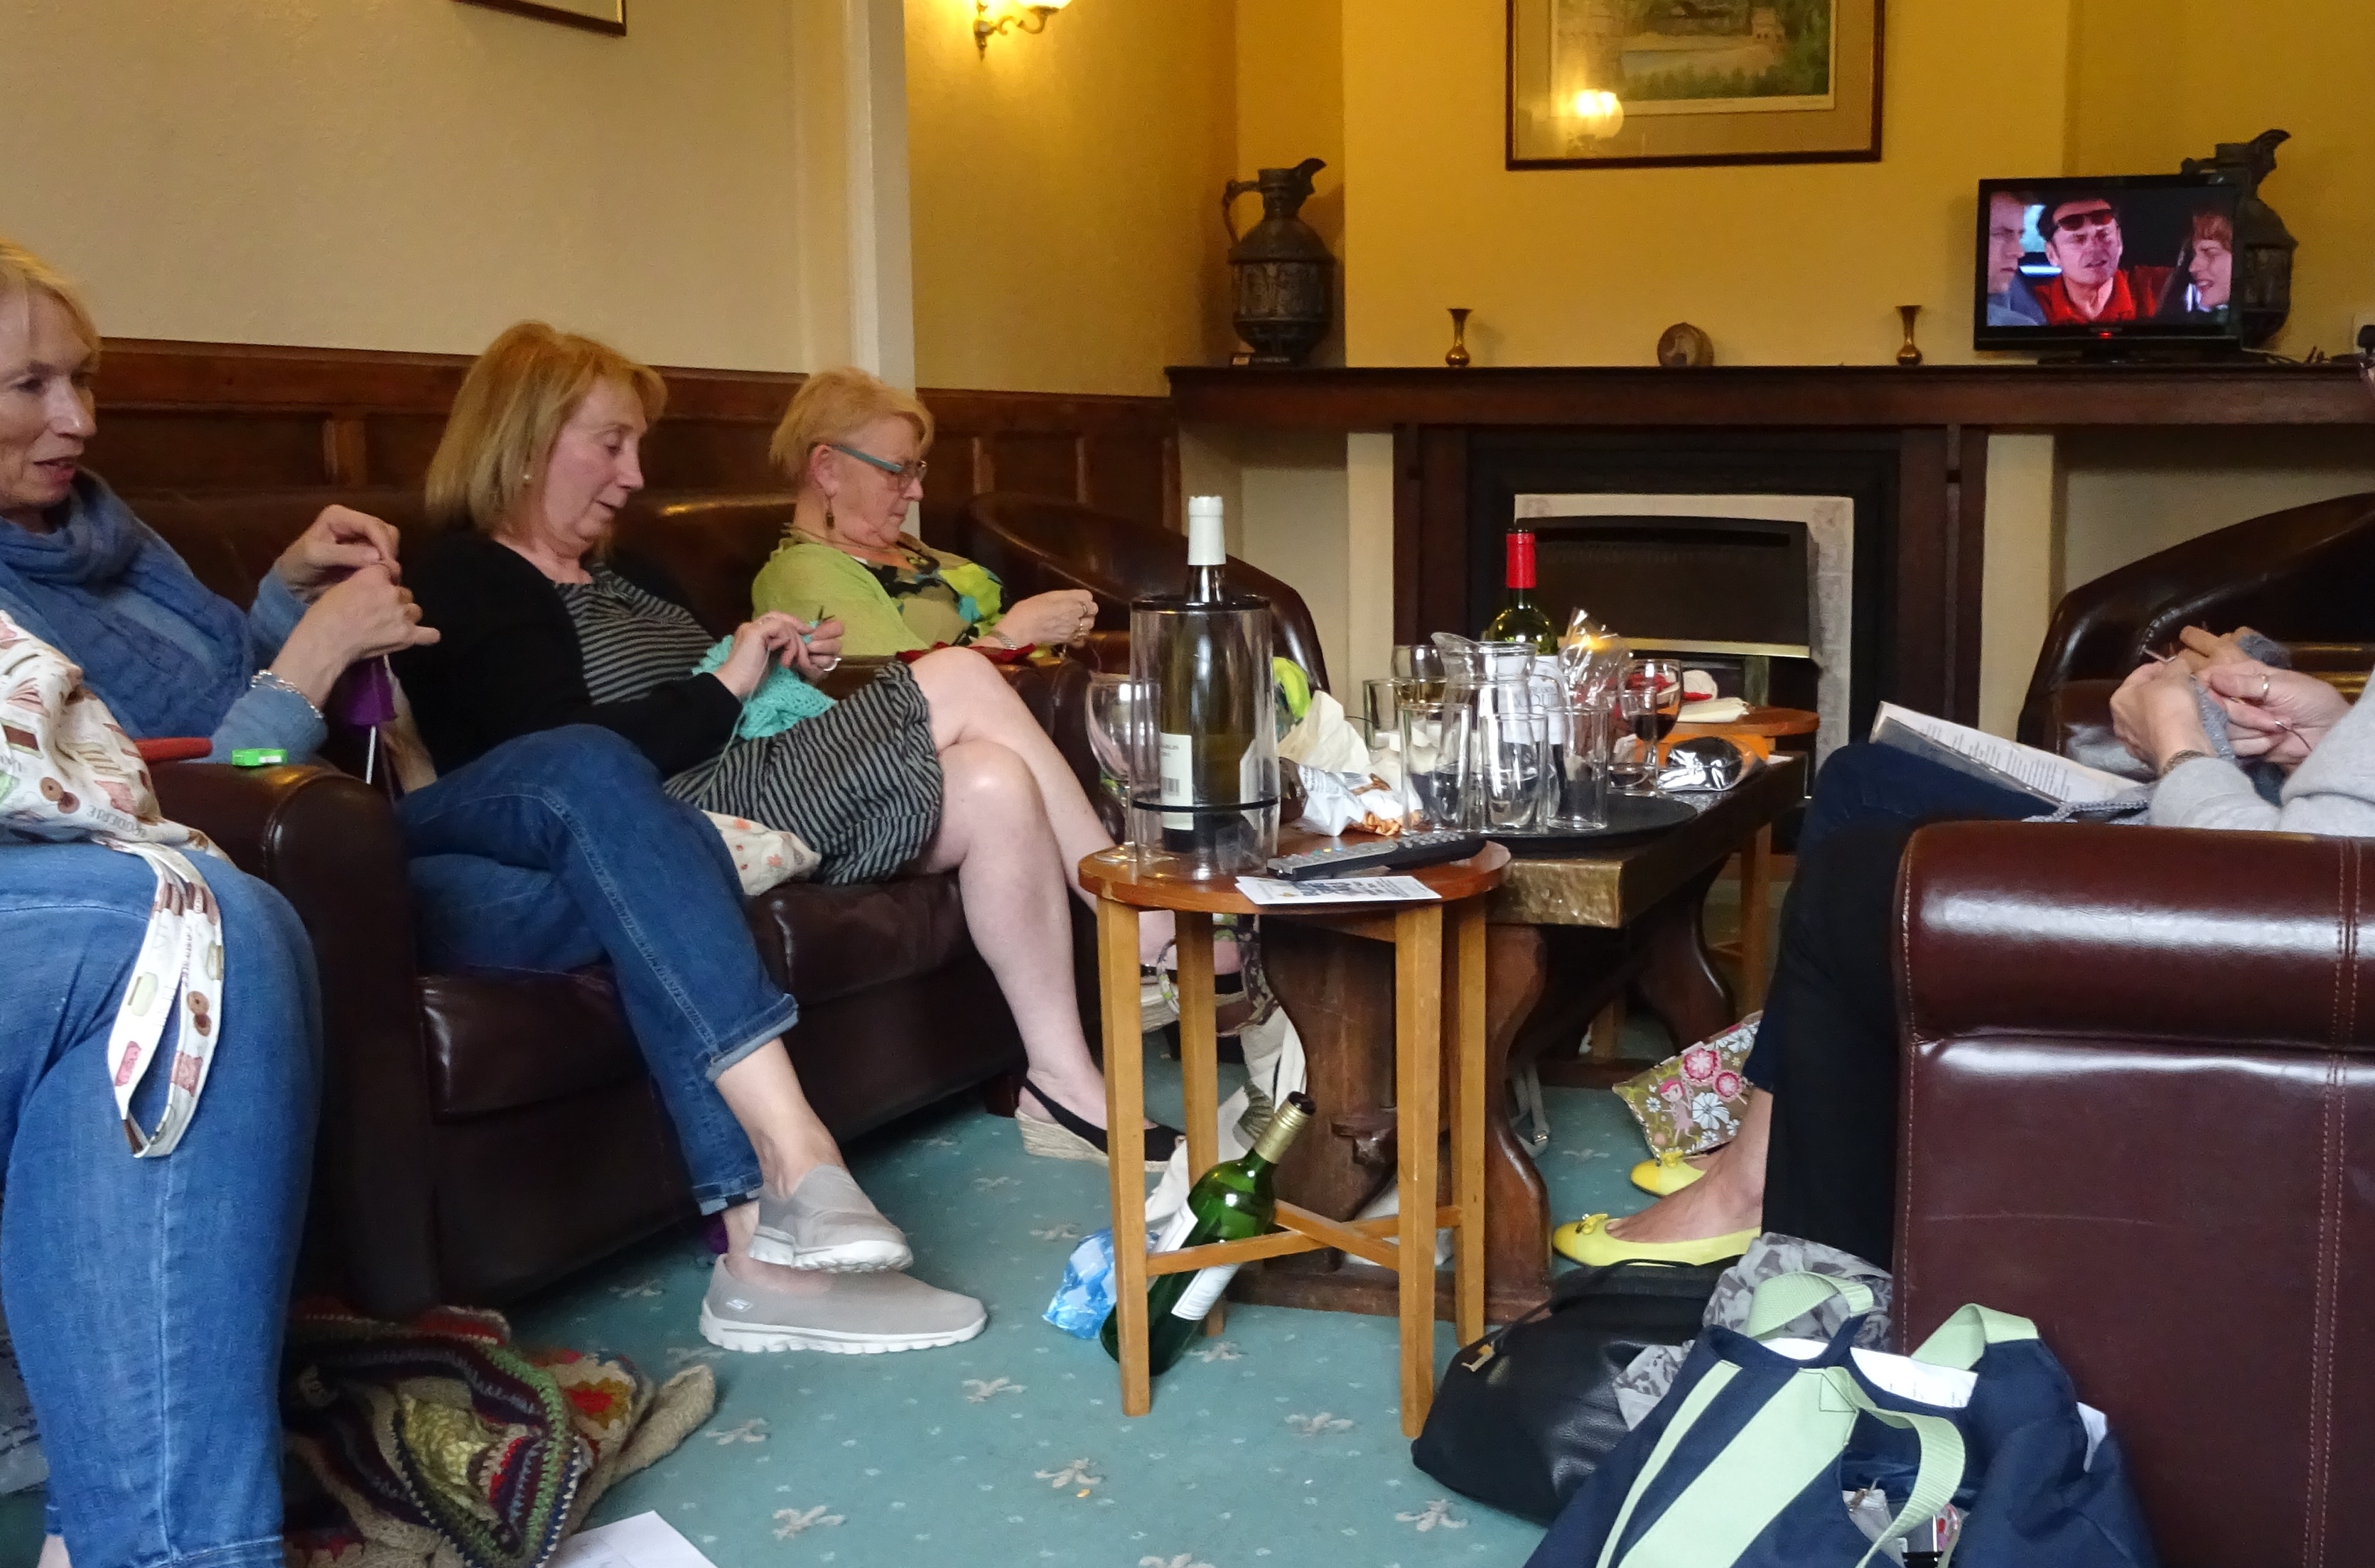
I have just returned from a lovely few days away with my knittery friends! We went to the very same venue as last November – the Alison Park Hotel in Buxton.
Buxton is a lovely spa town in the Peak District, with lots of history, and each time I visit I learn more. But the main focus of our visit was a knitaway – a holiday with like minded friends where we can knit and crochet, do a little shopping and exploring, knit and crochet, eat a little, knit and crochet, eat a bit more and maybe drink a little….and have a great laugh, good time and share special memories together. I didn’t think it possible, but this knitaway was even better than the last.
So what did we do….here’s a quick review in a few photos:
Bay window
We decorated the lounge of the hotel, which is a lovely Arts and Crafts building with interesting features like this window, with crochet decorations 🙂
Sunshine on the patio
We spent each afternoon on the patio – the weather was glorious and we knitted and crocheted and drank…Pimms on the patio in the Buxton sunshine was fantabulous!
Evenings…..
We spent the evenings enjoying our knitting/crochet time……..and we drank a little and watched DVDs and (you just can’t tell from this studious photo) we laughed A LOT!
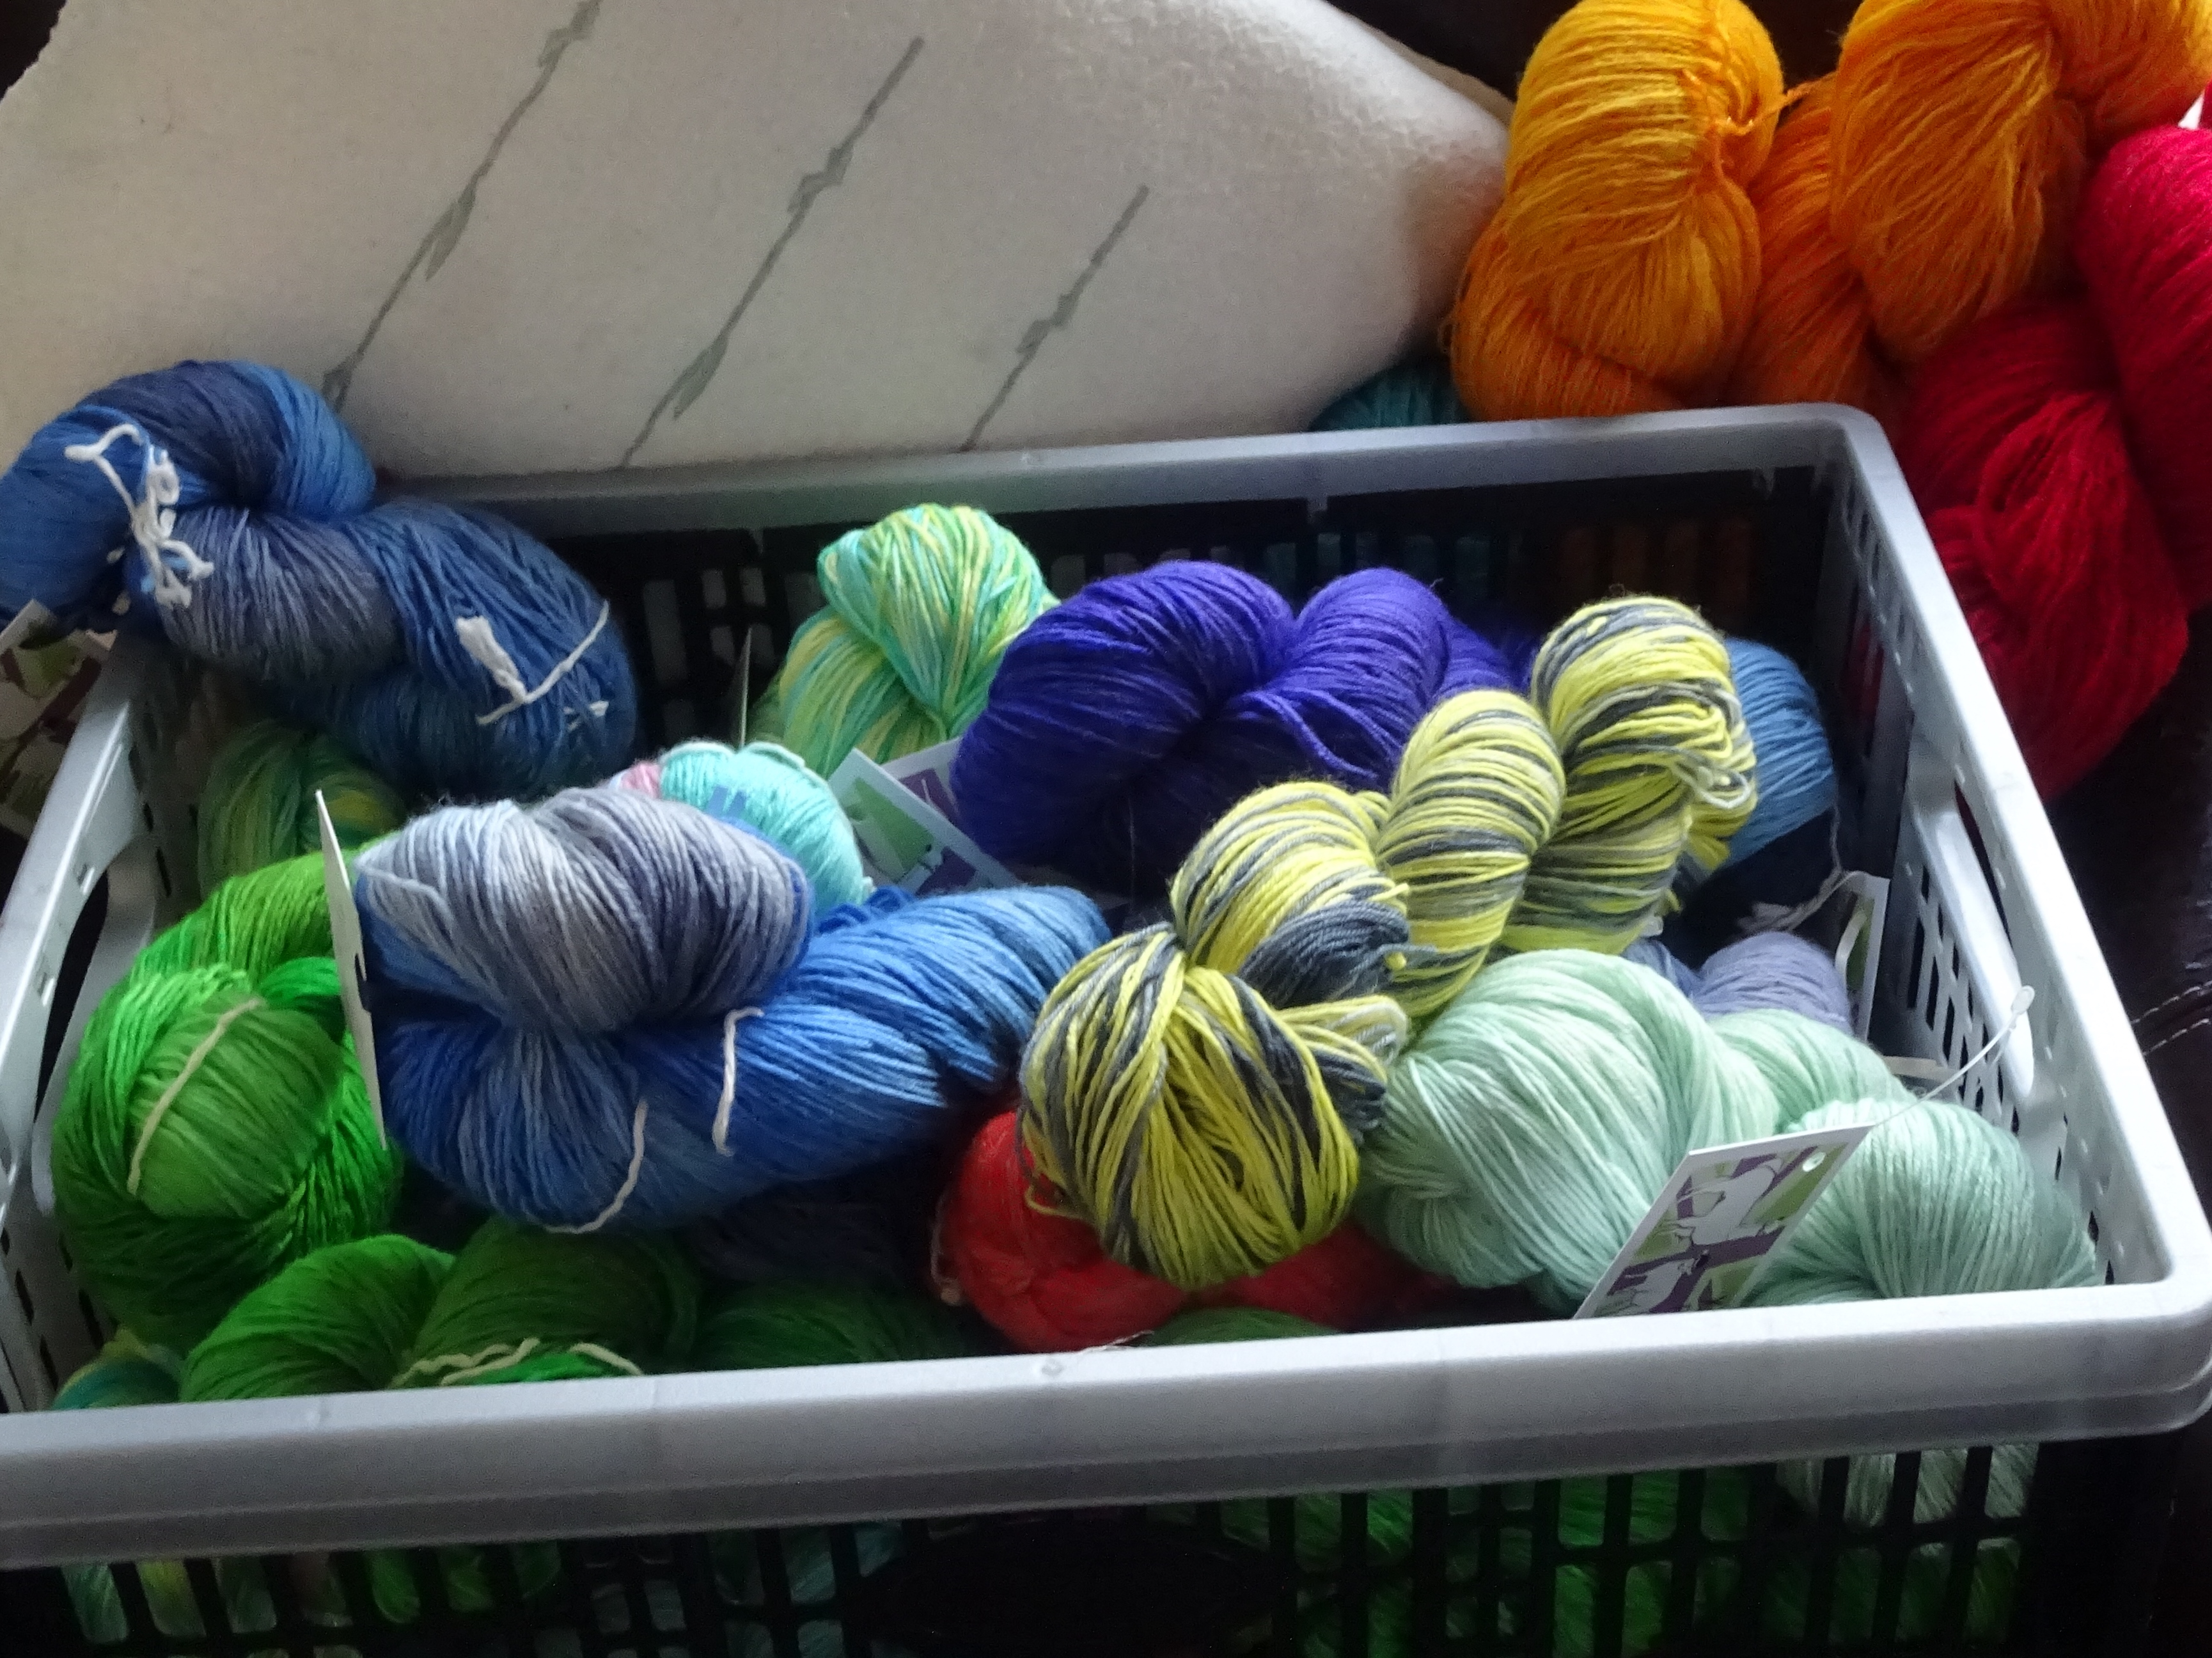
Nic’s yarn
We had a visit from Nic – aka Yarnsfromtheplain – who brought her pop up wool shop and stayed for dinner and knitting. And there was plenty of scrummy yarn:
More of Nic’s yarnAnd more….
And I couldn’t resist 😉
Each morning we fuelled ourselves on an excellent breakfast at the hotel.
And each day we walked into Buxton for lunch at one of our 2 favourite venues – Upstairs at Charlotte’s and Number 6 tea rooms. And we shopped – especially at Jantar. And we bought wool at Sew In. And we had ice cream…at least some of us did 😉 And we had an exclusive presentation from Netta of DiscoverBuxton about Mary Queen of Scots and her regular visits to Buxton.
And we had visits from Ruth and Rose, who joined us for a few hours…lunch and knitting 🙂
And each evening we enjoyed an amazing dinner at the hotel.
And each day we enjoyed excellent hospitality from Sara and Dave and the staff at the hotel. And we will be back, because it is a perfect venue for us.
Thank you to my lovely knittery friends for your excellent company and so many great times, and to the hotel for an excellent venue, food and hospitality and to Buxton for a great town and to the weather gods for the most perfect weather.
And I am soooooo looking forward to doing it all again!
I received something lovely in the post the other day. Here’s a photo of some of it:
PERFECT PROJECT LABELS
These labels are cheeky and practical. They are perfect for adding to handmade items, informing the lucky recipient just how to care for their gift and hopefully giving them a smile as they read the cheeky words!
They are supplied by Joanne Scrace (aka Not So Granny), a talented crochet and knitting designer, and she sells them in her Etsy shop here. A few weeks ago she ran a competition on her facebook page asking what people would write on a care label. Now I don’t often enter competitions, but I thought this was a great idea – I always worry that preciously-made gifts should be cared for properly, I have been known to produce care sheets for those I make! So I entered the competition with ‘one of a kind – just like the wearer’. Lo and behold, Joanne liked it and I won some labels!
There are several cheeky messages to choose from, so I may be going shopping for some more. I love the one designed for your project bag. I will be adding mine to my favourite project bag:
Carpet wool bag
This bag was made from a kit by Hookedbydesign given to me for my birthday last year by Karen and Ruth, another lovely surprise. It is made from carpet wool which is exceedingly sturdy and perfect for a bag. I lined it with fabric, added some strong hessian tape to the handles (which I encased with crochet) and it is now my most favourite project bag which travels to many a knit group. Similar kits can be found here.
Whenever I design anything I always swatch various ideas and some of them are changed or discarded altogether before I settle on a design. This is not unusual, I am sure most, if not all, designers do something like this.
When designing the squares for the Blog Blanket CAL, I swatched one square which I decided wouldn’t be appropriate – I needed it to finish on a solid round and the 8 round version would end on a granny round. But it wasn’t discarded, I liked it so I just put it aside waiting for some other use.
This is my original swatch and……………there’s an error in it, but I won’t tell you where!
The one that got away
That other use just came up. I am making a small blanket and I thought a huge granny square using the design would be perfect. It would be quick to make but also have just enough interest to avoid being boring to make.
The blanket was started yesterday, and I have already completed 15 rounds. I decided to swap colour every 2 rounds because the pattern changes then (which is what I did intuitively on my original swatch). But when I got to Round 6 I thought it looked familiar. And then I realised it is similar to Attic24’s cosy stripe blanket. Of course, it wasn’t planned and it does have 2 significant differences – firstly it is a granny-style square not a stripe and second I use some chain sts in this square.
If you wanted to make an Attic24 cosy stripe-style granny blanket then it would be easy to adjust the pattern by removing the chain sts and adjusting the number of trebles along each ‘granny’ round – but I wanted to continue with my own design.
So here’s the pattern for you (with a sneaky peek at a part made blanket that I don’t really want to reveal):
Sneaky peek
ABBREVIATIONS
The pattern is written in English crochet terms.
St = stitch
Ch = chain
Tr = treble (US dc)
Ss = slip stitch
Sp = space
Ch-sp =chain space
I changed colour every 2 rounds, simply joining the new colour where I started each round with a ss.
Foundation: Make a 4ch foundation ch and join into a ring with a ss Round 1: 5ch (counts as 1tr, 2ch), (3tr, 2ch) 3 times into the ring, 2tr into the ring, join to 3rd st of starting 5ch with a ss. Round 2: ss into 2ch-sp, (note for this and each subsequent round: this ss is to position the start of the round in the right place) 5ch (counts as 1tr, 2ch), (3tr, 1ch) into the same 2ch-sp, (3tr, 2ch, 3tr, 1ch) into each of the next three 2ch-sps, 2tr into the first 2ch-sp, join to 3rd st of starting 5ch with a ss. Round 3: ss into 2ch-sp, 5ch (counts as 1tr, 2ch), 2tr into the same 2ch-sp, 1tr into each st around (working into the 1ch not the 1ch-sp), (2tr, 2ch, 2tr) into each 2ch-sp, and work a final 1tr into the first 2ch-sp, join to 3rd st of starting 5ch with a ss. Round 4: ss into 2ch-sp, 5ch (counts as 1tr, 2ch), 2tr into the same 2ch-sp, 1tr into each st around, (2tr, 2ch, 2tr) into each 2ch-sp, and work a final 1tr into the first 2ch-sp, join to 3rd st of starting 5ch with a ss. Round 5: ss into 2ch-sp, 5ch (counts as 1tr, 2ch), (3tr, 1ch) into the same 2ch-sp, miss 3 sts, [*(3tr, 1ch) in next st, miss 3 sts; repeat from * to next 2ch-sp, (3tr, 2ch, 3tr, 1ch) in 2ch-sp, miss 3sts] 4 times but on the last repeat of this just work 2tr into the 2ch-sp at the start of the round, join to 3rd st of starting 5ch with a ss. Round 6: ss into 2ch-sp, 5ch (counts as 1tr, 2ch), (3tr, 1ch) into each 1ch-sp around and (3tr, 2ch, 3tr, 1ch) into each corner 2ch-sp, 2tr into the first 2ch-sp, join to 3rd st of starting 5 ch with a ss.
Repeat Rounds 3 to 6 until you have a blanket the size you want. I plan to finish on a Round 4 so I have a nice edge.
If you decide to make a blanket using this design, please share a photo 🙂
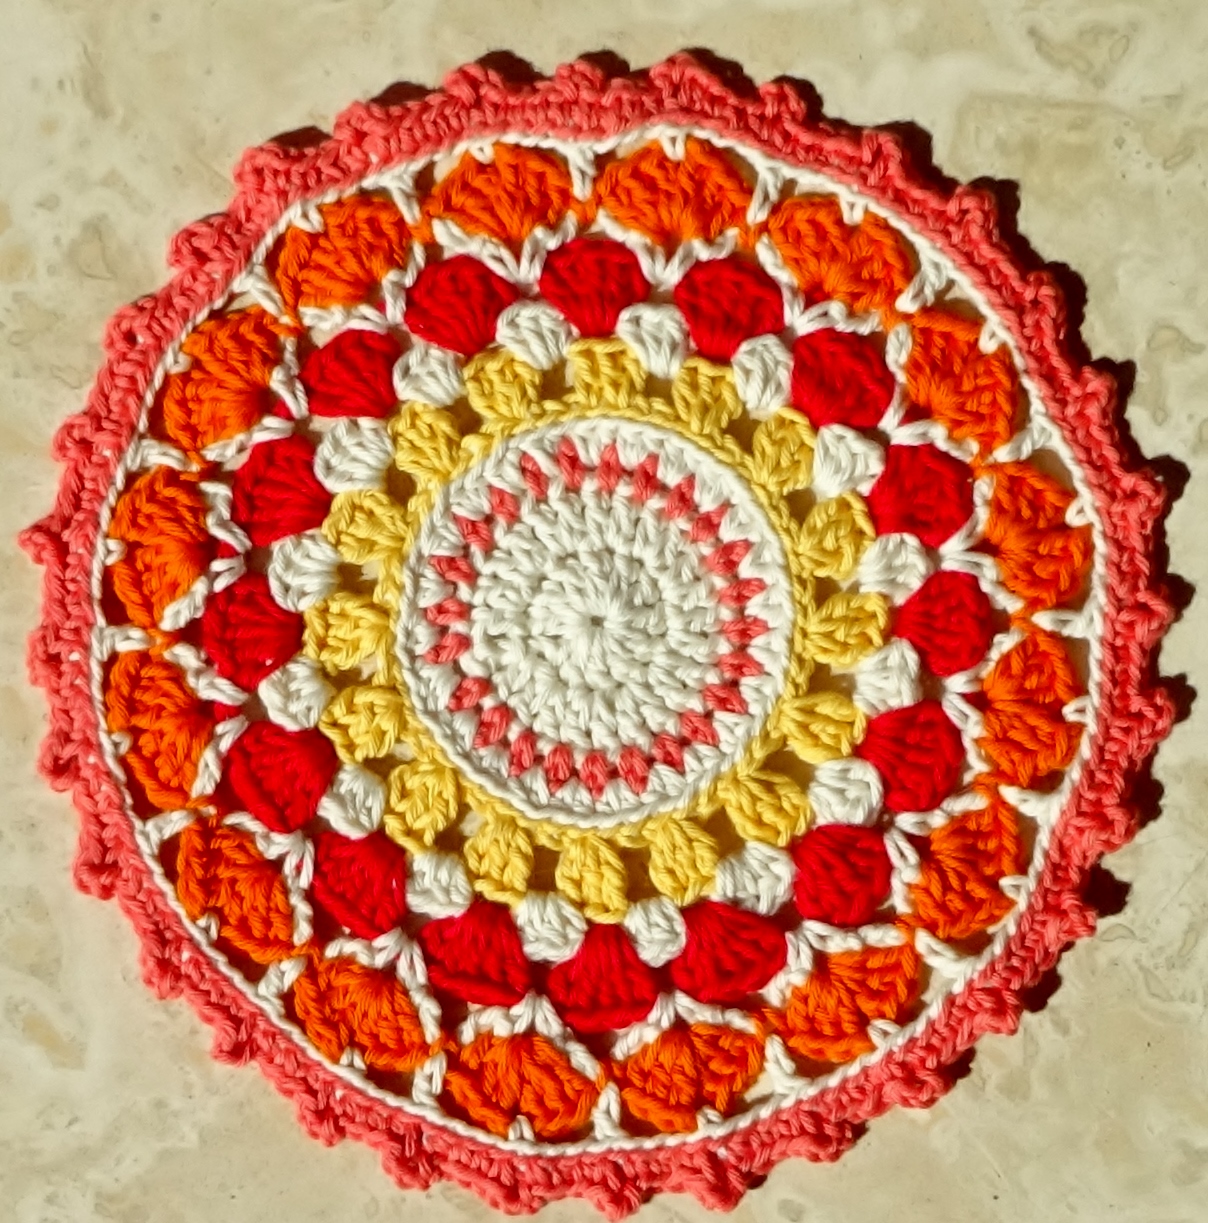
I wanted to brighten up a corner and I decided there was no better way than with a little crochet. However, I wanted something small not as big as a blanket or cushion. After some thought I decided to try a mandala. I have never made a mandala before let alone designed one but it is only a large round motif and I have lost count of the number of motifs I have designed……..
So here is my bright sunshine mandala:
Sunshine Mandala
I enjoyed making it, which came as a surprise to me because I hadn’t even imagined that mandalas had a use, nor that I would design or like one! But I did enjoy it, and now I am thinking about making another……….
Oh, and when I dropped it I discovered that yarnaddictcat also liked it – well, I’m not surprised really!
When I photographed it on the bench I realised that I would make a sturdy outdoor blanket, so I expect plenty of use from it this spring.
The final part of the pattern for you is the border I used. But of course you may use any border you like.
The Border
I made the border a couple of weeks ago, in fact I made 3 borders. At first I tried a simple one, but I didn’t like it. Then I tried something more substantial, but that looked odd. So I had to frog it all back twice. I realised one of the reasons I didn’t like the border was the colours I used – originally blue and orange. The orange worked well next to the squares but the blue was totally wrong. So I looked at my remaining yarn scraps, chose some colours I preferred then ordered more yarn – no good trying to make do with what I had.
My border used a just under 4 balls of Drops Nepal (aran weight, 75m per 50g ball) – I used 2 of Goldenrod (yellow), 1 of Orange and 1 of Green.
Here’s the pattern:
ABBREVIATIONS
The pattern is written in English crochet terms.
St = stitch
Ch = chain
Tr = treble (US dc)
Htr = half treble (US hdc)
Dtr = double treble (US tr)
Ss = slip stitch
Sp = space
Ch-sp = chain space
Round 1 – using Orange, starting one stitch to the right of a corner, ss in the back loop of each stitch around, join the round with a ss. This gives a nice firm and crisp edge to work the rest of the border from.
Round 2 – again you should start this round one stitch to the right of a corner and ensure you work through the ss from round 1 and the back loop of each square for a good firm finish, *(1htr, 2ch) in this st, (1dtr, 2ch) in next st, then work (1htr, 1ch, miss 1 st) repeated along the side edge to the stitch just before the next corner; repeat from * until end of round, join the round with a ss to the top of your first st, break yarn and fasten off. NOTE: I had 85 htr and 84 1ch-sps along each side and (2ch-sp, 1dtr, 2ch-sp) in each corner.
Round 3 – using Yellow, work 1htr in each stitch around (counting each htr and ch as a st and working into the ch not the ch-sp), in the corners I worked (1tr, 2ch, 1tr) in the corner dtr st, join the round with a ss, break yarn and fasten off. (NOTE: I had 175 sts along each side and a 2ch-sp in each corner, ideally you should have a multiple of 6 sts plus 1 along each side).
Round 4 – using Green, start in the tr just to the right of a 2ch-sp corner, 1dc in tr, *(2tr, 2ch, 2tr) in 2ch-sp, 1dc in next tr, [miss 2 sts, (2tr, 2ch, 2tr) in next st, miss 2 sts, 1dc in next st] repeated to next corner 2ch-sp; repeat from * until end of round, join the round with a ss, break yarn and fasten off.
Round 5 – using Yellow, work (2tr, 2ch, 2tr) in each dc and 1 dc in each 2ch-sp around, join the round with a ss, break yarn and fasten off. Sew in all loose ends.
I blocked my blanket, taking up the most of the floor space in the spare room for a couple of days! With the border (which is about 6cm/2.5″), it ended up at about 140cm/55″ square.
I hope you have enjoyed this CAL. I have enjoyed sharing it with you 🙂
For me, most of the pleasure is in seeing your finished blanket, so please share a photo.
For those of you who celebrate/enjoy the easter weekend – Happy Easter! For those who don’t, Happy Sunday!
Unfortunately the weather here today is dull, so I don’t plan to spend any time out in the garden – I think I’ll be doing a little crochet…..although there is nothing new in that! If the sun does creep out I will just take my crochet into the garden 🙂
So please join me in some crochet if you can, and to entice you I am offering my Easter Egg Bunting pattern free until midnight GMT tomorrow (6th April).
Easter Egg Bunting
The pattern is here on Ravelry and you need to use the coupon code HAPPY EASTER at checkout to obtain the free pattern. The Bunting is based on granny stitches, so is quick to make. You can adorn it with buttons, beads, ribbon.
The long Easter weekend is almost upon us and here in the UK we have some wet and windy weather forecast. So I think crocheters in the UK may well have plenty of hooking time this weekend, much better to be inside with a hook than outside battling the weather! So pull up a chair, get out your hook and your blanket CAL and start on the last square, plan your layout from the 2 options below and start to join your blanket. Yes, this is a bumper post today – with plenty to help keep you occupied 😉
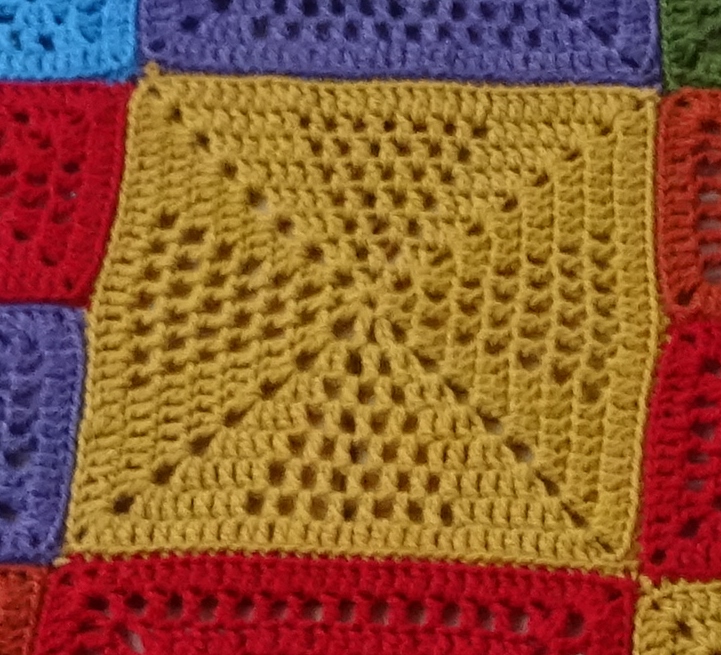
Here is square number 6, it’s a large version of square number 2, so you should be able to complete it with ease.
Square number 6
This photo shows number 6 joined into the blanket, look closely and you will see it has one large square above and below but 2 smaller squares to either side. This gives you a clue to one of the layouts below 🙂
Here’s the pattern:
A reminder of the ABBREVIATIONS
The pattern is written in English crochet terms.
St = stitch
Ch = chain
Tr = treble (US dc)
Ss = slip stitch
Sp = space
Ch-sp =chain space
Foundation: Make a 4ch foundation ch and join into a ring with a ss
Round 1: 5ch (counts as 1tr, 2ch), (1tr, 1ch, 1tr, 2ch) 3 times into the ring, (1tr, 1ch) into the ring, join to 3rd st of starting 5ch with a ss.
Round 2: ss into 2ch-sp, (note for this and each subsequent round: this ss is to position the start of the round in the right place) 5ch (counts as 1tr, 2ch), (2tr, 1ch) into the same 2ch-sp, *(1tr, 1ch) into next 1ch-sp, (2tr, 2ch, 2tr, 1ch) into the next 2ch-sp; repeat from * another 2 times, (1tr, 1ch) into next 1ch-sp, 1tr into first 2ch-sp, join to 3rd st of starting 5ch with a ss.
Round 3: ss into 2ch-sp, 5ch (counts as 1tr, 2ch), 2tr into the same 2ch-sp, *(1tr, 1ch) in next st, (1tr, 1ch) in each of next two 1ch-sps, miss 1 st, 1tr in next st**, (2tr, 2ch, 2tr) in next 2ch-sp; repeat from * another 3 times but on the last repeat finish at **, 1tr into the first 2ch-sp, join to 3rd st of starting 5ch with a ss.
Round 4: ss into 2ch-sp, 5ch (counts as 1tr, 2ch), 2tr into the same 2ch-sp, *1tr in next st, (1tr, 1ch) in next st, (1tr, 1ch) in each of next three 1ch-sps, miss 1 st, 1tr in each of next 2 sts**, (2tr, 2ch, 2tr) in next 2ch-sp; repeat from * another 3 times but on the last repeat finish at **, 1tr into the first 2ch-sp, join to 3rd st of starting 5ch with a ss.
Round 5: ss into 2ch-sp, 5ch (counts as 1tr, 2ch), 2tr into the same 2ch-sp, *1tr in each of next 2 sts, (1tr, 1ch) in next st, (1tr, 1ch) in each of next four 1ch-sps, miss 1 st, 1tr in each of next 3 sts**, (2tr, 2ch, 2tr) in next 2ch-sp; repeat from * another 3 times but on the last repeat finish at **, 1tr into the first 2ch-sp, join to 3rd st of starting 5ch with a ss.
Round 6: ss into 2ch-sp, 5ch (counts as 1tr, 2ch), 2tr into the same 2ch-sp, *1tr in each of next 3 sts, (1tr, 1ch) in next st, (1tr, 1ch) in each of next five 1ch-sps, miss 1 st, 1tr in each of next 4 sts**, (2tr, 2ch, 2tr) in next 2ch-sp; repeat from * another 3 times but on the last repeat finish at **, 1tr into the first 2ch-sp, join to 3rd st of starting 5ch with a ss.
Round 7: ss into 2ch-sp, 5ch (counts as 1tr, 2ch), 2tr into the same 2ch-sp, *1tr in each of next 4 sts, (1tr, 1ch) in next st, (1tr, 1ch) in each of next six 1ch-sps, miss 1 st, 1tr in each of next 5 sts**, (2tr, 2ch, 2tr) in next 2ch-sp; repeat from * another 3 times but on the last repeat finish at **, 1tr into the first 2ch-sp, join to 3rd st of starting 5ch with a ss.
Round 8: ss into 2ch-sp, 5ch (counts as 1tr, 2ch), 2tr into the same 2ch-sp, 1tr into each st and 1ch-sp around, (2tr, 2ch, 2tr) into each 2ch-sp, and work a final 1tr into the first 2ch-sp, join to 3rd st of starting 5ch with a ss.
Break yarn and fasten off, leaving a long tail of about 6m for sewing or crocheting together later.
You should have 31tr along each side and a 2ch-sp at each corner.
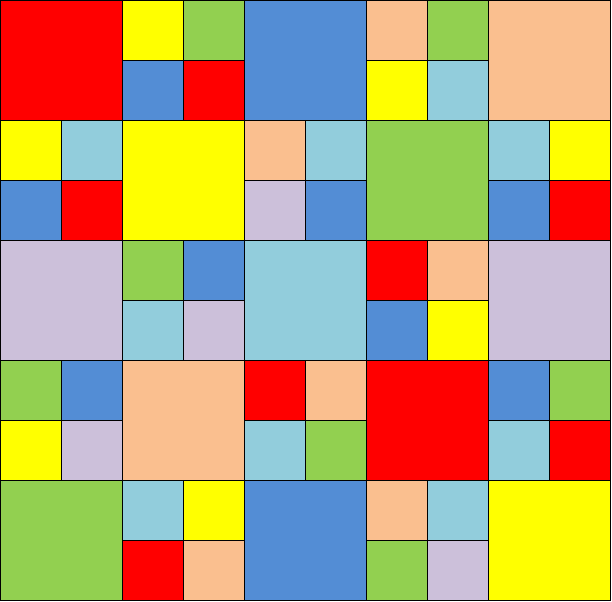
I made 5 of these in varying colours, but you may make as many as you like. However, for the layouts below you will need a total of 48 small squares and 13 large squares.
Before thinking of joining, you need to see the layouts and decide which you want. So here are the 2 options:
OPTION 1
OPTION 2
Both these options use the same number of large and small squares.
Option 1 is the layout I used, and it includes the colours I used as well as the square numbers. If you choose this option then the best way to join is by sewing or slip stitching together the way I did in the Christmas CAL here. If you try a different join (such as double crocheting together) the width of the joining seam of 2 small squares makes them too big to join neatly against a large square.
If you choose option 2 then first join 4 small squares by slip stitch or sewing together and then treat them all as large squares. Using this option you can use more fancy joining – from double crochet to braids.
Before you join your squares, have a play with the different colours and patterns until you find a layout/colour scheme you like – it doesn’t have to be the same as mine!
As usual please share progress, either here in the comments or on the Ravelry forum here.
A crochet blog where you will find free crochet patterns along with oodles of crochet inspiration. Featured in top 100 crochet blogs and also in Crochet Now Magazine