Cloud CAL part 2

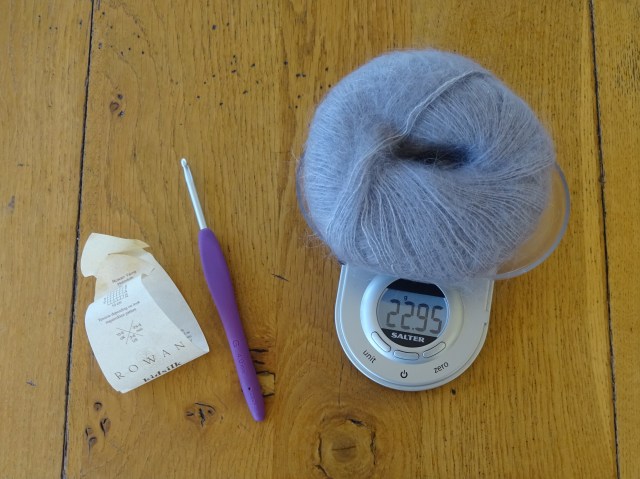
This is the second and final week of the Cloud CAL.   Here’s a recap of part 1.

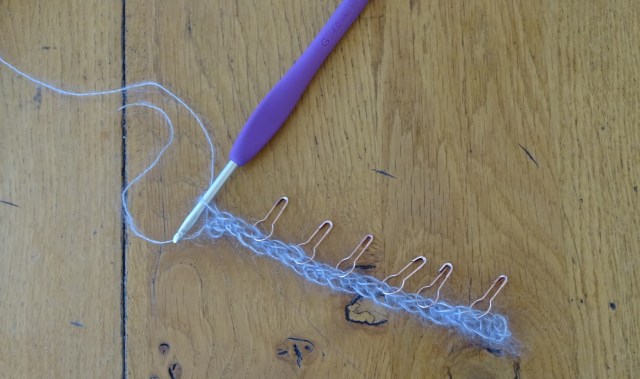
The first stage of this part is to finish the end with a beaded edge.

Beading with crochet can be done several ways, one way is to thread the beads onto the yarn and then keep pushing them down the yarn as you work, bringing them up to the hook when needed.  This design has beads only at the very ends of the scarf, so I thought it much better to just add them when needed, because I would have found it a bit of a faff to keep pushing beads down the yarn for so long so I am sure you would too!

The beaded edge is simple – a set of 6 loops with 5 beads on each.  You could make these loops longer if you like, but I found 5 beads sufficient.  If you don’t want to use beads then you can miss out some of the work – maybe just do a picot instead of the 5 beaded sts.

Are you ready?  Well here we go:

Beaded row: 1ch (does not count as a st), 1dc in st at base of ch, 1dc in next tr, 1dc in next 1ch-sp….now the fun bit, we are going to do 5 ch with beads on them, as follows:

Slip a few beads on the small crochet hook:

DSC02815

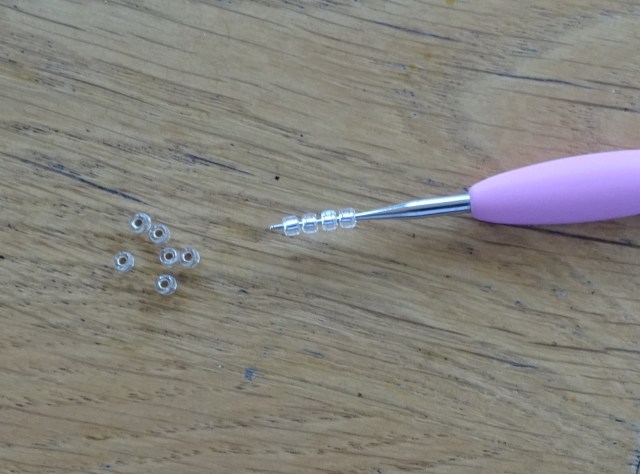
Now remove the working hook from the loop, place the small hook on the loop and slide one bead down over the hook and onto the loop, remove the small hook and replace the working hook on the loop, make 1ch.  You have trapped one bead in the ch.  These photos show the technique:

Now repeat this process, removing the working hook, placing a bead on the loop and then completing the ch.

Do this until you have 5 beads trapped on the ch loop.

*Now work 1dc in the same 1ch-sp as the last dc, 1dc in each of next 2 tr, 1dc in the next 1ch-sp.

And repeat the 5 ch of beads.

Repeat from * until you have 6 loops of beads, then end with 1dc in last 1ch-sp and 1dc in the last st.  Break yarn and fasten off.

DSC02831

You now have half a scarf!

To make the second half, re-join the yarn to the underside of your original starting ch (this is now the centre of the scarf), and then complete the second half to be identical to the first half.

Set up row: (this is basically the same as Row 2 from the first part) 2ch, (1tr, 1ch, 1tr) in first 1ch-sp, (1tr, 1ch, 1tr) in each of next four 1ch-sps,  in the last 1ch-sp you do something slightly different: (1tr, 1ch, tr2tog placing first part in 1ch-sp and last part in last st on the Row), turn.

The first 2ch and 1tr together count as a tr2tog – so you start and end the row with a tr2tog which helps give a firm edge.

Next row: 2ch, *(1tr, 1ch, 1tr) in 1ch-sp; repeat from * to last 1ch-sp, in this last 1ch-sp you do something slightly different: (1tr, 1ch) in last 1ch-sp, now tr2tog placing first part in last 1ch-sp and second part in last st on the Row, turn.  This is the pattern row and is repeated until the second half of the scarf is the same length as the first half, and then finish with the same beaded edge described above.  And voila!  You have a skinny summer scarf, light as a feather!

DSC02833

If you have any questions please ask on Ravelry or Facebook, and please share photos 🙂

I am working on my second scarf and hope to finish this weekend.  So I will share a photo when it is done, until then Happy Crocheting!  xxx

Fancy a blanket made by me?

Earlier this year I ran my annual blanket CAL using the Wrapped in Memories blanket design.  As part of my designing process I made 2 blankets – one in Stylecraft DK and one in 4 ply leftovers/scraps (which was the theme for the blanket).

Here’s the Stylecraft blanket:

DSC02648
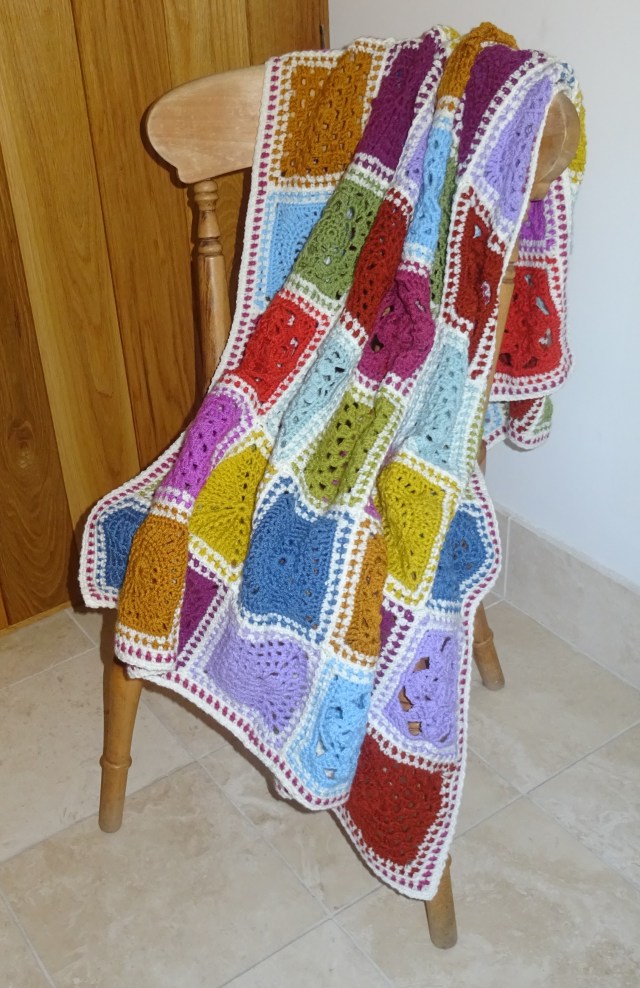
I love my scraps blanket because of all the memories hooked into it, and I love the Stylecraft blanket because of the colours!  But I have so many blankets at home that I decided I needed to find a good cause for the Stylecraft blanket.   And I am so pleased to say that I found that cause through my friend Kathy.  She supports many good causes through auctions and other fundraisers, and she was more than happy to find a way of raising funds from my blanket, in fact I think she was a bit gobsmacked that I could give away such a beautiful blanket!  But I was so pleased that Kathy could help me 🙂

If you want a chance to win this blanket (hooked by me!) then hop along to the ‘I love crafting – Friends and supporters’ group on Facebook – you will need to join the group but that will give you the chance to help the fundraising and maybe win the blanket!

Good luck! xxx


Cloud CAL part 1

I can’t believe a week has passed since I introduced this CAL.   But here we are ready to start Part 1!   I hope you have selected your yarn and beads.  I have seen a few people considering the colour of beads, so if you are undecided I suggest you wait until you’ve done a bit of Part 1 and then try the beads against the crochet.

I am joining the CAL as well, and this is my yarn choice, plus some beads (I’m undecided on the beads):

DSC02849

The yarn is vintage Natural Dye Studio Cobweb, I have 50g with approx 360m – maybe I have enough for 2.  That would be good as I am so undecided on the beads – it gives me the option to try another colour of beads!

So are you ready?  Well, let’s start 🙂

First weigh your yarn.  Sometimes the ball is a slightly different weight to that expected.  Mine was only 22.95g rather than 25g but it had been lurking in my stash for years, so I may have used a little of it on a project.

DSC02800

You will need to weigh your remaining yarn regularly as you work.  So make a note of the amount you started with and keep those scales handy as you work.  Now do a little maths – first divide by 2 and then add 0.2g.   For me this was:

22.95 divided by 2 equals 11.475, add 0.2 equals 11.675.  I rounded this up to 11.7g

Keep a note of your number because you need to stop crocheting the first part when your remaining yarn weighs this amount!

What if you have more than a 25g ball?   Well, you work until you have used about 12.3g or the length is half what you want.

Tension/gauge does not matter for this design, but you do need to ensure you keep a loose stitch for a light and airy feel to the scarf.    For this you must allow the hook to decide the stitch size and do not pull the yarn tight when you complete each stitch.

I found 22.95g was sufficient for a scarf approx. 10cm wide by 220cm long (in Rowan Kidsilk Haze yarn, 22.95g is about 190m).   So unless you want a very long scarf, and provided you have a full ball of yarn, then you can afford to do a little tension trial to start with.  Try the first 4 rows – this should measure approx. 10cm wide and 5cm long.  It doesn’t matter if you are a bit out.  But if you are a lot out (say more than 20%) try using a different hook – bigger hook if your swatch is too small, smaller hook if you swatch is too big.  Having said that, if you like the look of your tension swatch it really doesn’t matter if it isn’t the correct size!

Now we can start crocheting!

The pattern is written in UK terms only, so here are the abbreviations I use (with US in brackets, if different):
st(s) = stitch(es)
sp(s) = space(s)
ch = chain
ch-sp(s) = chain space(s)
dc = double crochet (US single crochet)
tr = treble (US double crochet)
t2tog = work 2 treble together (US dc2tog, work 2 dc together)

Foundation: make 21ch

Row 1: Turn and work 1dc in 2nd ch from hook, (1dc in next ch, 1ch, miss 1 ch, 1dc in next ch) repeated until last ch, 1dc in last ch, turn.  You should have 6 1ch-sps and 14dc.

Now to make life easy for you when doing the next row, place a stitch marker in every 1ch-sp, like this:

DSC02804

Row 2: 2ch, *(1tr, 1ch, 1tr) in 1ch-sp (where the stitch marker is), missing all the dc inbetween; repeat from * to last 1ch-sp, in this last 1ch-sp you do something slightly different: (1tr, 1ch) in last 1ch-sp, tr2tog placing first part in the same 1ch-sp and second part in last dc on the Row, turn.  You can remove your stitch markers now.

The first 2ch and 1tr together count as a tr2tog – so you start and end the row with a tr2tog which helps give a firm edge.

Row 3: 2ch, *(1tr, 1ch, 1tr) in 1ch-sp; repeat from * to last 1ch-sp, in this last 1ch-sp you do something slightly different: (1tr, 1ch) in last 1ch-sp, now tr2tog placing first part in last 1ch-sp and second part in last st on the Row (this is the top of the 2ch at start of last Row), turn.  You should now see that the pattern is a series of V sts.

Row 3 is the pattern, repeat it until your remaining yarn weighs that magic number you calculated – it must be no less than this number, so you may want to weigh your yarn regularly and estimate when that magic number will be reached.   I did a total of 77 rows.

This is how my stitches look, light and open with a lovely haze:

DSC02829

Do not break yarn when you reach the end – wait until next week when I show you what to do next!

Some tips on working this design:

As I mentioned in tension, let the hook decide the size of your stitch – do not pull the yarn once the hook is through the stitch as this will tighten it too much and you won’t get the open cloud-like effect.

It is very easy to miss the yarn and hook a bit of the fluff instead.  So check that you have placed you stitches correctly at the end of each Row.   It means stopping for a few seconds to look, but it is worth the effort as that check can save some frogging later.

If you do have to frog, go very slowly and use the hook to help break the fibres that somehow manage to blend together in the fluff, don’t use scissors as it is easy to have an accident and cut your yarn!

If you have plenty of yarn and want a wider scarf, then increase your foundation chain in multiples of 3ch, each 3ch extra gives an additional V st to each Row.

Please feel free to ask questions, here or on Ravelry or on Facebook.  And please share progress photos!

Until next week, happy crocheting xxx

Cloud CAL

I promised you details of the kidsilk CAL a few days ago and here they are!

This is the introduction to the Cloud CAL, a skinny summer scarf made from kidsilk yarn – that is a laceweight yarn which is approx 70% kid mohair and 30% silk.  It is light and fluffy, much like a cloud 🙂

This is a fun CAL and will come in 2 parts – part 1 will be published next Friday (18th  May 2018) and part 2 the Friday afterwards (25th May 2018).  Today I’m giving you details of the materials; hopefully a week is long enough for you to gather these.

What you will need:

The essentials:

DSC02798

1 x 25g ball of kidsilk yarn, about 200m long.   There are many yarns available of this variety – Rowan Kidsilk Haze, Debbie Bliss Angel, Willow & Lark Plume to name a few. I used a ball of Rowan Kidsilk Haze that I have had in my stash for AGES – so long that the shade number is no longer available and I can’t even find a name from the shade by trawling through Ravelry!  It is number 591 and is a lovely pale grey which is neutral enough to go with anything.

4.0mm (US G/6) crochet hook, I like Clover Amour

Weighing scales, I use Salter scales because they have a handy weighing tray which doubles up as a cover, but any good small weight kitchen scales will do – ideally ones that weigh in 0.1g or 0.05g measures and with a weighing tray that will take a ball or skein of yarn (some of them are a bit too small for this)

Also useful:

DSC02801

6 lockable stitch markers, the ones I used are like little safety pins and very lightweight so ideal for the yarn

And optionally:

DSC02812

Beads plus a small hook (small enough to go through the centre of the bead),  I used 60 size 8 beads and a Clover Amour 0.6mm crochet hook. Whilst beads are optional, I think they really set this scarf off well.

This is a very simple CAL, aiming to be a relaxing make rather than a challenge as many people find using kidsilk yarn is a challenge anyway.

Just one last thing, I can’t set you off on a CAL unless I give you a sneak peek!

DSC02844

This is skinny and simple, and may even convert some of you to kidsilk yarn!  Of course, you don’t have to use kidsilk yarn – any yarn will do as this pattern will work with anything, but of you want to use beads then 4ply would be best.

If you want to chat about this CAL, you can ask questions or comment on this blog, or on my Facebook page or on Ravelry.

Until part 1 next week…………..

Happy crocheting xxx

Using it!

I have mentioned before that I am following Lynne Rowe’s Use it or Lose it campaign.  It has been very much like a spring clean of my yarn stash – I have been through all of it thoroughly and if I could see no use for it then it was given to a worthy cause.  I have also refrained from buying new yarn, which has proved extremely difficult and I have to confess to a couple of lapses.  The first was to buy some red yarn to make poppies for our knitgroup’s annual poppy display (which increases every year) and the other to buy some double knit sock yarn (most of which has been used).

One of the joys of reviewing all my stash is finding yarn I haven’t looked at or used for a long time.  I have found some fabulous yarn bases and glorious colours, and it has made me want to find good uses for it.   So I decided to log it all, and that is what I have been doing this last weekend.

I have 7 tubs of yarn now (much reduced from before) and my logging has resulted in some interesting statistics.  Of course, I could just keep these to myself as I do find the amount of yarn I still have rather embarassing,  But if I confess then maybe it will inspire me (or embarass me) into making sure I use it!  So here goes:

My 7 tubs hold 153 skeins/balls of yarn, a total of almost 12kg in weight and almost 50km in length.  My logic told me I should use the aran and chunky yarn first, as it is thicker and will make up quickly – but I have less than 1km of that and it really is too warm here right now to knit or crochet heavy items.   So I have decided to look at the laceweight, which does amount to over 21km!   Amongst this is some kidsilk yarn – and that is what I have been playing with.   Here’s a small selection from my stash:

DSC02840

I have some lovely colours and I really enjoy working with it but it is like marmite – some people hate it and some people love it.  I love the cloud-like quality that I achieve when crocheting it, it is so light that it is perfect from summer wear (but not next to my sensitive skin!).  If you love it then maybe I can entice you to join in a CAL here on the blog.  This is a one ball CAL, meaning 1 x 25g or about 200m of yarn.  There are lots of brands you could use – such as Rowan Kidsilk Haze, Debbie Bliss Angel and Willow & Lark Plume, so if you don’t have any in your stash you have plenty of choice if you want to buy some.   The CAL is for a skinny scarf and is very simple, and it could be used with any yarn so if you don’t like or have any kidsilk yarn then you could join in using something else.

I will publish more details in a few days, so watch this space.   Oh, and if you like a bit of sparkle then you could add a simple beaded edge 🙂

Happy crocheting xxx