Beach Blues Bag CAL – final part

Welcome to the final part of the Beach Blues Bag CAL. In this part we finish by making a handle.

First you need to strengthen the top edge of the bag, then you need create the base of the handle.  I did all of this in double crochet (US single crochet).

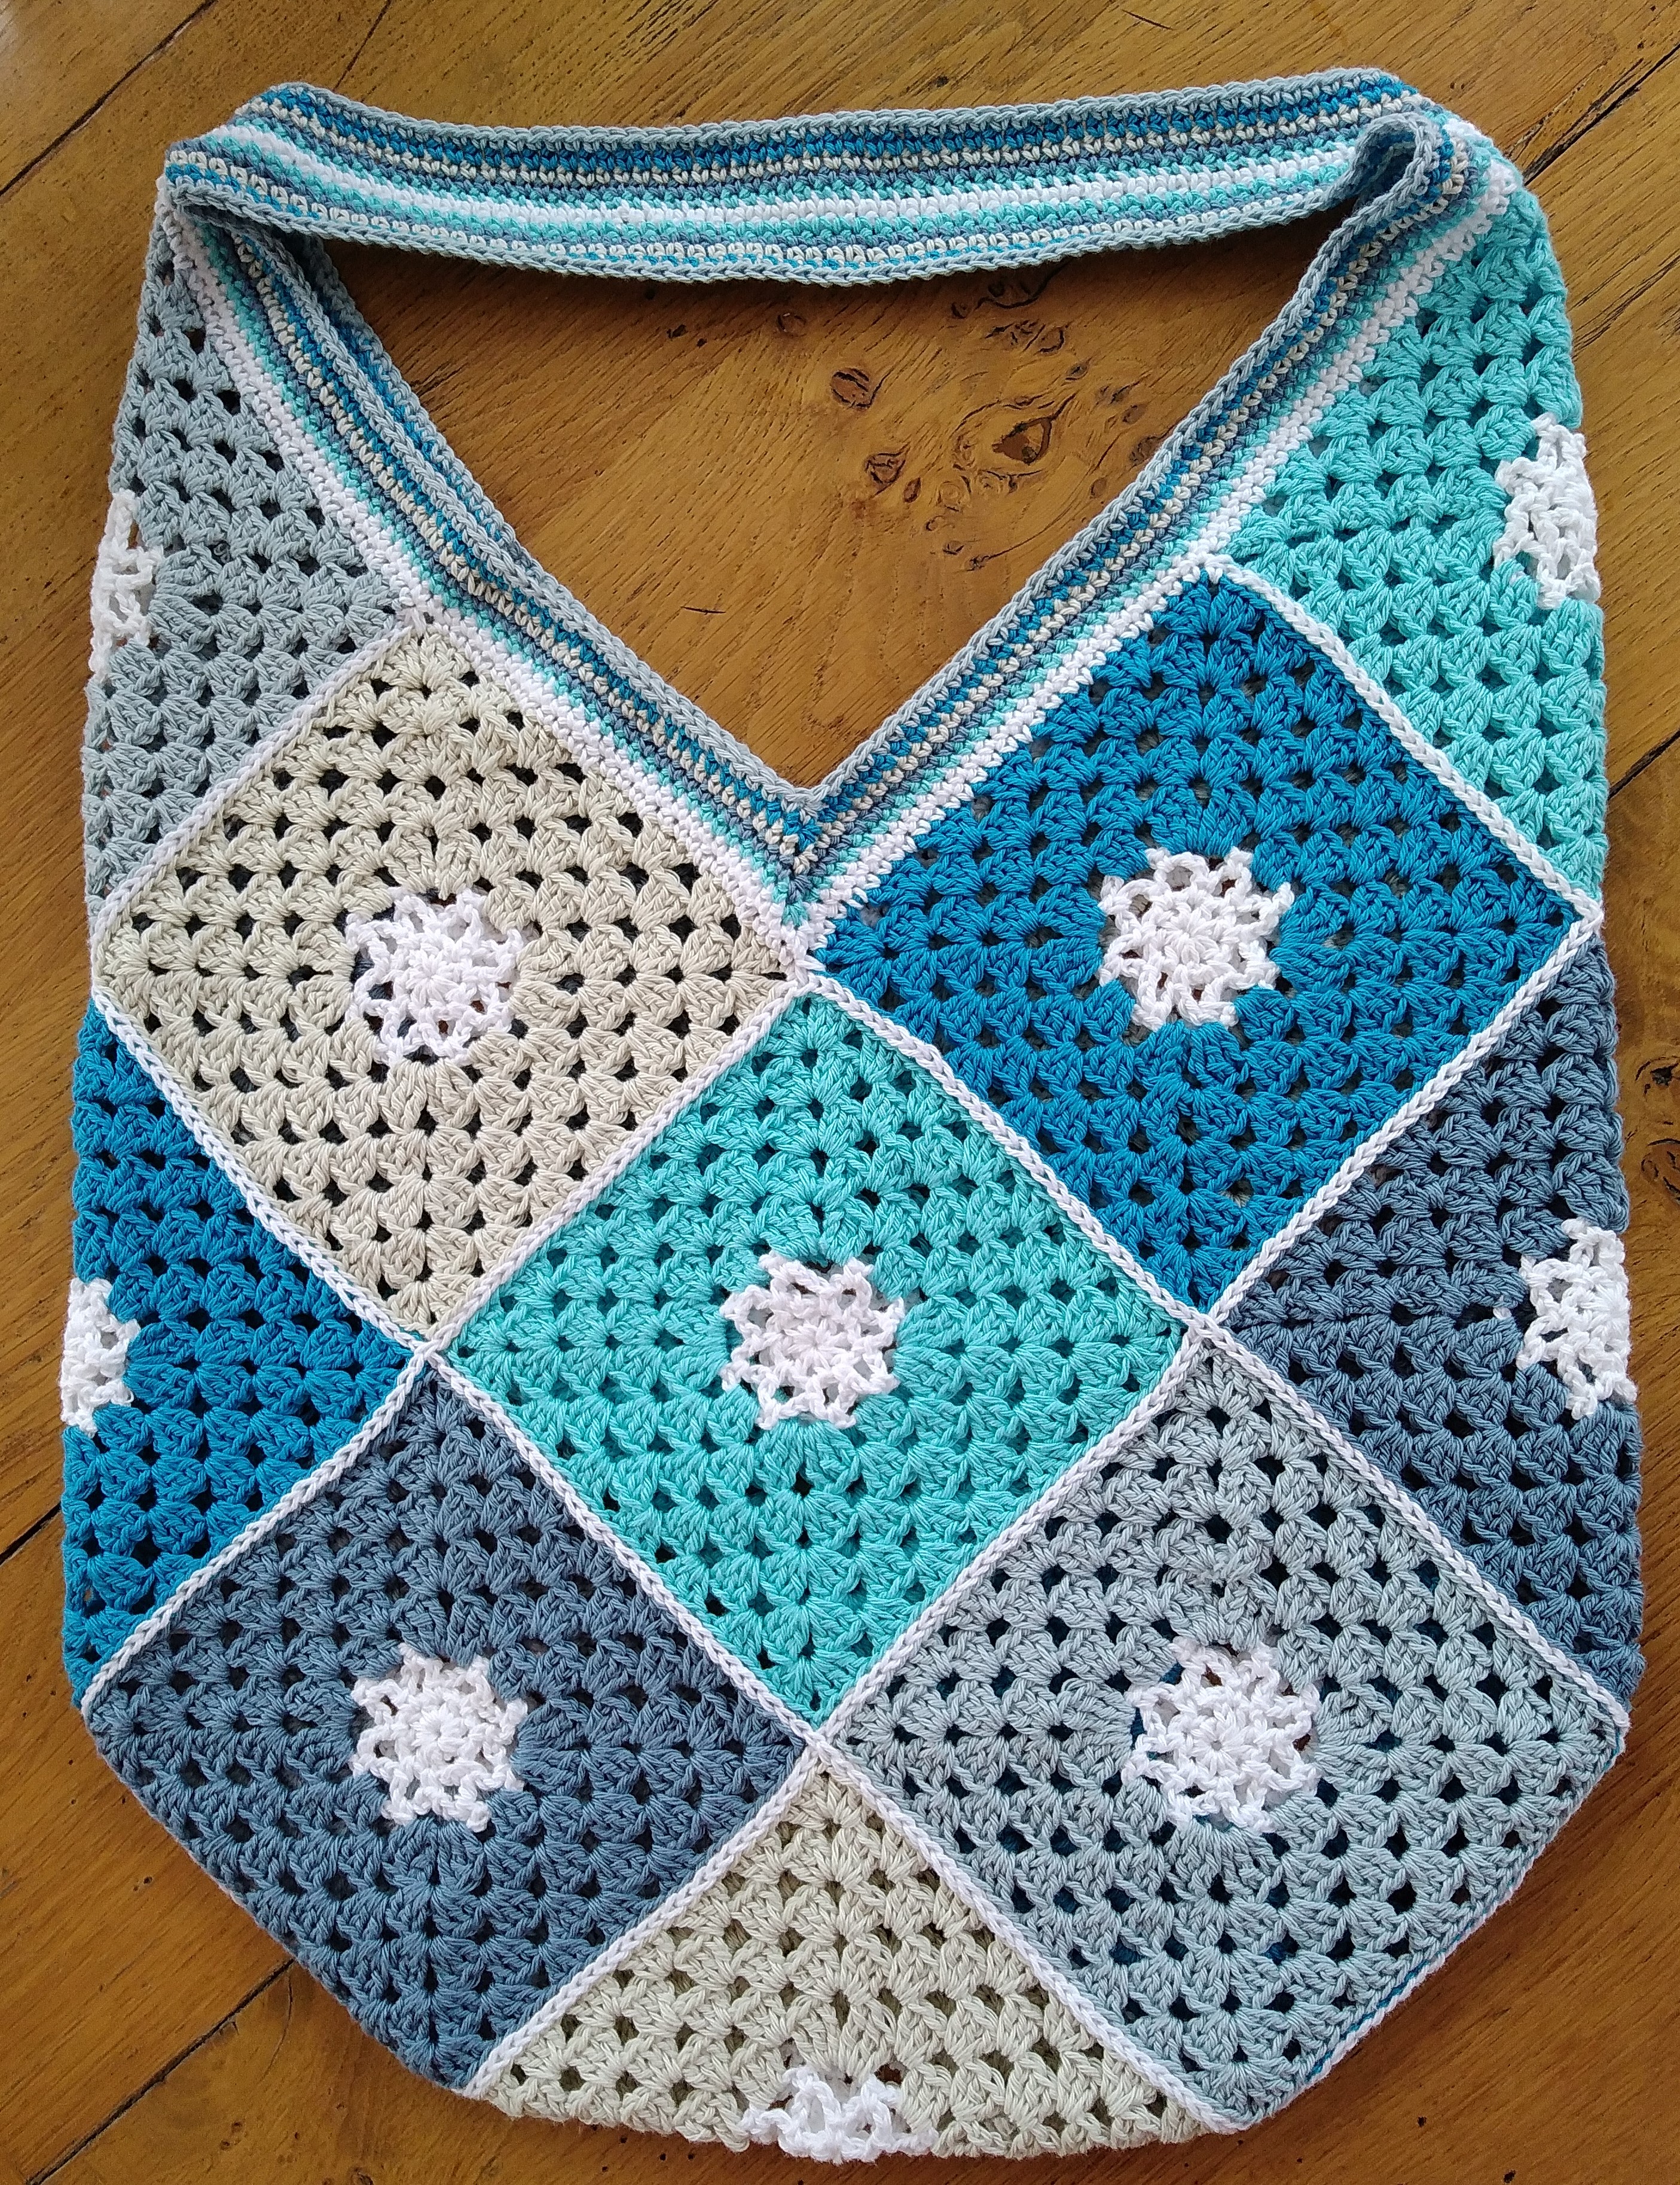
Let’s start with a reminder of the shape at the top of the bag. The photo below shows the shape and final edging, and the diagram shows one side of the bag.  

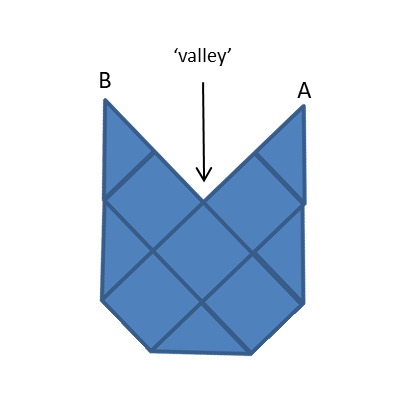
The first 2 rounds strengthen the top edge and create the base (centre) of the handle. Start the first round at point A, as indicated in the diagram above.

Round 1:  Using White (the colour I used for the centre of the motifs and for joining them), work 1 round of dc as follows: Place 1dc in each tr or 1ch-sp along the edges.  At the top corners of the squares (Points A and B) put 3dc into each 2ch-sp and place a sm into the middle of these 3dc.  At the ‘valleys’ work 3dc together.  As you start the round at A, start by working 3dc in the 2ch-sp. Join the round with a ss.

Round 2:   At point A, 1dc in 1st st, 2dc into the st marked, remove sm and replace into the first of these 2 dcs.  Work 1dc in each st around except at the valleys, work 3dc together and at point B, put 2dc into the st marked, remove sm and replace into the second of these 2 dcs.  Join the round with a ss and then ss into the first marked st.   Now make a chain for the handle (I made 60 ch but you could make it longer), without twisting the ch join to the marked st at B, ss in next st along at B, turn and work back down the ch with 1dc in each ch, ss in next st at A to complete the handle base.

As this is a single handle, I made it wide, adding 5 rounds of dc either side of the centre as follows.  However, you could make it wider or narrower as you prefer.

Round 3:  join Light Turquoise at any point, work 1dc into each around and work 3dc together at the valleys, join with a ss.  Break yarn and fasten off

Rounds 4-7: repeat Round 3 using yarns Jeans Blue, Light Grey, Bright Blue, Blue Grey.

Repeat Rounds 3 to 7 on opposite side of bag top and handle.

Weave in all your ends. Voila! You have a finished bag!

I hope you enjoyed the CAL. I would love to see what you make, please join in the discussion on Facebook or Ravelry.

Happy crocheting xx

Beach Blues Bag CAL – Part 2

Welcome to the second part of the CAL.

This week I’m going to show you how to turn the motifs into the bag shape.  Here’s a reminder of the bag, so you know the shape you are aiming for:

First you need to block the motifs, if you haven’t already done so.   If you leave it until you finish the bag you may find it a bit tricky.

Then you need to decide how you are going to join them.  I recommend joining in one of these 4 ways:

  1. By slip stitch holding the motifs right sides together, as I did for the Christmas CAL here.
  2. By double crochet (US single crochet) holding the motifs wrong sides together.
  3. By sewing.
  4. By slip stitch holding the motifs side by side, this is the method I used and I worked into the back stitch only.  You may find this a bit tricky if you haven’t done it before, but I think it gives a good effect and is worth that extra effort.  This shows you the technique:
Slip stitch side by side back loops only

Slip stitch side by side back loops only

I joined my bag using the same yarn that I used for the centres of my motifs – White. This is how the joins look:

To form the bag shape you need to join them in a particular order.  And I have illustrated this in the following diagrams:

The final part next week will show you how I finished the bag and made the handle.

I would love to see what you make. Join in the discussion on Facebook or Ravelry.

Happy crocheting xxx

Beach Blues Bag CAL – Part 1

Welcome to Part 1 of the Beach Blues Bag CAL. One thing I didn’t mention last week was that I started this bag to use up some of my cotton left over from a CAL I did last year run by Black Sheep Wools – the Folklore Jewels CAL. I chose the Pastel colour pack but I love blue, so I replaced some of the colours with more blue! This did mean I had quite a few shades of blue cotton left over and wanted to use all of them. So I now have bag and jewellery to match, perfect for the beach!

Are you ready to start the CAL?

You will need 15 square motifs, each about 13cm/5¼” square.  My motif has an open flower centre for the first 3 rounds, which I did in White and is then squared off and finished with granny rounds in a different colour. You could do more granny rounds to make larger squares and then a larger bag if you like. My bag is approx 36cm/14½” wide and 45cm/18” high when laid flat, excluding handle.

If you are using different weight of yarn you may wish to do fewer or more granny rounds and, of course, you may choose any colour scheme you want.

ABBREVIATIONS
The pattern is written in UK crochet terms.

St(s) = stitch(es)

Sp(s) = space(s)

Ch = chain

Ch-sp(s) = chain space(s)

Ss = slip stitch

Htr = half treble

Dc = double crochet

Tr = treble

Dtr = double treble

PATTERN

Make 15 motifs. All 15 motifs I made have White for the first 3 rounds and for the other rounds (Rounds 4 to 8) I made 3 each of the other 5 colours.

Foundation: Using White, make a 4ch foundation ch and join into a ring with a ss

Round 1: 3ch (counts as 1htr, 1ch), (1htr, 1ch) 7 times into ring, join to 2nd st of original 3ch with a ss. (8 1ch-sps)

Round 2: ss into 1ch-sp, 1ch (does not count as st), 1dc in same 1ch-sp, 5ch, (1dc in next 1ch-sp, 5ch) 6 times, 1dc in next 1ch-sp, 2ch, 1tr into 1st dc (forming last 5ch-sp). (8 5ch-sps)

Round 3: 1ch (does not count as st), 1dc in same 5ch-sp, 4ch, (1dc in next 5ch-sp, 4ch) 7 times, ss to 1st dc to join.  (8 4ch-sps)

Round 4: join new colour into any 4ch-sp, 6ch (counts as 1dtr, 2ch), (2dtr, 1tr, 1ch) in same 4ch-sp, *(3tr, 1ch) in next 4ch-sp, (1tr, 2dtr, 2ch, 2dtr, 1tr, 1ch) in next 4ch-sp; rep from * twice more, (3tr, 1ch) in next 4ch-sp, (1tr, 1dtr) in first 4ch-sp, join to 4th st of starting 6ch with a ss.

Round 5: ss into 2ch-sp, (note for this and each subsequent round: this ss is to position the start of the round in the right place) 5ch (counts as 1tr, 2ch), (3tr, 1ch) into the same 2ch-sp, *(3tr, 1ch) into each of the next two 1ch-sps, (3tr, 2ch, 3tr, 1ch) into the next 2ch-sp; repeat from * another 2 times, (3tr, 1ch) into each of the next two 1ch-sps, 2tr in the first 2ch-sp, join to 3rd st of starting 5ch with a ss.

Round 6:  ss into 2ch-sp, 5ch (counts as 1tr, 2ch), (3tr, 1ch) into the same 2ch-sp, *(3tr, 1ch) into each of the next three 1ch-sps, (3tr, 2ch, 3tr, 1ch) into the next 2ch-sp; repeat from * another 2 times (3tr, 1ch) into each of the next three 1ch-sps, 2tr into the 1st 2ch-sp, join to 3rd st of starting 5ch with a ss. 

Round 7: ss into 2ch-sp, 5ch (counts as 1tr, 2ch), (3tr, 1ch) into the same 2ch-sp, *(3tr, 1ch) into each of the next four 1ch-sps, (3tr, 2ch, 3tr, 1ch) into the next 2ch-sp; repeat from * another 2 times (3tr, 1ch) into each of the next four 1ch-sps, 2tr into the 1st 2ch-sp, join to 3rd st of starting 5ch with a ss. 

Round 8: ss into 2ch-sp, 5ch (counts as 1tr, 2ch), (3tr, 1ch) into the same 2ch-sp, *(3tr, 1ch) into each of the next five 1ch-sps, (3tr, 2ch, 3tr, 1ch) into the next 2ch-sp; repeat from * another 2 times (3tr, 1ch) into each of the next five 1ch-sps, 2tr into the 1st 2ch-sp, join to 3rd st of starting 5ch with a ss. 

Break yarn and fasten off.

The motifs will benefit from a gentle blocking before they are joined. And joining is the next part, which I’ll publish in a week.

I have a Facebook page and a discussion thread on my Ravelry Group here.   Please join in and share your progress.

Happy crocheting xx