Advent CAL 2023 – part 2

Welcome to day 2 of the Advent CAL 2023 – the 10 Gift Bags of Christmas!

The second bag is my go to style for a quick bag.  I call it the V Simple Gift Bag

I’ve been making variations of this for some time.  

It is also perfect for using leftover yarn and that’s exactly what I used for one of the samples I made for the CAL.  And it’s easy to vary this by making a larger base or higher sides. This sample was slightly smaller and used 6 different colours of leftover silk yarn, perfect for wrapping a candle

The pattern is available here and is free provided you use the code VSTITCH on purchase.  All the patterns in the CAL will be available free for the duration of the CAL, until midnight GMT 13th December 2023.

I hope you enjoy making this gift bag.  Please share progress on Ravelry, Facebook or instagram.

Until tomorrow, happy crocheting xxx

Advent CAL 2023 – part 1

Welcome to the Advent CAL 2023 – the 10 Gift Bags of Christmas!

I have indulged myself far too much over the years by crafting presents and do not wish to repeat them.  But I can still indulge myself by crafting gift bags.  This has many benefits including helping reduce my stash of leftover yarn and ensuring my gift bags fit the gifts by tailoring them to size. The bags are all pretty enough to be kept or re-used for another recipient, so I get plenty of satisfaction when making them. This CAL gives me the opportunity to share the gift bags I’ve designed over the years.

Each day for the next 10 days I will present to you a crocheted gift bag.  I’m starting the CAL with a gift bag that I think is easy.  I originally designed this to use up some of my extensive stock of afghan square samples from my designs over the years.  I never like to waste them and using them in a gift bag is a perfect use for them.  However to show you how to make one I designed a straightforward Granny Square Gift Bag.

I made this one in silk so it has a lovely sheen.  The pattern is available here and is free.  All the patterns in the CAL will be available free for the duration of the CAL, until midnight GMT 13th December 2023.

The concept of making this bag is the same for any pair of afghan squares.   I made a lovely small project bag (not a gift bag!) using my Highland Sunburst and Thistle squares designed for Friends Around the World.  

And a tip – you can add a touch of sparkle by holding your yarn together with a strand of metallic sewing thread.  Just look at this: 

I hope you enjoy making this gift bag, Please share progress on Ravelry, Facebook or even instagram (I confess I locked myself out of my original account so I have a newer one here).

Until tomorrow, happy crocheting xxx

Granny Square Day 2023

Today (15th August 2023) is Granny Square Day so I thought it the right time to remind you of some of my granny square designs, many of which are free.

First is the Festival Bag with a free pattern on the blog here.

Next there are lots of granny square variations in my Blog Blanket CAL 2015, first blog post here. These are free on the blog but there is also a downloadable pattern on Ravelry for £2.

And my Christmas Blanket 2014 also has granny square variations free on the blog, or again a printable version for £2 on Ravelry.

These are all ‘traditional’ styles of granny square, you can find other square designs of mine on Ravelry here.

Finally, I was having a chat with a good friend today about how I’d love a t-shirt or blouse in granny square fabric. I was so pleased to discover she has some designs available on her website – just have a look here. What a fantastic thing to discover on Granny Square Day!! I may just have ordered a couple of items 🙂

Happy crocheting xxx

Beach Blues Bag CAL – Part 2

Welcome to the second part of the CAL.

This week I’m going to show you how to turn the motifs into the bag shape.  Here’s a reminder of the bag, so you know the shape you are aiming for:

First you need to block the motifs, if you haven’t already done so.   If you leave it until you finish the bag you may find it a bit tricky.

Then you need to decide how you are going to join them.  I recommend joining in one of these 4 ways:

  1. By slip stitch holding the motifs right sides together, as I did for the Christmas CAL here.
  2. By double crochet (US single crochet) holding the motifs wrong sides together.
  3. By sewing.
  4. By slip stitch holding the motifs side by side, this is the method I used and I worked into the back stitch only.  You may find this a bit tricky if you haven’t done it before, but I think it gives a good effect and is worth that extra effort.  This shows you the technique:
Slip stitch side by side back loops only

Slip stitch side by side back loops only

I joined my bag using the same yarn that I used for the centres of my motifs – White. This is how the joins look:

To form the bag shape you need to join them in a particular order.  And I have illustrated this in the following diagrams:

The final part next week will show you how I finished the bag and made the handle.

I would love to see what you make. Join in the discussion on Facebook or Ravelry.

Happy crocheting xxx

Beach Blues Bag CAL – Part 1

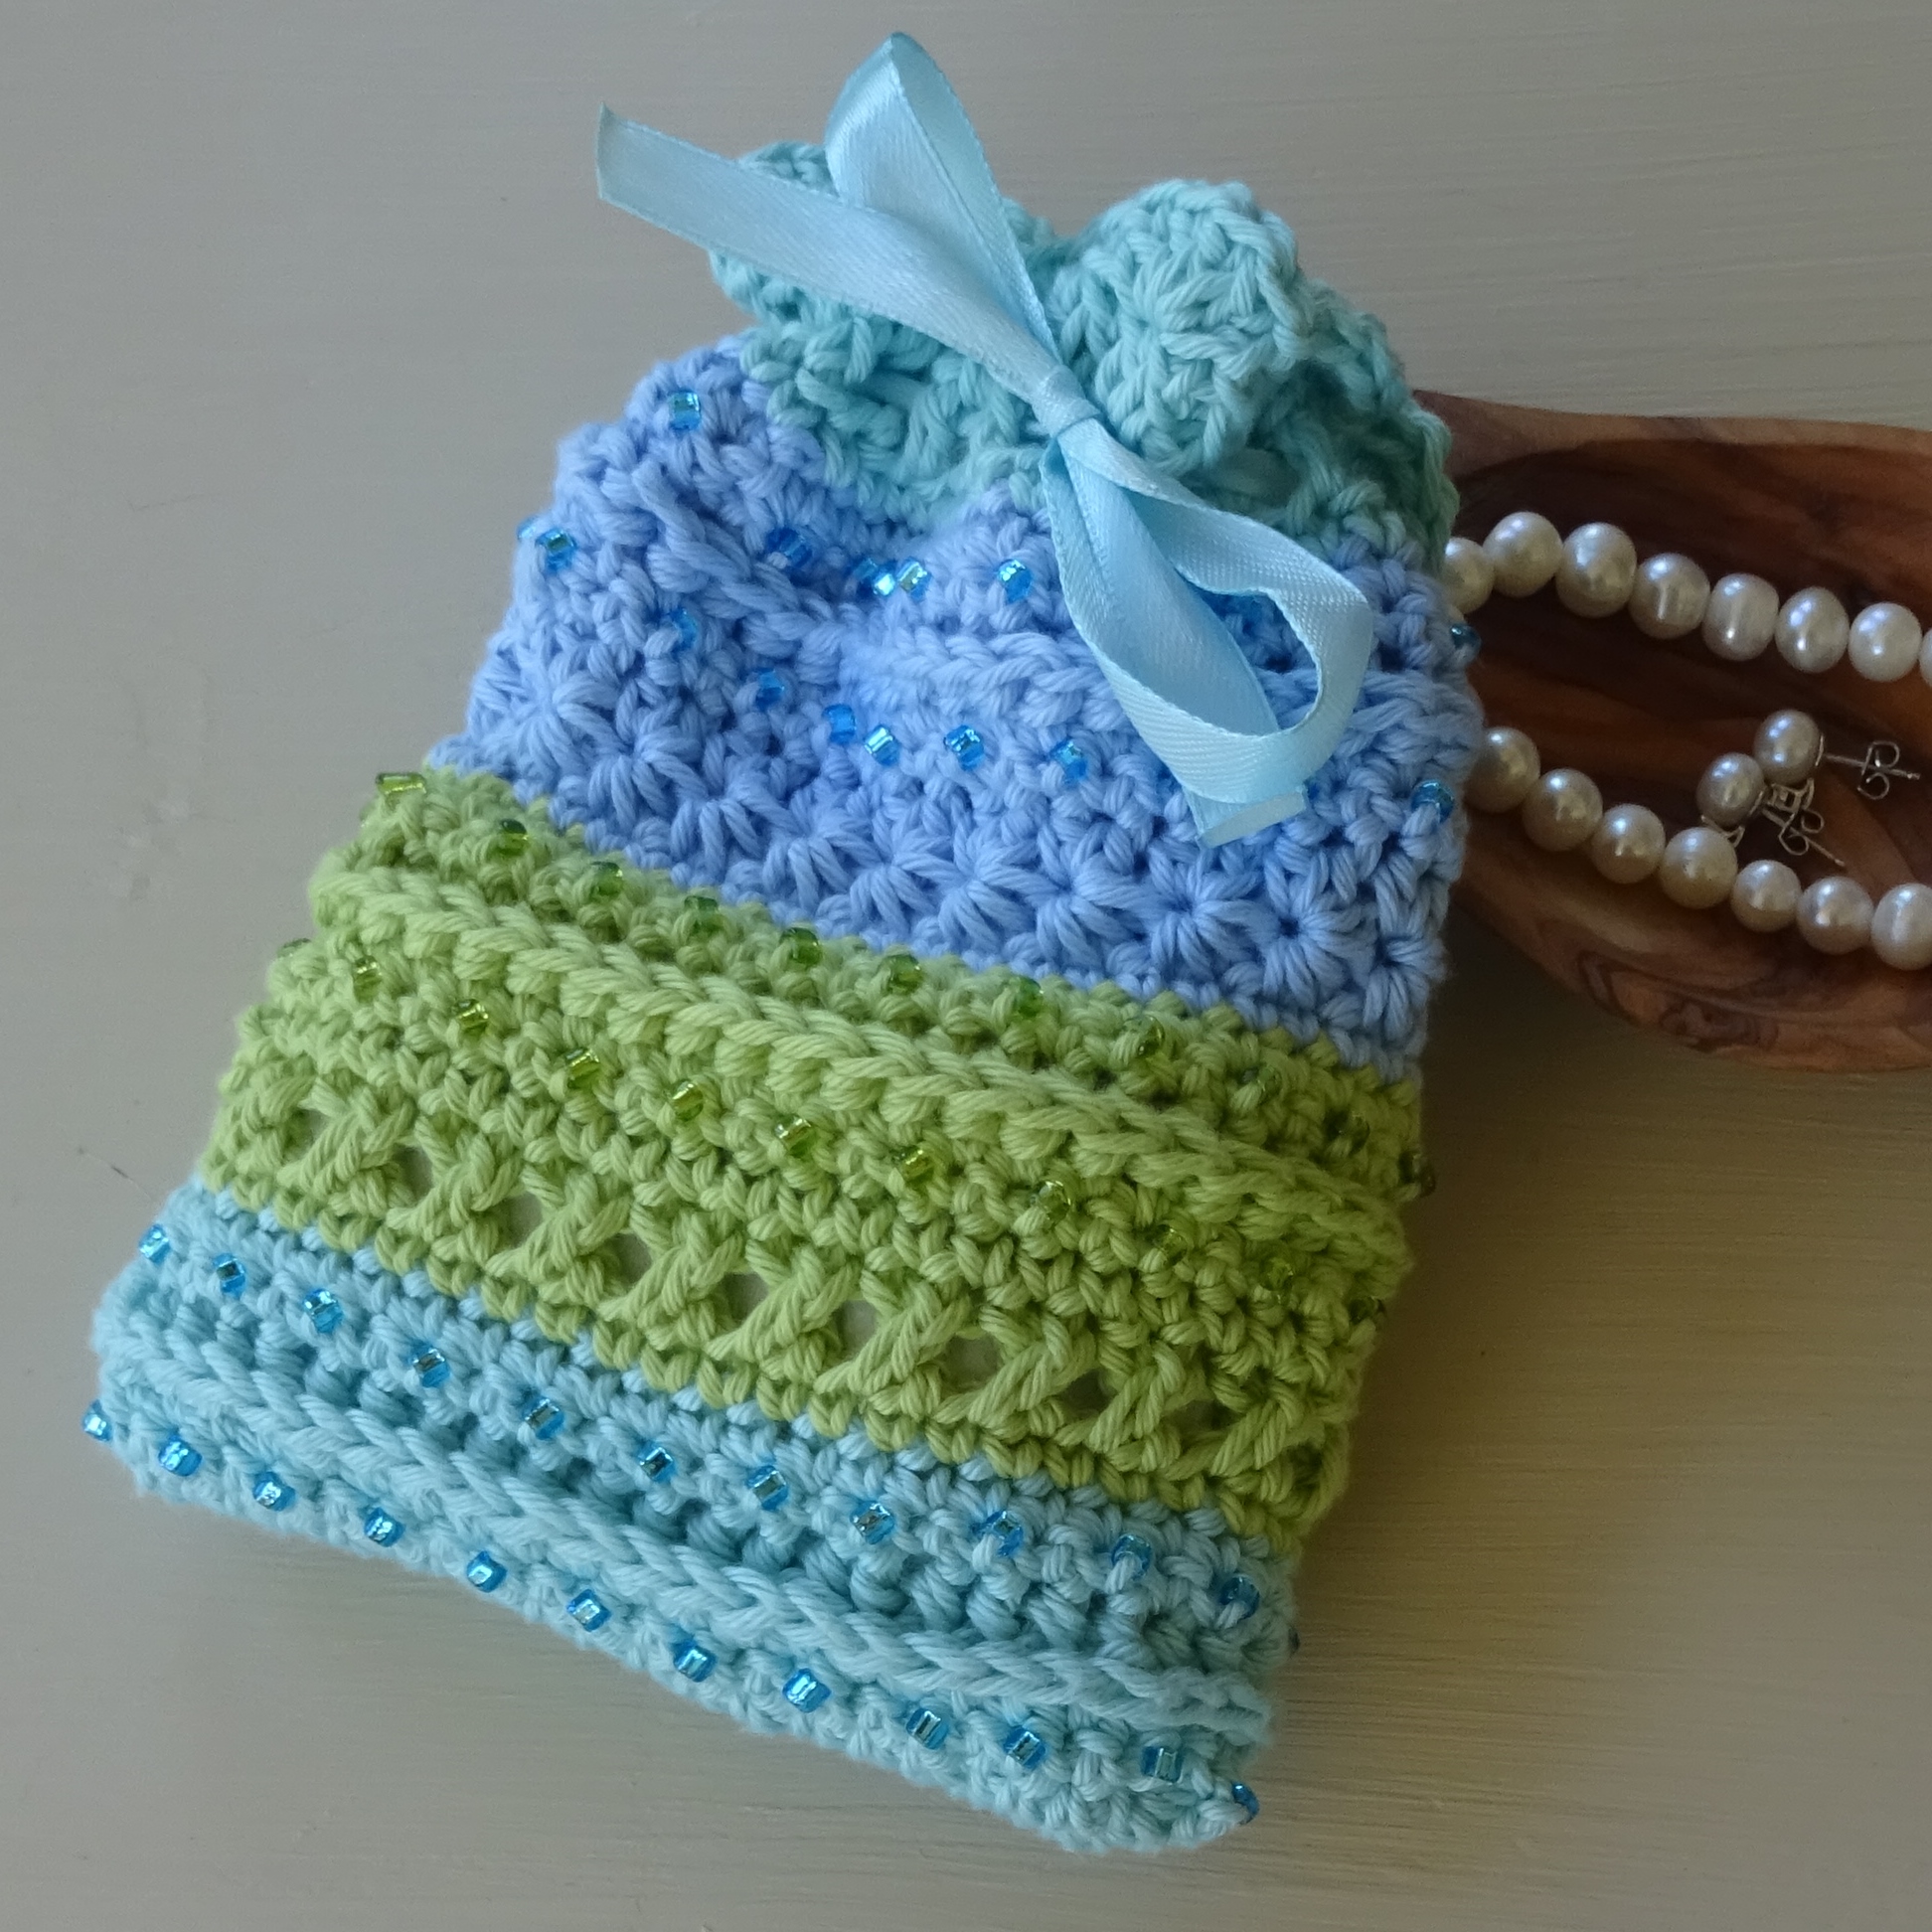
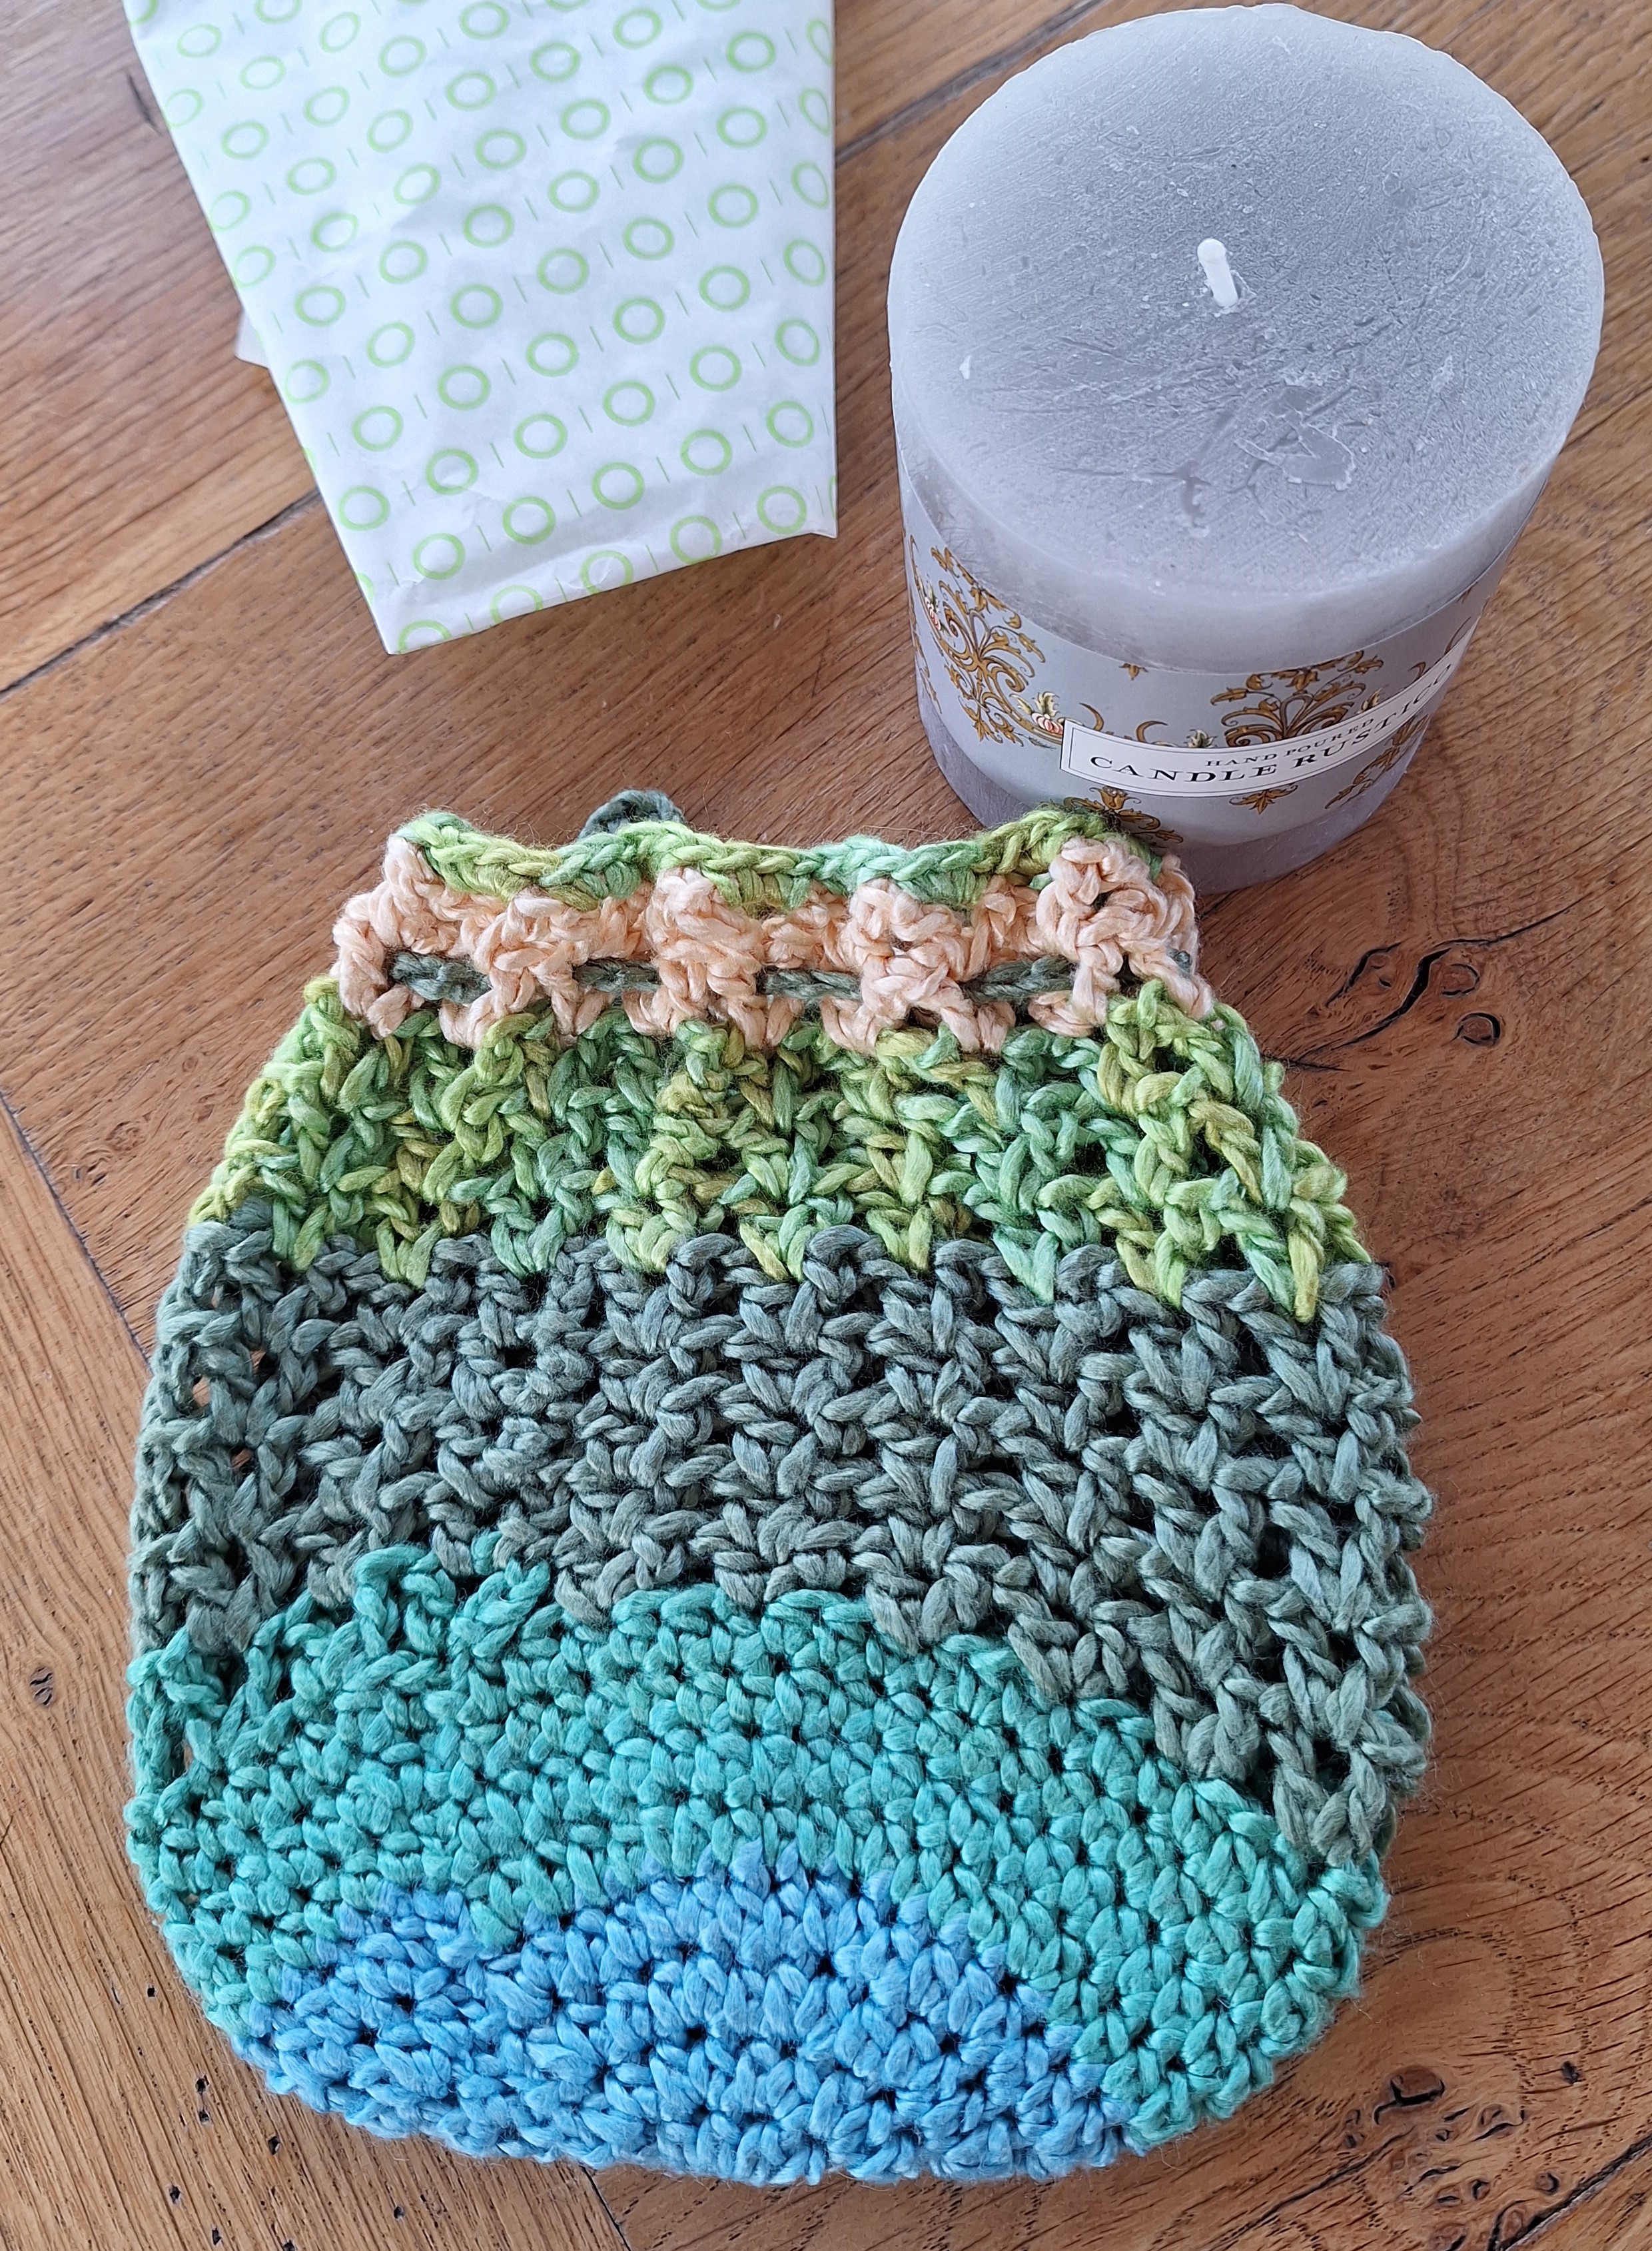
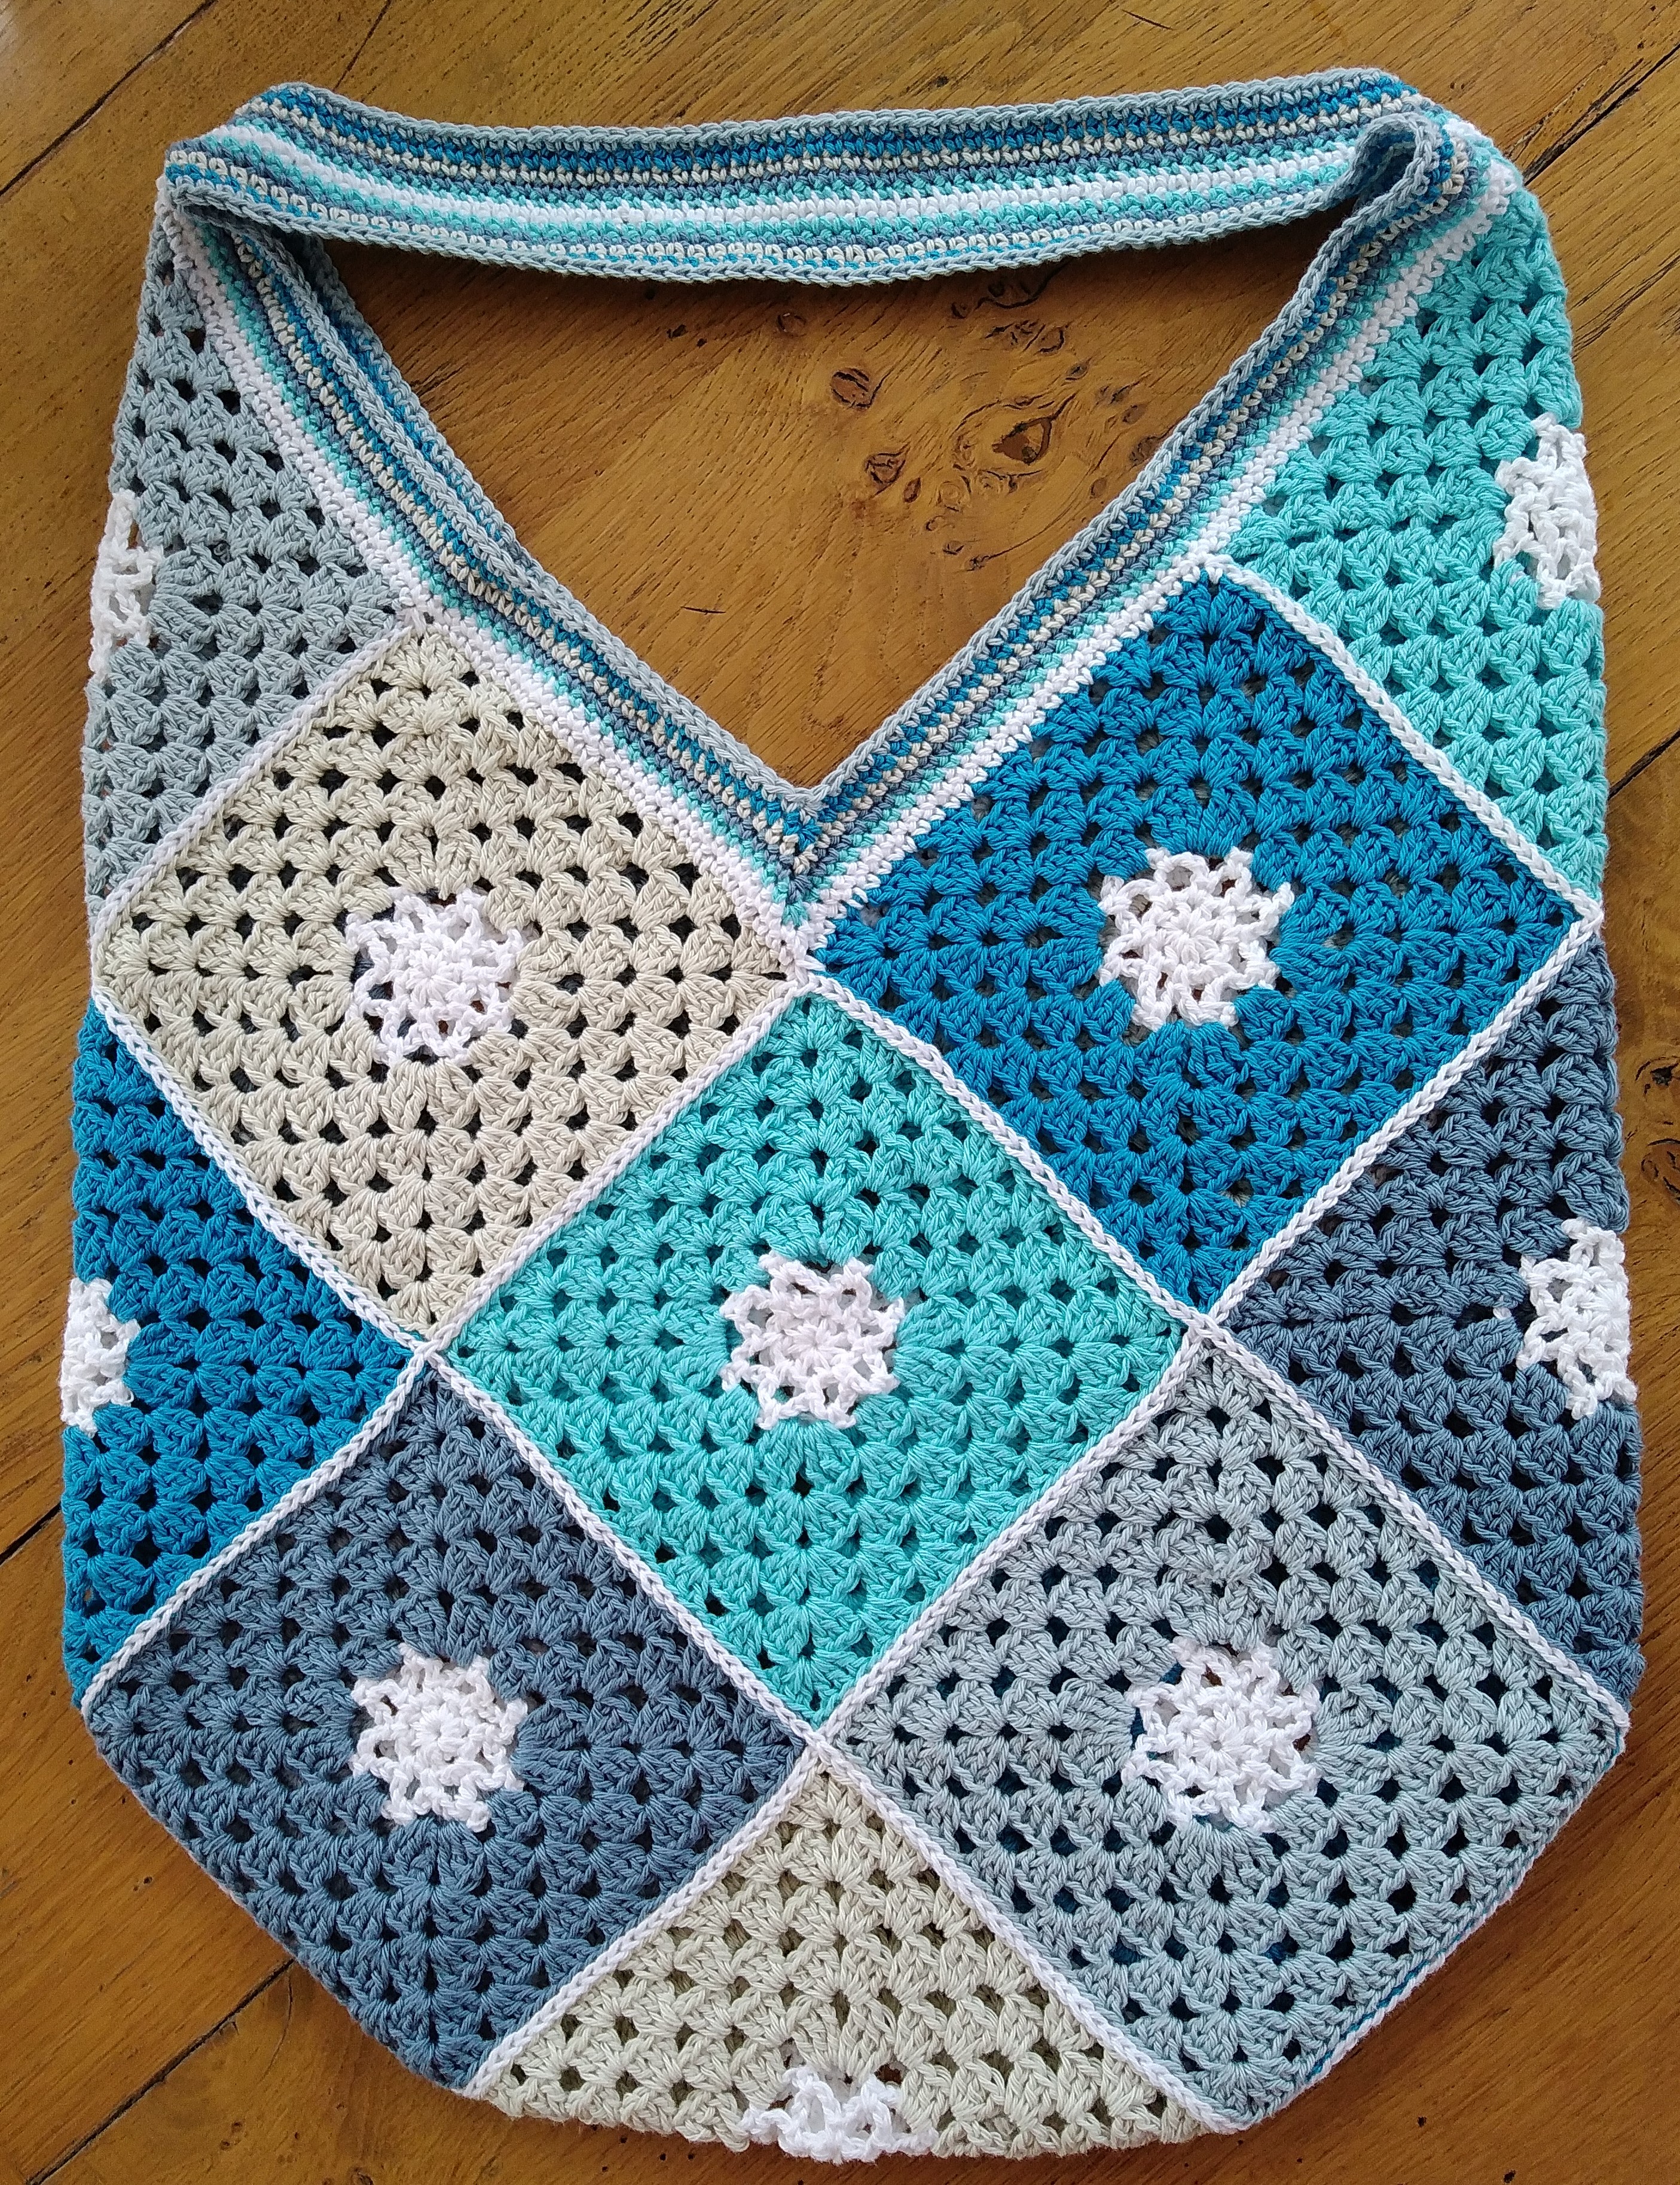
Welcome to Part 1 of the Beach Blues Bag CAL. One thing I didn’t mention last week was that I started this bag to use up some of my cotton left over from a CAL I did last year run by Black Sheep Wools – the Folklore Jewels CAL. I chose the Pastel colour pack but I love blue, so I replaced some of the colours with more blue! This did mean I had quite a few shades of blue cotton left over and wanted to use all of them. So I now have bag and jewellery to match, perfect for the beach!

Are you ready to start the CAL?

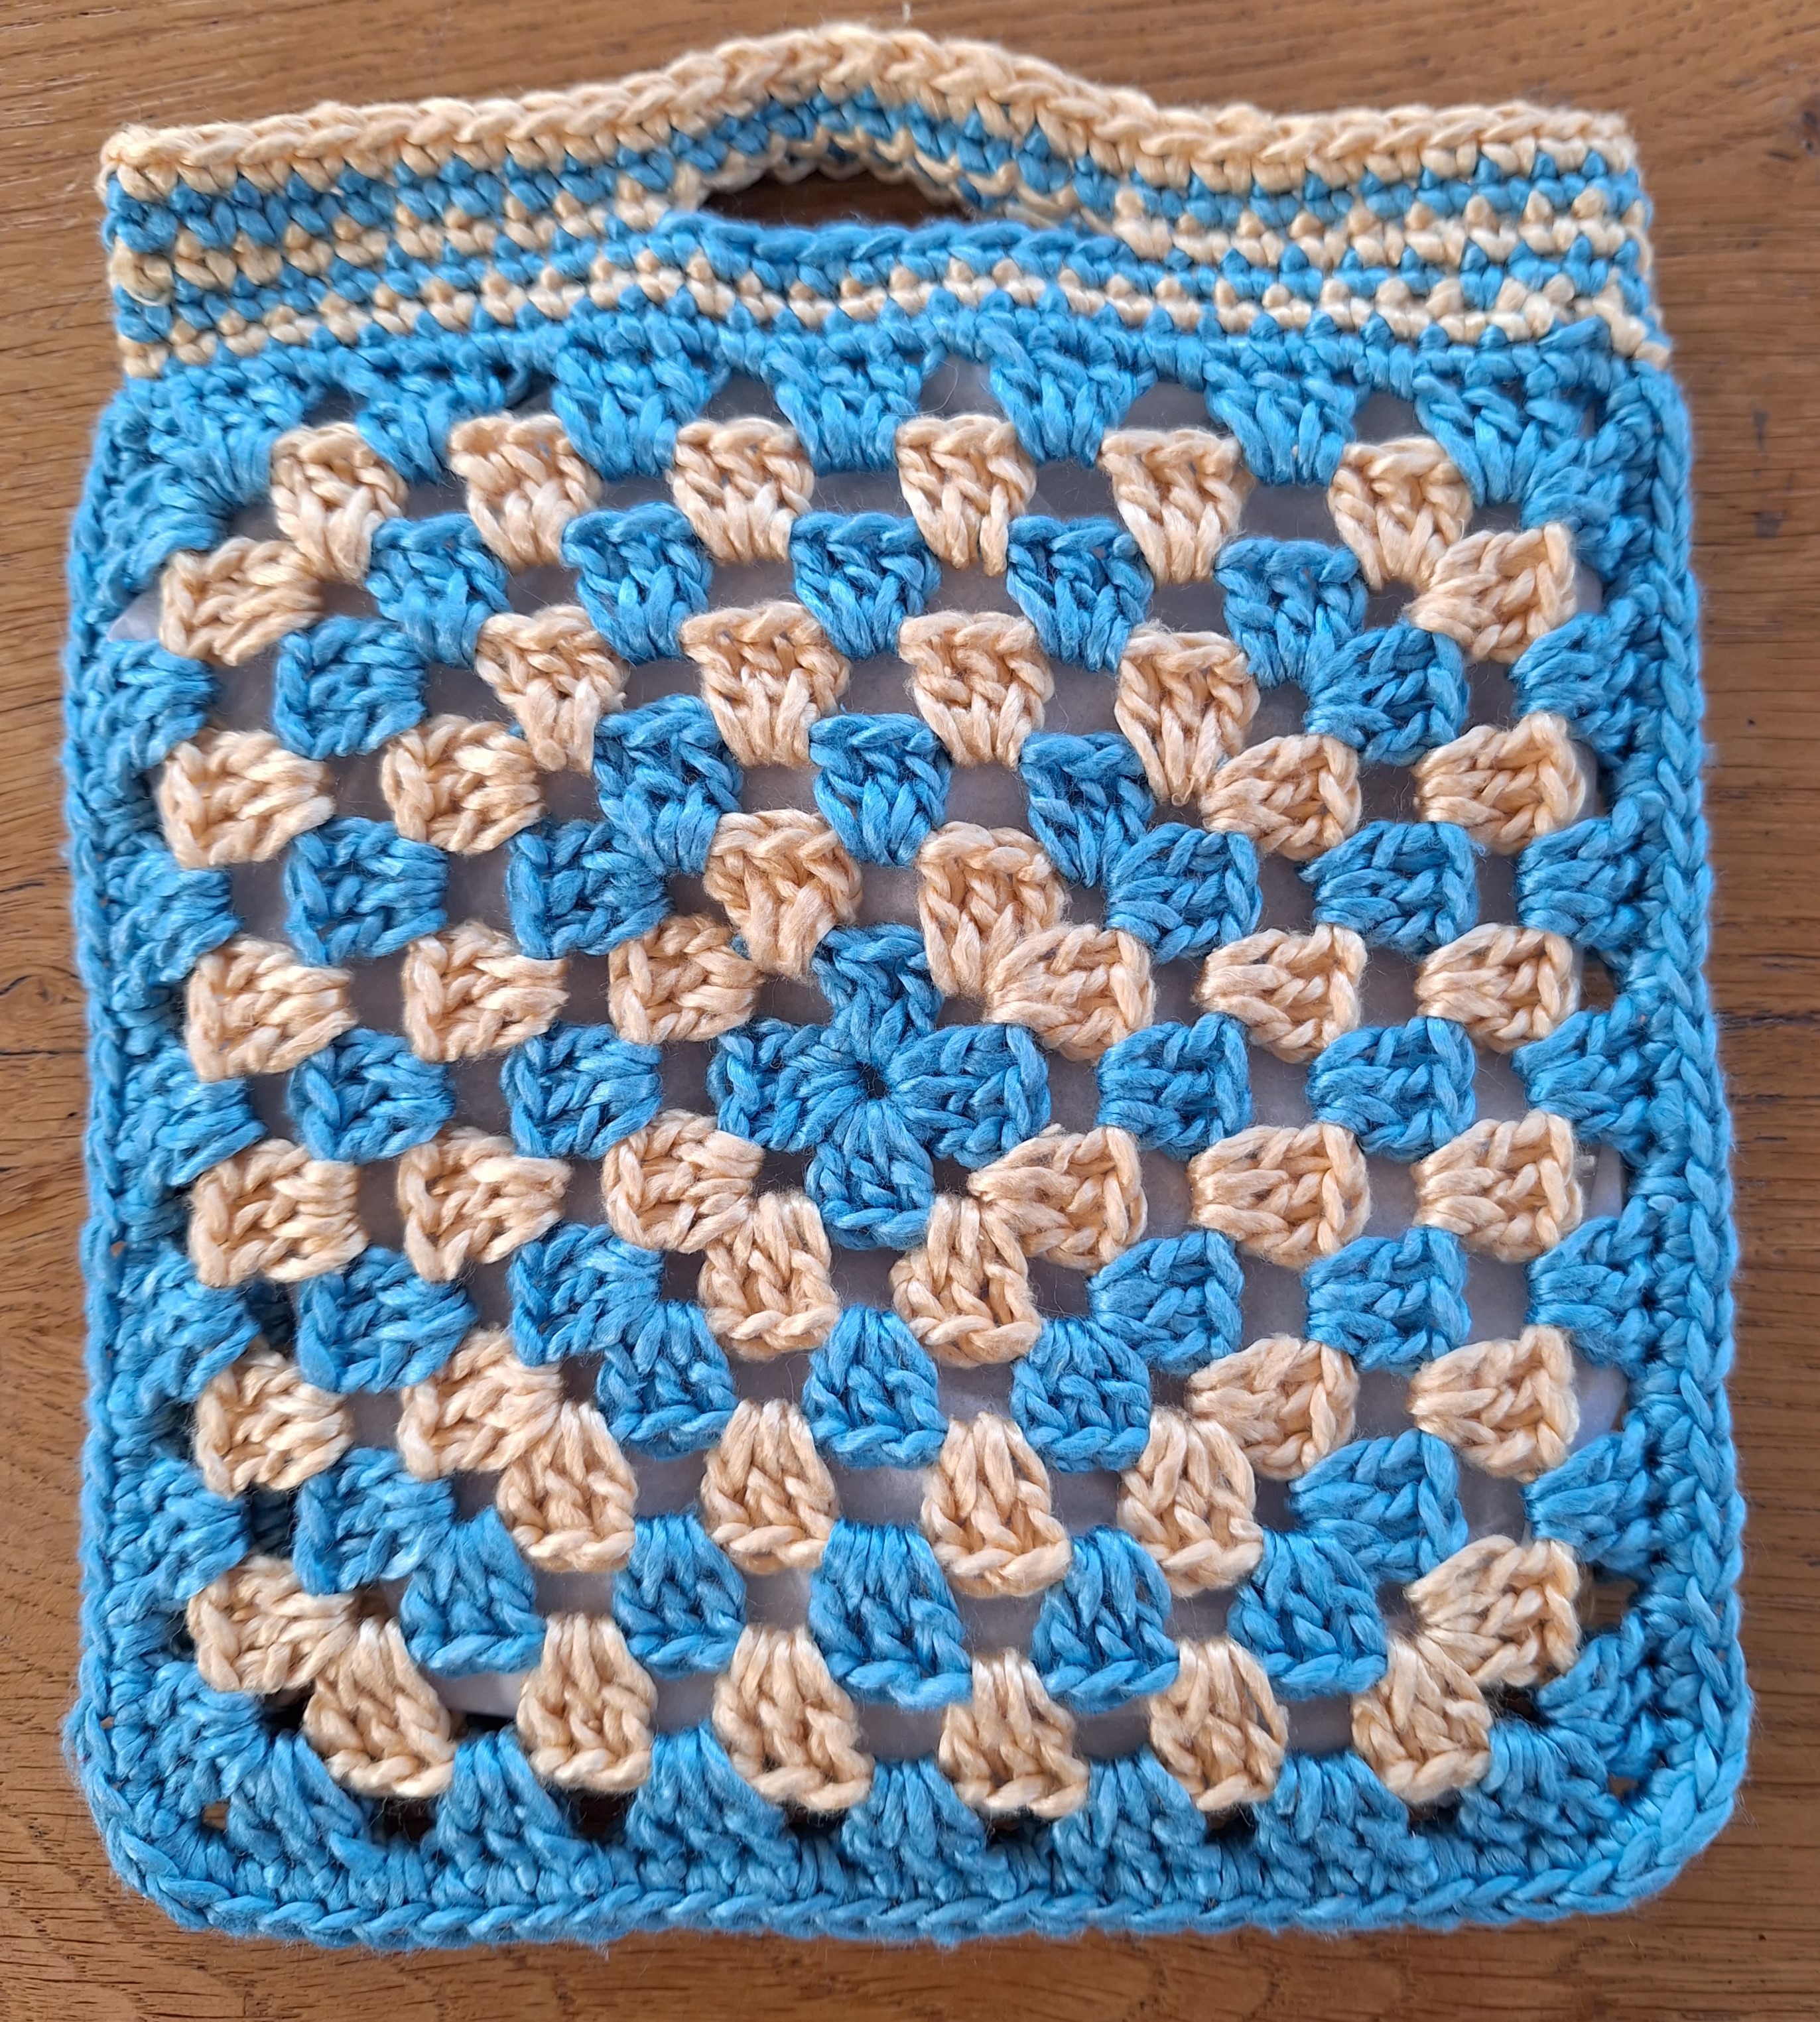
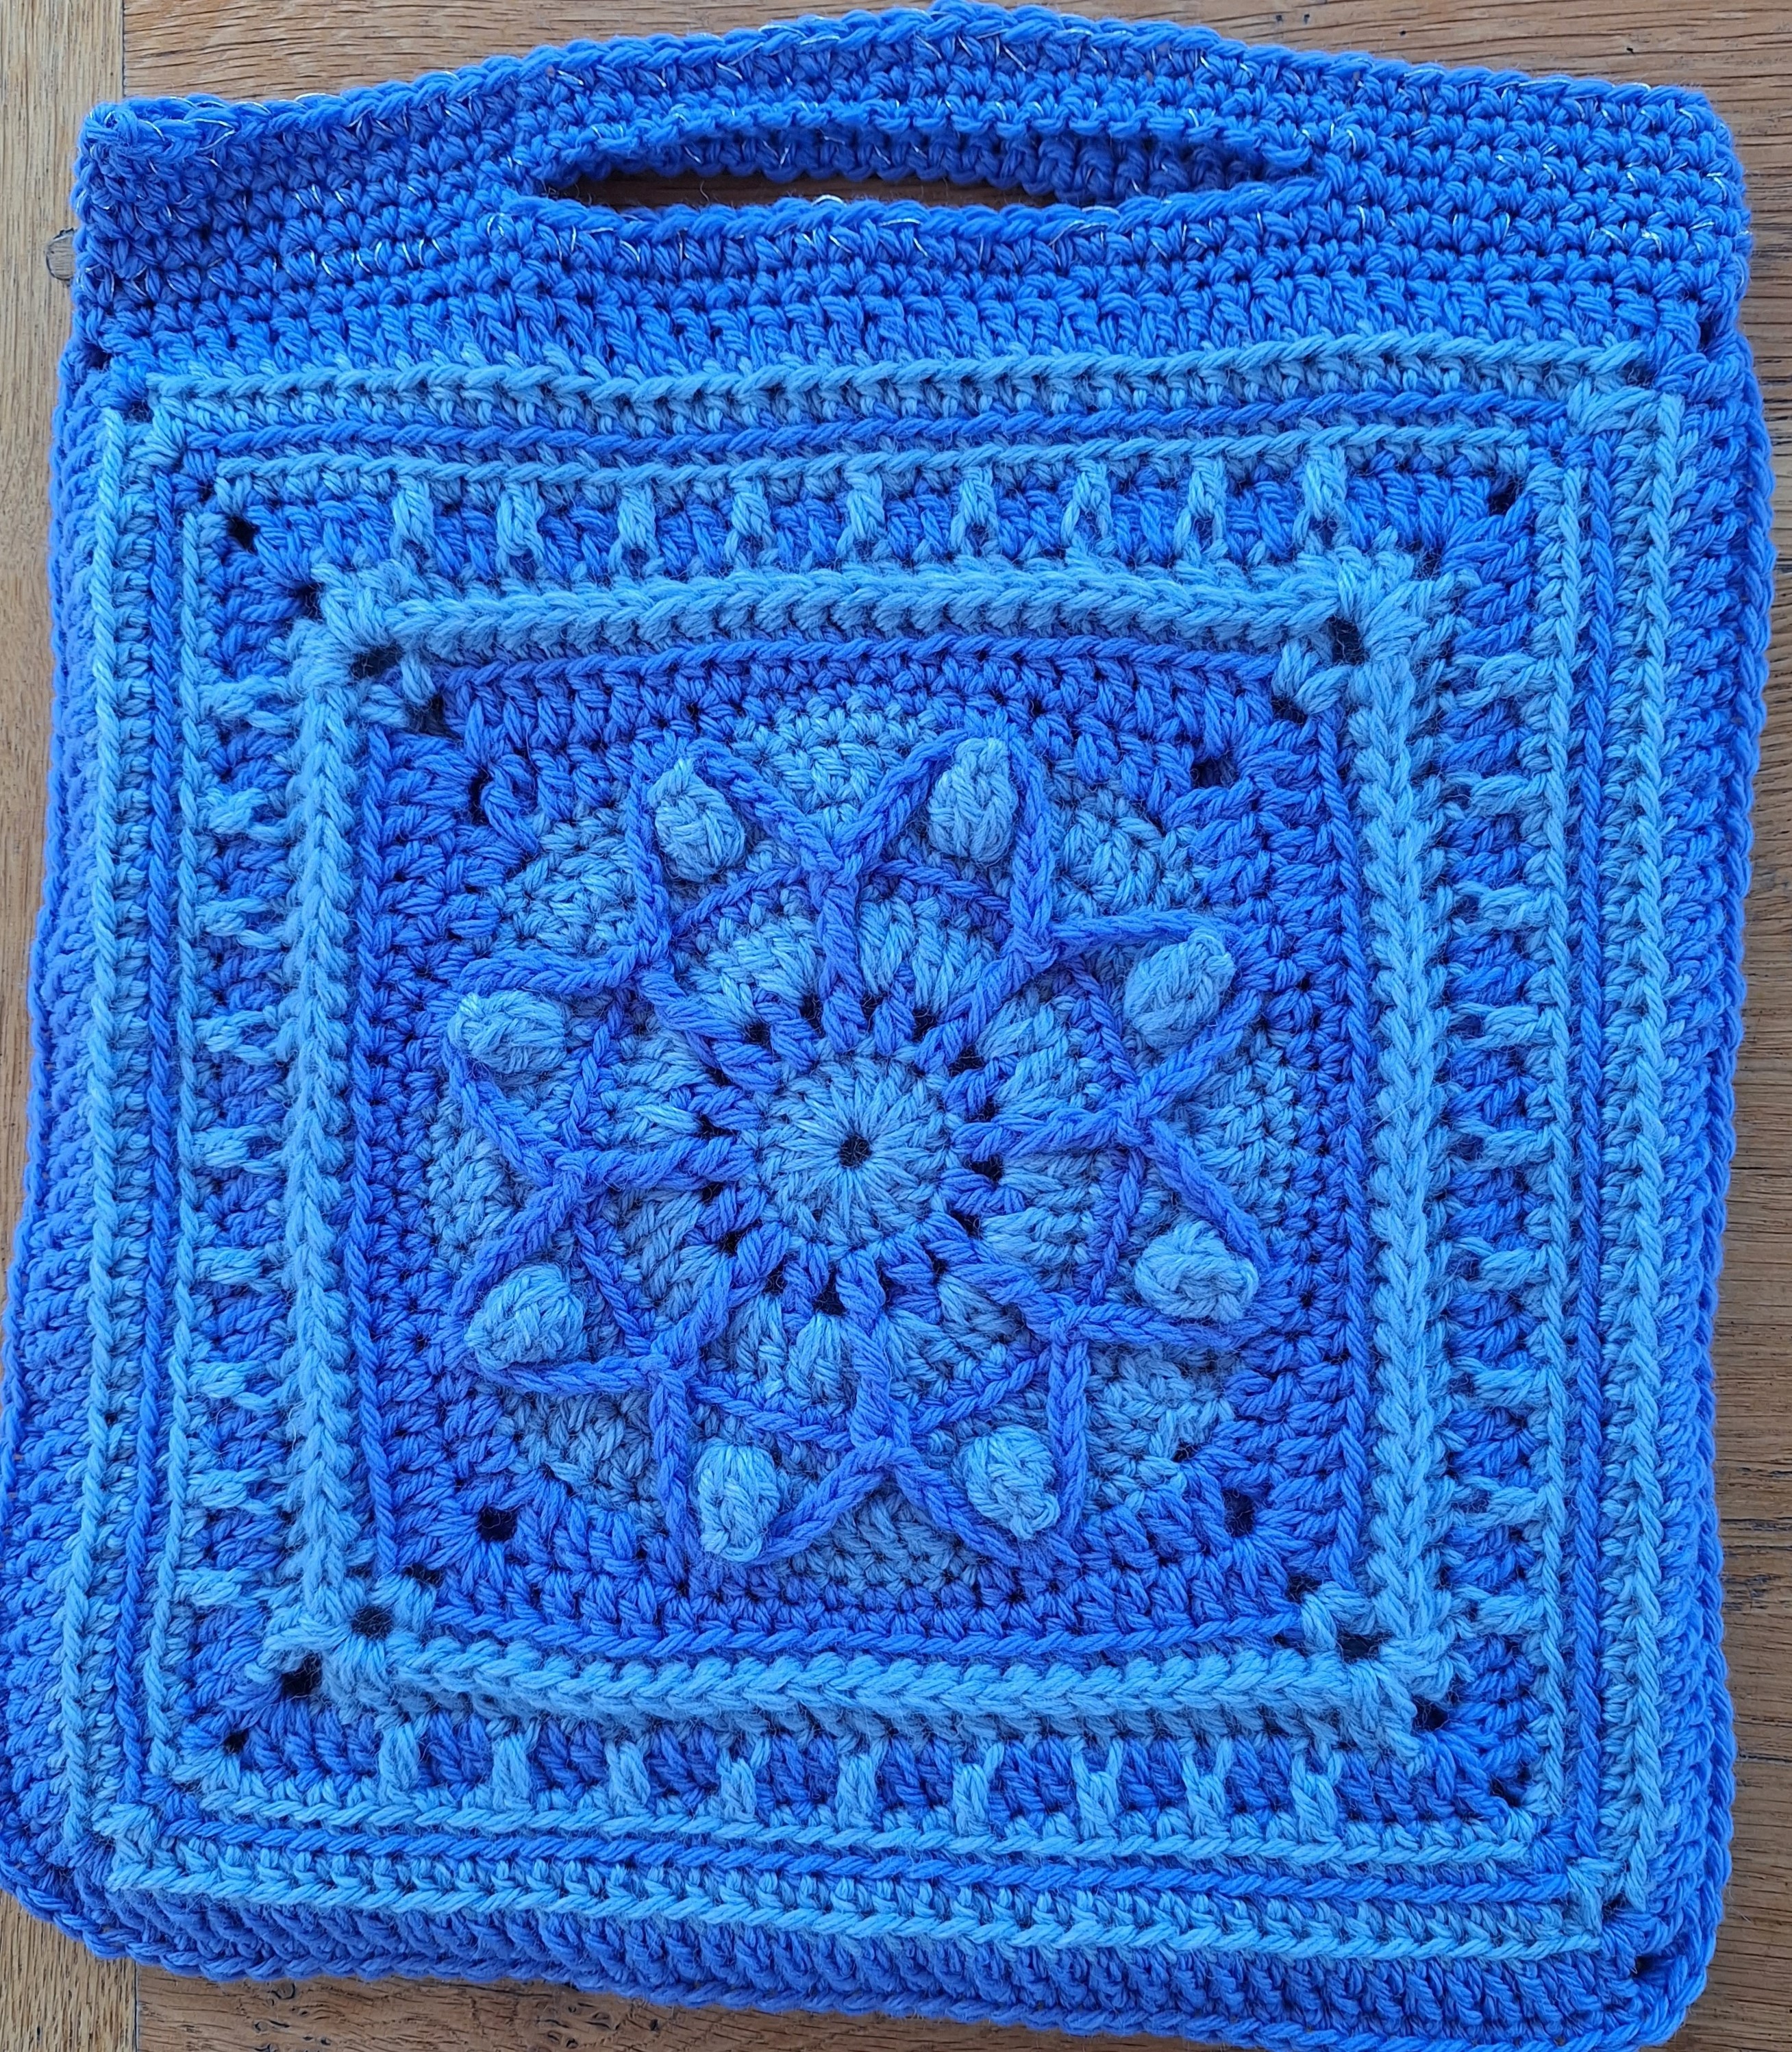
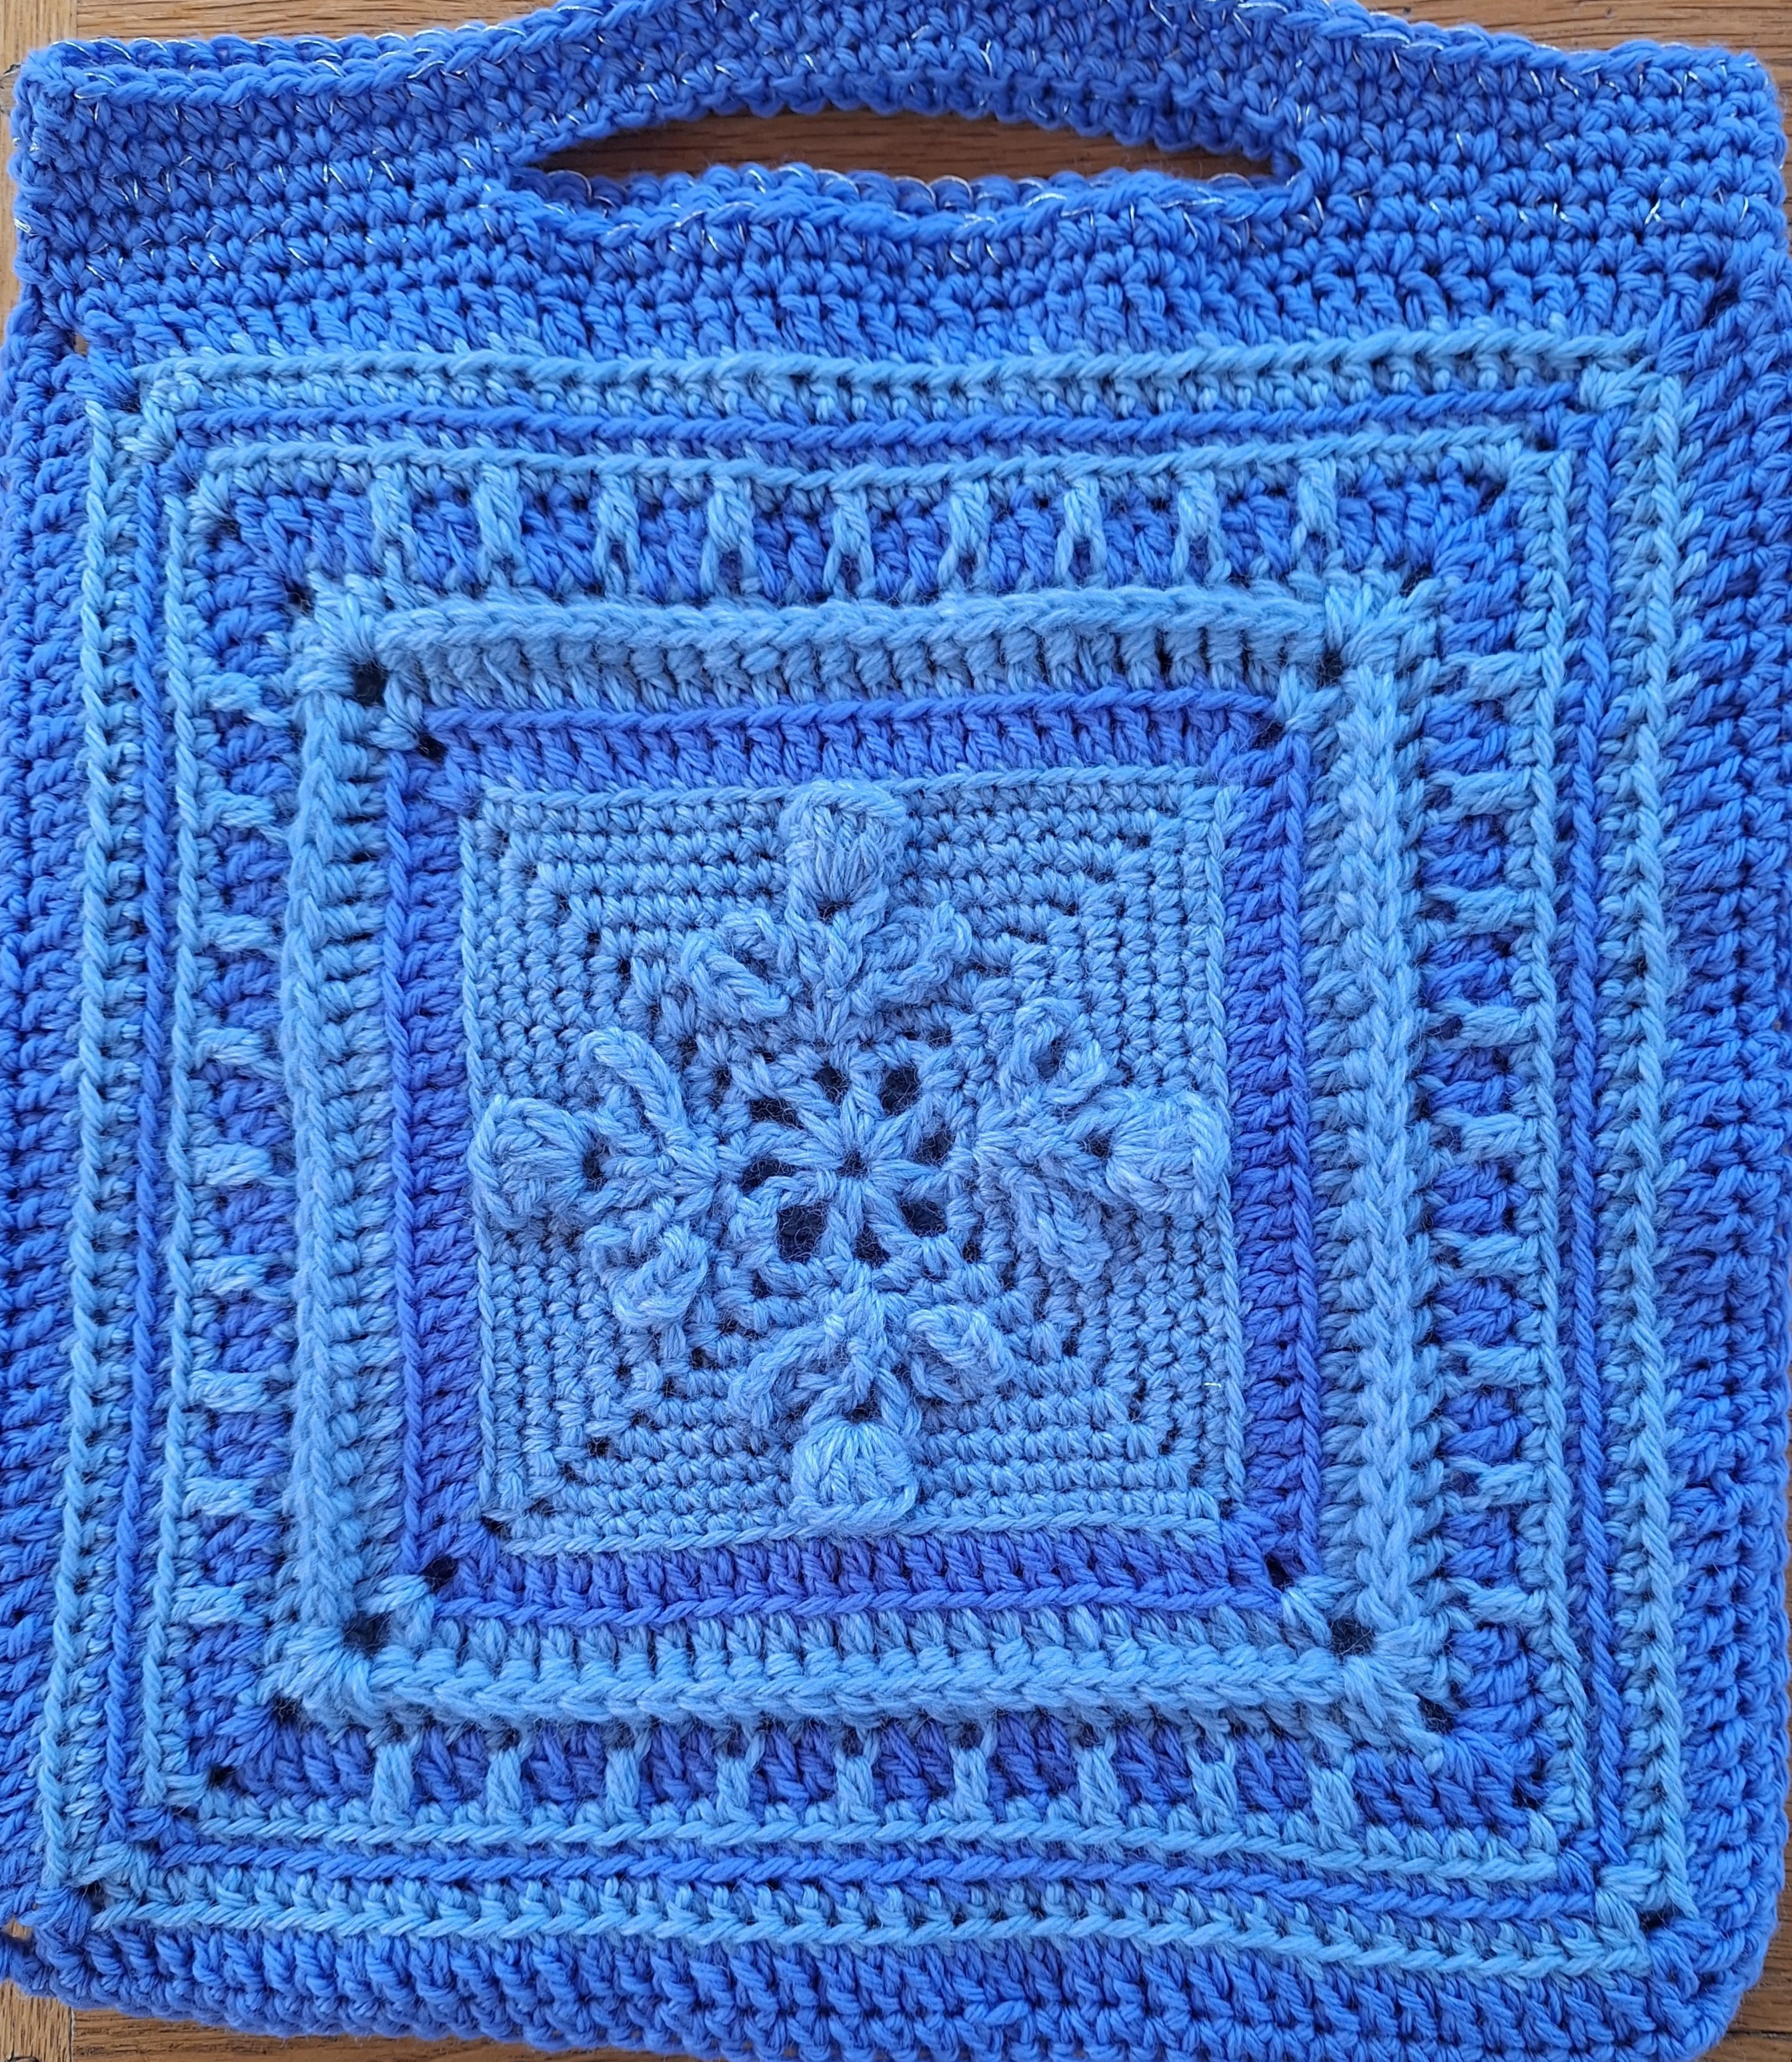
You will need 15 square motifs, each about 13cm/5¼” square.  My motif has an open flower centre for the first 3 rounds, which I did in White and is then squared off and finished with granny rounds in a different colour. You could do more granny rounds to make larger squares and then a larger bag if you like. My bag is approx 36cm/14½” wide and 45cm/18” high when laid flat, excluding handle.

If you are using different weight of yarn you may wish to do fewer or more granny rounds and, of course, you may choose any colour scheme you want.

ABBREVIATIONS
The pattern is written in UK crochet terms.

St(s) = stitch(es)

Sp(s) = space(s)

Ch = chain

Ch-sp(s) = chain space(s)

Ss = slip stitch

Htr = half treble

Dc = double crochet

Tr = treble

Dtr = double treble

PATTERN

Make 15 motifs. All 15 motifs I made have White for the first 3 rounds and for the other rounds (Rounds 4 to 8) I made 3 each of the other 5 colours.

Foundation: Using White, make a 4ch foundation ch and join into a ring with a ss

Round 1: 3ch (counts as 1htr, 1ch), (1htr, 1ch) 7 times into ring, join to 2nd st of original 3ch with a ss. (8 1ch-sps)

Round 2: ss into 1ch-sp, 1ch (does not count as st), 1dc in same 1ch-sp, 5ch, (1dc in next 1ch-sp, 5ch) 6 times, 1dc in next 1ch-sp, 2ch, 1tr into 1st dc (forming last 5ch-sp). (8 5ch-sps)

Round 3: 1ch (does not count as st), 1dc in same 5ch-sp, 4ch, (1dc in next 5ch-sp, 4ch) 7 times, ss to 1st dc to join.  (8 4ch-sps)

Round 4: join new colour into any 4ch-sp, 6ch (counts as 1dtr, 2ch), (2dtr, 1tr, 1ch) in same 4ch-sp, *(3tr, 1ch) in next 4ch-sp, (1tr, 2dtr, 2ch, 2dtr, 1tr, 1ch) in next 4ch-sp; rep from * twice more, (3tr, 1ch) in next 4ch-sp, (1tr, 1dtr) in first 4ch-sp, join to 4th st of starting 6ch with a ss.

Round 5: ss into 2ch-sp, (note for this and each subsequent round: this ss is to position the start of the round in the right place) 5ch (counts as 1tr, 2ch), (3tr, 1ch) into the same 2ch-sp, *(3tr, 1ch) into each of the next two 1ch-sps, (3tr, 2ch, 3tr, 1ch) into the next 2ch-sp; repeat from * another 2 times, (3tr, 1ch) into each of the next two 1ch-sps, 2tr in the first 2ch-sp, join to 3rd st of starting 5ch with a ss.

Round 6:  ss into 2ch-sp, 5ch (counts as 1tr, 2ch), (3tr, 1ch) into the same 2ch-sp, *(3tr, 1ch) into each of the next three 1ch-sps, (3tr, 2ch, 3tr, 1ch) into the next 2ch-sp; repeat from * another 2 times (3tr, 1ch) into each of the next three 1ch-sps, 2tr into the 1st 2ch-sp, join to 3rd st of starting 5ch with a ss. 

Round 7: ss into 2ch-sp, 5ch (counts as 1tr, 2ch), (3tr, 1ch) into the same 2ch-sp, *(3tr, 1ch) into each of the next four 1ch-sps, (3tr, 2ch, 3tr, 1ch) into the next 2ch-sp; repeat from * another 2 times (3tr, 1ch) into each of the next four 1ch-sps, 2tr into the 1st 2ch-sp, join to 3rd st of starting 5ch with a ss. 

Round 8: ss into 2ch-sp, 5ch (counts as 1tr, 2ch), (3tr, 1ch) into the same 2ch-sp, *(3tr, 1ch) into each of the next five 1ch-sps, (3tr, 2ch, 3tr, 1ch) into the next 2ch-sp; repeat from * another 2 times (3tr, 1ch) into each of the next five 1ch-sps, 2tr into the 1st 2ch-sp, join to 3rd st of starting 5ch with a ss. 

Break yarn and fasten off.

The motifs will benefit from a gentle blocking before they are joined. And joining is the next part, which I’ll publish in a week.

I have a Facebook page and a discussion thread on my Ravelry Group here.   Please join in and share your progress.

Happy crocheting xx

Bagging a CAL!

In my last post I mentioned that I was working on a bag which may become a CAL. The bag is finished!

The bag is based on the Spring Lifter using a different motif but also has an extra 2 motifs and a single handle. It makes the bag feel roomier and by making a shorter handle I can throw it over my shoulder and feel like the contents of the bag are secure because I’m hugging them close. It feels like a beach bag so I named it Beach Blues Bag.

It is March next week, and that means it is International Crochet Month so a great month for a CAL. And I decided Beach Blues Bag is a great bag for a CAL for spring, when plans for summer beach holidays are at a peak! So I’m starting the CAL next week and it will be published over 3 weeks here on the blog and free, although I will also publish a paid for pattern after the CAL. I will publish each part on a Saturday – the first will be on Saturday 4th March.

If you want to join in you need to know the materials required so you can be ready with your hook for next Saturday.

The bag was made in 4ply/fingering weight cotton yarn but can be made in any yarn weight provided you use a suitable hook size.

This is what I used:

Scheepjes Cotton 8, 50g/170m/186yds per ball.  I used 6 colours, 1 ball each of:

White (502), Bright Blue (563), Light Turquoise (622), Grey Blue (652), Light Grey (700) and Jeans Blue (711)

3mm crochet hook (US D/3)

2 lockable stitch markers

Yarn needle

Start gathering your equipment and I’ll post Part 1 next week.

Meanwhile, I have started a discussion on my Ravelry forum here, if you want to join in this CAL please join in the discussion too.

I’d love to see what you make.

Happy crocheting xx

I’m still here!

I’m so sorry that I have been quiet for the last 10 months, I’m still here but I haven’t had much to say!

Like many people, I’ve had plenty of time for reflection in the last few years. I’ve analysed my design work and realised that, even though I love it, I had become a slave to it. I spent too many hours making items I designed, writing patterns, drawing charts, organising testers and tech editors, and then publishing, promoting and, the most time-consuming, running CALs. I decided the best thing I could do for me is to slow right down and that is exactly what I have done. I confess I like it!

So designs have been minimal and I haven’t even got round to publishing them yet. But I have spent time decluttering and organising. I’ve also used my making time to make things for me, in particular socks which have become one of my easy makes. These are mainly knitted but I have spent time trying to find a great crochet sock – my favourite so far is Riley and Saunders by Joanne Scrace, written for both DK and 4ply yarn in a wide range of sizes.

Over the years, I’ve built a lot of personal stash and, as you will know from previous posts, I have tried to reduce this and did a good job for a while but I need to be more rigorous. So I’ve sorted some stash to sell (this was a hard decision!) and started to advertise it (slowly). So far I’ve advertised only on a facebook group but I may spread further. I’ve also realised that my WIPs have got out of hand so they are having some well deserved love. I’ve pulled out a Cloud Line Wrap that I started last May using some luxury stash yarn and I’m halfway through.

I’m using 4ply yarn in 4 colours and a 4mm hook. I haven’t decided how much of a fringe I want so I’m leaving some lengthy ends. I will do 19 or 20 repeats of the 4 colours using up virtually all the yarn.

I’m keeping some of my precious stash for my own use. I have 6 skeins allocated for more socks and 9 skeins in blues and greens which I may turn into an easy and, hopefully, quick blanket. This may turn into a CAL so watch this space.

Something that will be a CAL is a bag. This will be in blues and greys and will be very similar to the Spring Lifter. This may well emerge later this month 🙂

So I’ve just committed myself to a CAL and there’ll be another blog post soon.

In the meantime, happy crocheting xxx

Round Again CAL – Part 6

Time has flown. It seems like yesterday when this CAL started yet here we are at the final stage. Part 6 is the border. This is one of my favourite borders, simple, relaxing and very effective.

The pattern here is written in UK crochet terms and these are the abbreviations used

st(s) stitch(es)

ch ch

dc double crochet

htr half treble

htr3tog half treble 3 sts together

ss slip stitch

ch-sp chain space

The first round of the border is best in the same colour as your joining round.  Thereafter, you can use your scrap yarns.  I used about 12g/48m for Round 1 and I found each Round from 2 to 9 took between 8g/32m and 10g/40m of yarn.  I finished with a final round in the same mid grey as the joining.

Round 1:  join yarn in any 3ch-sp in corner, 1ch (does not count as st), work sts in this round as follows:

(2dc, 1ch, 2dc) in each 3ch-sp,

1dc in each st,

2dc in each 2ch-sp,

htr3tog across the join (placing the first leg of the st in the space before the join, the second leg in the join and the third leg in the space after the join)

ss to 1st dc to join, break yarn and fasten off.

You will have an odd number of sts on each side of the blanket and a 1ch-sp in each corner.

Round 2:  join yarn in any 1ch-sp in corner, 1ch (does not count as st),

**(1dc, 1ch, 1dc) in 1ch-sp, 1ch, miss 1 st, *1dc in next st, 1ch, miss 1 st; repeat from * until next 1ch-sp in corner then repeat from ** along each side, ss to 1st dc to join, break yarn and fasten off.

Round 3:  join yarn in any 1ch-sp in corner, 1ch (does not count as st),

*(1dc, 1ch, 1dc) in 1ch-sp, 1ch, (1dc, 1ch) in each 1ch-sp along the side; repeat from * to end of round, ss to 1st dc to join, break yarn and fasten off.

Rounds 4 onwards: repeat Round 3 until your border is the width you want.

I worked the last round in the same mid grey as the joining round and then finished with the final round.

Final Round: *(ss, 1htr, ss, 1htr) in 1ch-sp in corner, (ss, 1htr) in each 1ch-sp to next corner; rep from * to end of round, break yarn and fasten off.

Weave in all ends.

Don’t forget there is a paid for pattern on Ravelry which is also being released in parts and has a US crochet terms available too. It also includes some charts of the joining and the start of the border.

This is my blanket, I would love to see photos of your blankets, please share them on Facebook and Ravelry.

Happy crocheting xxx

All patterns and photographs are copyright

Round Again CAL – Part 5

Have you made all your circles yet? Don’t worry if you haven’t, just go at a pace that is right for you. But if you have finished you can now start joining.

The pattern here is written in UK crochet terms and these are the abbreviations used

st(s) stitch(es)

ch ch

dc double crochet

tr treble

htr half treble

dtr double treble

ss slip stitch

ch-sp chain space

The motifs are joined as you go, with a final round in your joining colour.  I used a mid grey sock yarn.

Make all the circle motifs first, then lay them out in your blanket shape, moving them around until you have a colour scheme you like.  Then photograph them to remind you of your layout.  You may also wish to thread them onto a knitting needle in the reverse order you will join them.  Either one long circular needle or one needle per row of blanket.

The final round is the same for all motifs and you will end with 24 2ch-sps and 4 3ch-sps.  The motifs are joined at all these ch-sps.

First Motif Final Round: join yarn into any st (for Circle 7 it is best to join into a dtr), 1ch (does not count as st), *1dc, 2ch, miss 2 sts, 1htr, 2ch, miss 2 sts, 1tr, 2ch, miss 1 st, (1dtr, 3ch, 1dtr, 2ch) in next st, miss 1 st, 1tr, 2ch, miss 2 sts, 1htr, 2ch, miss 2 sts; rep from * to end of round, ss to 1st dc to join, break yarn and fasten off.

Start by joining the first row of motifs along the top of your blanket.

As with many join as you go methods, for each ss join insert the hook from the right side (front) through to the wrong side (back) of the motif you are joining to.

Complete your first motif with the final joining round. Then work the final round of the second motif, joining on one side of the first at 8 points as follows:

Final Round: join yarn colour into any st, 1ch (does not count as st), *1dc, 2ch, miss 2 sts, 1htr, 2ch, miss 2 sts, 1tr, 2ch, miss 1 st, (1dtr, 3ch, 1dtr, 2ch) in next st, miss 1 st, 1tr, 2ch, miss 2 sts, 1htr, 2ch, miss 2 sts; rep from * once, 1dc, 2ch, miss 2 sts, 1htr, 2ch, miss 2 sts, 1tr, 2ch, miss 1 st, (1dtr, 1ch, ss into 3ch-sp on first motif, 1ch, 1dtr) in next st, 1ch, ss to next 2ch-sp on first motif, miss 1 st, 1tr, 1ch, ss in next 2ch-sp on first motif, miss 2 sts, 1htr, 1ch, ss in next 2ch-sp on first motif, miss 2 sts, 1dc, ss in next 2ch-sp on first motif, 1ch, miss 2 sts, 1htr, ss in next 2ch-sp on first motif, 1ch, miss 2 sts, 1tr, ss in next 2ch-sp on first motif, 1ch, miss 1 st, (1dtr, 1ch, ss in 3ch-sp on first motif, 1ch, 1dtr, 2ch) in next st, miss 1 st, 1tr, 2ch, miss 2 sts, 1htr, 2ch, miss 2 sts, ss to 1st dc to join, break yarn and fasten off.

Continue in this way, joining the motifs across rows and then adding new rows on the bottom.   For motifs from the second row onwards most will have to be joined along 2 sides, just follow the same techniques as you join.  When joining into previously joined corners I prefer to place the ss into the space between the motifs that are already joined and over the previous ss join to secure it.

Don’t forget there is a paid for pattern on Ravelry which is also being released in parts and has a US crochet terms available too. It also includes some charts for the joining round.

I would love to see photos of your little circles, please share them on Facebook and Ravelry. Next week is the border.

Until then, happy crocheting xxx

All patterns and photographs are copyright