Welcome to day 5 of the Advent CAL 2023 – the 10 Gift Bags of Christmas!
The fifth bag is one I published several years ago and is another beaded beauty. It is called the Advent Bag.
Although it has beads which does slow down the working, it is made in one colour only so no need to change colour and less ends to sew in.
The pattern is available here and is free provided you use the code ADVENT on purchase. All the patterns in the CAL will be available free for the duration of the CAL, until midnight GMT 13th December 2023.
Welcome to day 4 of the Advent CAL 2023 – the 10 Gift Bags of Christmas!
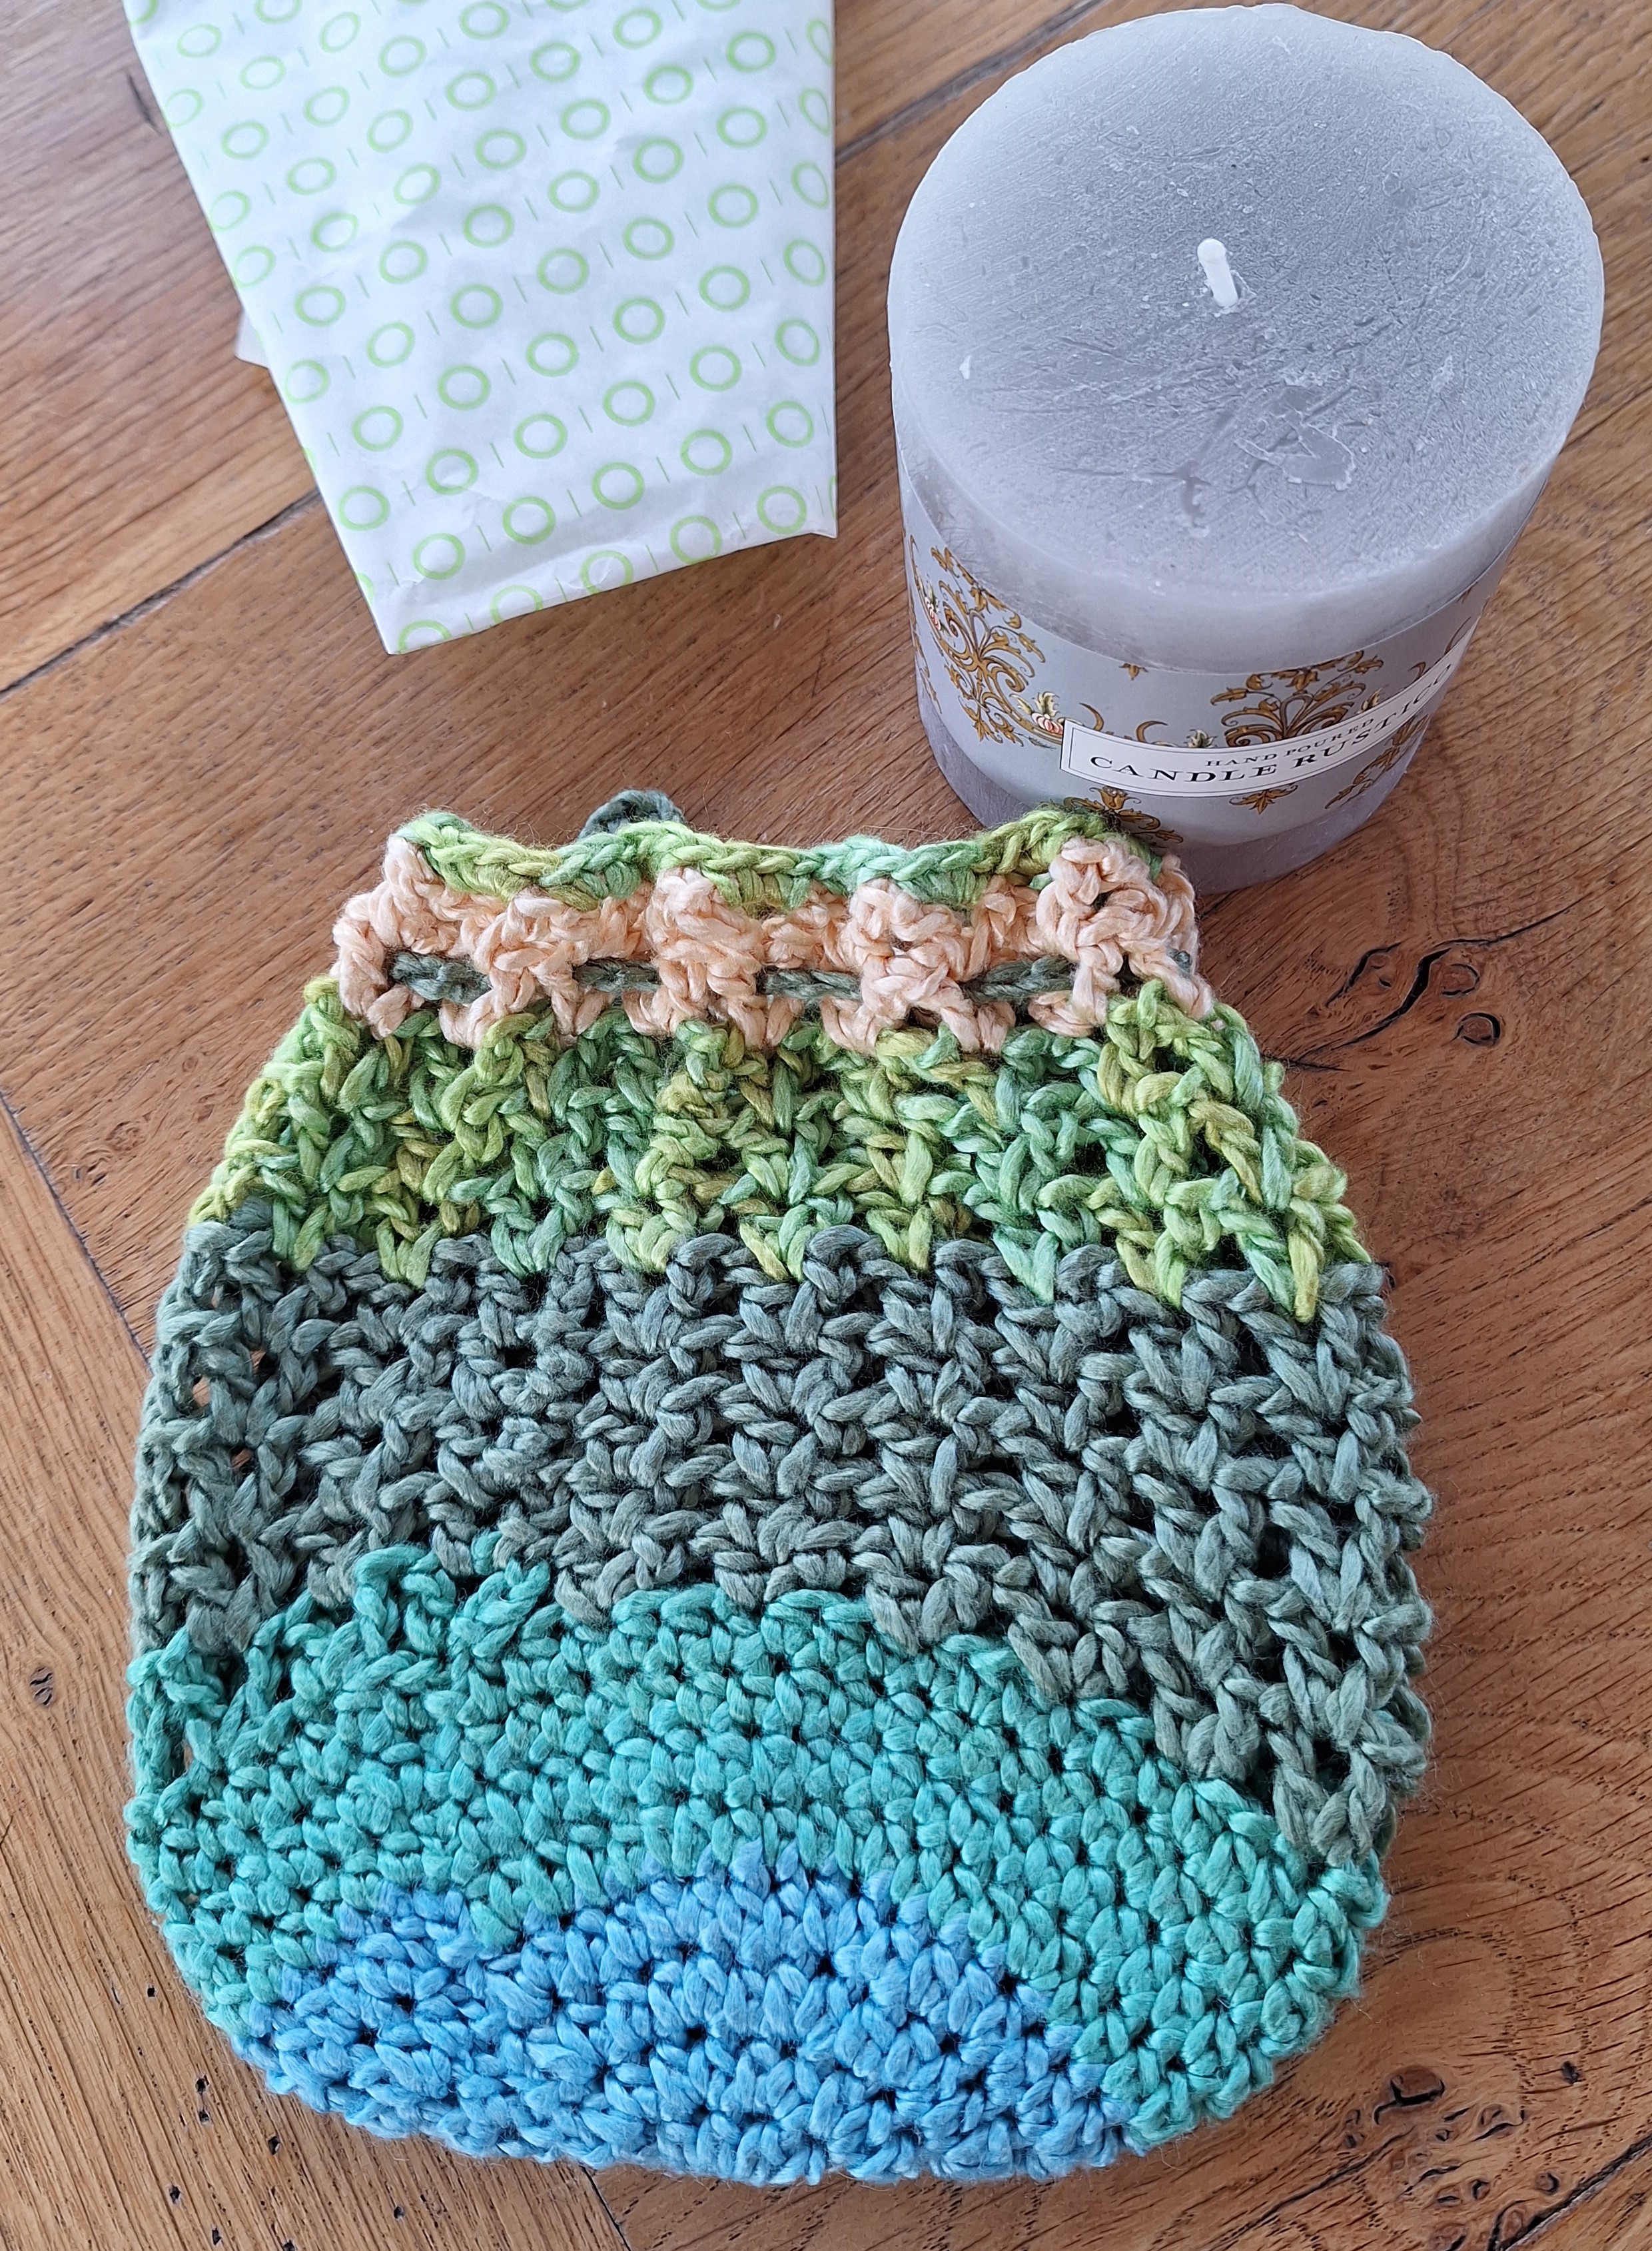
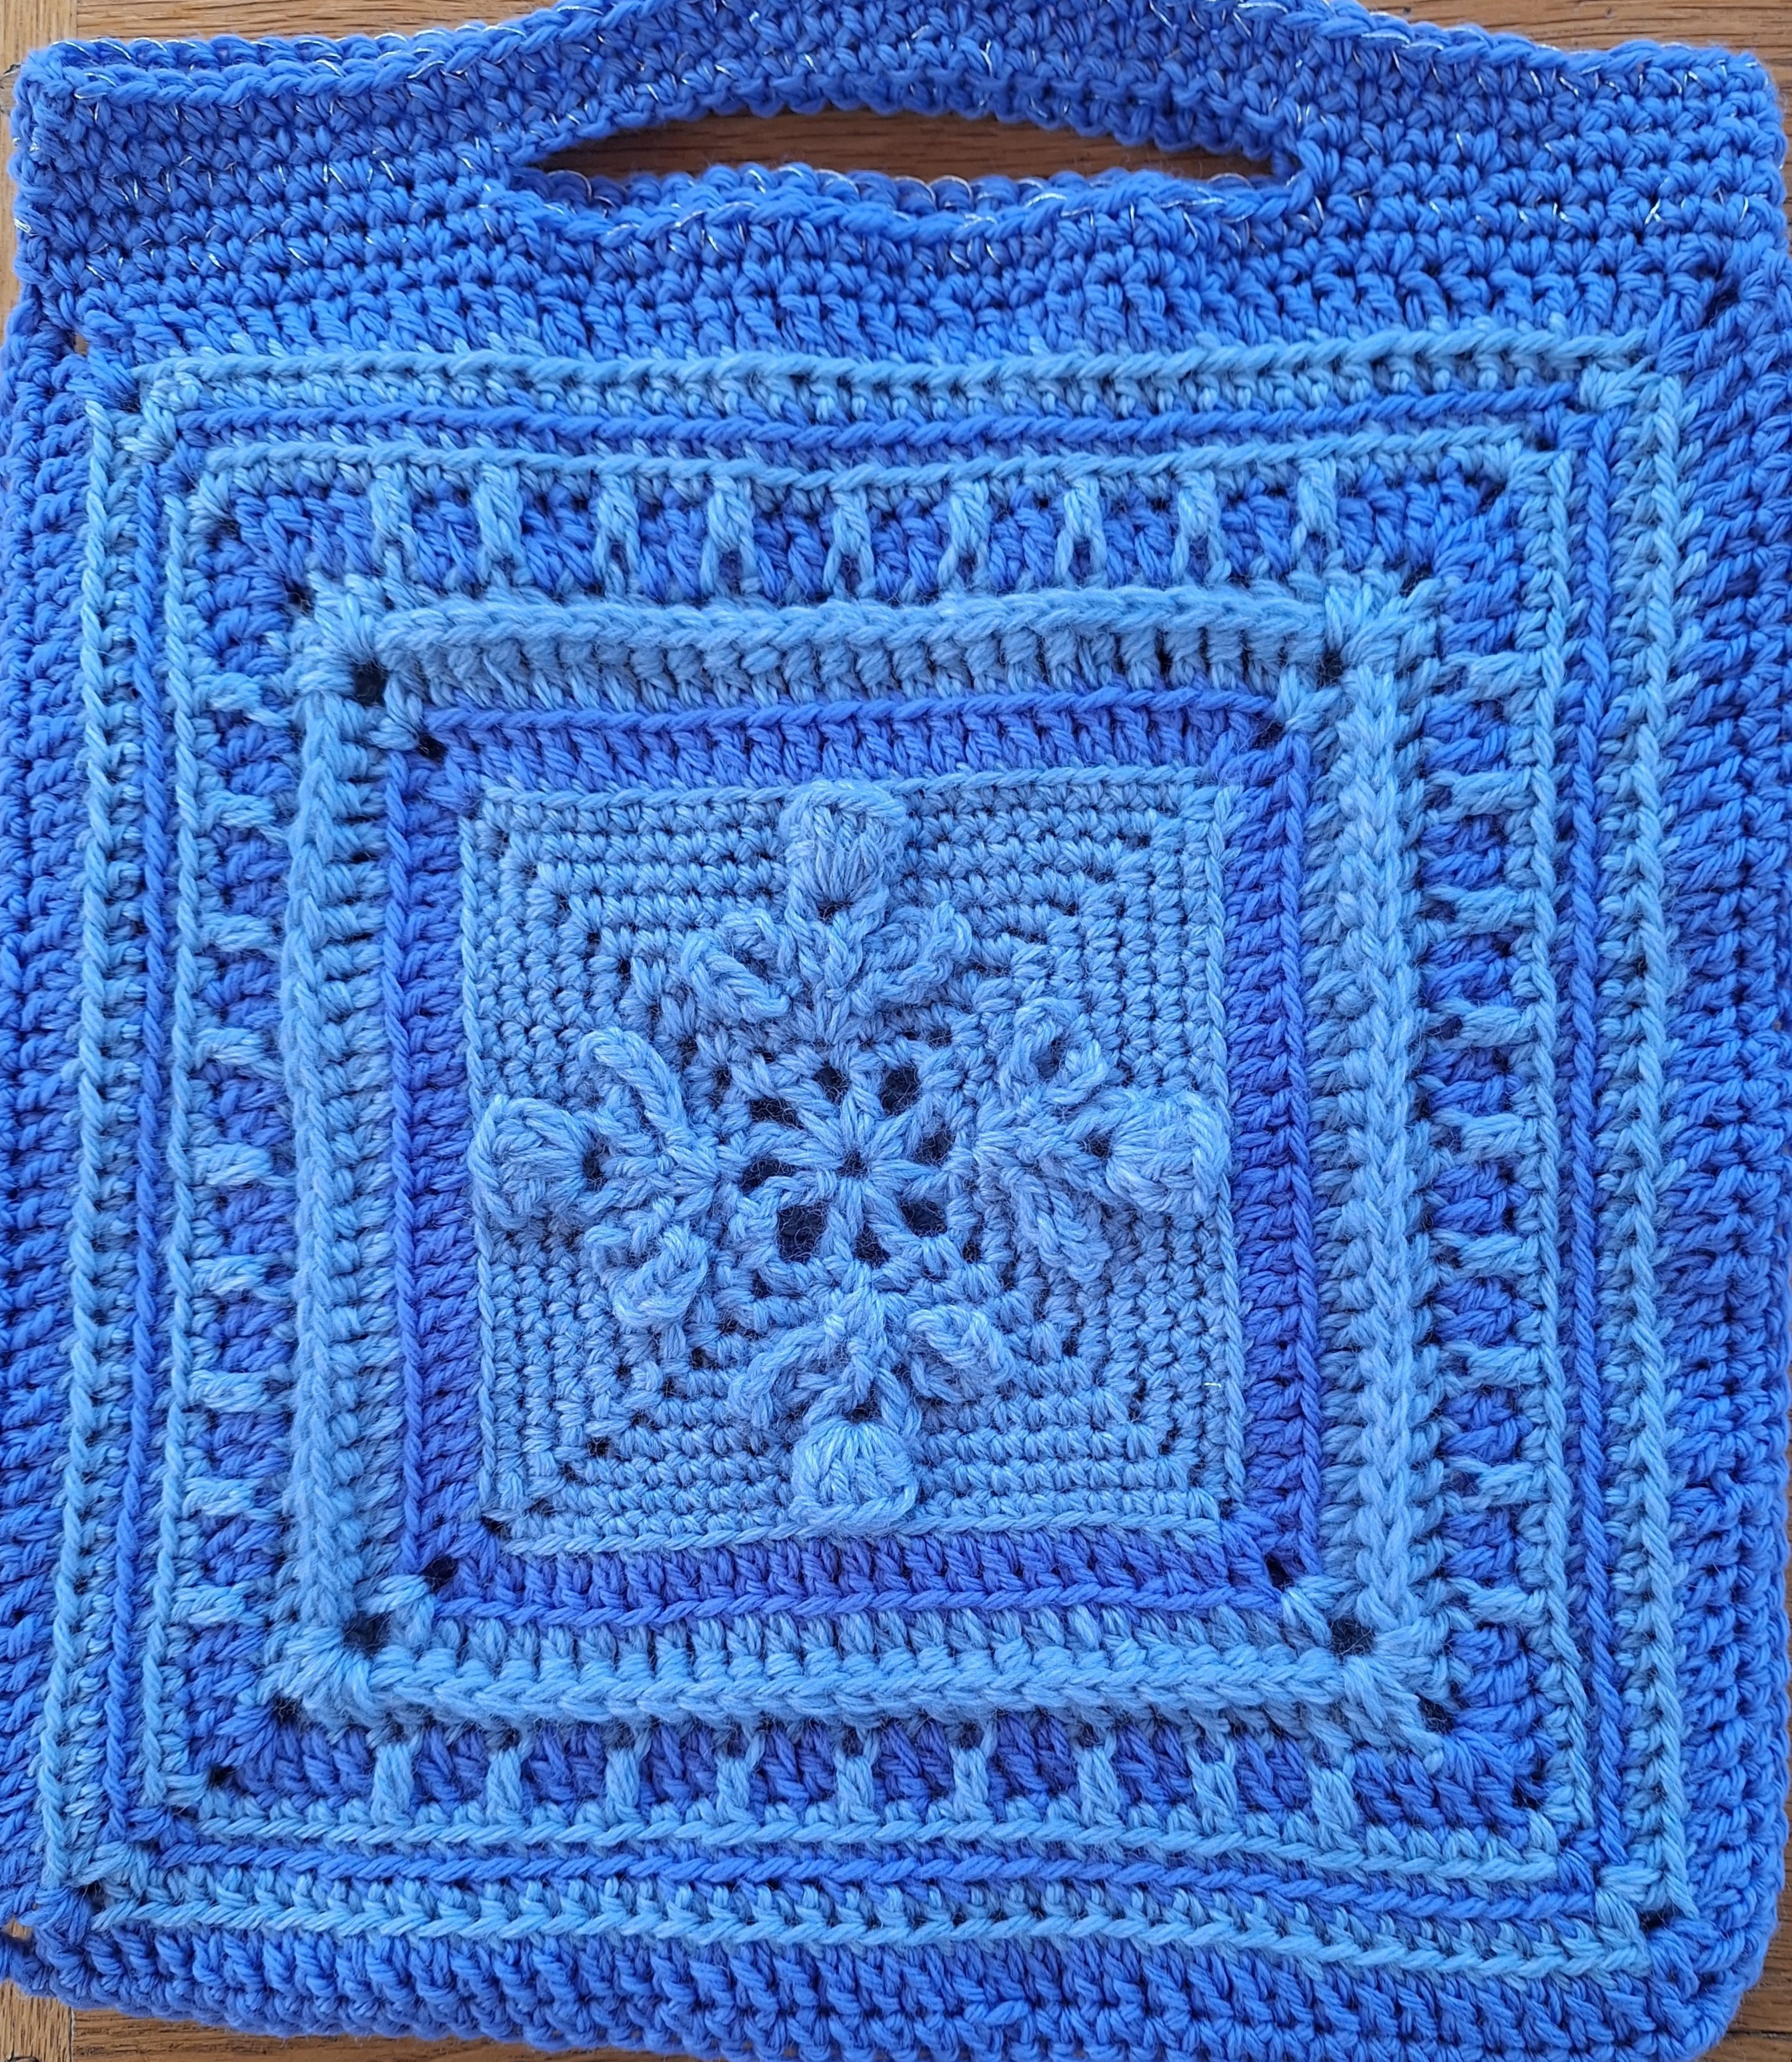
The fourth bag is again based on granny squares and I designed it specifically for a present of a bar of luxury soap (plus a washcloth, oops did I make a present?). So I called it the Soap Gift Bag. Granny squares are extremely versatile and can be joined together to make a larger shape and 3D shapes. Small granny squares are also great for using up leftover yarn and are more versatile when creating 3D shapes. So this is a perfect stashbusting gift bag.
The pattern includes a diagram of how you join the grannies to make the bag. Once you’ve mastered the joining then you could make all shapes of bags with grannies.
The pattern is available here and is free provided you use the code SOAP on purchase. All the patterns in the CAL will be available free for the duration of the CAL, until midnight GMT 13th December 2023.
Welcome to day 3 of the Advent CAL 2023 – the 10 Gift Bags of Christmas!
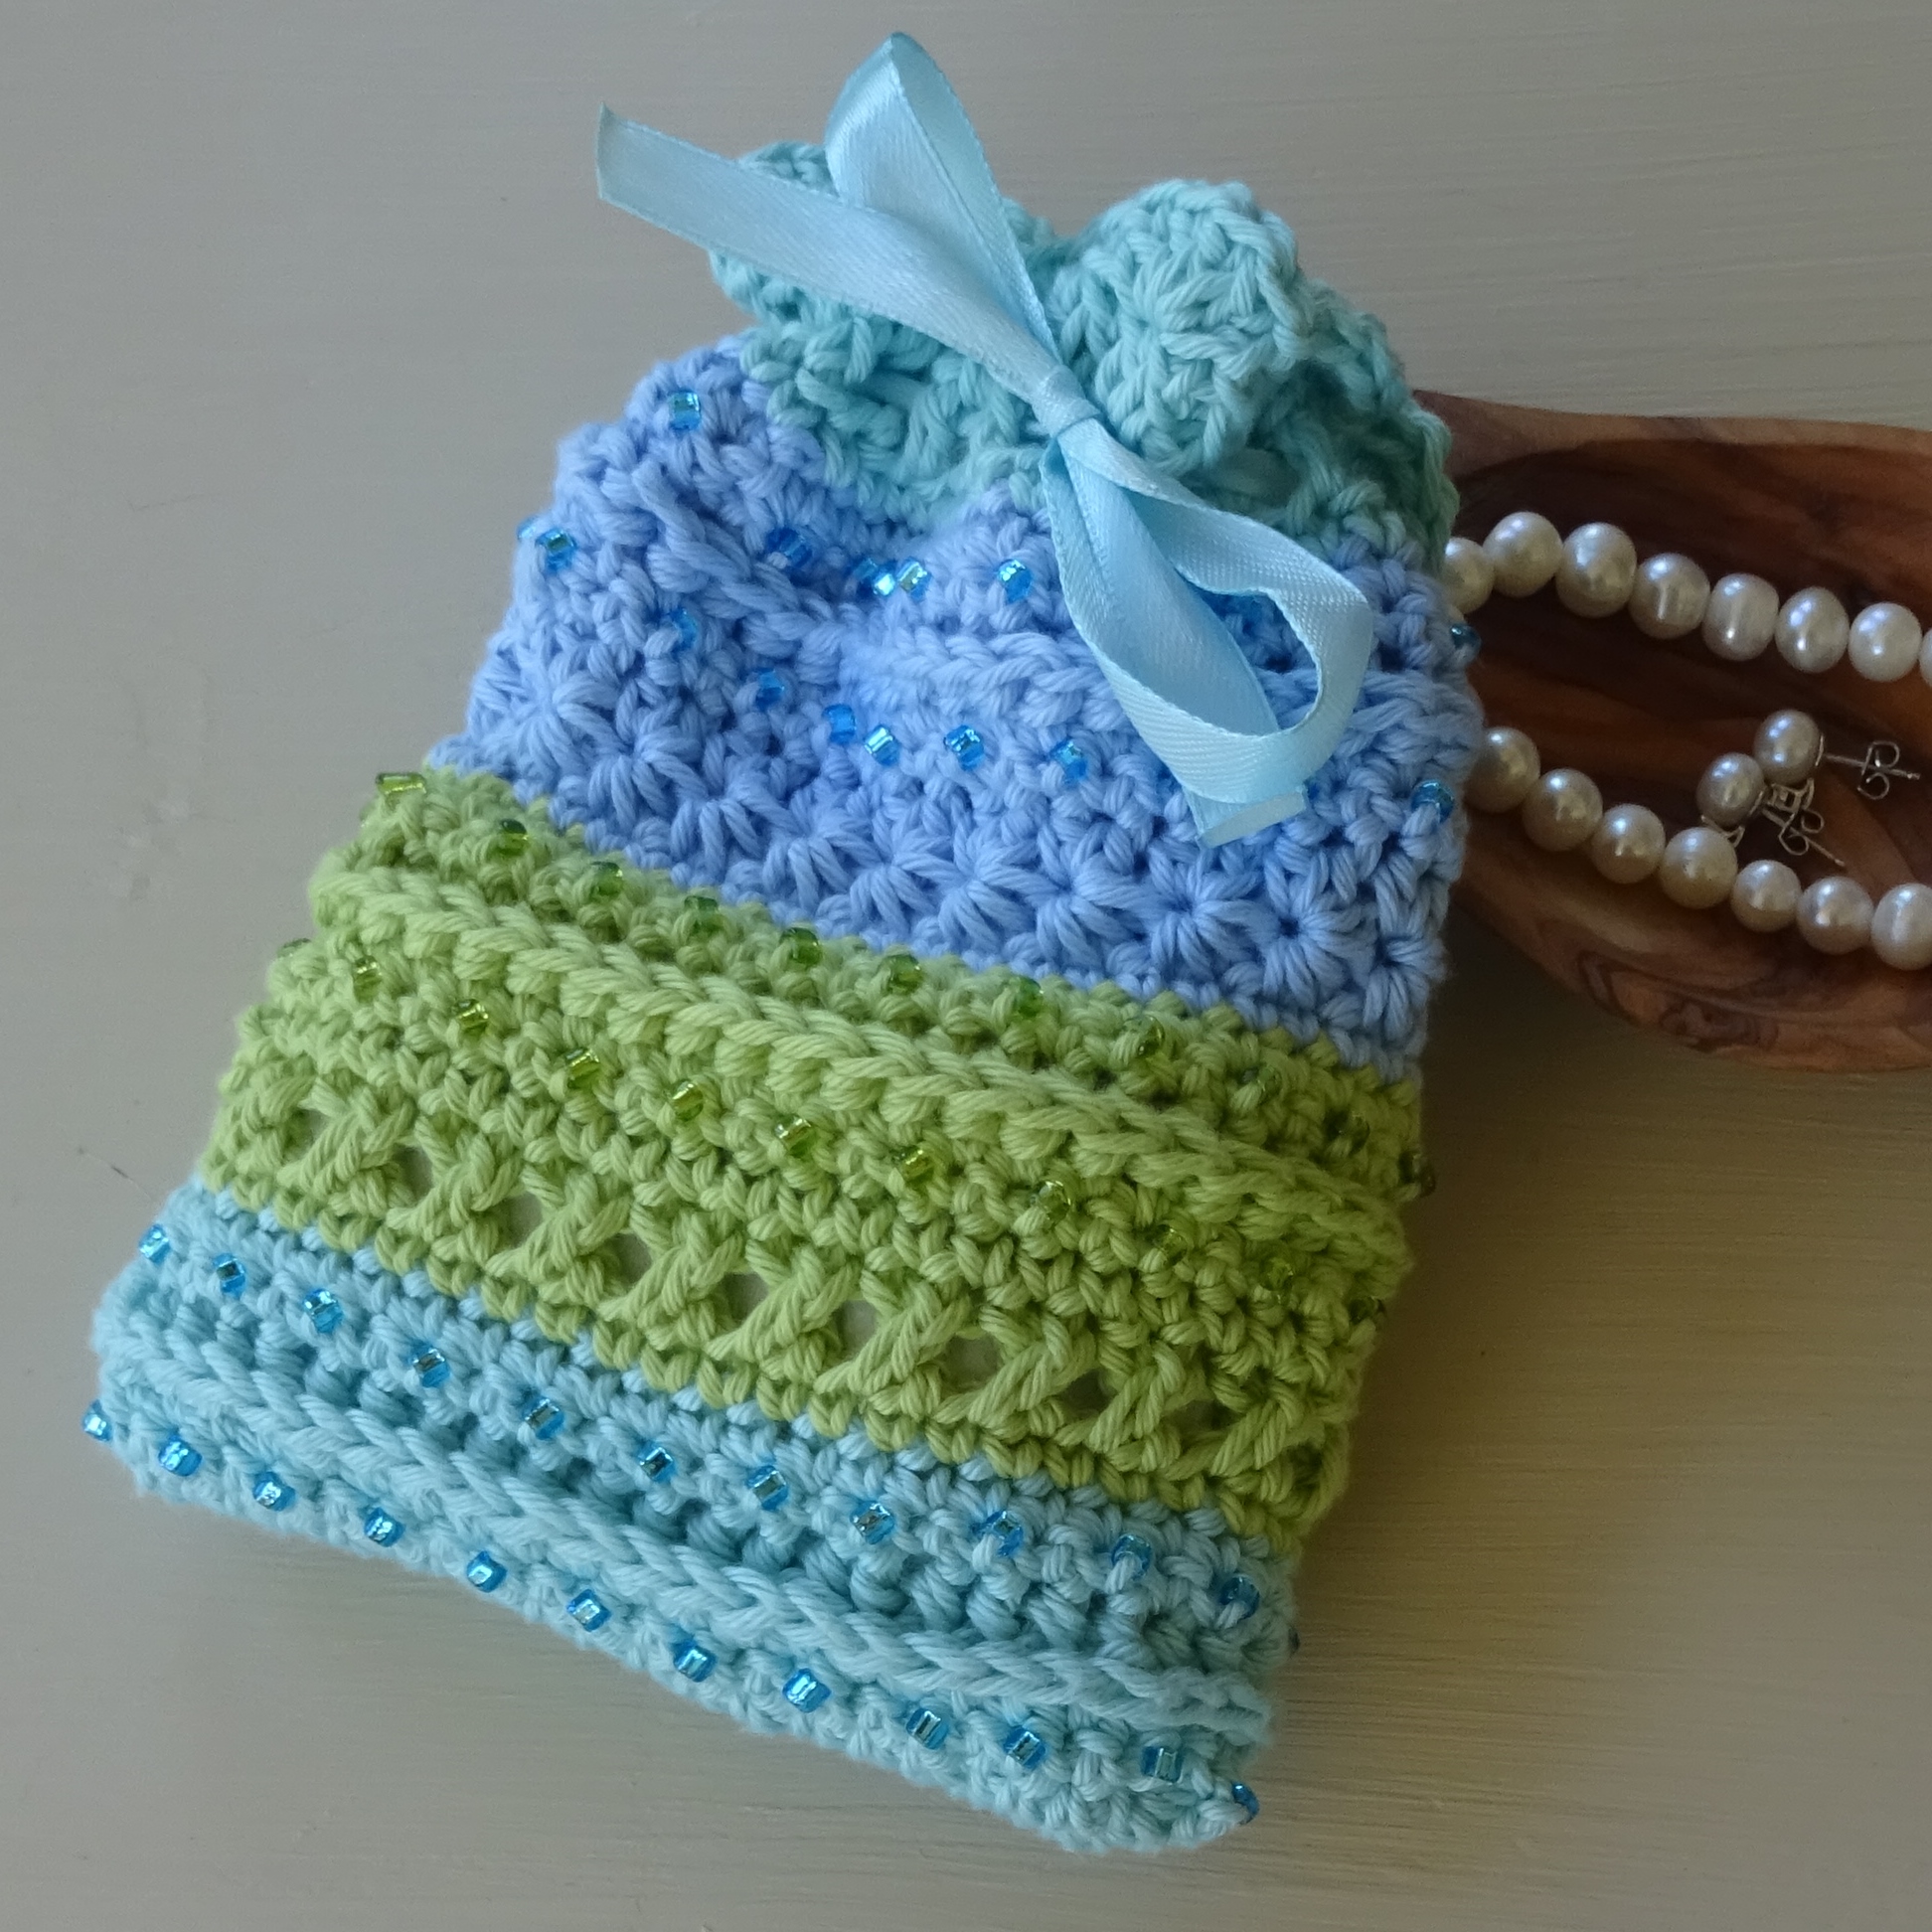
The third bag is one I published several years ago and is perfect for jewellery, in fact so pretty it could be a gift itself!
It takes a little longer than some bags as you need to add beads (did I ever tell you I love to add beads to bags?) but it is oh so pretty and worth the effort.
The pattern is called Precious Gift Bag and is available here, it is free provided you use the code PRECIOUS on purchase. All the patterns in the CAL will be available free for the duration of the CAL, until midnight GMT 13th December 2023.
I hope you enjoy making this gift bag. Please share progress on Ravelry, Facebook or instagram.
Welcome to day 2 of the Advent CAL 2023 – the 10 Gift Bags of Christmas!
The second bag is my go to style for a quick bag. I call it the V Simple Gift Bag
I’ve been making variations of this for some time.
It is also perfect for using leftover yarn and that’s exactly what I used for one of the samples I made for the CAL. And it’s easy to vary this by making a larger base or higher sides. This sample was slightly smaller and used 6 different colours of leftover silk yarn, perfect for wrapping a candle
The pattern is available here and is free provided you use the code VSTITCH on purchase. All the patterns in the CAL will be available free for the duration of the CAL, until midnight GMT 13th December 2023.
Welcome to the Advent CAL 2023 – the 10 Gift Bags of Christmas!
I have indulged myself far too much over the years by crafting presents and do not wish to repeat them. But I can still indulge myself by crafting gift bags. This has many benefits including helping reduce my stash of leftover yarn and ensuring my gift bags fit the gifts by tailoring them to size. The bags are all pretty enough to be kept or re-used for another recipient, so I get plenty of satisfaction when making them. This CAL gives me the opportunity to share the gift bags I’ve designed over the years.
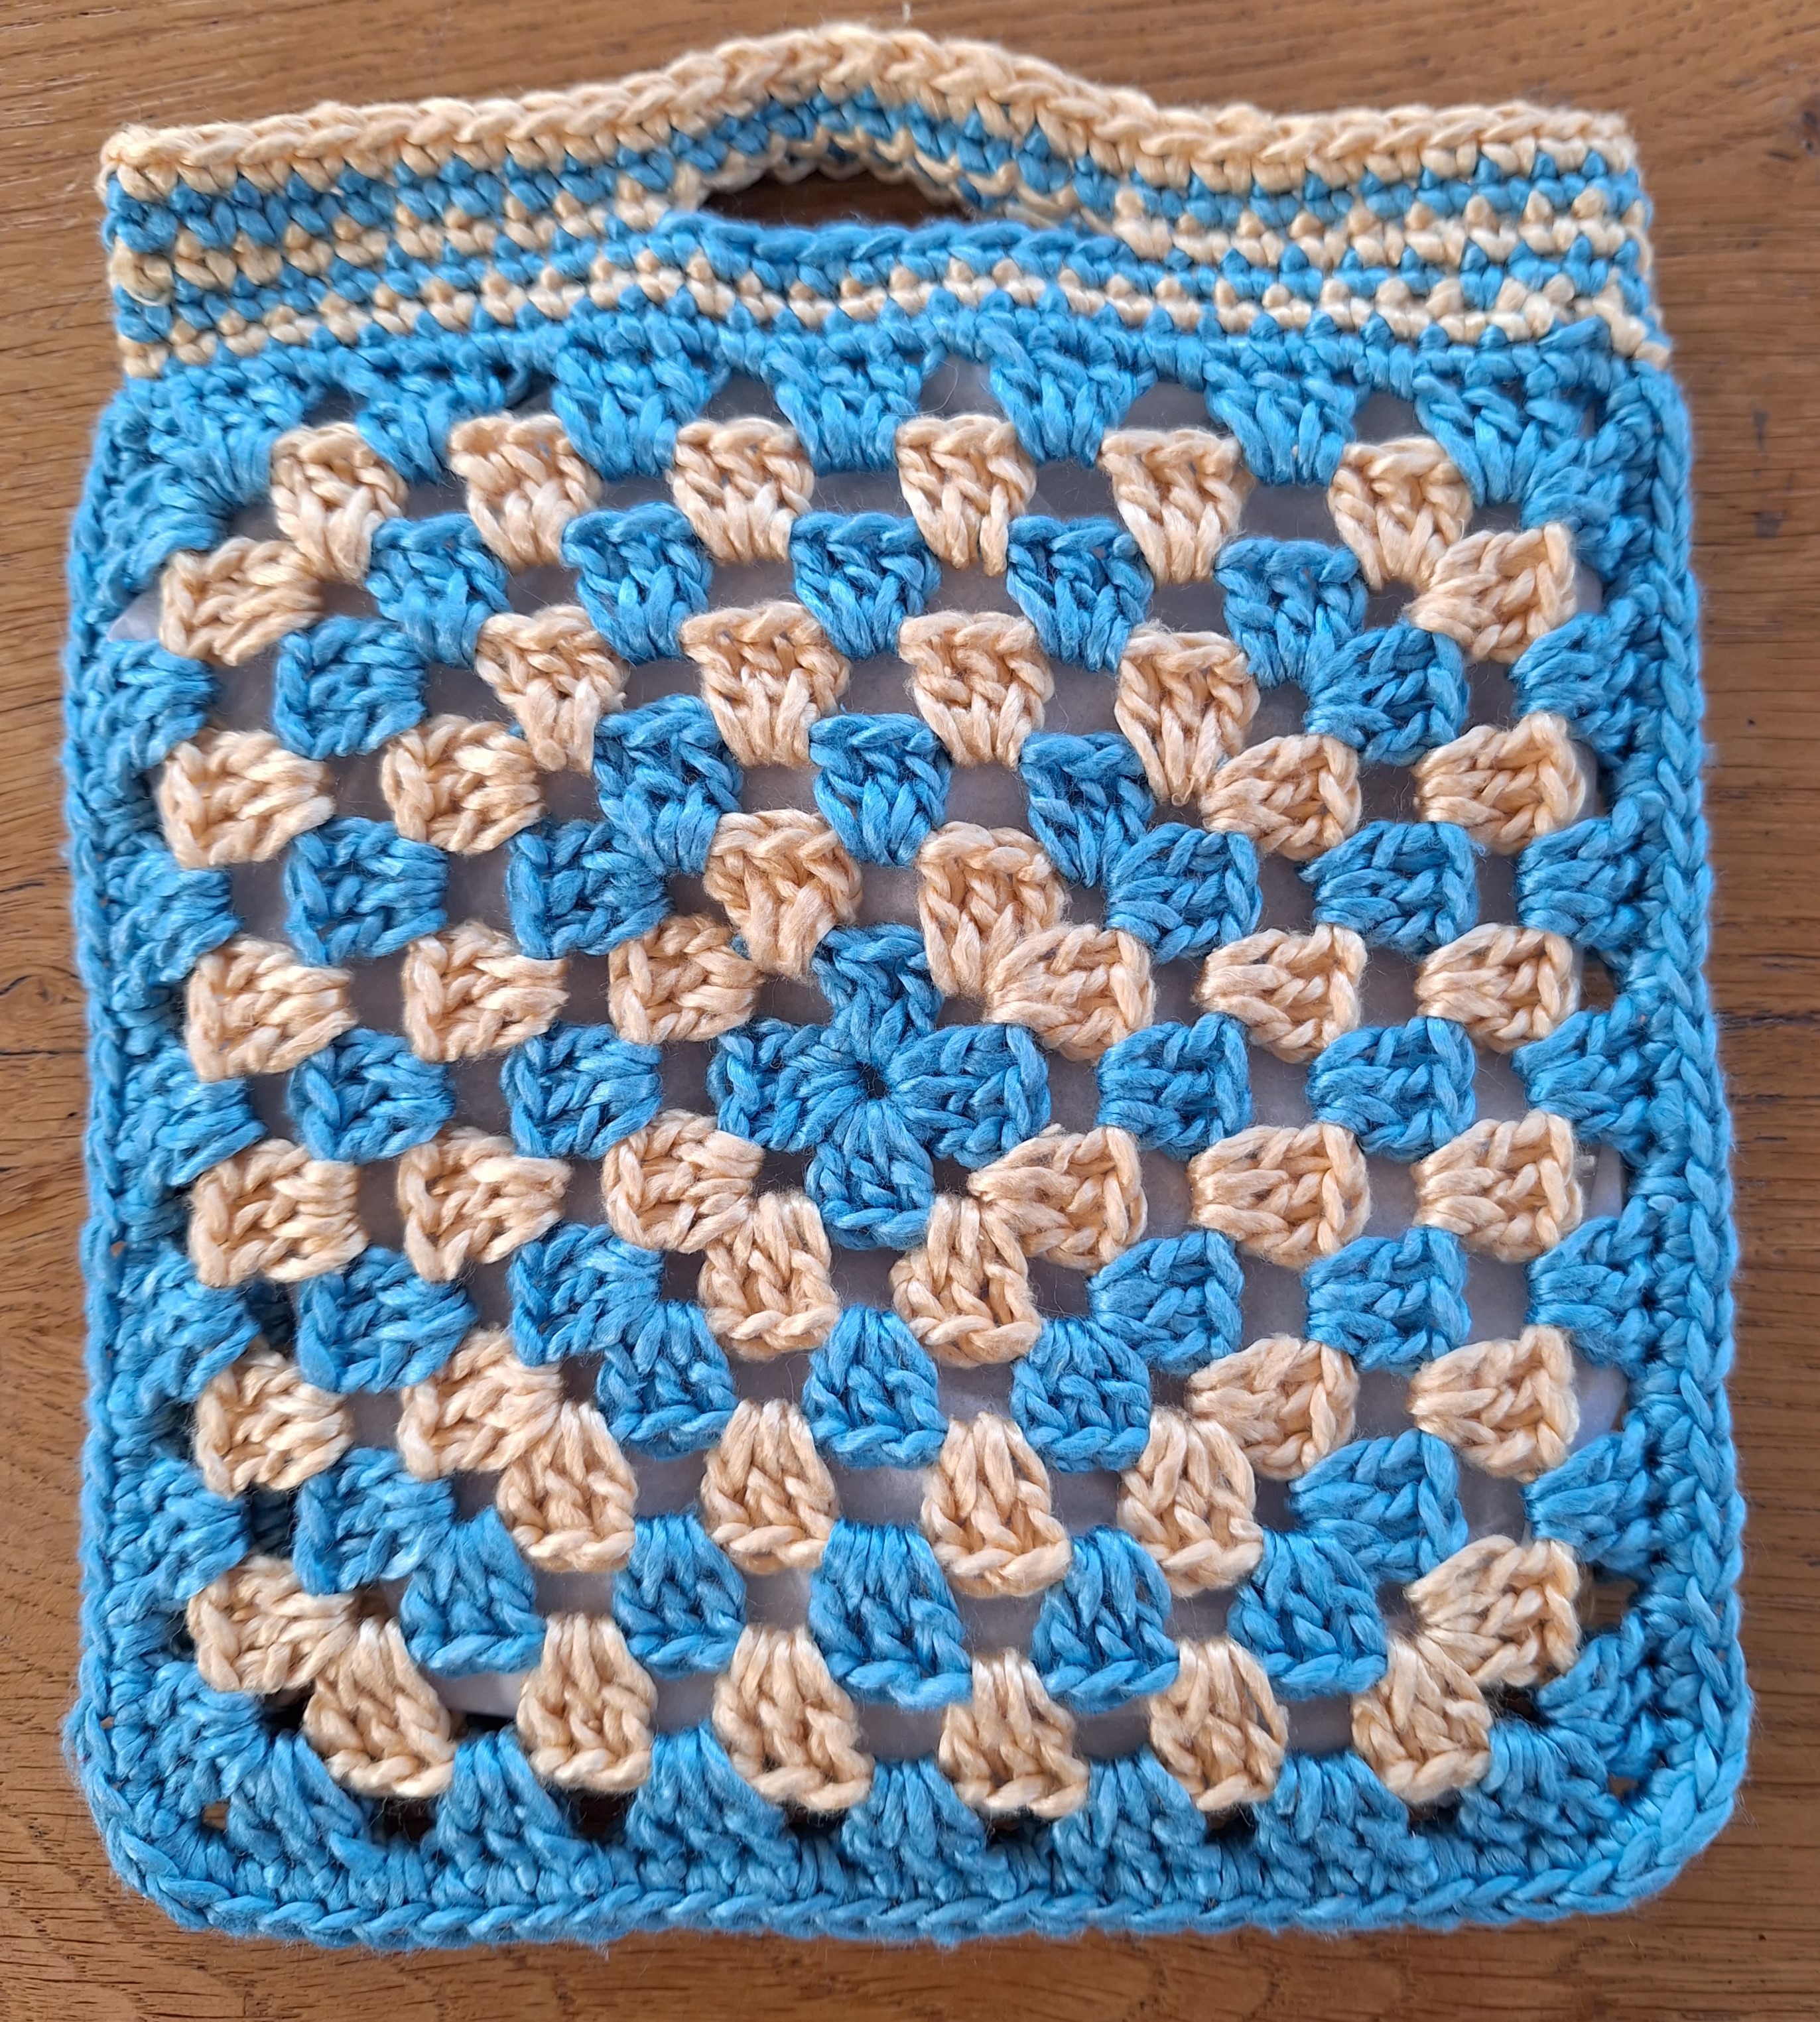
Each day for the next 10 days I will present to you a crocheted gift bag. I’m starting the CAL with a gift bag that I think is easy. I originally designed this to use up some of my extensive stock of afghan square samples from my designs over the years. I never like to waste them and using them in a gift bag is a perfect use for them. However to show you how to make one I designed a straightforward Granny Square Gift Bag.
I made this one in silk so it has a lovely sheen. The pattern is available here and is free. All the patterns in the CAL will be available free for the duration of the CAL, until midnight GMT 13th December 2023.
The concept of making this bag is the same for any pair of afghan squares. I made a lovely small project bag (not a gift bag!) using my Highland Sunburst and Thistle squares designed for Friends Around the World.
And a tip – you can add a touch of sparkle by holding your yarn together with a strand of metallic sewing thread. Just look at this:
I hope you enjoy making this gift bag, Please share progress on Ravelry, Facebook or even instagram (I confess I locked myself out of my original account so I have a newer one here).
Is it too early to mention Christmas? Well, it is 1st November so Christmas is next month and I’m happy to start talking about it – I hope you don’t mind.
Over the years I have crocheted and knitted so many gifts for Christmas that I’m in danger of repeating the presents or even boring the recipients! So in recent years I’ve started to change my gifting and, like many people, I’ve been driven by a desire for sustainability. Unless someone has told me expressly what they would like then I prefer to buy something useful, frequently consumable, and as far as possible ecological, often meaning no plastic. This means my crafting has been relegated to gift tags, embellishments and reusable gift bags.
Would you like to join me in making gift bags this year? Gift bags is the theme of the Advent CAL which I plan to run this year.
The CAL will start on 3rd December to coincide with the start of Advent and will run for 10 days. Each day for 10 days I will present a crocheted gift bag. I have designed 6 new bags and will include 4 existing patterns in the CAL. Many of the bags can be made with leftover yarn and many can be made in an evening. All of the bag patterns will be free from the time of presenting on the blog until the end of the CAL (midnight GMT on 13th December).
Most of the bags can be made in DK or worsted weight yarn (they make up quickly!), but some very pretty bags will need fingering/sock weight and beads. Of course you can adapt any of the patterns to other yarn weights provided you use an appropriate hook size.
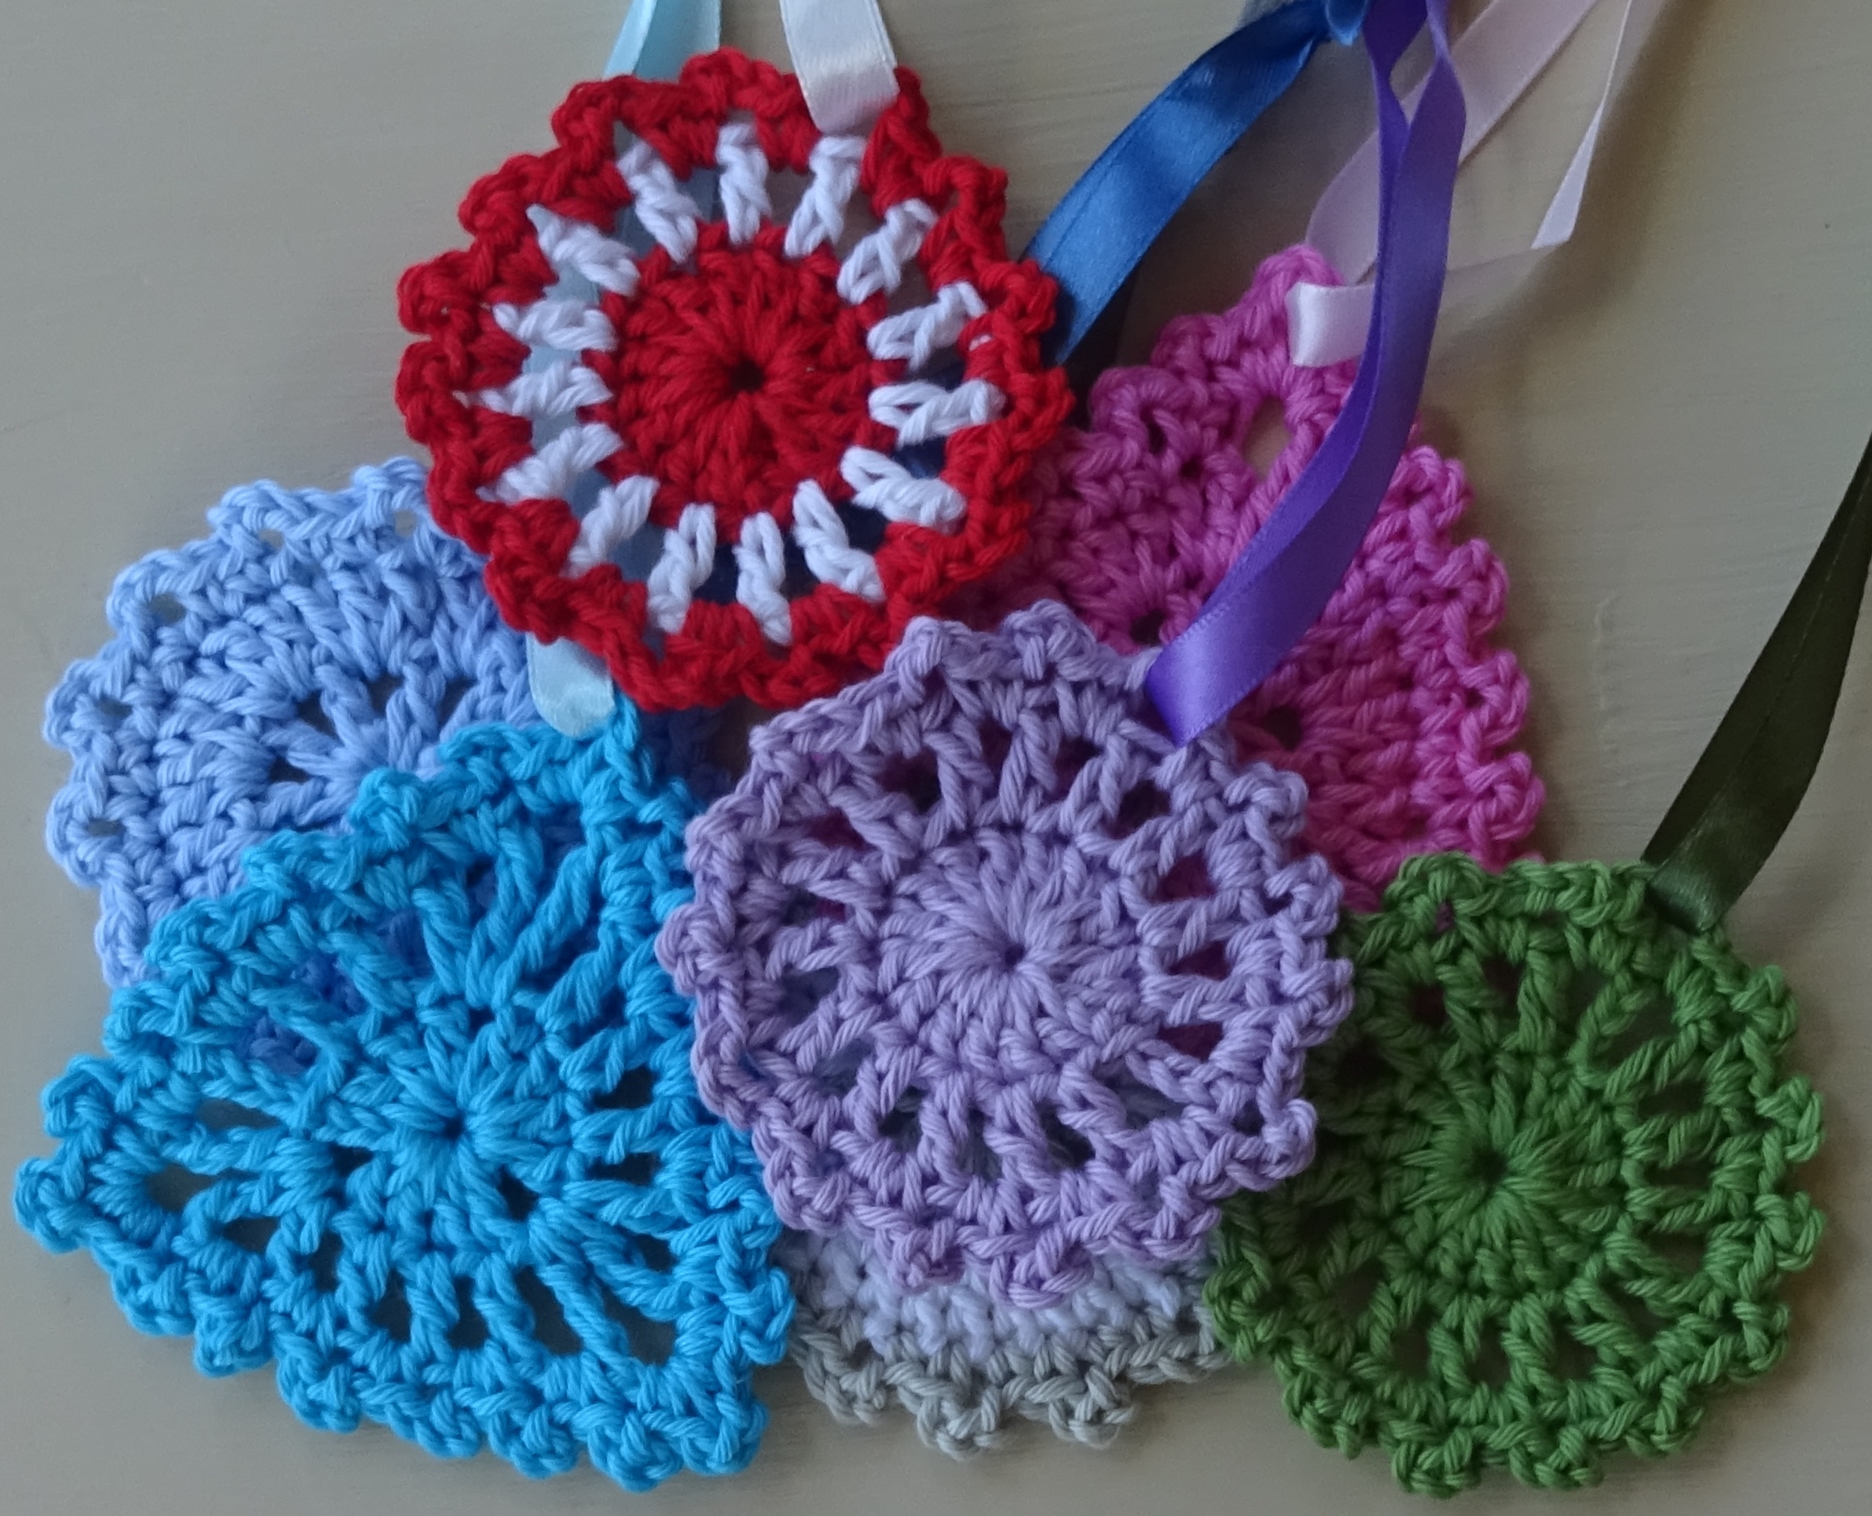
In the meantime, would you like to make a start on wrappings by making some crochet gift tags? I have a couple of free patterns to share with you.
First is the mini snowflake, designed way back in 2015! Pattern here.
Then the Quick Decorations, designed in 2018. Pattern here.
The lovely thing about crocheting gift tags is that they can be used as decorations by the recipient!
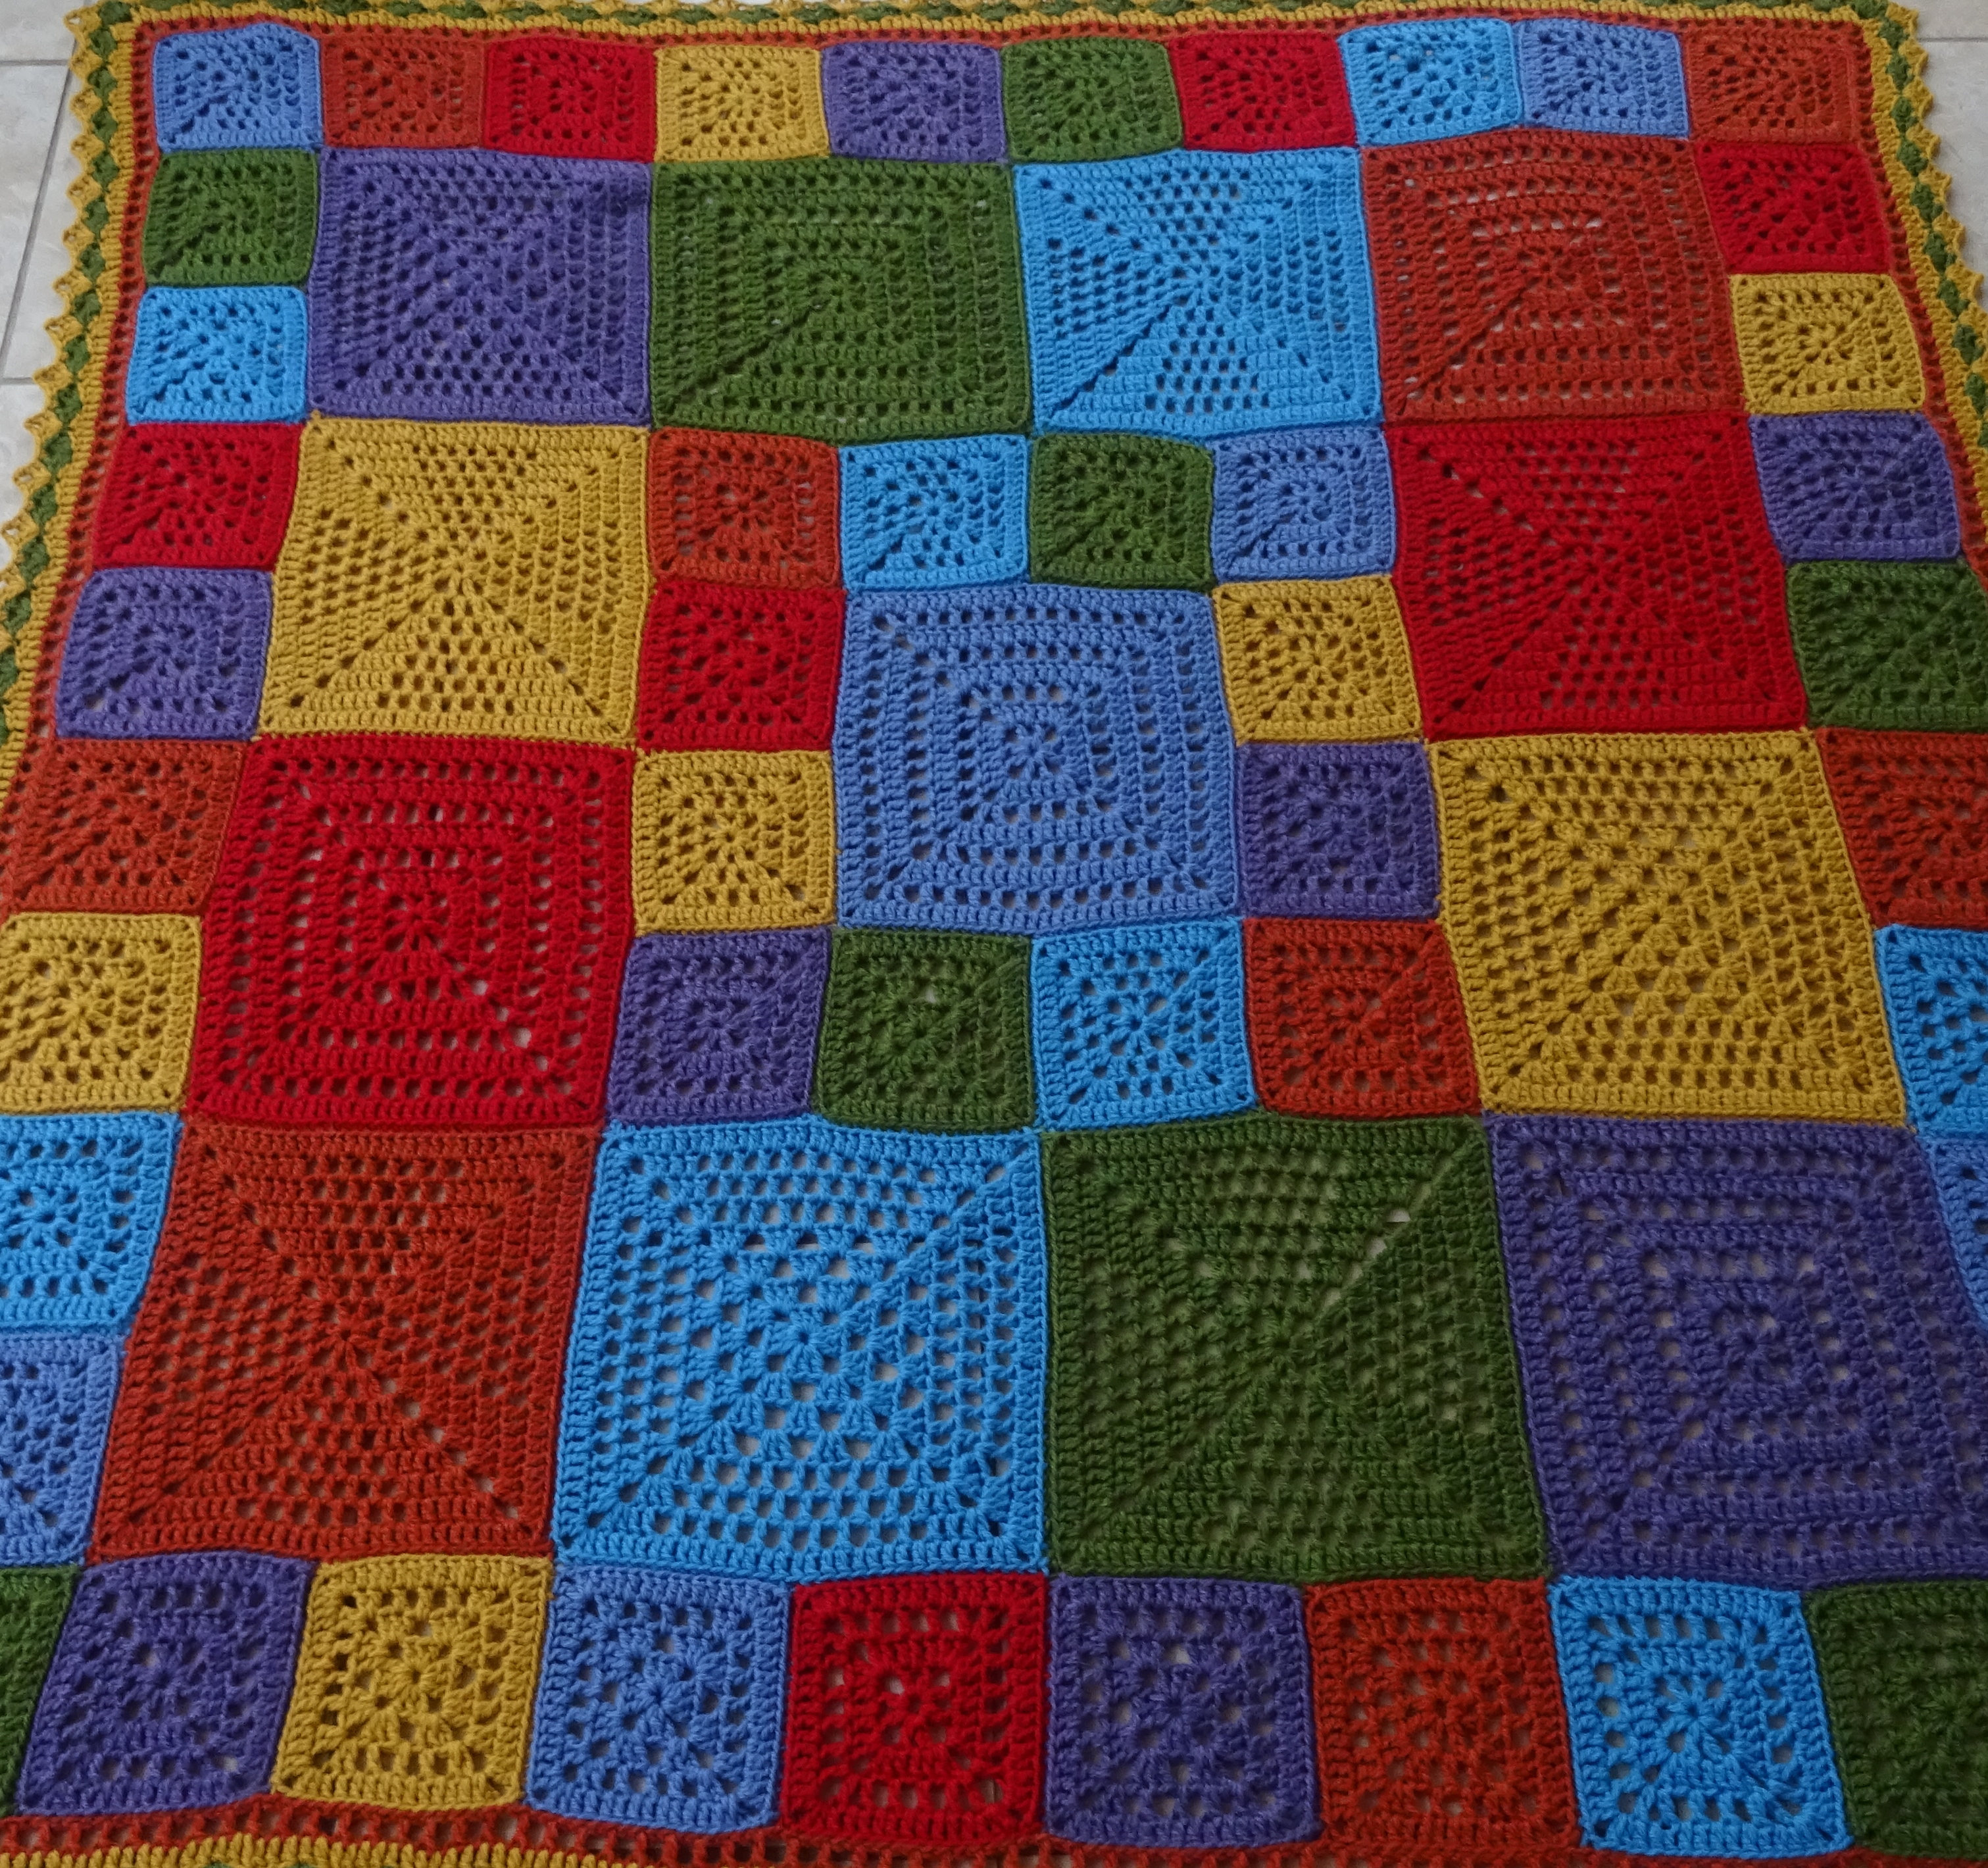
Today (15th August 2023) is Granny Square Day so I thought it the right time to remind you of some of my granny square designs, many of which are free.
First is the Festival Bag with a free pattern on the blog here.
Next there are lots of granny square variations in my Blog Blanket CAL 2015, first blog post here. These are free on the blog but there is also a downloadable pattern on Ravelry for £2.
And my Christmas Blanket 2014 also has granny square variations free on the blog, or again a printable version for £2 on Ravelry.
These are all ‘traditional’ styles of granny square, you can find other square designs of mine on Ravelry here.
Finally, I was having a chat with a good friend today about how I’d love a t-shirt or blouse in granny square fabric. I was so pleased to discover she has some designs available on her website – just have a look here. What a fantastic thing to discover on Granny Square Day!! I may just have ordered a couple of items 🙂
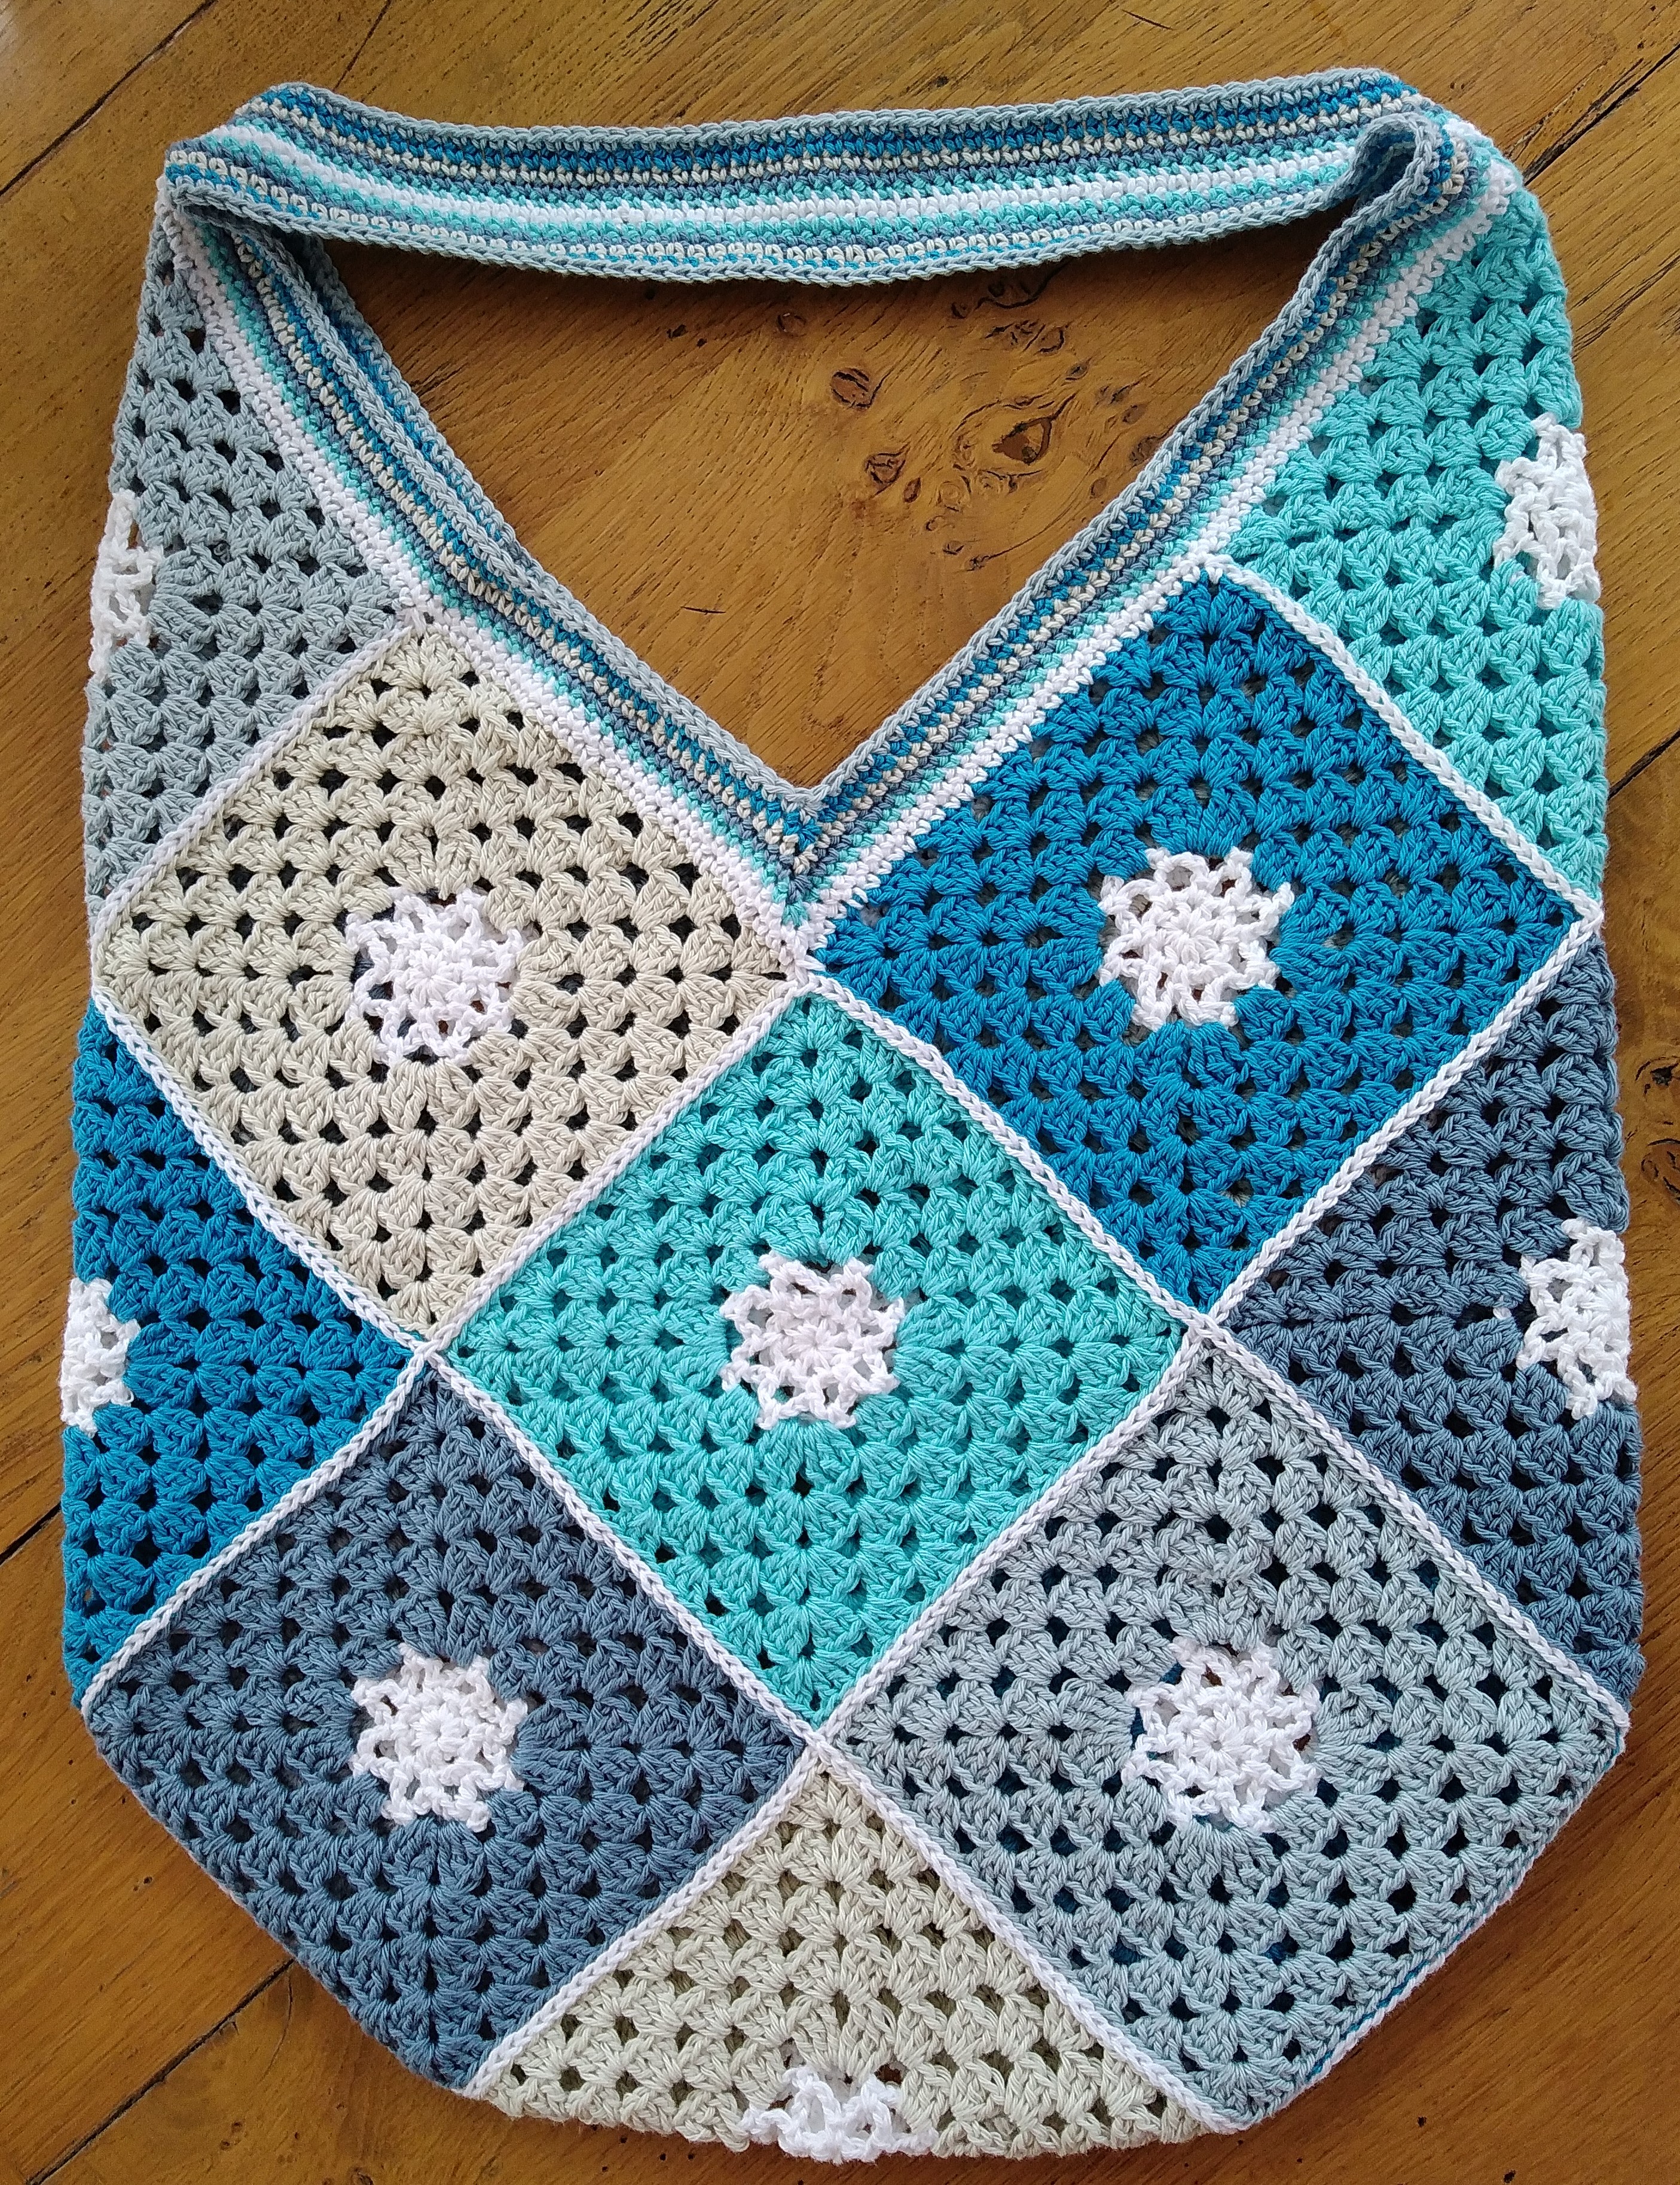
Welcome to the final part of the Beach Blues Bag CAL. In this part we finish by making a handle.
First you need to strengthen the top edge of the bag, then you need create the base of the handle. I did all of this in double crochet (US single crochet).
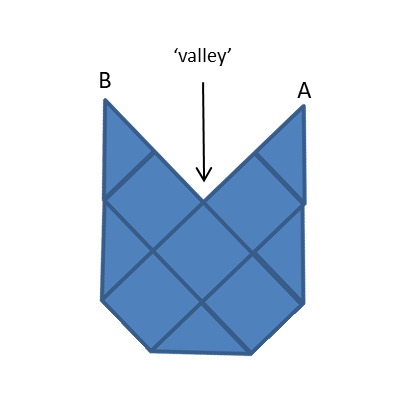
Let’s start with a reminder of the shape at the top of the bag. The photo below shows the shape and final edging, and the diagram shows one side of the bag.
The first 2 rounds strengthen the top edge and create the base (centre) of the handle. Start the first round at point A, as indicated in the diagram above.
Round 1: Using White (the colour I used for the centre of the motifs and for joining them), work 1 round of dc as follows: Place 1dc in each tr or 1ch-sp along the edges. At the top corners of the squares (Points A and B) put 3dc into each 2ch-sp and place a sm into the middle of these 3dc. At the ‘valleys’ work 3dc together. As you start the round at A, start by working 3dc in the 2ch-sp. Join the round with a ss.
Round 2: At point A, 1dc in 1st st, 2dc into the st marked, remove sm and replace into the first of these 2 dcs. Work 1dc in each st around except at the valleys, work 3dc together and at point B, put 2dc into the st marked, remove sm and replace into the second of these 2 dcs. Join the round with a ss and then ss into the first marked st. Now make a chain for the handle (I made 60 ch but you could make it longer), without twisting the ch join to the marked st at B, ss in next st along at B, turn and work back down the ch with 1dc in each ch, ss in next st at A to complete the handle base.
As this is a single handle, I made it wide, adding 5 rounds of dc either side of the centre as follows. However, you could make it wider or narrower as you prefer.
Round 3: join Light Turquoise at any point, work 1dc into each around and work 3dc together at the valleys, join with a ss. Break yarn and fasten off
Rounds 4-7: repeat Round 3 using yarns Jeans Blue, Light Grey, Bright Blue, Blue Grey.
Repeat Rounds 3 to 7 on opposite side of bag top and handle.
Weave in all your ends. Voila! You have a finished bag!
I hope you enjoyed the CAL. I would love to see what you make, please join in the discussion on Facebook or Ravelry.
This week I’m going to show you how to turn the motifs into the bag shape. Here’s a reminder of the bag, so you know the shape you are aiming for:
First you need to block the motifs, if you haven’t already done so. If you leave it until you finish the bag you may find it a bit tricky.
Then you need to decide how you are going to join them. I recommend joining in one of these 4 ways:
By slip stitch holding the motifs right sides together, as I did for the Christmas CAL here.
By double crochet (US single crochet) holding the motifs wrong sides together.
By sewing.
By slip stitch holding the motifs side by side, this is the method I used and I worked into the back stitch only. You may find this a bit tricky if you haven’t done it before, but I think it gives a good effect and is worth that extra effort. This shows you the technique:
Slip stitch side by side back loops only
I joined my bag using the same yarn that I used for the centres of my motifs – White. This is how the joins look:
To form the bag shape you need to join them in a particular order. And I have illustrated this in the following diagrams:
The final part next week will show you how I finished the bag and made the handle.
I would love to see what you make. Join in the discussion on Facebook or Ravelry.
A crochet blog where you will find free crochet patterns along with oodles of crochet inspiration. Featured in top 100 crochet blogs and also in Crochet Now Magazine