Do you remember the Christmas CAL 2014? It was a spontaneous CAL, I did not plan it in advance it just happened. And I enjoyed it so much!
My mind is now turning to blanket CALs again, and I am planning another. But before I share my plans with you I thought it would be good to show you some of the blankets that were made in the last CAL.
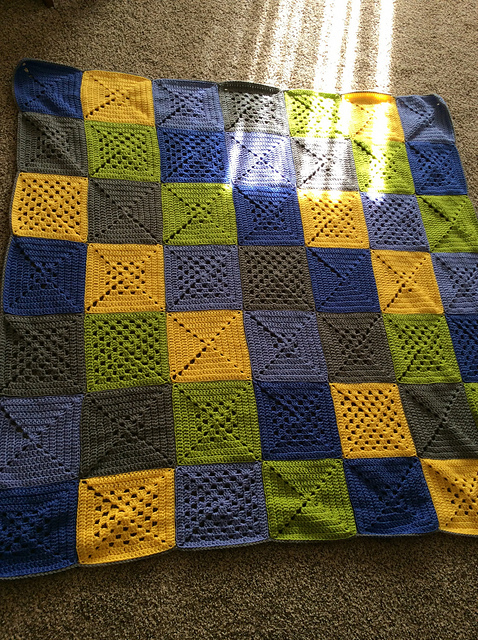
Here is Charita’s blanket. I love the subtle blue colour scheme. I love also the flower embellishments!
Charita’s blanket
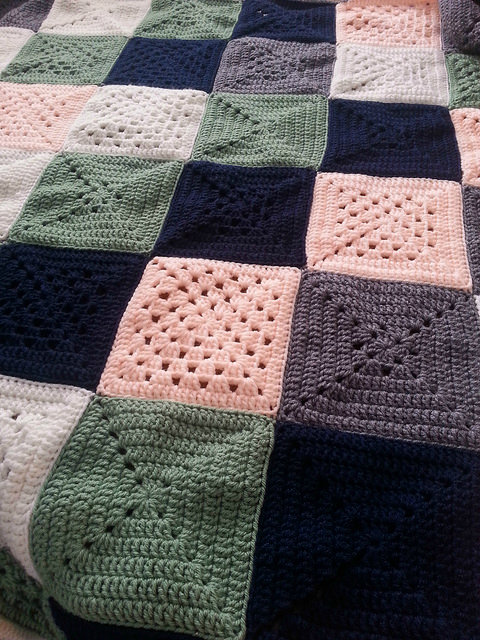
And this is Nona’s blanket. I love the bright zingy colours, and I was astonished to discover this was her first blanket!
Nona’s blanket
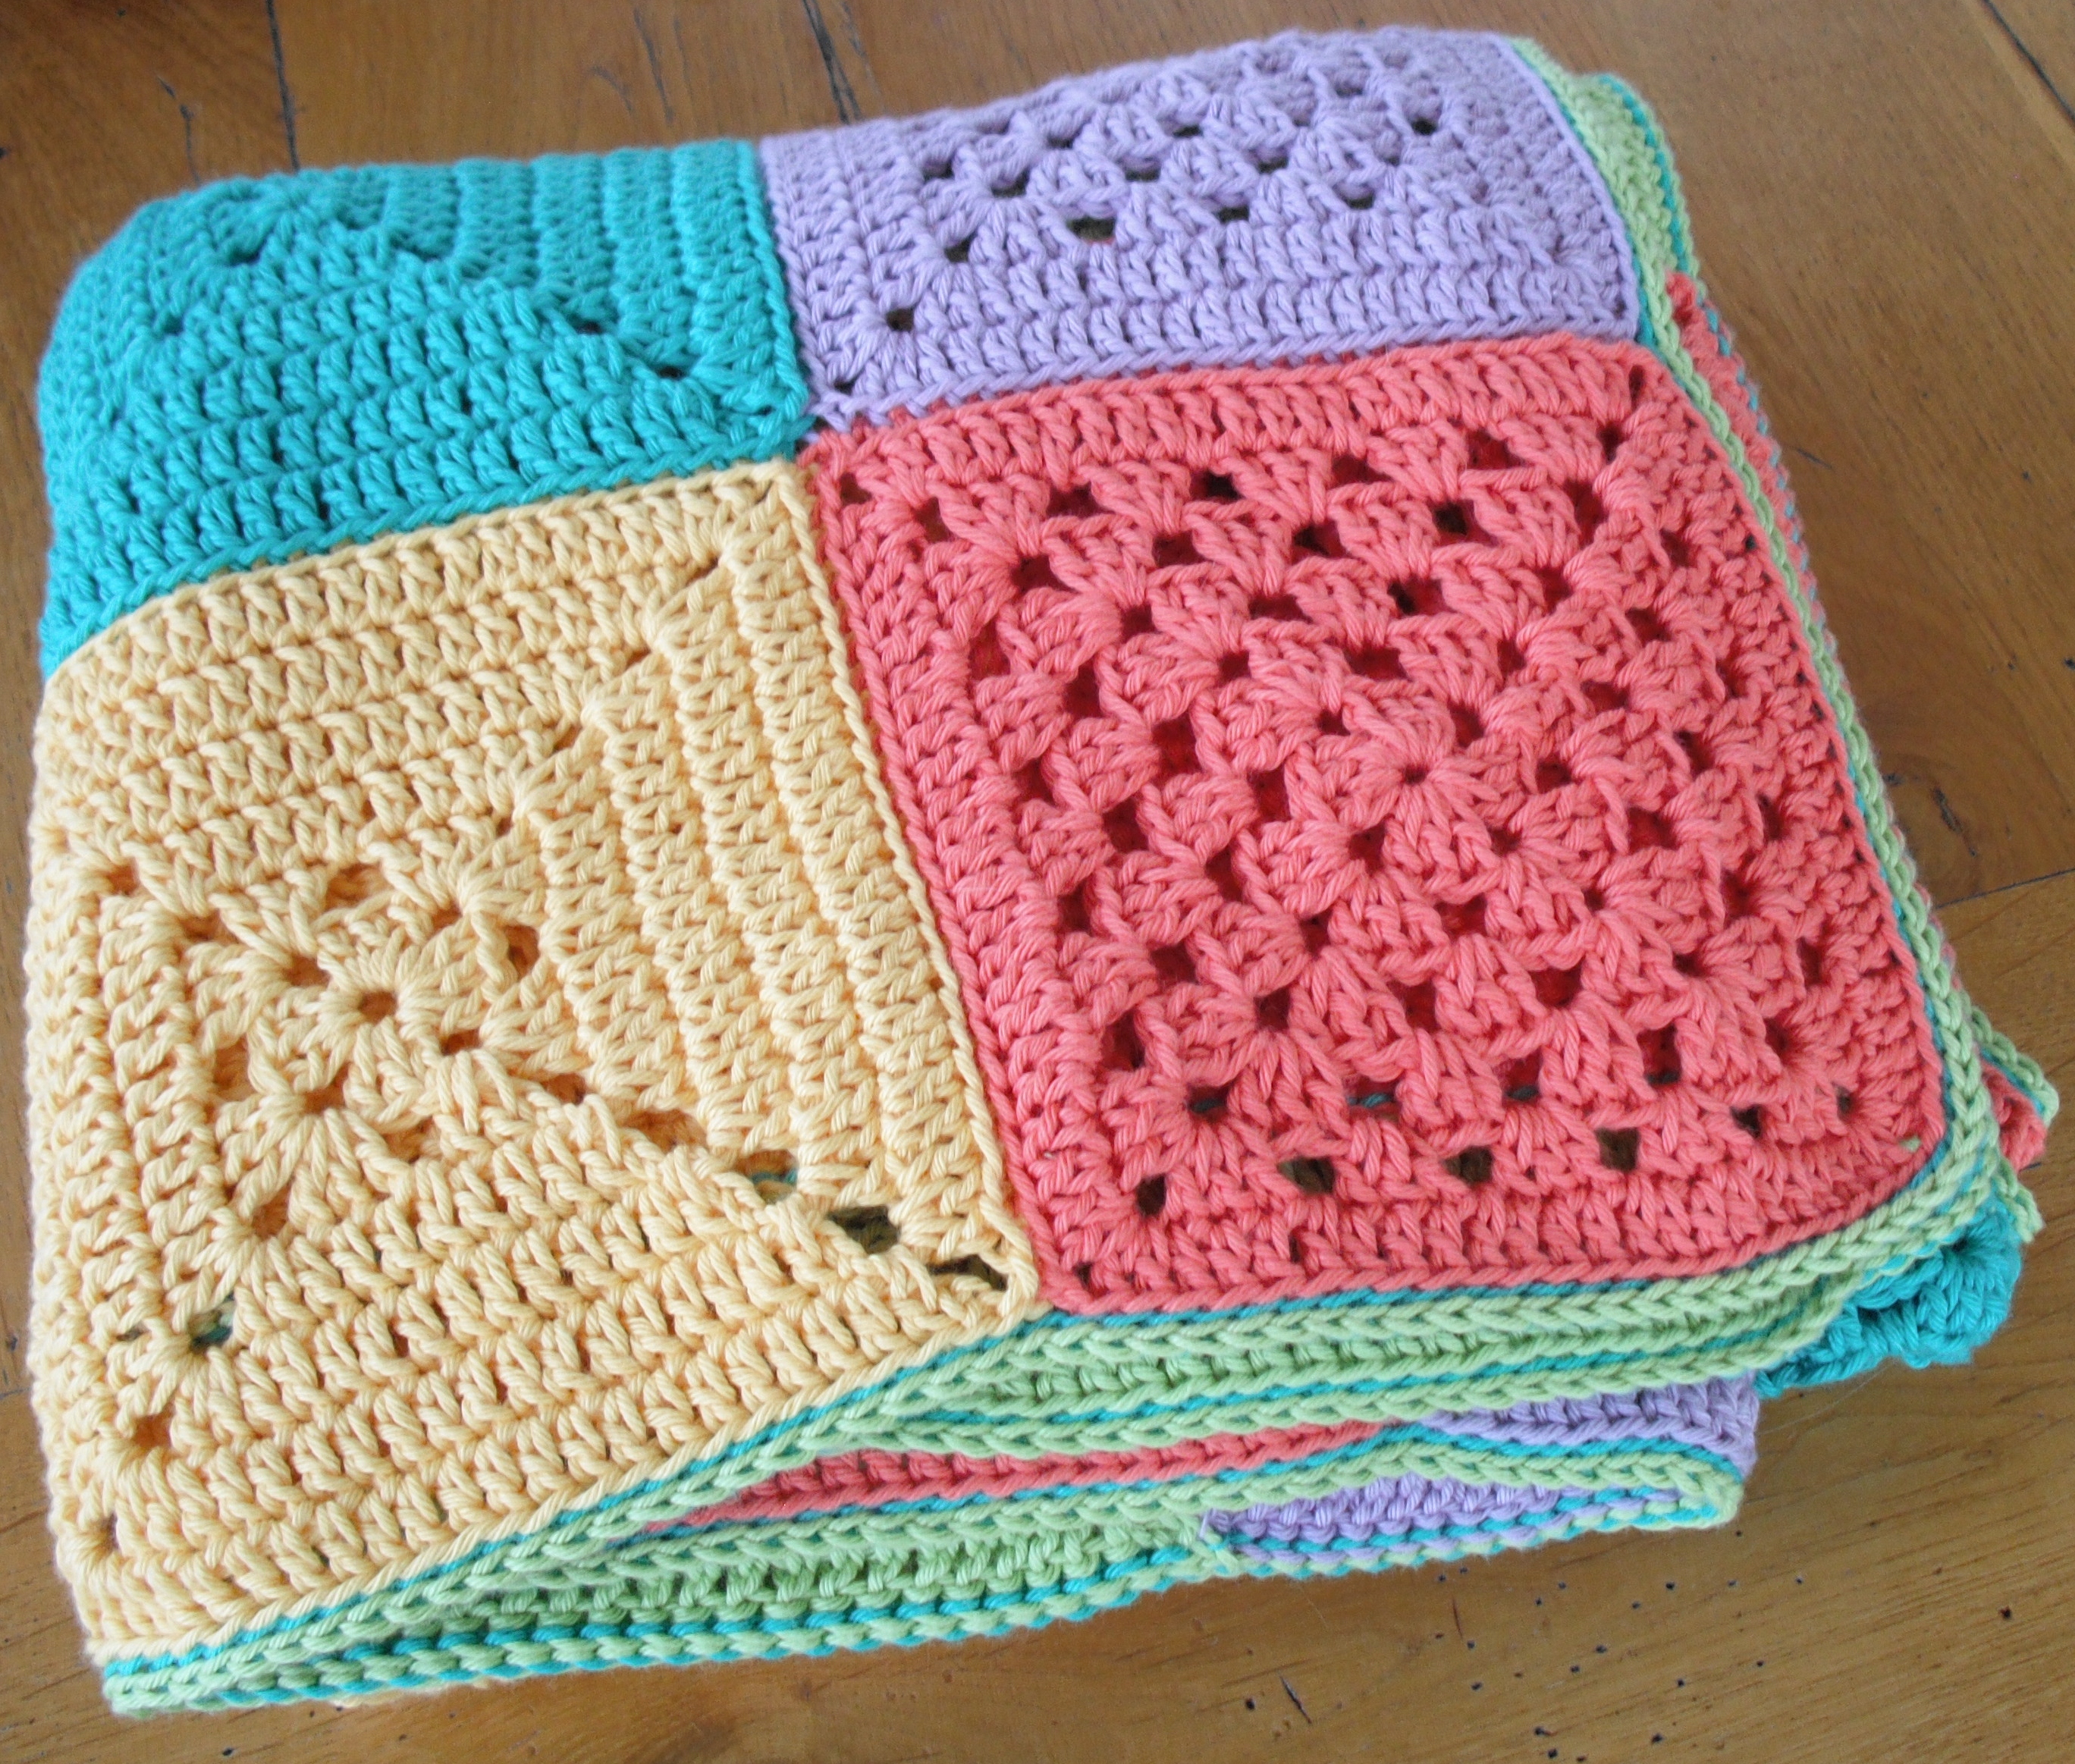
This is Jen’s blanket. Some lovely soft colours in this one and she made it in only 9 days! Well done Jen!
Jen’s blanket
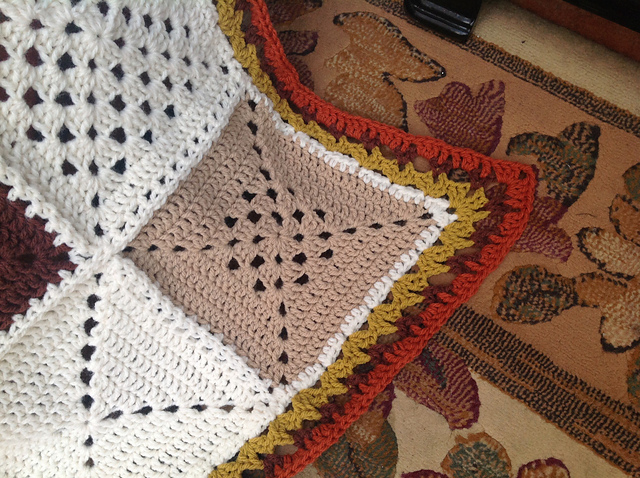
And this one is Vicky’s. She chose lovely autumnal colours.
Vicky’s blanket
And remember I did a very simple edging on my blanket? Well Vicky chose to do something prettier. Here’s her edge.
Vicky’s edge
What I love the most about this sort of CAL is, even though we all start with the same design, the colours, layouts and all types of variations mean no-one has an identical blanket. I thoroughly enjoyed seeing everyone’s progress and final blankets. And I look forward to a similar experience soon!
Thank you Charita, Nona, Jen and Vicky for letting me share your photos.
This week I published a new ebook: Hooking Up!
This ebook contains 6 patterns that are ideal for those who have just learnt to crochet as well as experienced crocheters.
Hooking Up!
If you are new to crochet then you will gain experience and learn new techniques as you work through the 6 designs. The book also provides good reference material – a reminder of the stitches used, the importance of tension and how to adjust your hook size, what to have in your beginner crochet kit, all about blocking and lots of other useful reference material.
If you are experienced at crochet then you will find some beautiful projects which you can make quickly and adapt to your requirements.
Over the next week I will be featuring each pattern in turn. Today it is Simple Scarf.
Simple Scarf
I designed this especially for some gorgeous silk yarn by Willow Knits and I used 5 mini skeins. However, it is adaptable and can be used with any type of yarn – ideas on how to adapt are provided in the ebook. Here is one I made using a single ball of Rowan Kidsilk Haze:
Simple Kidsilk Scarf
If you make a mistake counting your foundation chain on this pattern then you will find a cure – I provide instructions on how to work with this little mistake without having to take back your work; a simple scarf with simple solutions!
The other patterns in the book are April Scarf, Round and Round Cowl, Granny Blue Lap/Baby Blanket and, by special permission, Cassia Cowl and Starry Night Blanket by Amanda Perkins. More information on these 5 patterns will feature in future blogs.
Happy New Year! I hope you celebrated the turn of the old year in suitable style.
Today is the big reveal!
First I will explain my edging. I wanted something simple. In fact when I had joined my motifs I liked the look of the blanket so much that I almost didn’t do an edging. But not doing an edging is a crochet sin! All blankets need something firm along the edge to hold the whole shape.
I experimented with several ideas and settled for the simplest. I expect you think I did a double crochet edging, this is simple isn’t it? Well I didn’t. The simplest edging is slip stitch, and I did 2 rounds of slip stitch.
To maintain the same effect that I achieved with the joining of the motifs, the slip stitch edging was done into the back loop only. This leaves the front loop of each motif to ‘frame’ the motif. So the first edging round was done into the back loop of every stitch along the sides (that works out at 25 per motif edge).
Edging first round
Once you have completed the first round you will find the blanket has a nice firm edge. Actually I think this simple round give a good finish, but I wanted a little more.
The second round went into the back loop of the first round. When the second round is complete you’ll see that only the front loop of the first round is showing. So choose your colours carefully as the second round is the predominant colour.
Edging second round
I didn’t do any extra stitches in the corners, I don’t think it necessary when it is just 2 rounds of slip stitch. And it creates a gentle curve at the corner.
Edging corner
Nicely edged
And this is the final blanket in it’s glory, being inspected by @yarnaddictcat :
@yarnaddictcat inspection
No little embellishment have been added (yet!).
If you look very closely you may notice that I didn’t quite follow the layout plan. The colours are the same but the motifs are slightly off plan. This is because, as I mentioned in part 4, I was running out of some colours so adjusted the order of motifs I made a little bit.
Now I’ve shown you mine – please show me yours!
Happy crocheting xxxx
Now for the legal stuff – I designed this, it’s all my own work and is copyright. Please feel free to make as many as you like, but not for commercial purposes, and please credit me with the design. Thank you!
I have finished my blanket now, but I will save the big reveal until New Year’s Day. Today I am sharing my little embellishment.
If you have been reading this blog for the last week or so you will know that I had my idea for the little embellishment only a few days ago. I thought a small flower would look lovely in the centre of some of the squares:
Embellishment
Regular blog readers may recognise this flower, it is the Anniversary Crochet Flower that I designed and published here. I used one colour for the first 2 rounds, then swapped to a different colour for the last round. I think it is perfect as a little embellishment.
Embellishment 2
What do you think? Maybe you should wait until your blanket is joined and edged before making these, as you don’t want to run out of yarn! But you can practice on some scraps, as these little flowers don’t use too much yarn.
Flower field
I still haven’t decided whether to add them to my blanket (hence the long tails haven’t been cut off yet as they will be needed for sewing on), I think my blanket zings already………..decisions, decisions…….
Tune in tomorrow for the final part and THE BIG REVEAL!
Happy crocheting xxxx
Now for the legal stuff – I designed this, it’s all my own work and is copyright. Please feel free to make as many as you like, but not for commercial purposes, and please credit me with the design. Thank you!
I am feeling pretty happy today, I have joined all my motifs and I love the way the blanket looks. The colours are bright and fresh, and I have decided this will be my garden throw/picnic rug – it zings!
Today I am sharing my ideas for layout and how to join.
Let’s start with the joining.
I have opted for a very straightforward joining that doesn’t leave a ‘ridge’ on the front of the blanket. This is my preference, you may choose to join any way you like.
Remember I said to leave a long tail of about 3m at the end of each motif pattern? Well I use that long tail to join the motifs. Hold the motifs front sides together and slip stitch through the back loops of both motifs along the edges using the long tails.
Joining by slip stitch
Using the back loops means that the front loops of each motif are still visible on the front side along the edges making a nice straight edge where the motifs lie next to each, like this:
Front of join
You can get a similar effect by sewing together using the back loops as well.
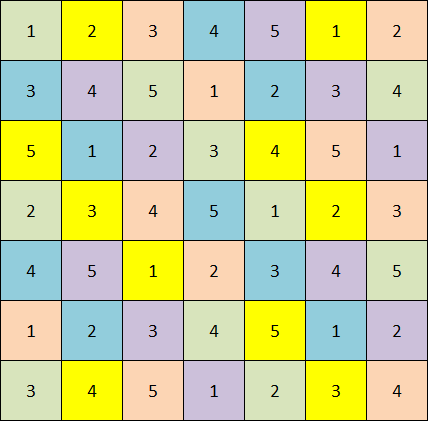
The layout of the blanket is 7 motifs by 7 motifs. The following diagram shows how I planned my layout.
First the key:
Full Motif is no 1
Granny 2 motif is no 2
Granny 3 motif is no 3
Granny 4 motif is no 4
Granny 5 motif is no 5.
The colours are pretty obvious!
Layout 1
In my layout the colours are sort of random but there is a regularity to the motif style. If you prefer the colours to be more regular then the following is an alternative:
Layout 2
You don’t have to follow either of these layouts, but I hope they give you some inspiration on how to make your blanket.
Tomorrow I will show you my little embellishment. I haven’t decided whether to use it on my blanket, but we’ll see!
As always please share your progress on my Ravelry group here, and you can ask any questions on there (I know joining can be tricky).
Happy crocheting xxx
Now for the legal stuff – I designed this, it’s all my own work and is copyright. Please feel free to make as many as you like, but not for commercial purposes, and please credit me with the design. Thank you!
Today I finished my final square. Phew! Only just ahead of you all….this spontaneous CAL has been a lot of fun and has kept me busy over the Christmas season. It is lovely to be able to say I made a blanket in this short time.
My promise for today was to publish the final 2 motifs, so here we go……
Here’s the usual reminder of the ABBREVIATIONS:
The pattern is written in English crochet terms.
St = stitch
Ch = chain
Tr = treble (US dc)
Ss = slip stitch
Sp = space
Ch-sp =chain space
This GRANNY 2 MOTIF, I am making 10, 2 of each of my colours:
Granny 2 motif
Foundation: Make a 4ch foundation ch and join into a ring with a ss
Round 1: 5ch (counts as 1tr, 2ch), (3tr, 2ch) 3 times into the ring, 2tr into the ring, join to 3rd st of first 5ch with a ss.
Round 2: ss into 2ch-sp, (note for this and each subsequent round: this ss is to position the start of the round in the right place) 5ch (counts as 1tr, 2ch), (3tr, 1ch) into the same 2ch-sp, (3tr, 2ch, 3tr, 1ch) into each of the next three 2ch-sps, 2tr into the first 2ch-sp, join to 3rd st of starting 5ch with a ss.
Round 3: ss into 2ch-sp, 5ch (counts as 1tr, 2ch), 2tr into the same 2ch-sp, 1tr into each tr and 1ch-sp along each side and (2tr, 2ch, 2tr) in each 2ch-sp on the corners, finish with 1tr in the first 2ch-sp and join to 3rd ch from start with a ss. You should have 11tr along each side and 2ch in each corner of your motif.
Round 4: ss into 2ch-sp, 5ch (counts as 1tr, 2ch), 2tr into the same 2ch-sp, 1tr into each tr along each side and (2tr, 2ch, 2tr) in each 2ch-sp on the corner, finish with 1tr in the first 2ch-sp and join to 3rd ch from start with a ss. You should have 15tr along each side and 2ch in each corner of your motif.
Rounds 5 and 6: Repeat Round 4. You should have 23tr along each side and 2ch in each corner of your motif. Break yarn and fasten off leaving a long tail about 3m long for sewing or crocheting together later.
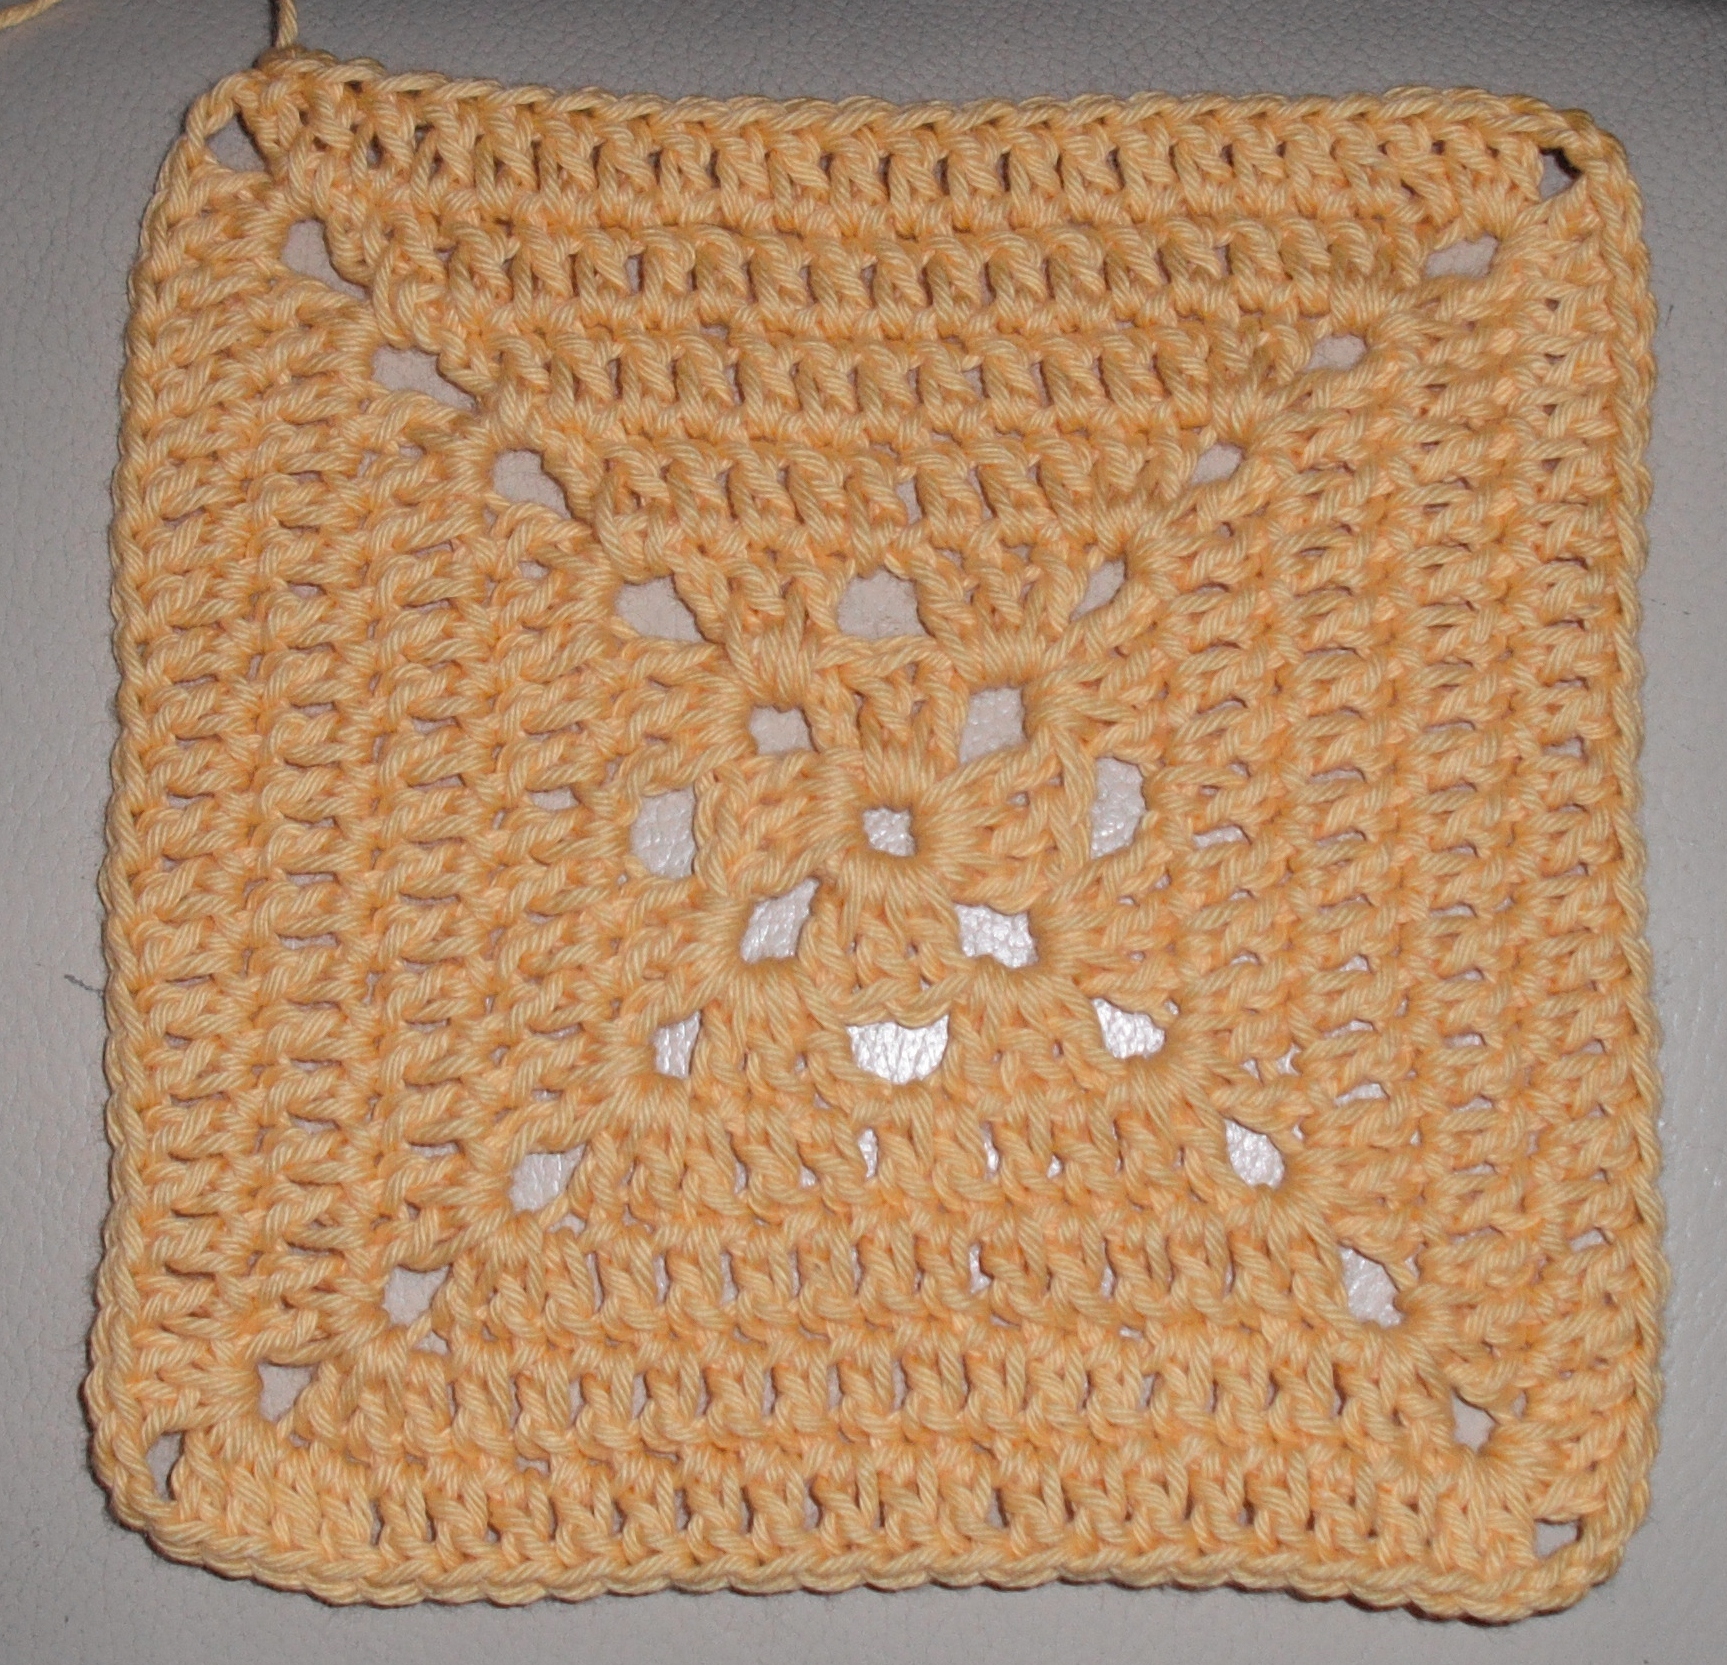
This GRANNY 4 MOTIF, I am making 10, 2 of each of my colours:
Granny 4 motif
Foundation: Make a 4ch foundation ch and join into a ring with a ss
Round 1: 5ch (counts as 1tr, 2ch), (3tr, 2ch) 3 times into the ring, 2tr into the ring, join to 3rd st of first 5ch with a ss.
Round 2: ss into 2ch-sp, (note for this and each subsequent round: this ss is to position the start of the round in the right place) 5ch (counts as 1tr, 2ch), (3tr, 1ch) into the same 2ch-sp, (3tr, 2ch, 3tr, 1ch) into each of the next three 2ch-sps, 2tr into the first 2ch-sp, join to 3rd st of starting 5ch with a ss.
Round 3: ss into 2ch-sp, 5ch (counts as 1tr, 2ch), (3tr, 1ch) into the same 2ch-sp, *(3tr, 1ch) into the next 1ch-sp, (3tr, 2ch, 3tr, 1ch) into the next 2ch-sp; repeat from * another 2 times (3tr, 1ch) into the next 1ch-sp, 2tr into the first 2ch-sp, join to 3rd st of starting 5ch with a ss.
Round 4: ss into 2ch-sp, 5ch (counts as 1tr, 2ch), (3tr, 1ch) into the same 2ch-sp, *(3tr, 1ch) into each of the next two 1ch-sps, (3tr, 2ch, 3tr, 1ch) into the next 2ch-sp; repeat from * another 2 times (3tr, 1ch) into each of the next two 1ch-sps, 2tr in the first 2ch-sp, join to 3rd st of starting 5ch with a ss.
Round 5: ss into 2ch-sp, 5ch (counts as 1tr, 2ch), 2tr into the same 2ch-sp, 1tr into each tr and 1ch-sp along each side and (2tr, 2ch, 2tr) in each 2ch-sp on the corners, finish with 1tr in the first 2ch-sp and join to 3rd ch from start with a ss. You should have 19tr along each side and 2ch in each corner of your motif.
Round 6: ss into 2ch-sp, 5ch (counts as 1tr, 2ch), 2tr into the same 2ch-sp, 1tr into each tr along each side and (2tr, 2ch, 2tr) in each 2ch-sp on the corner, finish with 1tr in the first 2ch-sp and join to 3rd ch from start with a ss. You should have 23tr along each side and 2ch in each corner of your motif. Break yarn and fasten off leaving a long tail about 3m long for sewing or crocheting together later.
My mind is now turning to edging but first I need to join them all. I don’t have a lot of yarn left, in fact I have to confess now that I didn’t have a full 2 balls of each colour and I knew I might be a little short of yarn at the end. But you should have taken my advice and made sure you have at least a full 2 balls of each colour (or 2 x 184m/201yds), so you should have plenty left.
I do want a simple edging and I know I have just enough for that, but you may want to do something more fancy and I know you’ll have enough yarn left to experiment.
Tomorrow I’ll share layout ideas and how to join.
Please keep sharing your progress on my Ravelry group here:
Happy crocheting xxx
Now for the legal stuff – I designed this, it’s all my own work and is copyright. Please feel free to make as many as you like, but not for commercial purposes, and please credit me with the design. Thank you!
I’ve been busy today, so I apologise for being a bit late with this post. My ‘busy’ was a family gathering. It is always lovely to see the family, especially at Christmas. And I do enjoy the catering for a crowd, which I don’t do very often. Perhaps if I catered for a large group more frequently I wouldn’t enjoy it as much!
So now I am ready for some relaxing crochet. Are you ready for the next motif? I hope so, because here it is:
First a reminder of the ABBREVIATIONS:
The pattern is written in English crochet terms.
St = stitch
Ch = chain
Tr = treble (US dc)
Ss = slip stitch
Sp = space
Ch-sp =chain space
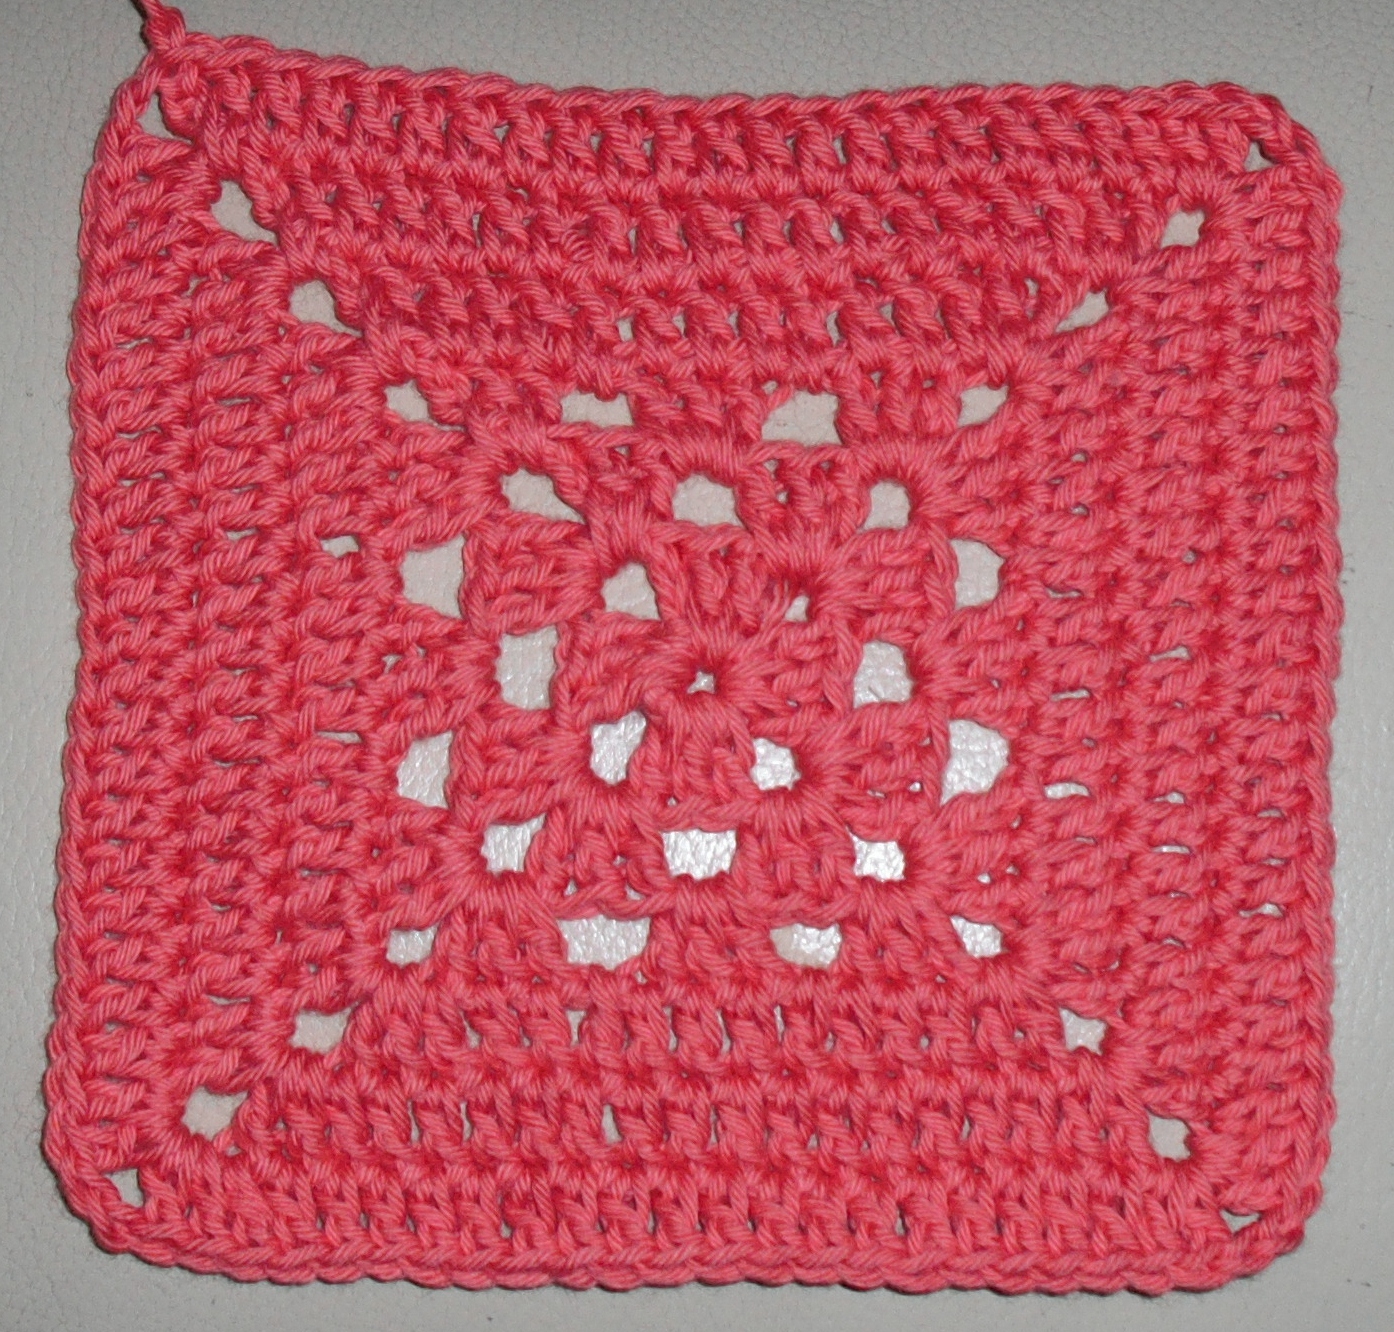
This is the third motif design, I am making 10, 2 in each of my chosen colours.
I call it the GRANNY 3 MOTIF:
Granny 3 motif
Foundation: Make a 4ch foundation ch and join into a ring with a ss
Round 1: 5ch (counts as 1tr, 2ch), (3tr, 2ch) 3 times into the ring, 2tr into the ring, join to 3rd st of first 5ch with a ss.
Round 2: ss into 2ch-sp, (note for this and each subsequent round: this ss is to position the start of the round in the right place) 5ch (counts as 1tr, 2ch), (3tr, 1ch) into the same 2ch-sp, (3tr, 2ch, 3tr, 1ch) into each of the next three 2ch-sps, 2tr into the first 2ch-sp, join to 3rd st of starting 5ch with a ss.
Round 3: ss into 2ch-sp, 5ch (counts as 1tr, 2ch), (3tr, 1ch) into the same 2ch-sp, *(3tr, 1ch) into the next 1ch-sp, (3tr, 2ch, 3tr, 1ch) into the next 2ch-sp; repeat from * another 2 times, (3tr, 1ch) into the next 1ch-sp, 2tr into the first 2ch-sp, join to 3rd st of starting 5ch with a ss.
Round 4: ss into 2ch-sp, 5ch (counts as 1tr, 2ch), 2tr into the same 2ch-sp, 1tr into each tr and 1ch-sp along each side and (2tr, 2ch, 2tr) in each 2ch-sp on the corners, finish with 1tr in the first 2ch-sp and join to 3rd ch from start with a ss. You should have 15tr along each side and 2ch in each corner of your motif.
Round 5: ss into 2ch-sp, 5ch (counts as 1tr, 2ch), 2tr into the same 2ch-sp, 1tr into each tr along each side and (2tr, 2ch, 2tr) in each 2ch-sp on the corner, finish with 1tr in the first 2ch-sp and join to 3rd ch from start with a ss. You should have 19tr along each side and 2ch in each corner of your motif.
Round 6: Repeat Round 5. You should have 23tr along each side and 2ch in each corner of your motif.
Break yarn and fasten off leaving a long tail about 3m long for sewing or crocheting together later.
Tomorrow, yes so soon, I will publish the last 2 motifs. I know some of you are powering away with your hooks, I can see the smoke from here! And those of you who haven’t progressed as quickly may like a little variety.
On Wednesday I will share my 2 proposals for layout, suggestions on how to join and my little embellishment.
And on Friday I will give you ideas on edging – mine will be simple.
As always, how you finish your blanket will be up to you, so all my ideas are only here to help inspire you. I love seeing variations, so please feel free to adapt as you like.
Please share your progress on the discussion thread on my Ravelry Group here.
Happy crocheting xxx
Now for the legal stuff – I designed this, it’s all my own work and is copyright. Please feel free to make as many as you like, but not for commercial purposes, and please credit me with the design. Thank you!
How are you all doing? Did you finish the motifs from part 1?
I didn’t do too much yesterday, I was far too busy eating and drinking! But I did have a flash of inspiration after all that excess, a little embellishment for the blanket – so this will be included in one of next week’s updates.
I have seen some progress on Ravelry, and I know some of you have completed 9 squares and therefore must be ready for this instalment. So here it is:
First a reminder of the ABBREVIATIONS:
The pattern is written in English crochet terms.
St = stitch
Ch = chain
Tr = treble (US dc)
Ss = slip stitch
Sp = space
Ch-sp =chain space
This is the second motif design, I am making 10, 2 in each of my chosen colours. I call it the FULL MOTIF 1:
FULL MOTIF 1
Foundation: Make a 4ch foundation ch and join into a ring with a ss
Round 1: 5ch (counts as 1tr, 2ch), (3tr, 2ch) 3 times into the ring, 2tr into the ring, join to 3rd st of first 5ch with a ss.
Round 2: ss into 2ch-sp, (note for this and each subsequent round: this ss is to position the start of the round in the right place) 5ch (counts as 1tr, 2ch), 2tr into the same 2ch-sp, 1tr into each tr along each side and (2tr, 2ch, 2tr) in each 2ch-sp on the corner, finish with 1tr in the first 2ch-sp and join to 3rd ch from start with a ss. You should have 7tr along each side and 2ch in each corner of your motif.
Rounds 3 to 6: Repeat Round 2. The number of tr along each side increases by 4 with each round. So after Round 3 you have 11tr, after Round 4 you have 15tr, after Round 5 you have 19tr and after Round 6 you have 23tr.
Break yarn and fasten off leaving a long tail about 3m long for sewing or crocheting together later.
Please share your progress on the discussion thread on my Ravelry Group here.
Stay tuned for the next instalment, which I aim to publish on Sunday……..
Happy crocheting xxx
Now for the legal stuff – I designed this, it’s all my own work and is copyright. Please feel free to make as many as you like, but not for commercial purposes, and please credit me with the design. Thank you!
I’ve done all my shopping and only have a few pre-Christmas chores to do before I can relax……..well almost, maybe total relaxation will arrive after the dinner is cooked tomorrow!
When your chores are done, pull up a chair, get yourself a glass of something good (with or without alcohol), have a few nibbles in a dish handy for when you feel peckish and ….put your feet up.
Did I forget something? Ah, yes – grab your crochet hook and a basket of yarn because I’d love you to join me in this Christmas CAL. It should be an easy relaxing project, perfectly manageable for this season.
I’m making a lap blanket and here are the details to get you started:
SIZE
The lap blanket I am making will be 7 motifs square – a total of 49 motifs. The blanket will be about 1m/42in square without border, because I haven’t designed a border yet, and I may have to find some more yarn for that!
YARN
I am using Stylecraft Cotton Classique DK yarn, 100g/184m per ball. I estimate I’ll need about 10 balls.
HOOK
I am using a 4mm crochet hook (US G/6)
MOTIF/TENSION
The motifs are square and each motif is approx. 15cm/6in square.
ADAPTABILITY
You can use any yarn you like, as long as you use a suitable hook size. And you can make it to any size you like. It is a perfect stash buster.
COLOUR SCHEME
I am using 5 colours, and each motif is one colour. But you could use as many colours as you like and change colour each round if you like.
These are my colours.
Christmas CAL colours
So here we go:
ABBREVIATIONS
The pattern is written in English crochet terms.
St = stitch
Ch = chain
Tr = treble (US dc)
Ss = slip stitch
Sp = space
Ch-sp =chain space
The first motif is based on the standard granny square, so you should be able to tackle this easily.
GRANNY 5 MOTIF (I am making 9, 2 in each in 4 of my chosen colours and 1 in the last colour)
GRANNY 5 MOTIF
Foundation: Make a 4ch foundation ch and join into a ring with a ss
Round 1: 5ch (counts as 1tr, 2ch), (3tr, 2ch) 3 times into the ring, 2tr into the ring, join to 3rd st of starting 5ch with a ss.
Round 2: ss into 2ch-sp, (note for this and each subsequent round: this ss is to position the start of the round in the right place) 5ch (counts as 1tr, 2ch), (3tr, 1ch) into the same 2ch-sp, (3tr, 2ch, 3tr, 1ch) into each of the next three 2ch-sps, 2tr into the first 2ch-sp, join to 3rd st of starting 5ch with a ss.
Round 3: ss into 2ch-sp, 5ch (counts as 1tr, 2ch), (3tr, 1ch) into the same 2ch-sp, *(3tr, 1ch) into the next 1ch-sp, (3tr, 2ch, 3tr, 1ch) into the next 2ch-sp; repeat from * another 2 times (3tr, 1ch) into the next 1ch-sp, 2tr into the first 2ch-sp, join to 3rd st of starting 5ch with a ss.
Round 4: ss into 2ch-sp, 5ch (counts as 1tr, 2ch), (3tr, 1ch) into the same 2ch-sp, *(3tr, 1ch) into each of the next two 1ch-sps, (3tr, 2ch, 3tr, 1ch) into the next 2ch-sp; repeat from * another 2 times (3tr, 1ch) into each of the next two 1ch-sps, 2tr in the first 2ch-sp, join to 3rd st of starting 5ch with a ss.
Round 5: ss into 2ch-sp, 5ch (counts as 1tr, 2ch), (3tr, 1ch) into the same 2ch-sp, *(3tr, 1ch) into each of the next three 1ch-sps, (3tr, 2ch, 3tr, 1ch) into the next 2ch-sp; repeat from * another 2 times (3tr, 1ch) into each of the next three 1ch-sps, 2tr into the 1st 2ch-sp, join to 3rd st of starting 5ch with a ss.
Round 6: ss into 2ch-sp, 5ch (counts as 1tr, 2ch), 2tr into the same 2ch-sp, 1tr into each tr and 1ch-sp along each side and (2tr, 2ch, 2tr) into each 2ch-sp on the corners, finish with 1tr in the first 2ch-sp and join to 3rd ch from start with a ss.
Break yarn and fasten off, leaving a long tail of about 3m for sewing or crocheting together later.
You should have 23tr along each side and 2ch in each corner of your motif.
I have a discussion thread on my Ravelry Group here. Please join in and share your progress or, if you prefer, add comments on this blog.
Stay tuned for the next motif pattern, which I aim to publish on Friday…..or is that too soon?
Merry Christmas xx
Now for the legal stuff – I designed this, it’s all my own work and is copyright. Please feel free to make as many as you like, but not for commercial purposes, and please credit me with the design. Thank you!
…..and I haven’t written a full blog in almost 2 weeks! So first I must apologise to my readers for being so quiet.
As well as being busy preparing for Christmas, I have also been thinking hard about my designs and how I sell them from next year. This is all due to a change in legislation relating to EU VAT. Aimed at making large tax-avoiding companies pay VAT, it has hit also a huge number of small businesses who sell digital downloads, whether crochet patterns, music or a multitude of other digital downloads or PDFs. The legislation has been in the wind for 6 years but hasn’t been widely marketed because the legislators did not realise just how many micro businesses there are that operate in the digital world. And yes, that includes me! I will not bore you with the details, but from 1st January 2015 I will be limiting my pattern sales to a few websites – definitely Ravelry and also Loveknitting.
Meanwhile the good things that have happened in the last few weeks:
I published my last crochet scarf design of 2014 on 1st December, the culmination of a year of scarf designs. I called this one The Starflower Scarf for obvious reasons:
Starflower Crochet Scarf
I used lots of oddments of gorgeous silk yarns from Willow Knits.
Also, I compiled all 12 designs from my monthly challenge into one ebook – My Year of Scarves.
My Year of Scarves
I can’t express just how good it felt when I pushed the button to publish this. I never expected I would last the whole year on this personal challenge but I did!
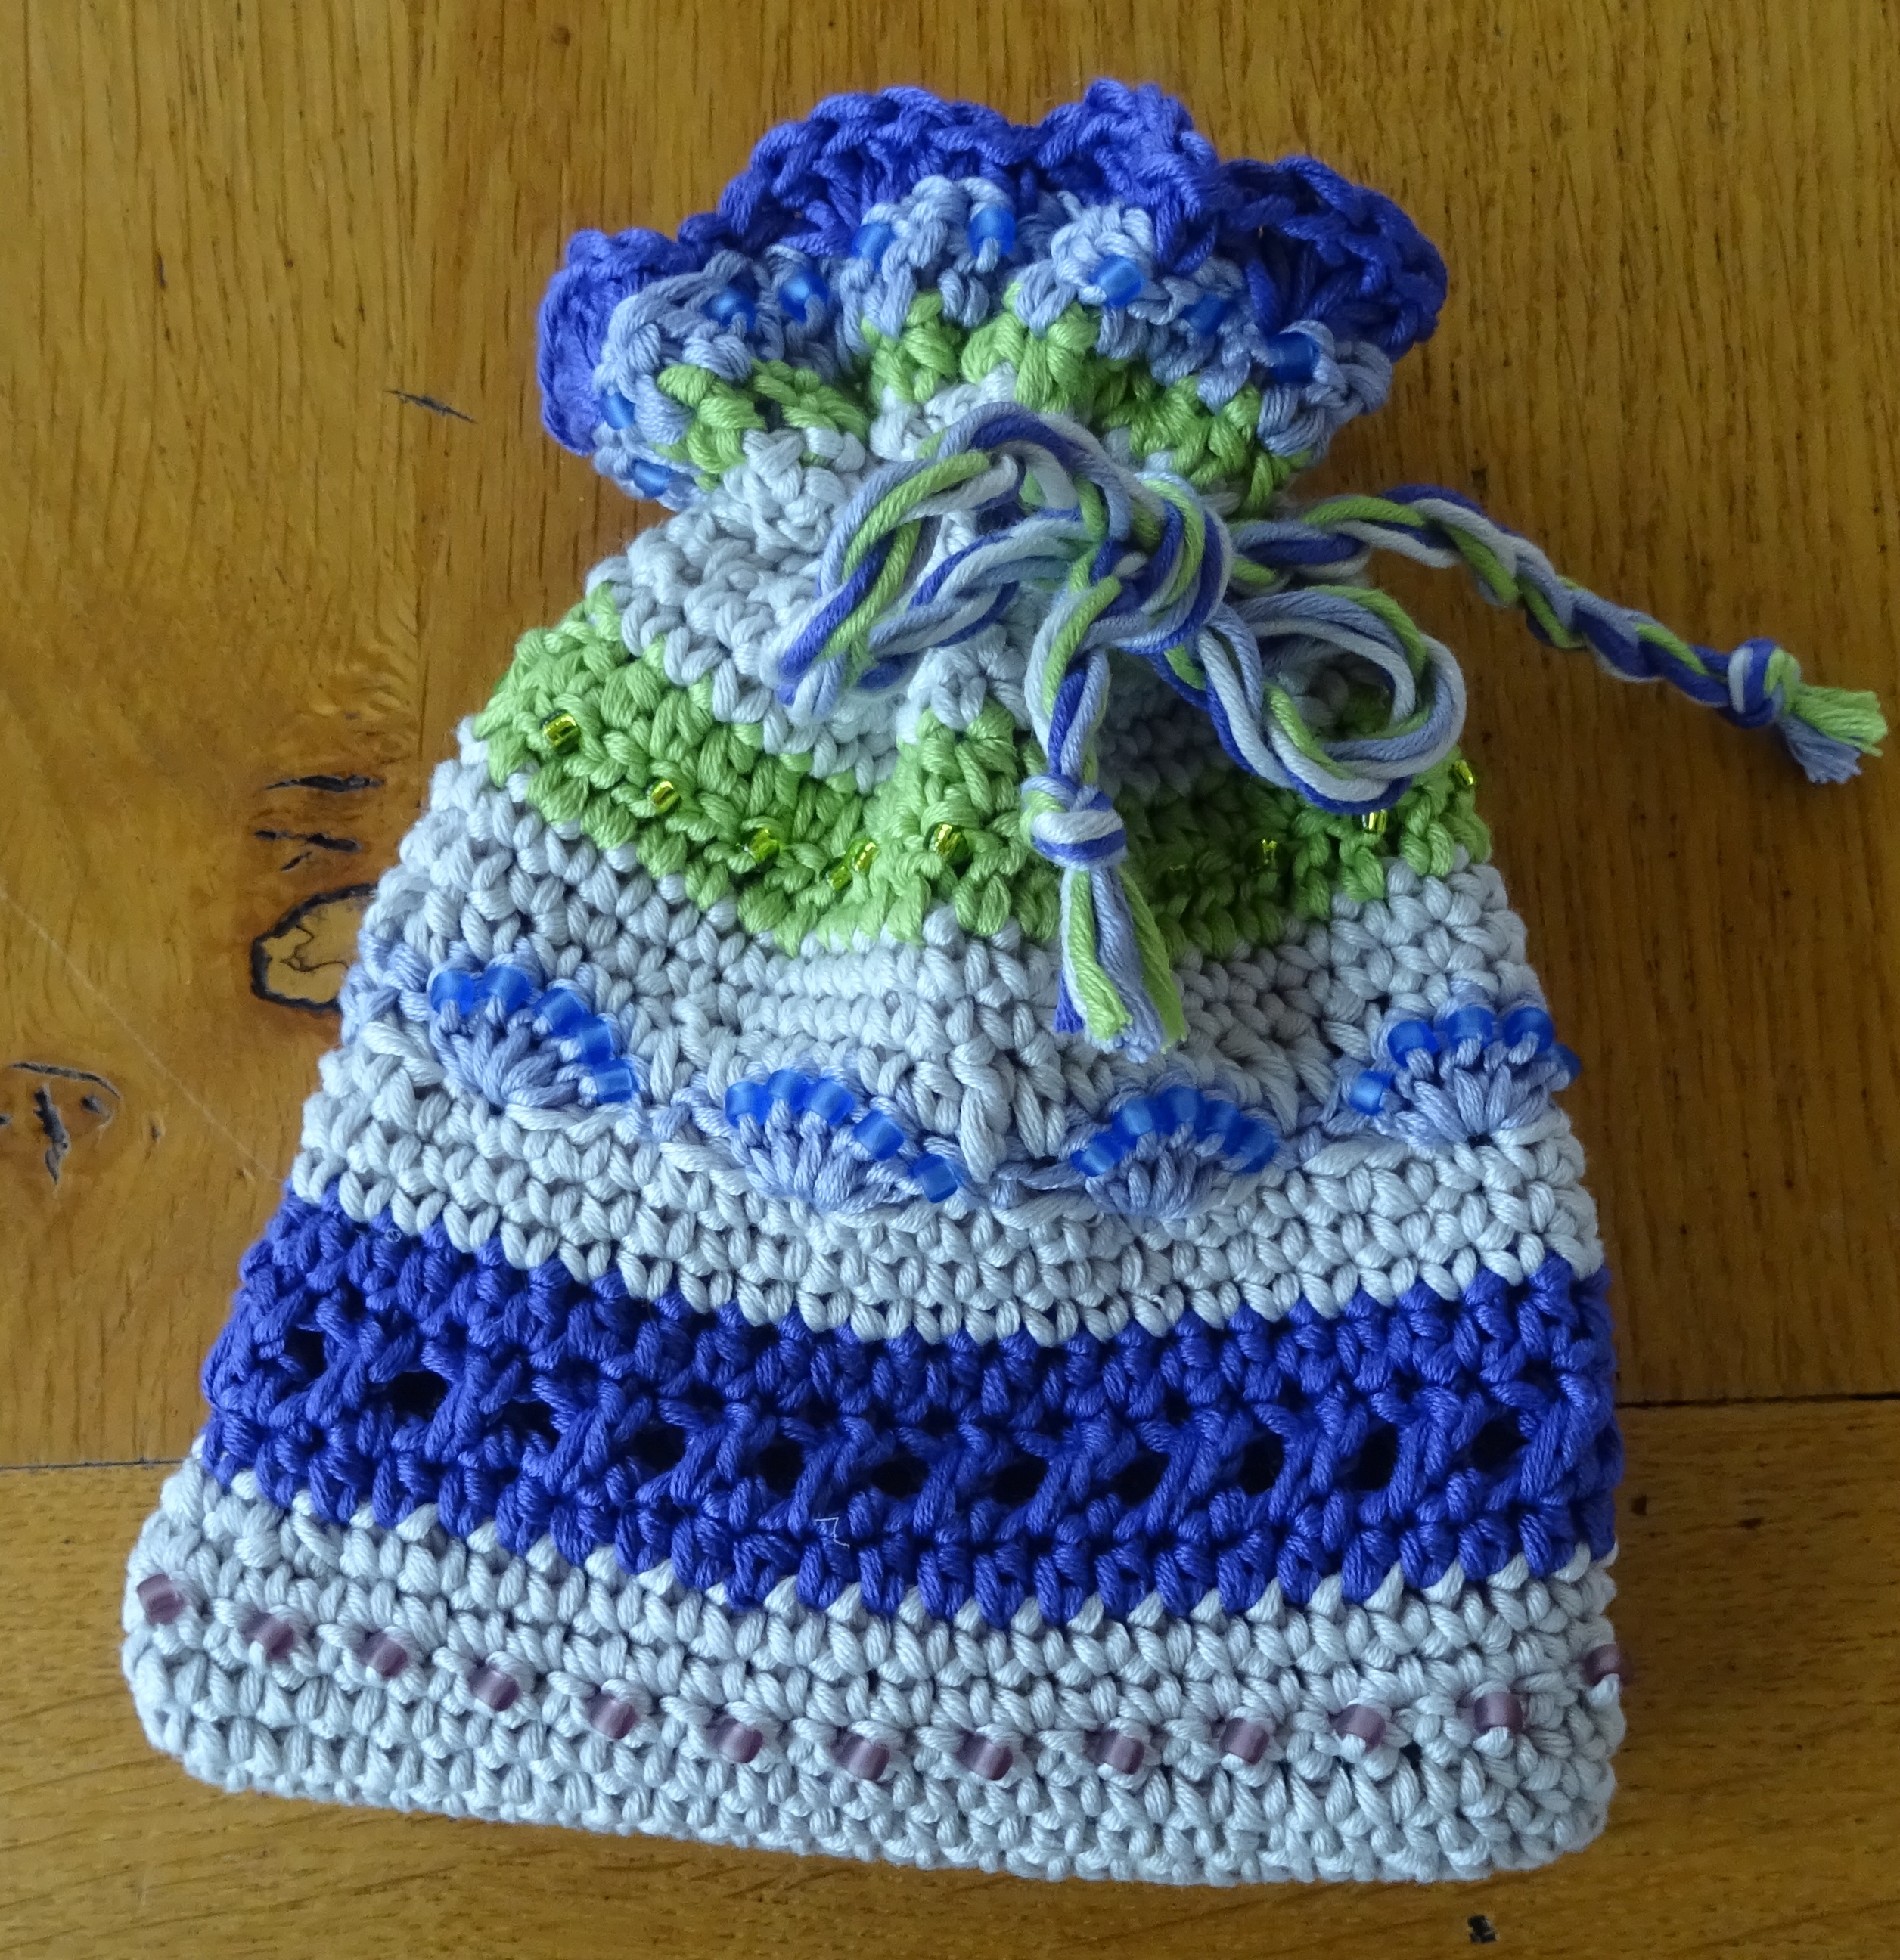
Remember the beaded crochet pouch that featured at the Buxton Knitaway? Well that has been published also.
Crochet pouch
So I am ready for a relaxing Christmas season, but if course it will always feature some making. I have a design I need to finish but it requires concentration, which may not be readily available during the holiday season! So I have decided to make a straightforward lap blanket, something that will flow quickly and easily off the hook, and doesn’t need too much concentration. This is designed (in my head) and will be started soon…..do you fancy joining me in a seasonal CAL? Some easy quick crochet, perfectly suitable for the holidaytime, great as a stash buster…….if you are up for it, then I will publish the pattern in parts on this blog over the festive season, starting on Christmas Eve. The pattern will be written as the design comes out of my head, so you will be crocheting along with me. It should be fun 🙂
A crochet blog where you will find free crochet patterns along with oodles of crochet inspiration. Featured in top 100 crochet blogs and also in Crochet Now Magazine