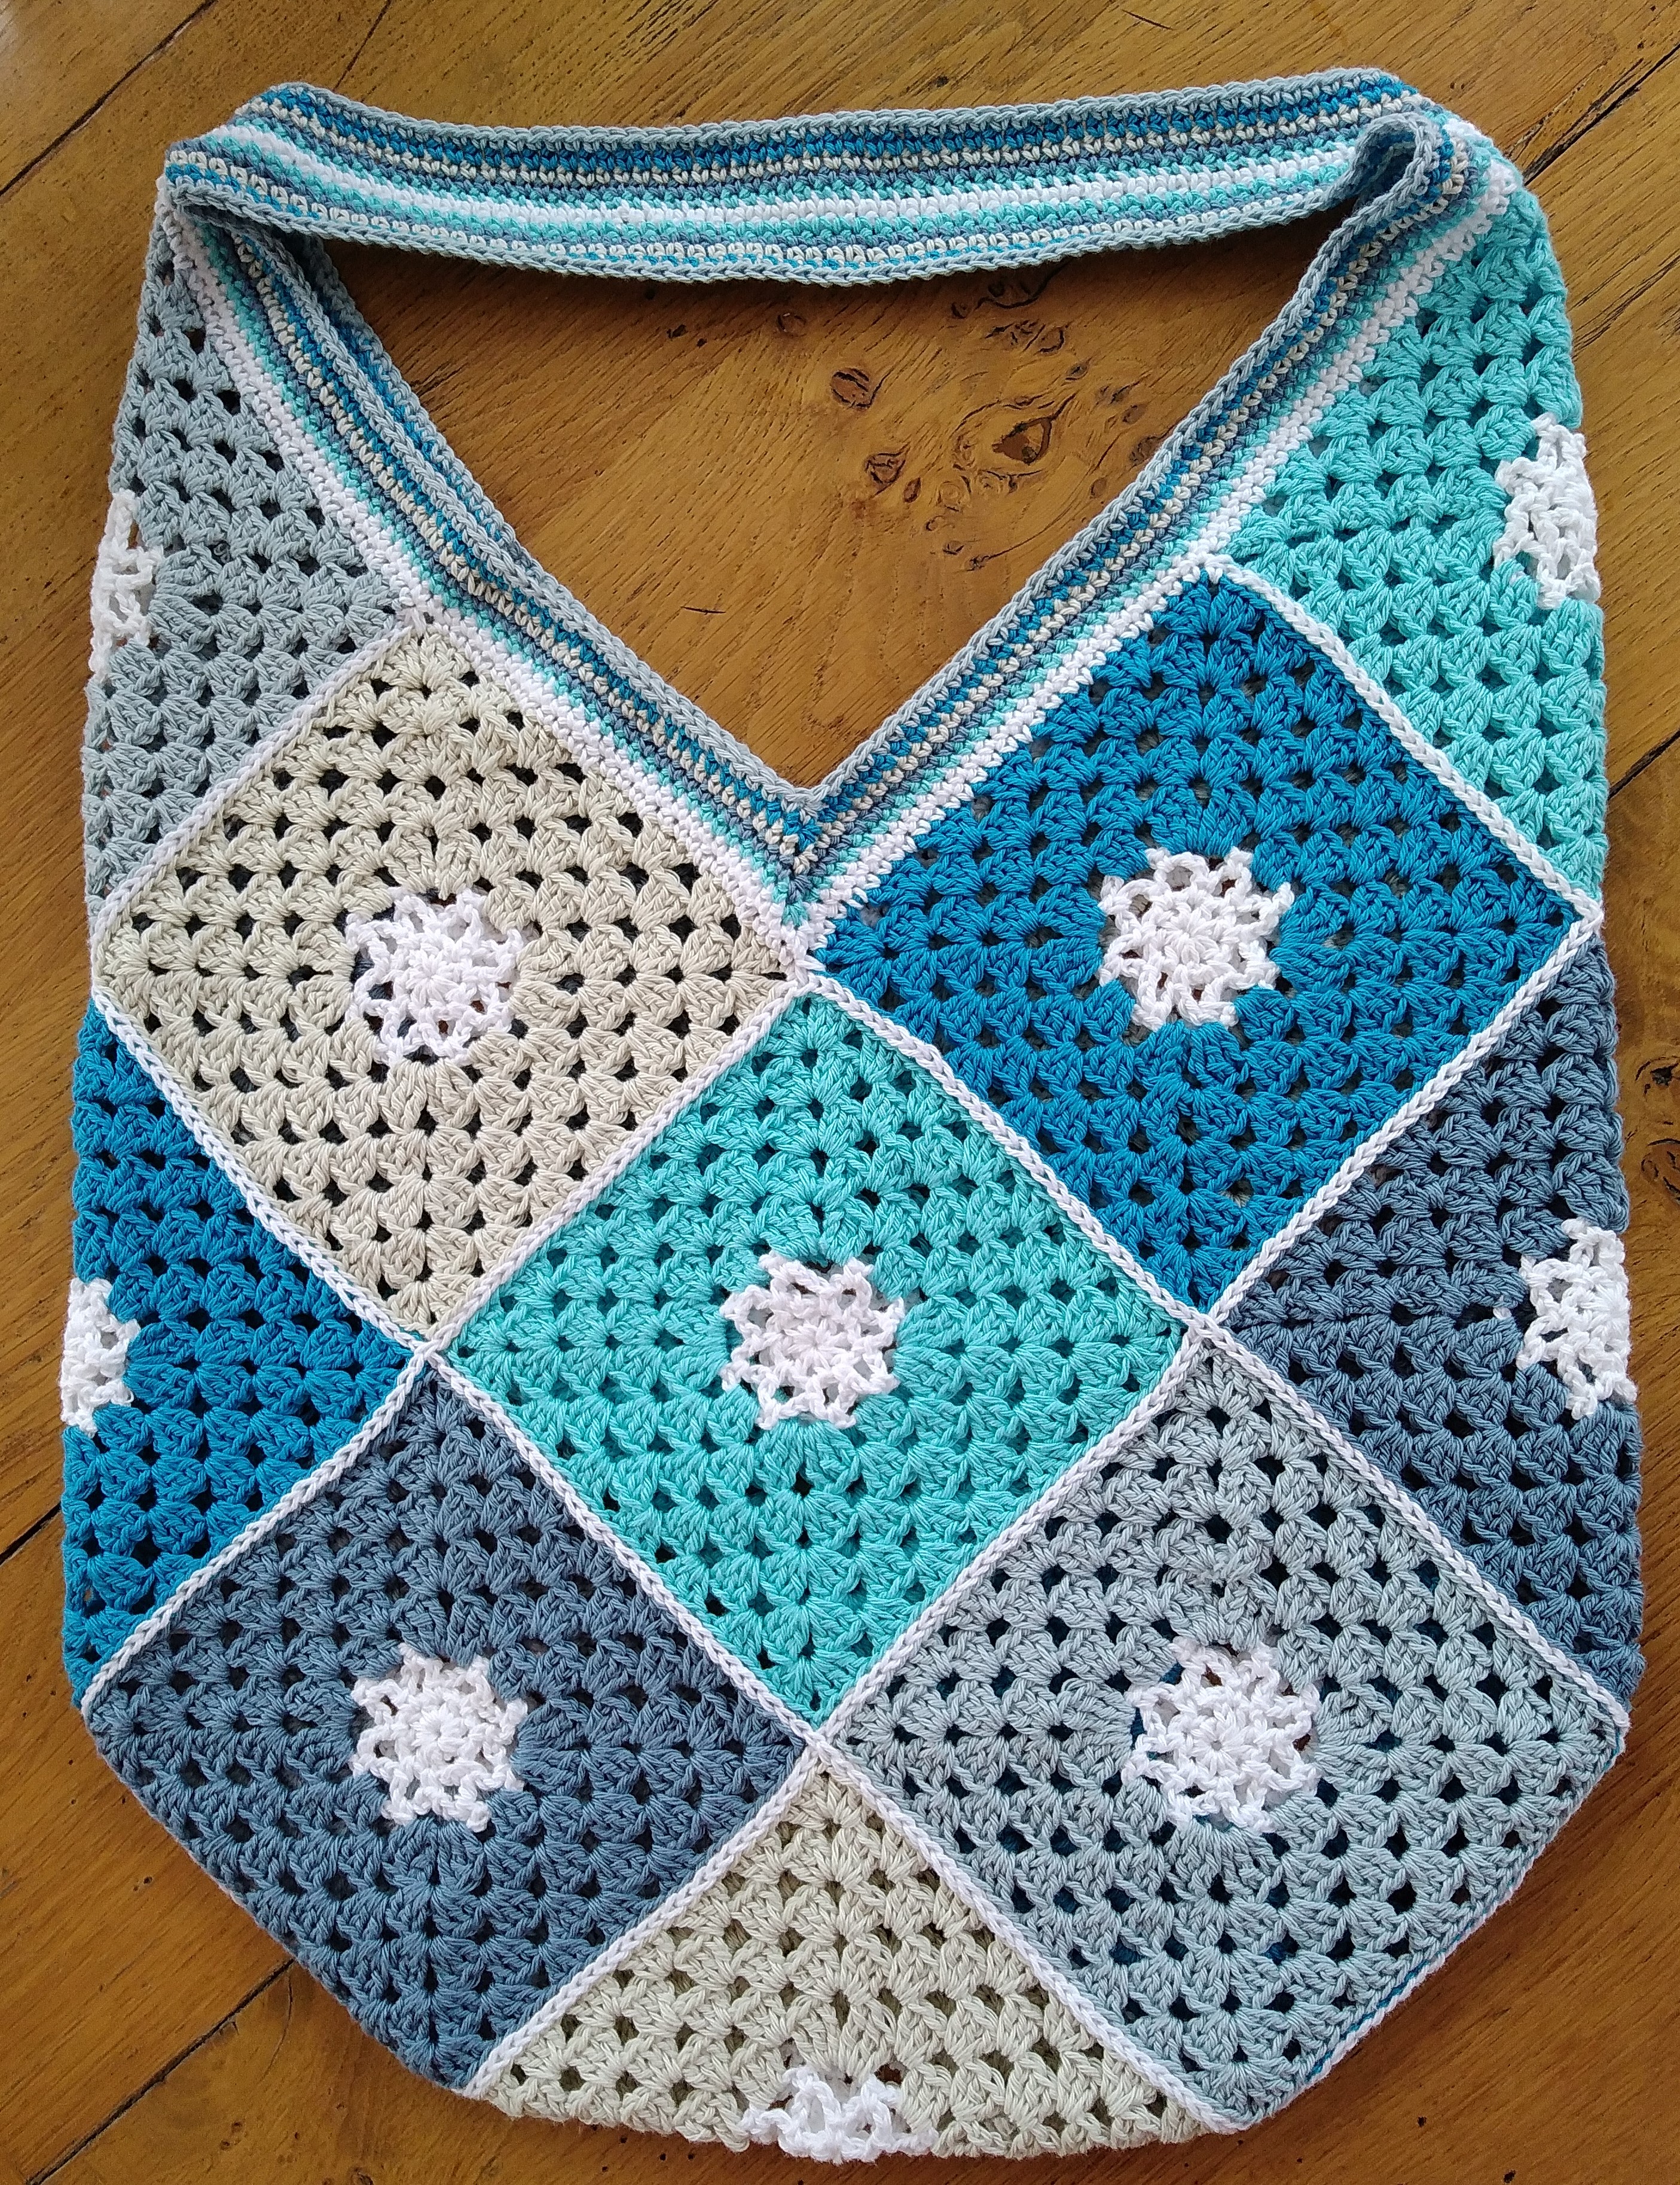
This week I’m going to show you how to turn the motifs into the bag shape. Here’s a reminder of the bag, so you know the shape you are aiming for:
First you need to block the motifs, if you haven’t already done so. If you leave it until you finish the bag you may find it a bit tricky.
Then you need to decide how you are going to join them. I recommend joining in one of these 4 ways:
By slip stitch holding the motifs right sides together, as I did for the Christmas CAL here.
By double crochet (US single crochet) holding the motifs wrong sides together.
By sewing.
By slip stitch holding the motifs side by side, this is the method I used and I worked into the back stitch only. You may find this a bit tricky if you haven’t done it before, but I think it gives a good effect and is worth that extra effort. This shows you the technique:
Slip stitch side by side back loops only
I joined my bag using the same yarn that I used for the centres of my motifs – White. This is how the joins look:
To form the bag shape you need to join them in a particular order. And I have illustrated this in the following diagrams:
The final part next week will show you how I finished the bag and made the handle.
I would love to see what you make. Join in the discussion on Facebook or Ravelry.
Welcome to Part 1 of the Beach Blues Bag CAL. One thing I didn’t mention last week was that I started this bag to use up some of my cotton left over from a CAL I did last year run by Black Sheep Wools – the Folklore Jewels CAL. I chose the Pastel colour pack but I love blue, so I replaced some of the colours with more blue! This did mean I had quite a few shades of blue cotton left over and wanted to use all of them. So I now have bag and jewellery to match, perfect for the beach!
Are you ready to start the CAL?
You will need 15 square motifs, each about 13cm/5¼” square. My motif has an open flower centre for the first 3 rounds, which I did in White and is then squared off and finished with granny rounds in a different colour. You could do more granny rounds to make larger squares and then a larger bag if you like. My bag is approx 36cm/14½” wide and 45cm/18” high when laid flat, excluding handle.
If you are using different weight of yarn you may wish to do fewer or more granny rounds and, of course, you may choose any colour scheme you want.
ABBREVIATIONS The pattern is written in UK crochet terms.
St(s) = stitch(es)
Sp(s) = space(s)
Ch = chain
Ch-sp(s) = chain space(s)
Ss = slip stitch
Htr = half treble
Dc = double crochet
Tr = treble
Dtr = double treble
PATTERN
Make 15 motifs. All 15 motifs I made have White for the first 3 rounds and for the other rounds (Rounds 4 to 8) I made 3 each of the other 5 colours.
Foundation: Using White, make a 4ch foundation ch and join into a ring with a ss
Round 1: 3ch (counts as 1htr, 1ch), (1htr, 1ch) 7 times into ring, join to 2nd st of original 3ch with a ss. (8 1ch-sps)
Round 2: ss into 1ch-sp, 1ch (does not count as st), 1dc in same 1ch-sp, 5ch, (1dc in next 1ch-sp, 5ch) 6 times, 1dc in next 1ch-sp, 2ch, 1tr into 1st dc (forming last 5ch-sp). (8 5ch-sps)
Round 3: 1ch (does not count as st), 1dc in same 5ch-sp, 4ch, (1dc in next 5ch-sp, 4ch) 7 times, ss to 1st dc to join. (8 4ch-sps)
Round 4: join new colour into any 4ch-sp, 6ch (counts as 1dtr, 2ch), (2dtr, 1tr, 1ch) in same 4ch-sp, *(3tr, 1ch) in next 4ch-sp, (1tr, 2dtr, 2ch, 2dtr, 1tr, 1ch) in next 4ch-sp; rep from * twice more, (3tr, 1ch) in next 4ch-sp, (1tr, 1dtr) in first 4ch-sp, join to 4th st of starting 6ch with a ss.
Round 5: ss into 2ch-sp, (note for this and each subsequent round: this ss is to position the start of the round in the right place) 5ch (counts as 1tr, 2ch), (3tr, 1ch) into the same 2ch-sp, *(3tr, 1ch) into each of the next two 1ch-sps, (3tr, 2ch, 3tr, 1ch) into the next 2ch-sp; repeat from * another 2 times, (3tr, 1ch) into each of the next two 1ch-sps, 2tr in the first 2ch-sp, join to 3rd st of starting 5ch with a ss.
Round 6: ss into 2ch-sp, 5ch (counts as 1tr, 2ch), (3tr, 1ch) into the same 2ch-sp, *(3tr, 1ch) into each of the next three 1ch-sps, (3tr, 2ch, 3tr, 1ch) into the next 2ch-sp; repeat from * another 2 times (3tr, 1ch) into each of the next three 1ch-sps, 2tr into the 1st 2ch-sp, join to 3rd st of starting 5ch with a ss.
Round 7: ss into 2ch-sp, 5ch (counts as 1tr, 2ch), (3tr, 1ch) into the same 2ch-sp, *(3tr, 1ch) into each of the next four 1ch-sps, (3tr, 2ch, 3tr, 1ch) into the next 2ch-sp; repeat from * another 2 times (3tr, 1ch) into each of the next four 1ch-sps, 2tr into the 1st 2ch-sp, join to 3rd st of starting 5ch with a ss.
Round 8: ss into 2ch-sp, 5ch (counts as 1tr, 2ch), (3tr, 1ch) into the same 2ch-sp, *(3tr, 1ch) into each of the next five 1ch-sps, (3tr, 2ch, 3tr, 1ch) into the next 2ch-sp; repeat from * another 2 times (3tr, 1ch) into each of the next five 1ch-sps, 2tr into the 1st 2ch-sp, join to 3rd st of starting 5ch with a ss.
Break yarn and fasten off.
The motifs will benefit from a gentle blocking before they are joined. And joining is the next part, which I’ll publish in a week.
I have a Facebook page and a discussion thread on my Ravelry Group here. Please join in and share your progress.
Time has flown. It seems like yesterday when this CAL started yet here we are at the final stage. Part 6 is the border. This is one of my favourite borders, simple, relaxing and very effective.
The pattern here is written in UK crochet terms and these are the abbreviations used
st(s) stitch(es)
ch ch
dc double crochet
htr half treble
htr3tog half treble 3 sts together
ss slip stitch
ch-sp chain space
The first round of the border is best in the same colour as your joining round. Thereafter, you can use your scrap yarns. I used about 12g/48m for Round 1 and I found each Round from 2 to 9 took between 8g/32m and 10g/40m of yarn. I finished with a final round in the same mid grey as the joining.
Round 1: join yarn in any 3ch-sp in corner, 1ch (does not count as st), work sts in this round as follows:
(2dc, 1ch, 2dc) in each 3ch-sp,
1dc in each st,
2dc in each 2ch-sp,
htr3tog across the join (placing the first leg of the st in the space before the join, the second leg in the join and the third leg in the space after the join)
ss to 1st dc to join, break yarn and fasten off.
You will have an odd number of sts on each side of the blanket and a 1ch-sp in each corner.
Round 2: join yarn in any 1ch-sp in corner, 1ch (does not count as st),
**(1dc, 1ch, 1dc) in 1ch-sp, 1ch, miss 1 st, *1dc in next st, 1ch, miss 1 st; repeat from * until next 1ch-sp in corner then repeat from ** along each side, ss to 1st dc to join, break yarn and fasten off.
Round 3: join yarn in any 1ch-sp in corner, 1ch (does not count as st),
*(1dc, 1ch, 1dc) in 1ch-sp, 1ch, (1dc, 1ch) in each 1ch-sp along the side; repeat from * to end of round, ss to 1st dc to join, break yarn and fasten off.
Rounds 4 onwards: repeat Round 3 until your border is the width you want.
I worked the last round in the same mid grey as the joining round and then finished with the final round.
Final Round: *(ss, 1htr, ss, 1htr) in 1ch-sp in corner, (ss, 1htr) in each 1ch-sp to next corner; rep from * to end of round, break yarn and fasten off.
Weave in all ends.
Don’t forget there is a paid for pattern on Ravelry which is also being released in parts and has a US crochet terms available too. It also includes some charts of the joining and the start of the border.
This is my blanket, I would love to see photos of your blankets, please share them on Facebook and Ravelry.
How did you like the ruffles last week? They are surprisingly easy to make and add some lovely texture. This week for our last circles we are adding a little lace, but I love the ruffles so much that I decided I should combine them into other circles as well!
The pattern here is written in UK crochet terms and these are the abbreviations used
st(s) stitch(es)
ch ch
dc double crochet
tr treble
htr half treble
dtr double treble
ss slip stitch
ch-sp chain space
PART 4
Circles 7 and 8 are lacy, again useful for single colour yarns. They use roughly the same amount of yarn as Circle 1.
Circle 7 – lace
Foundation: 4ch, join into a ring with a ss.
Round 1: 1ch (does not count as st), (1dc in ring, 4ch) 7 times, 1dc, 2ch, 1htr in 1st dc to join (the 2ch, 1htr forms the last 4ch-sp). [8dc, 8 4ch-sps]
Round 2: 1ch (does not count as st), (1dc in 4ch-sp at base of ch, 2ch, (1dc in next 4ch-sp, 2ch) 7 times, ss in 1st dc to join. [8dc, 8 2ch-sps]
Round 3: ss in 1st 2ch-sp, 3ch (counts as 1tr), 3tr in same 2ch-sp, 4tr in each remaining 2ch-sp around, ss in 3rd ch from start to join. [32tr]
Round 4: 1ch (does not count as st), 1dc in sp before 1st tr, 5ch, (1dc in next sp between 2 groups of 4tr, 5ch) 6 times, 1dc in next sp between groups of 4tr, 2ch, 1tr in 1st dc to join (the 2ch, 1tr forms the last 5ch-sp). [8dc, 8 5ch-sps]
Round 5: 1ch (does not count as st), (1dc in 5ch-sp at base of ch, 5ch, (1dc in next 5ch-sp, 5ch) 7 times, ss in 1st dc to join. [8dc, 8 5ch-sps]
Round 6: 4ch (counts as 1dtr), 7tr in next 5ch-sp, *1dtr in next dc, 7tr in next 5ch-sp; rep from * to end of round, ss in 4th ch from start to join, break yarn and fasten off. [56tr, 8dtr]
I made 14 of Circle 7 for my blanket.
Circle 8 – just a little lace
Foundation: 4ch, join into a ring with a ss.
Round 1: 1ch (does not count as st), (1dc in ring, 4ch) 7 times, 1dc, 2ch, 1htr in 1st dc to join (the 2ch, 1htr forms the last 4ch-sp). [8dc, 8 4ch-sps]
Round 2: 1ch (does not count as st), (1dc in 4ch-sp at base of ch, 2ch, (1dc in next 4ch-sp, 2ch) 7 times, ss in 1st dc to join. [8dc, 8 2ch-sps]
Round 3: ss in 1st 2ch-sp, 3ch (counts as 1tr), 3tr in same 2ch-sp, 4tr in each remaining 2ch-sp around, ss in 3rd ch from start to join. [32tr]
Round 4: 3ch (counts as 1tr), 2tr in next st, *1tr in next st, 2tr in next st; rep from * to end of round, ss in 3rd ch from start to join. [48tr]
Round 5: 3ch (counts as 1tr), 1tr in next st, 2tr in next st, *1tr in each of next 2 sts, 2tr in next st; rep from * to end of round, ss in 3rd ch from start to join, break yarn and fasten off. [64tr]
I made 14 of Circle 8 for my blanket.
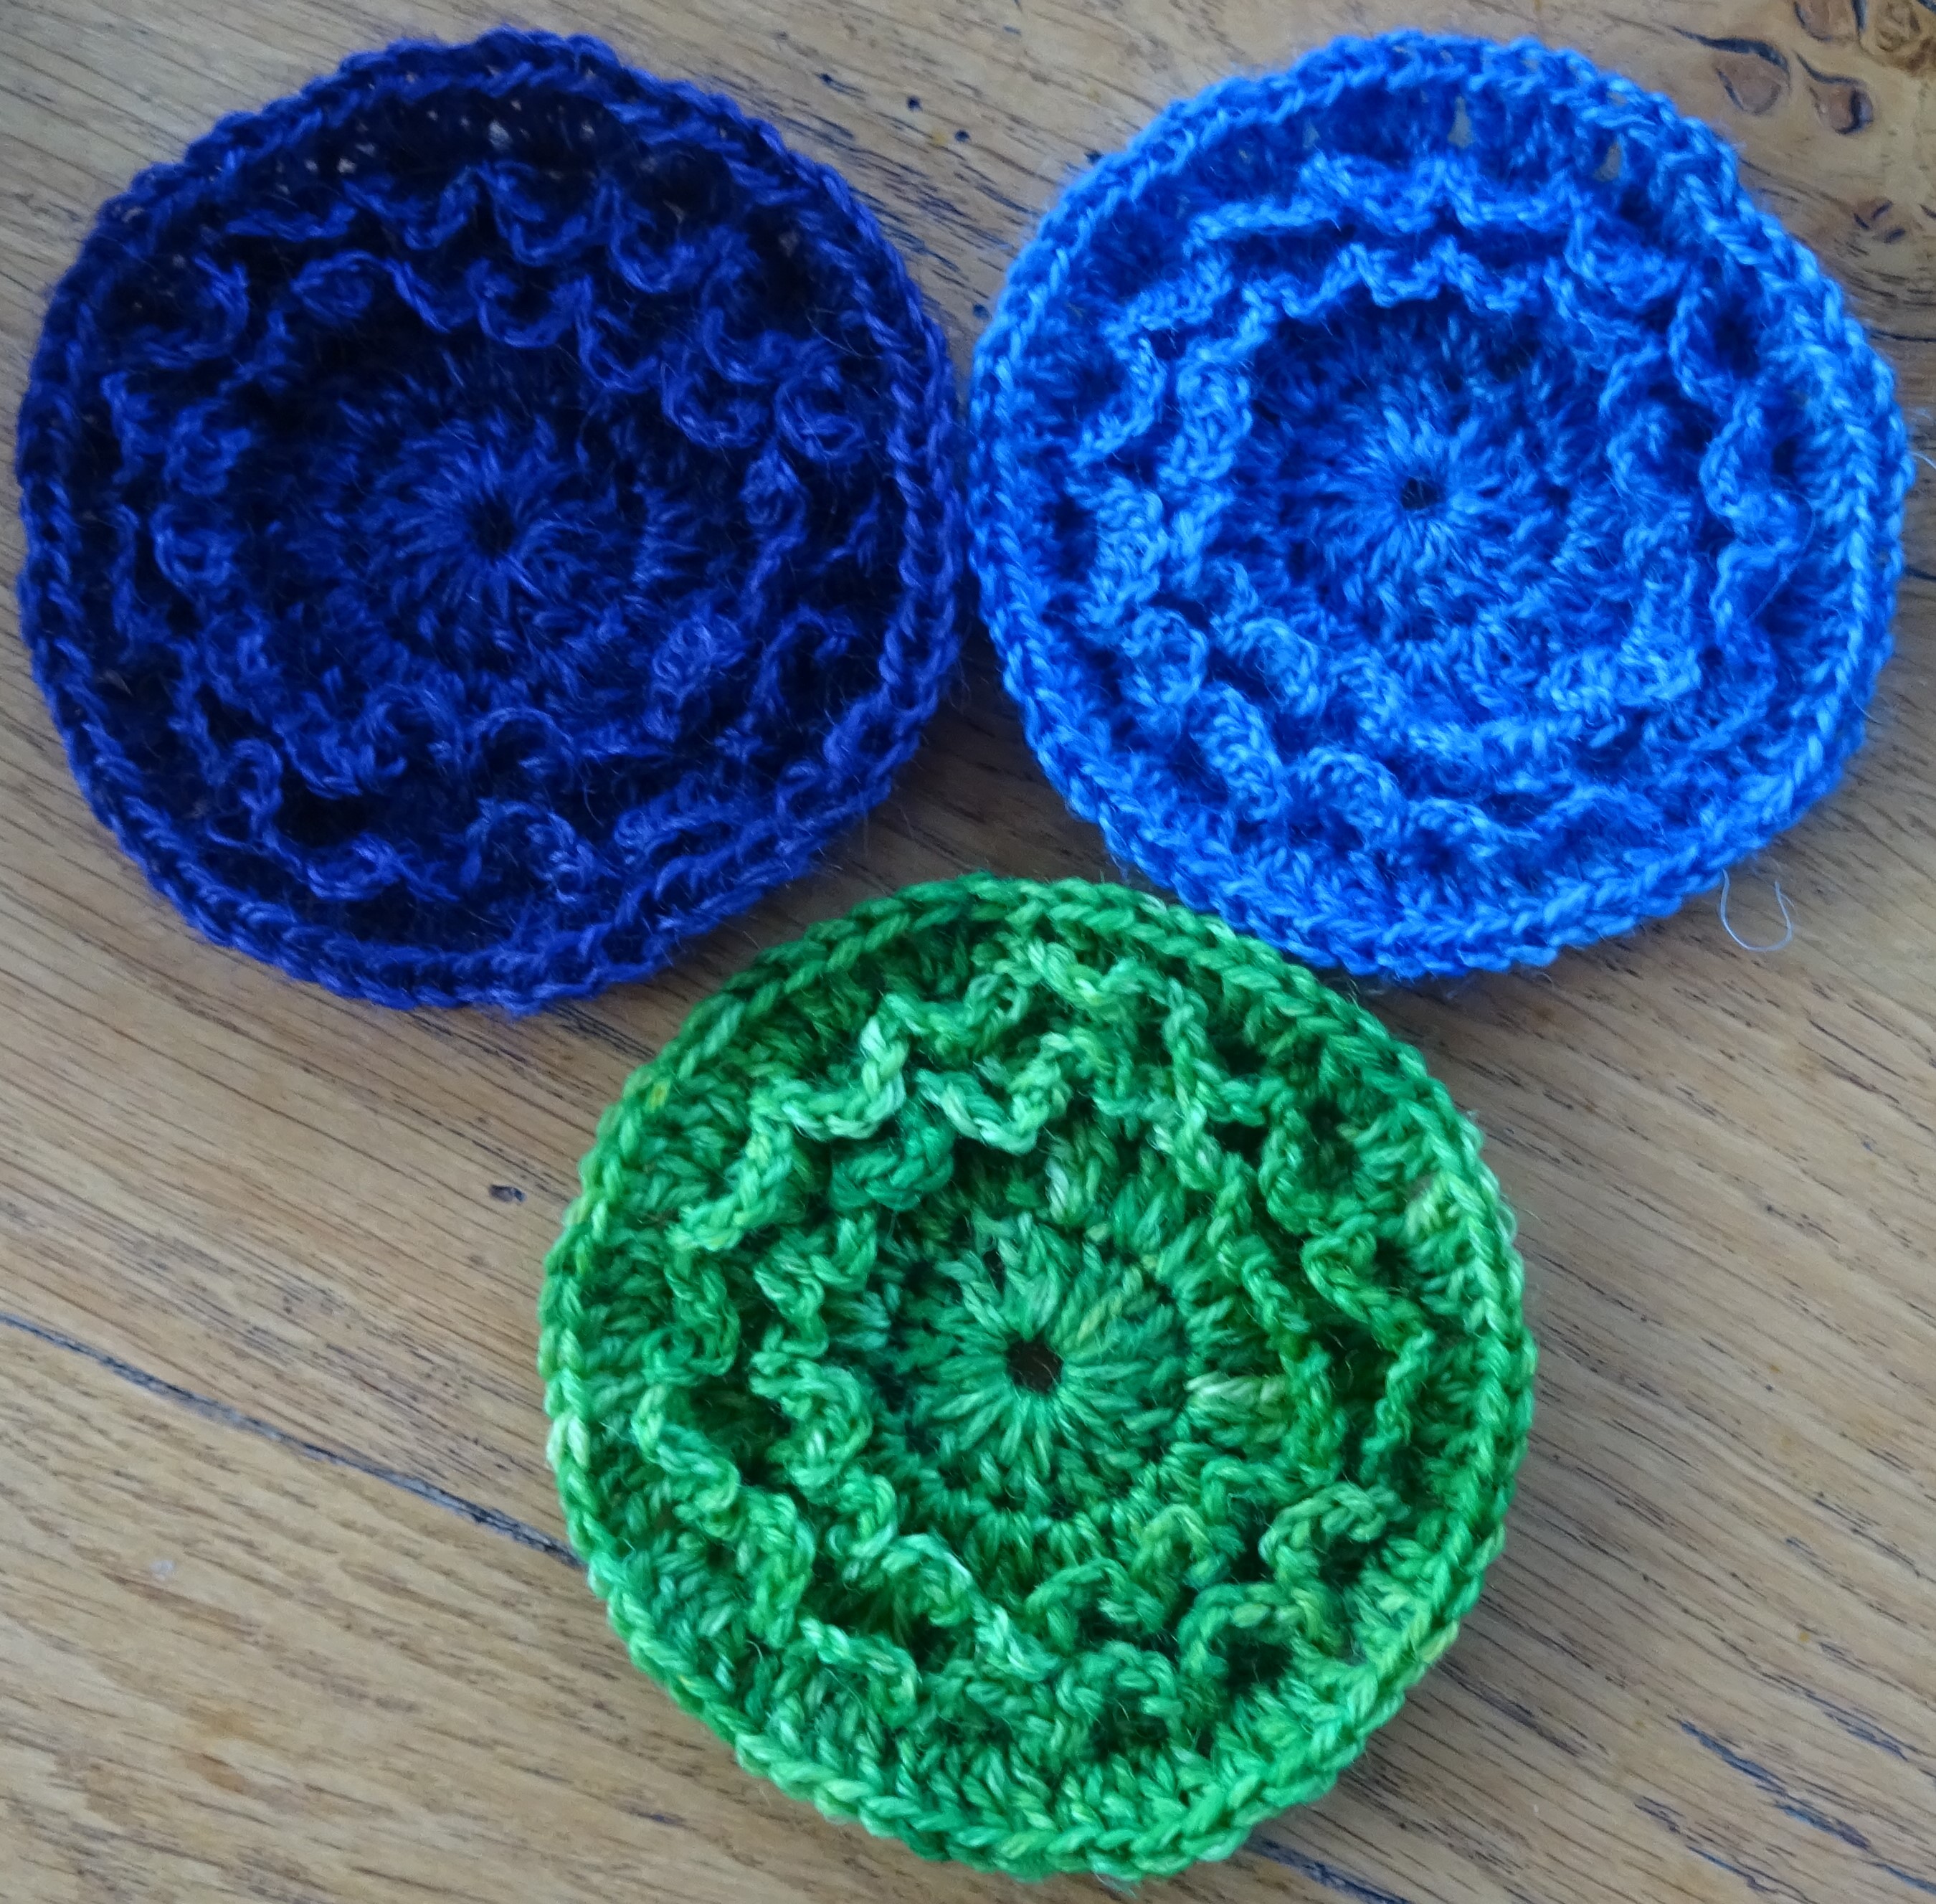
Now you have completed 8 different circles you could try combining elements from each circle to give more variation. For example, the following circle is a combination of Circle 7 and Circle 4.
Circle 9 – a little lace with a small ruffle
As shown in the motif at the bottom of the photo below.
Foundation: 4ch, join into a ring with a ss.
Round 1: 1ch (does not count as st), (1dc in ring, 4ch) 7times, 1dc, 2ch, 1htr in 1st dc to join (the 2ch, 1htr forms the last 4ch-sp). [8dc, 8 4ch-sps]
Round 2: 1ch (does not count as st), (1dc in 4ch-sp at base of ch, 2ch, (1dc in next 4ch-sp, 2ch) 7 times, ss in 1st dc to join. [8dc, 8 2ch-sps]
Round 3: ss in 1st 2ch-sp, 3ch (counts as 1tr), 3tr in same 2ch-sp, 4tr in each remaining 2ch-sp around, ss in 3rd ch from start to join. [32tr]
Round 4: 5ch (counts as 1dc, 4ch), miss 1 st, *1dc in next st, 4ch, miss 1 st; rep from * to end of round, ss in 1st ch from start to join. [16dc, 16 4ch-sps]
Round 5: work this round behind the 4ch-sps from Round 3, 1ch does not count as st, ss in 1st missed st in Round 2, 3ch (counts as 1tr), 2tr in st at base of ch, 3tr in each following missed st, ss in 3rd ch from start to join. [48tr]
Round 6: 3ch (counts as 1tr), 1tr in next st, 2tr in next st, *1tr in each of next 2 sts, 2tr in next st; rep from * to end of round, ss in 3rd ch from start to join, break yarn and fasten off. [64tr]
I made 9 different combined circles for my blanket.
Don’t forget there is a paid for pattern on Ravelry which is also being released in parts and has US crochet terms available too.
I would love to see photos of your little circles, please share them on Facebook and Ravelry. Next week it is joining!
How are you getting on with Part 2? I know some of you are still on Part 1 and I have seen even more lovely circles this week. It doesn’t matter what speed you work at, just enjoy the CAL.
So this is Part 3 and I know I shouldn’t have any favourites but these are definitely my favourite variations. They involve what I call ruffles and there are 3 different ruffle variations. They are very effective for single colour yarns. They all use more yarn than Circle 1, the small and large ruffle used about 3.5g/14m and the double ruffle used about 3.8g/15.25m.
The patterns here are written in UK crochet terms and these are the abbreviations used
st(s) stitch(es)
ch ch
dc double crochet
tr treble
ss slip stitch
ch-sp(s) chain space(s)
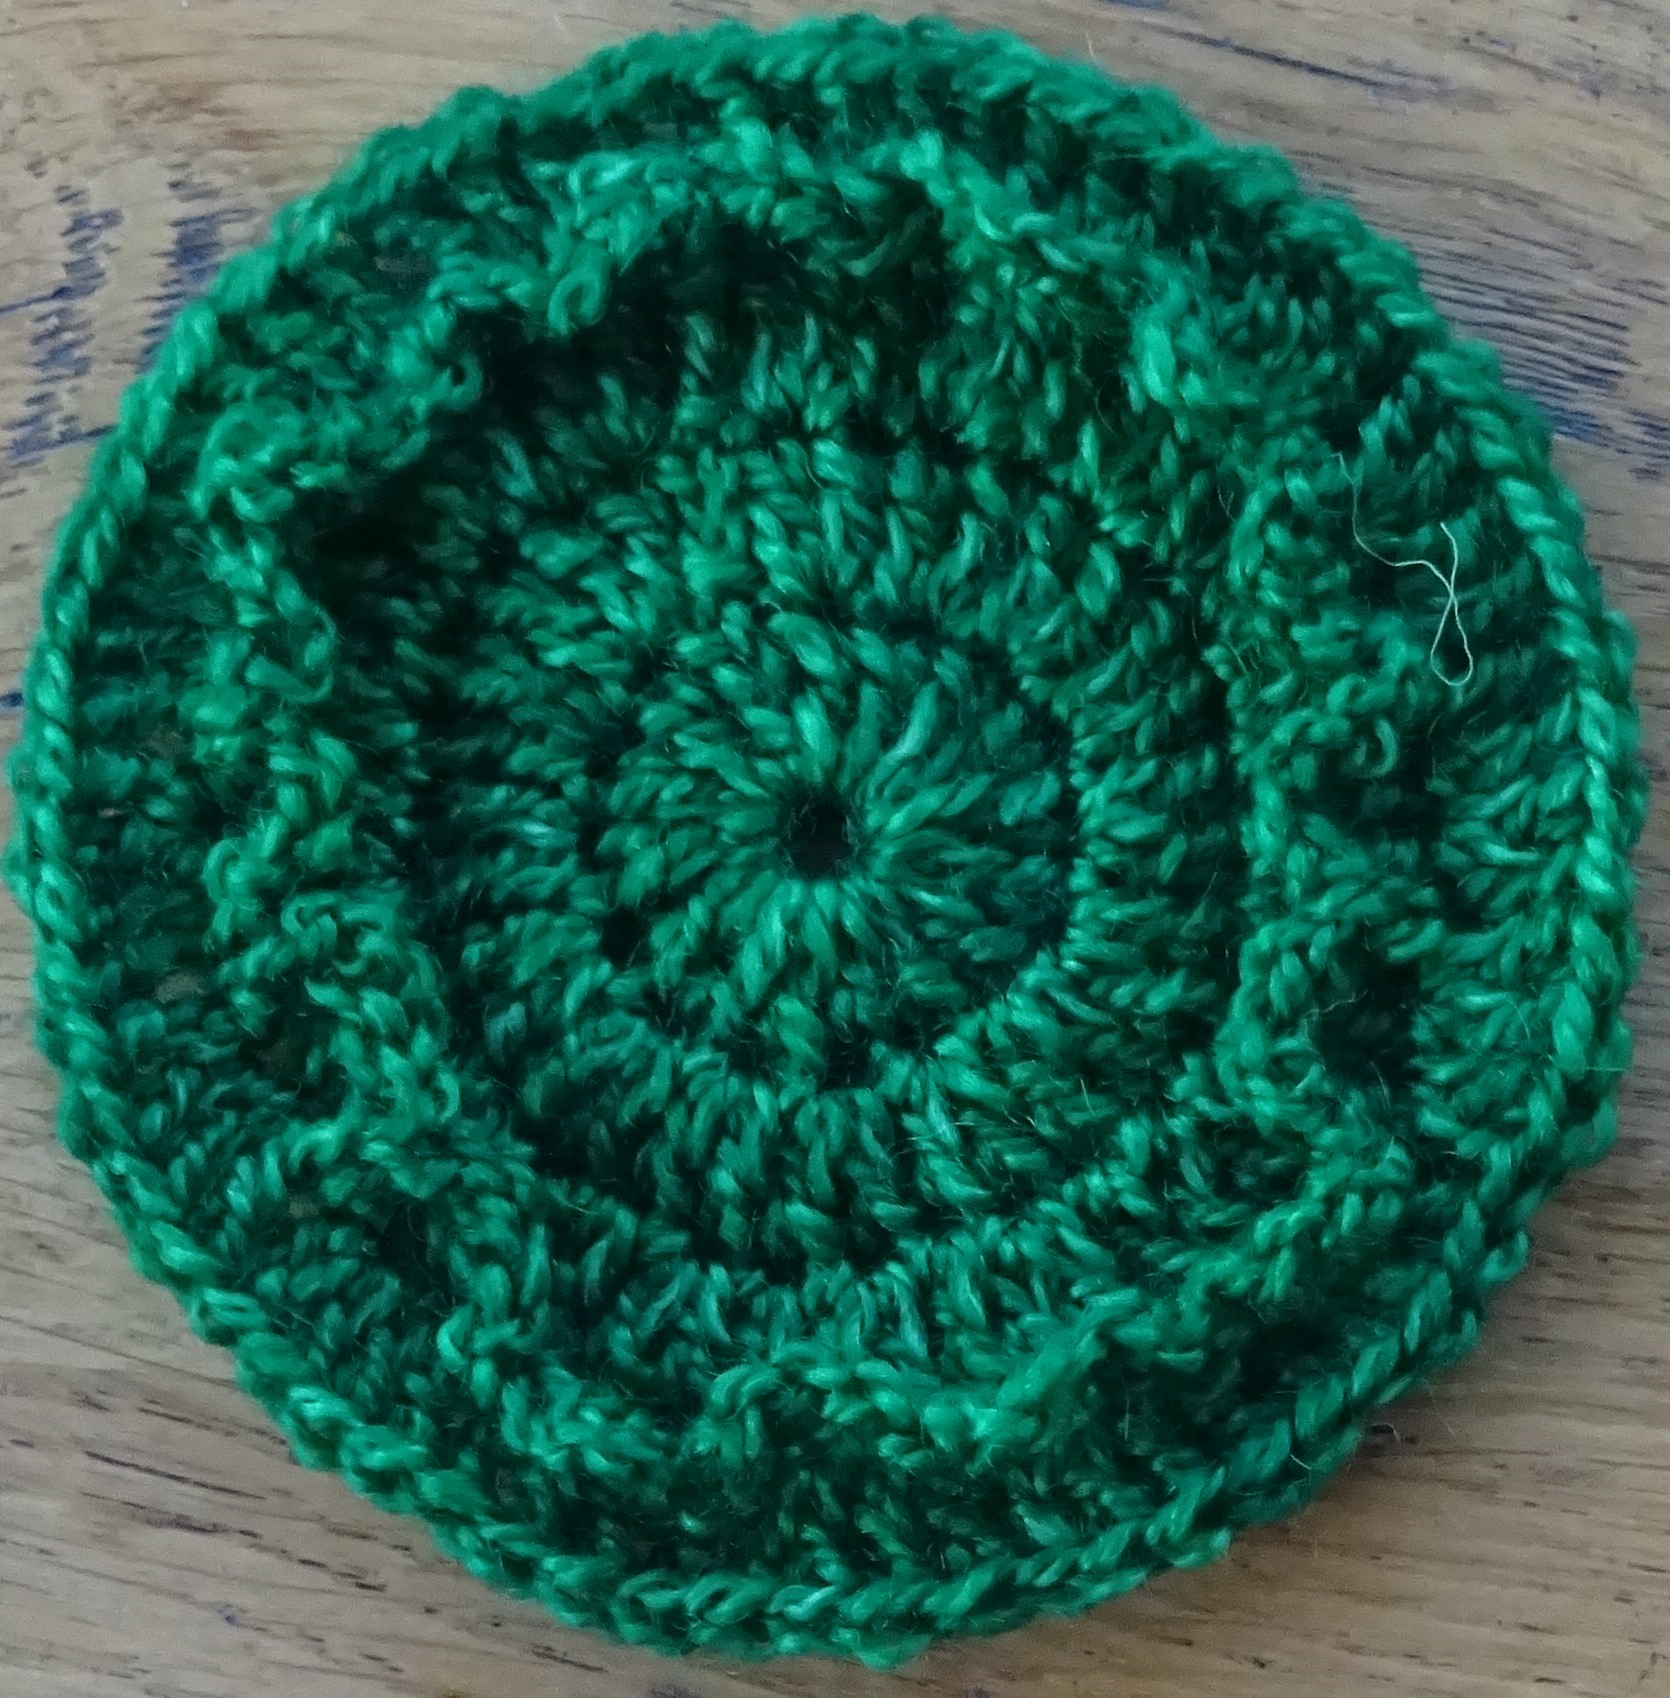
Circle 4 – small ruffle
Foundation: 4ch, join into a ring with a ss.
Round 1: 3ch (counts as 1tr), 15tr in ring, ss in 3rd ch from start to join. [16tr]
Round 2: 3ch (counts as 1tr), 1tr in st at base of ch, 2tr in each st around, ss in 3rd ch from start to join. [32tr]
Round 3: 5ch (counts as 1dc, 4ch), miss 1 st, *1dc in next st, 4ch, miss 1 st; rep from * to end of round, ss in 1st ch from start to join. [16dc, 16 4ch-sps]
Round 4: work this round behind the 4ch-sps from Round 3, 1ch (does not count as st), ss in 1st missed st in Round 2, 3ch (counts as 1tr), 2tr in st at base of ch, 3tr in each following missed st, ss in 3rd ch from start to join. [48tr]
Round 5: 3ch (counts as 1tr), 1tr in next st, 2tr in next st, *1tr in each of next 2 sts, 2tr in next st; rep from * to end of round, ss in 3rd ch from start to join, break yarn and fasten off. [64tr]
I made 16 of Circle 4 for my blanket.
Circle 5 – large ruffle
Foundation: 4ch, join into a ring with a ss.
Round 1: 3ch (counts as 1tr), 15tr in ring, ss in 3rd ch from start to join. [16tr]
Round 2: 3ch (counts as 1tr), 1tr in st at base of ch, 2tr in each st around, ss in 3rd ch from start to join. [32tr]
Round 3: 3ch (counts as 1tr), 2tr in next st, *1tr in next st, 2tr in next st; rep from * to end of round, ss in 3rd ch from start to join. [48tr]
Round 4: 6ch (counts as 1dc, 5ch), miss 2 sts, *1dc in next st, 5ch, miss 2 sts; rep from * to end of round, ss in 1st ch from start to join. [16dc, 16 5ch-sps]
Round 5: work this round behind the 5ch-sps from Round 4, 1ch (does not count as st), ss in 1st missed st in Round 3, 3ch (counts as 1tr), 1tr in st at base of ch, 2tr in each missed st around, ss in 3rd ch from start to join, break yarn and fasten off. [64tr]
I made 18 of Circle 5 for my blanket.
Circle 6 – double ruffle
Foundation: 4ch, join into a ring with a ss.
Round 1: 3ch (counts as 1tr), 15tr in ring, ss in 3rd ch from start to join. [16tr]
Round 2: 3ch (counts as 1tr), 1tr in st at base of ch, 2tr in each st around, ss in 3rd ch from start to join. [32tr]
Round 3: 5ch (counts as 1dc, 4ch), miss 1 st, *1dc in next st, 4ch, miss 1 st; rep from * to end of round, ss in 1st ch from start to join. [16dc, 16 4ch-sps]
Round 4: work this round behind the 4ch-sps from Round 3, 1ch (does not count as st), ss in 1st missed st in Round 2, 3ch (counts as 1tr), 2tr in st at base of ch, 3tr in each following missed st, ss in 3rd ch from start to join. [48tr]
Round 5: 6ch (counts as 1dc, 5ch), miss 2 sts, *1dc in next st, 5ch, miss 2 sts; rep from * to end of round, ss in 1st ch from start to join. [16dc, 16 5ch-sps]
Round 6: work this round behind the 5ch-sps from Round 5, 1ch (does not count as st), ss in 1st missed st in Round 4, 3ch (counts as 1tr), 1tr in st at base of ch, 2tr in each missed st around, ss in 3rd ch from start to join, break yarn and fasten off. [64tr]
I made 16 of Circle 6 for my blanket.
Don’t forget there is a paid for pattern on Ravelry which is also being released in parts and has a US crochet terms available too.
I would love to see photos of your little circles, please share them on Facebook and Ravelry.
My 2022 blanket for the CAL has a name – it is called Round Again Blanket. Round because it is made of circles and Again because I’m using scrap yarn so I’m using the yarn again!
In my last post I shared photos of all my little circles and promised I would give you details of start and timescale soon. Well soon is now! Testing is finished and I’m feeling very happy about the CAL.
I’ve had some lovely feedback from the testers including:
addictive
easy to crochet
fly off the hook
look great in variegated yarn
These are things I was aiming for and it looks like I have achieved them. So, after being so far behind in the preparation a few weeks ago, I am ready to share the details with you.
The CAL will be released in 6 parts
Basic circle
Variations 1 and 2
Variations 3, 4 and 5
Variations 6 and 7
Squaring off and joining the circle motifs
The border
Size, yarnand hook
The blanket I made is about 110cm by 160cm. I used approx. 650g/2600m of scrap sock yarn and 200g/800m of a mid grey sock yarn for joining and some of the border. These figures are approx. because I used scraps of different types and ever so slightly different meterage. I made 187 motifs in total. As I used sock yarn I used a 3mm hook. But of course you could use any yarn you like as long as you use a suitable hook size. And you can make it any size you like.
Stitches
The stitches used are all the normal sts – in UK terms these are ch, dc, htr, tr, dtr, ss and some sts worked together, nothing fancy at all. Everything is worked in the round, so you need to know how to do this, but otherwise I think a beginner could cope.
The pattern
The motifs will be published here on my blog in UK crochet terms and a comprehensive paid for pattern will be available on Ravelry in both UK and US terms.
When
Part 1 (the basic circle) will be published here on Saturday 19th February, and each further part follows every Saturday with the final part (the border) on 26th March. The Ravelry pattern will be updated on the same days.
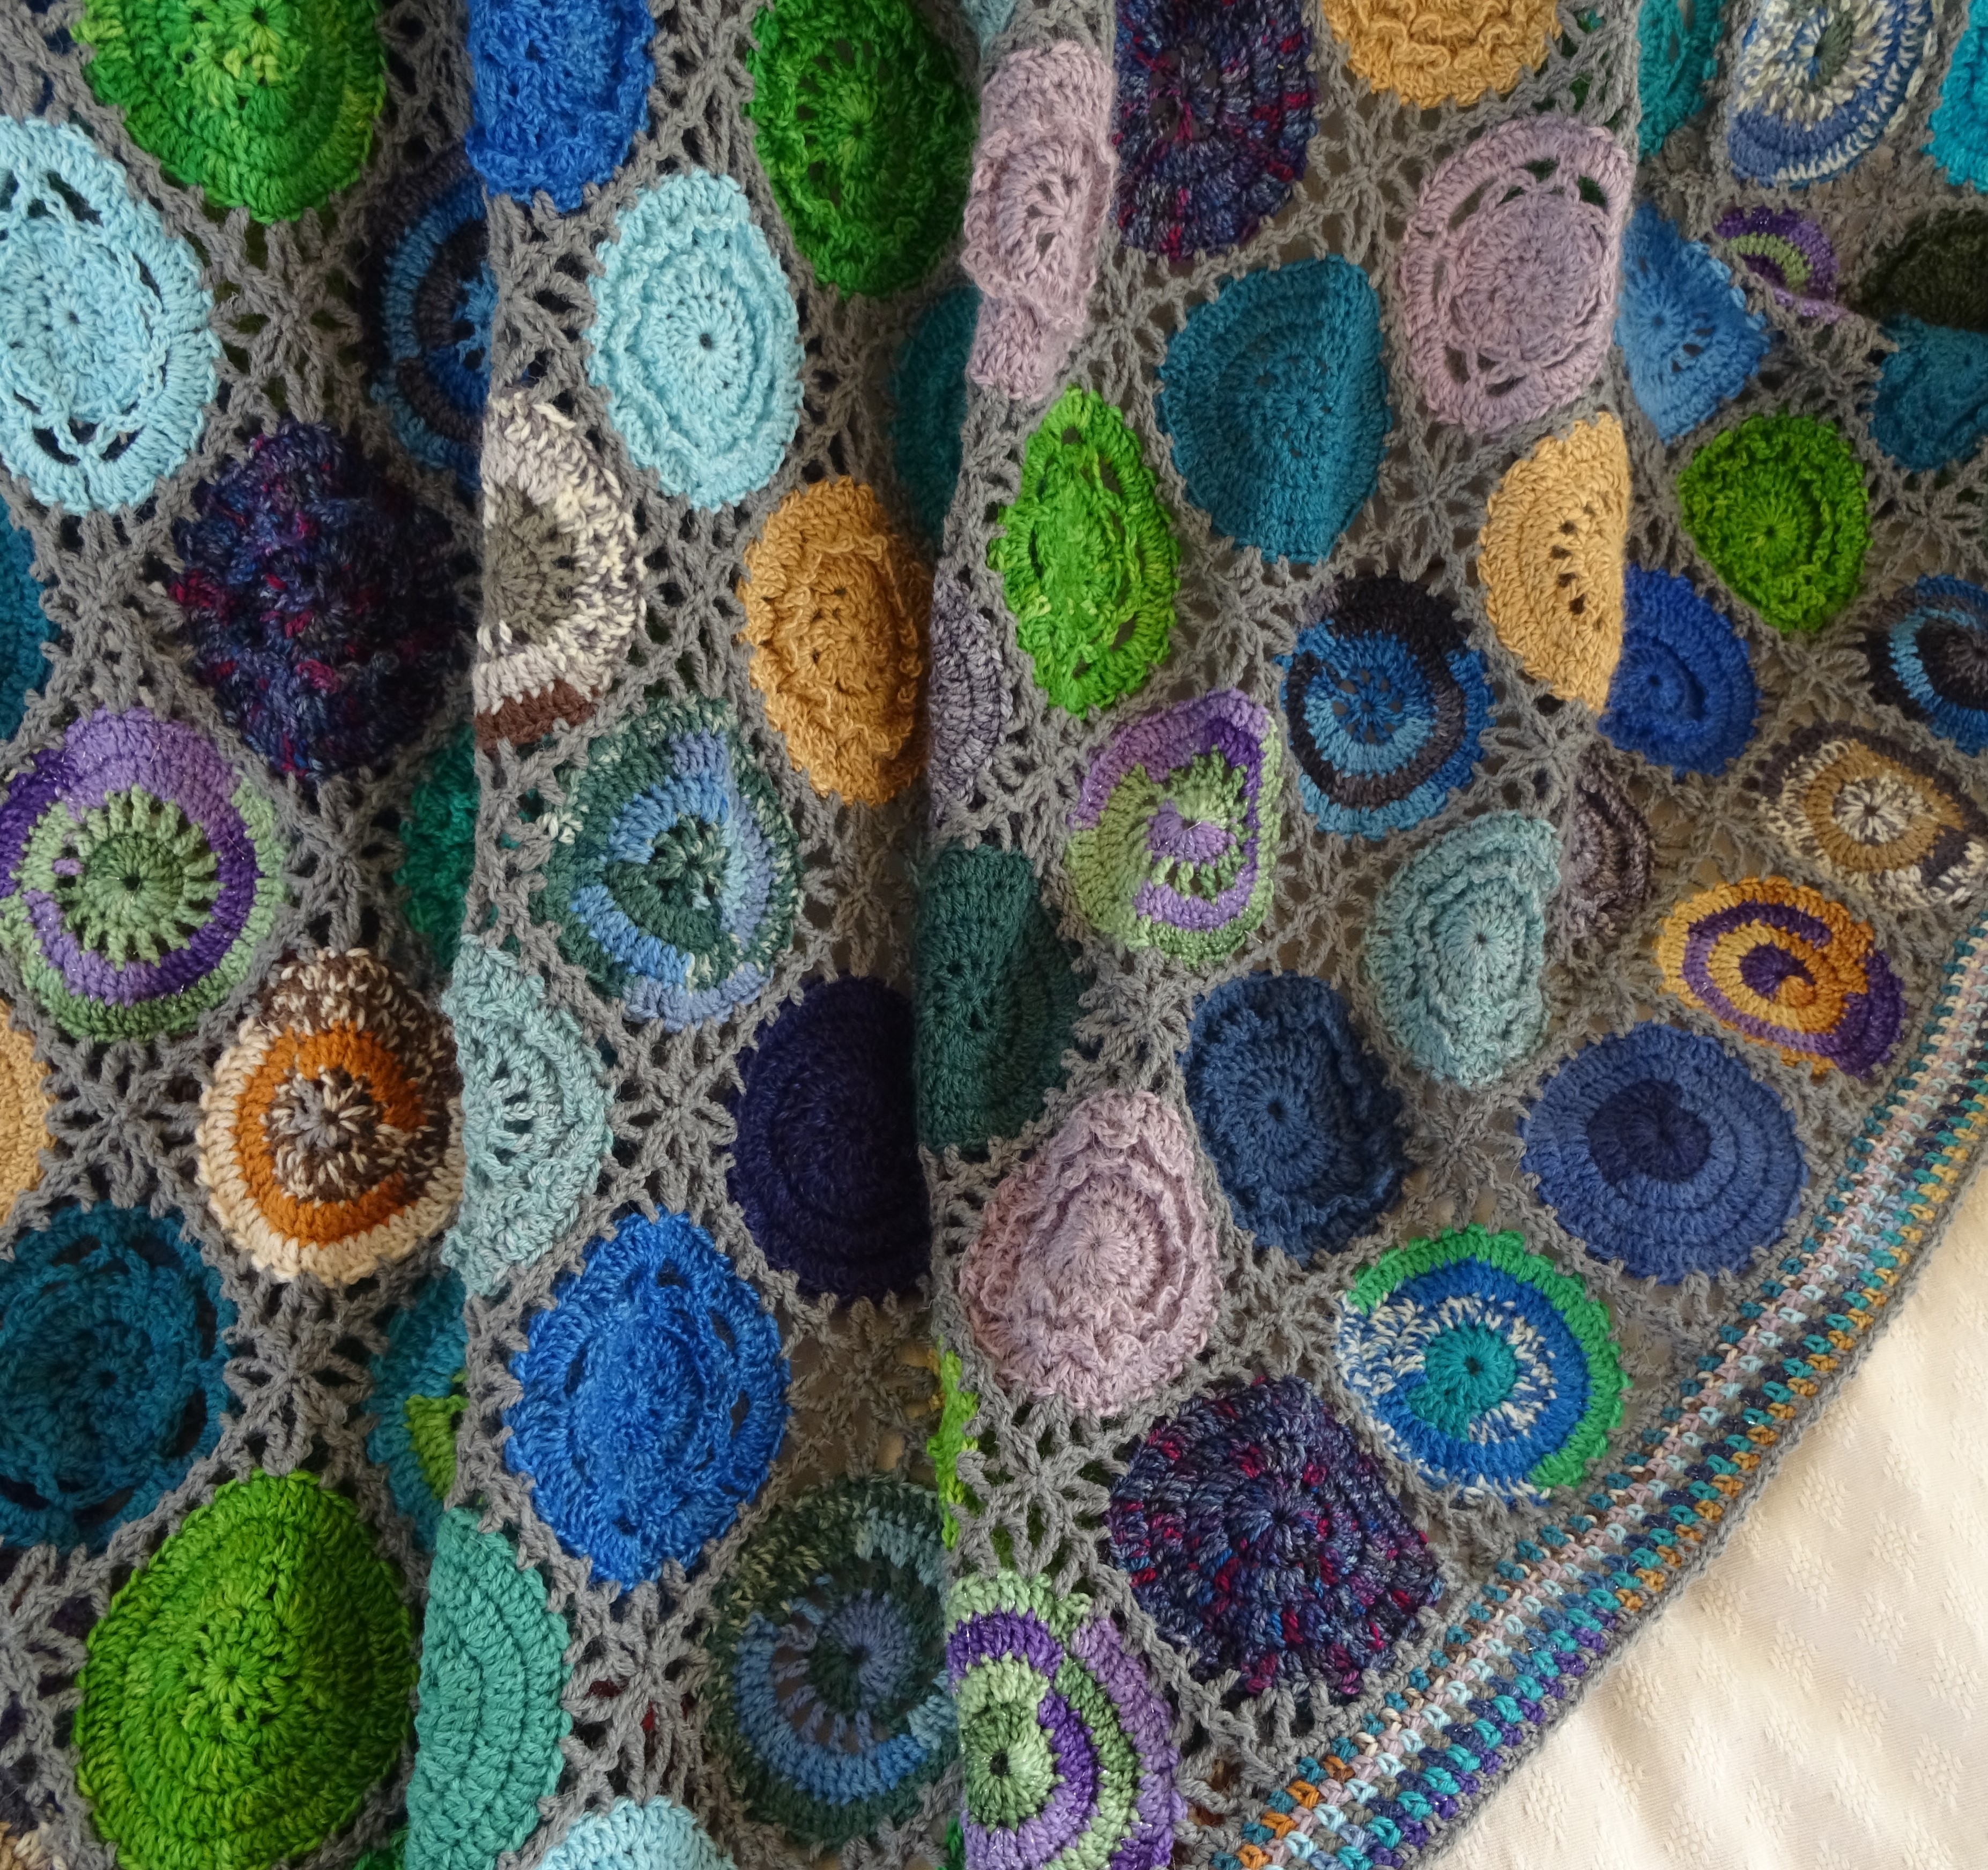
Just before I blocked my blanket I took a few photos including several of the back of the blanket because I think it looks just as lovely on the back, making it reversible. The back doesn’t show some of the detail of the motifs but it does show the lovely colours and it’s amazing how beautiful scraps of sock yarn can be together. It also makes a good sneak preview photo!
If you join the CAL it would be lovely if you share progress on Facebook or Ravelry.
This year’s blanket CAL has been a long time in the making, I have been so slow, and I have no excuses. Maybe it is simply that I have slowed down during these strange times we are living in and prefer to enjoy every stitch as I make it. But it is progressing to the finish line and it’s about time to share some of it with you.
First – my inspiration.
Some years ago when I was a stash building addict, I bought an Opal Sock Yarn Advent Calendar containing 24 mini balls of colourful sock yarn. I thoroughly enjoyed opening the calendar each day and finding a different coloured ball. I really didn’t know what to do with the mini balls, they remained a colourful collection in my stash but eventually I found a simple flower motif and decided to make lots of these colourful flowers. It became one of those projects you pick up between larger projects and after a long time I managed to make over 100 of these flowers. I decided to join them so I designed a border to make each flower a square. I bought some pale grey yarn to create the border and join the squares as you go. A very long time after I started to open those advent calendar ‘doors’ a lovely lap blanket emerged which I gifted to my sister. I never took any notes of this project, nor did I take any photographs. I just enjoyed the long lingering project.
Roll on a good number of years and I find I have accumulated plenty of scraps of yarn of all sorts – the vast majority of them being sock/4 ply or fingering weight – all roughly the same meterage per 100g in a variety of colours and yarn types. Much of this is because I have finally found my sock knitting mojo – I have made over 20 pairs in the last 2 years and most for myself. And I have small feet so I have plenty left over from 100g balls of sock yarn! So this was the year I decided to use up all these sock yarn scraps in my CAL (ok it’s not the first time I have done this remember Wrapped in Memories?).
I wanted a really relaxing project, something straightforward that can be done at crochet/knitgroup (I’m sure you’ve all experienced the frogging after taking a project with only a modicum of complexity to a crochet/knitgroup meeting!). I also wanted some uniformity so that the scrap project looked like it was meant to be made as a blanket not just a mess of colours. And I wanted to use the same border to each motif, in the same colour just like I did with the Opal mini ball project. Grey was a good choice for this, I think white or cream would be a stark contrast to the colours and make them stand out too much and I really do not like the stained glass effect of black, but grey helps the colours to blend gently on the eye.
The motifs are all the same shape. I started doodling a crochet circle and decided straightaway that circles should be the theme. So the CAL blanket progressed, the pattern is written and I have a few testers lined up (but shout if you’d like to help).
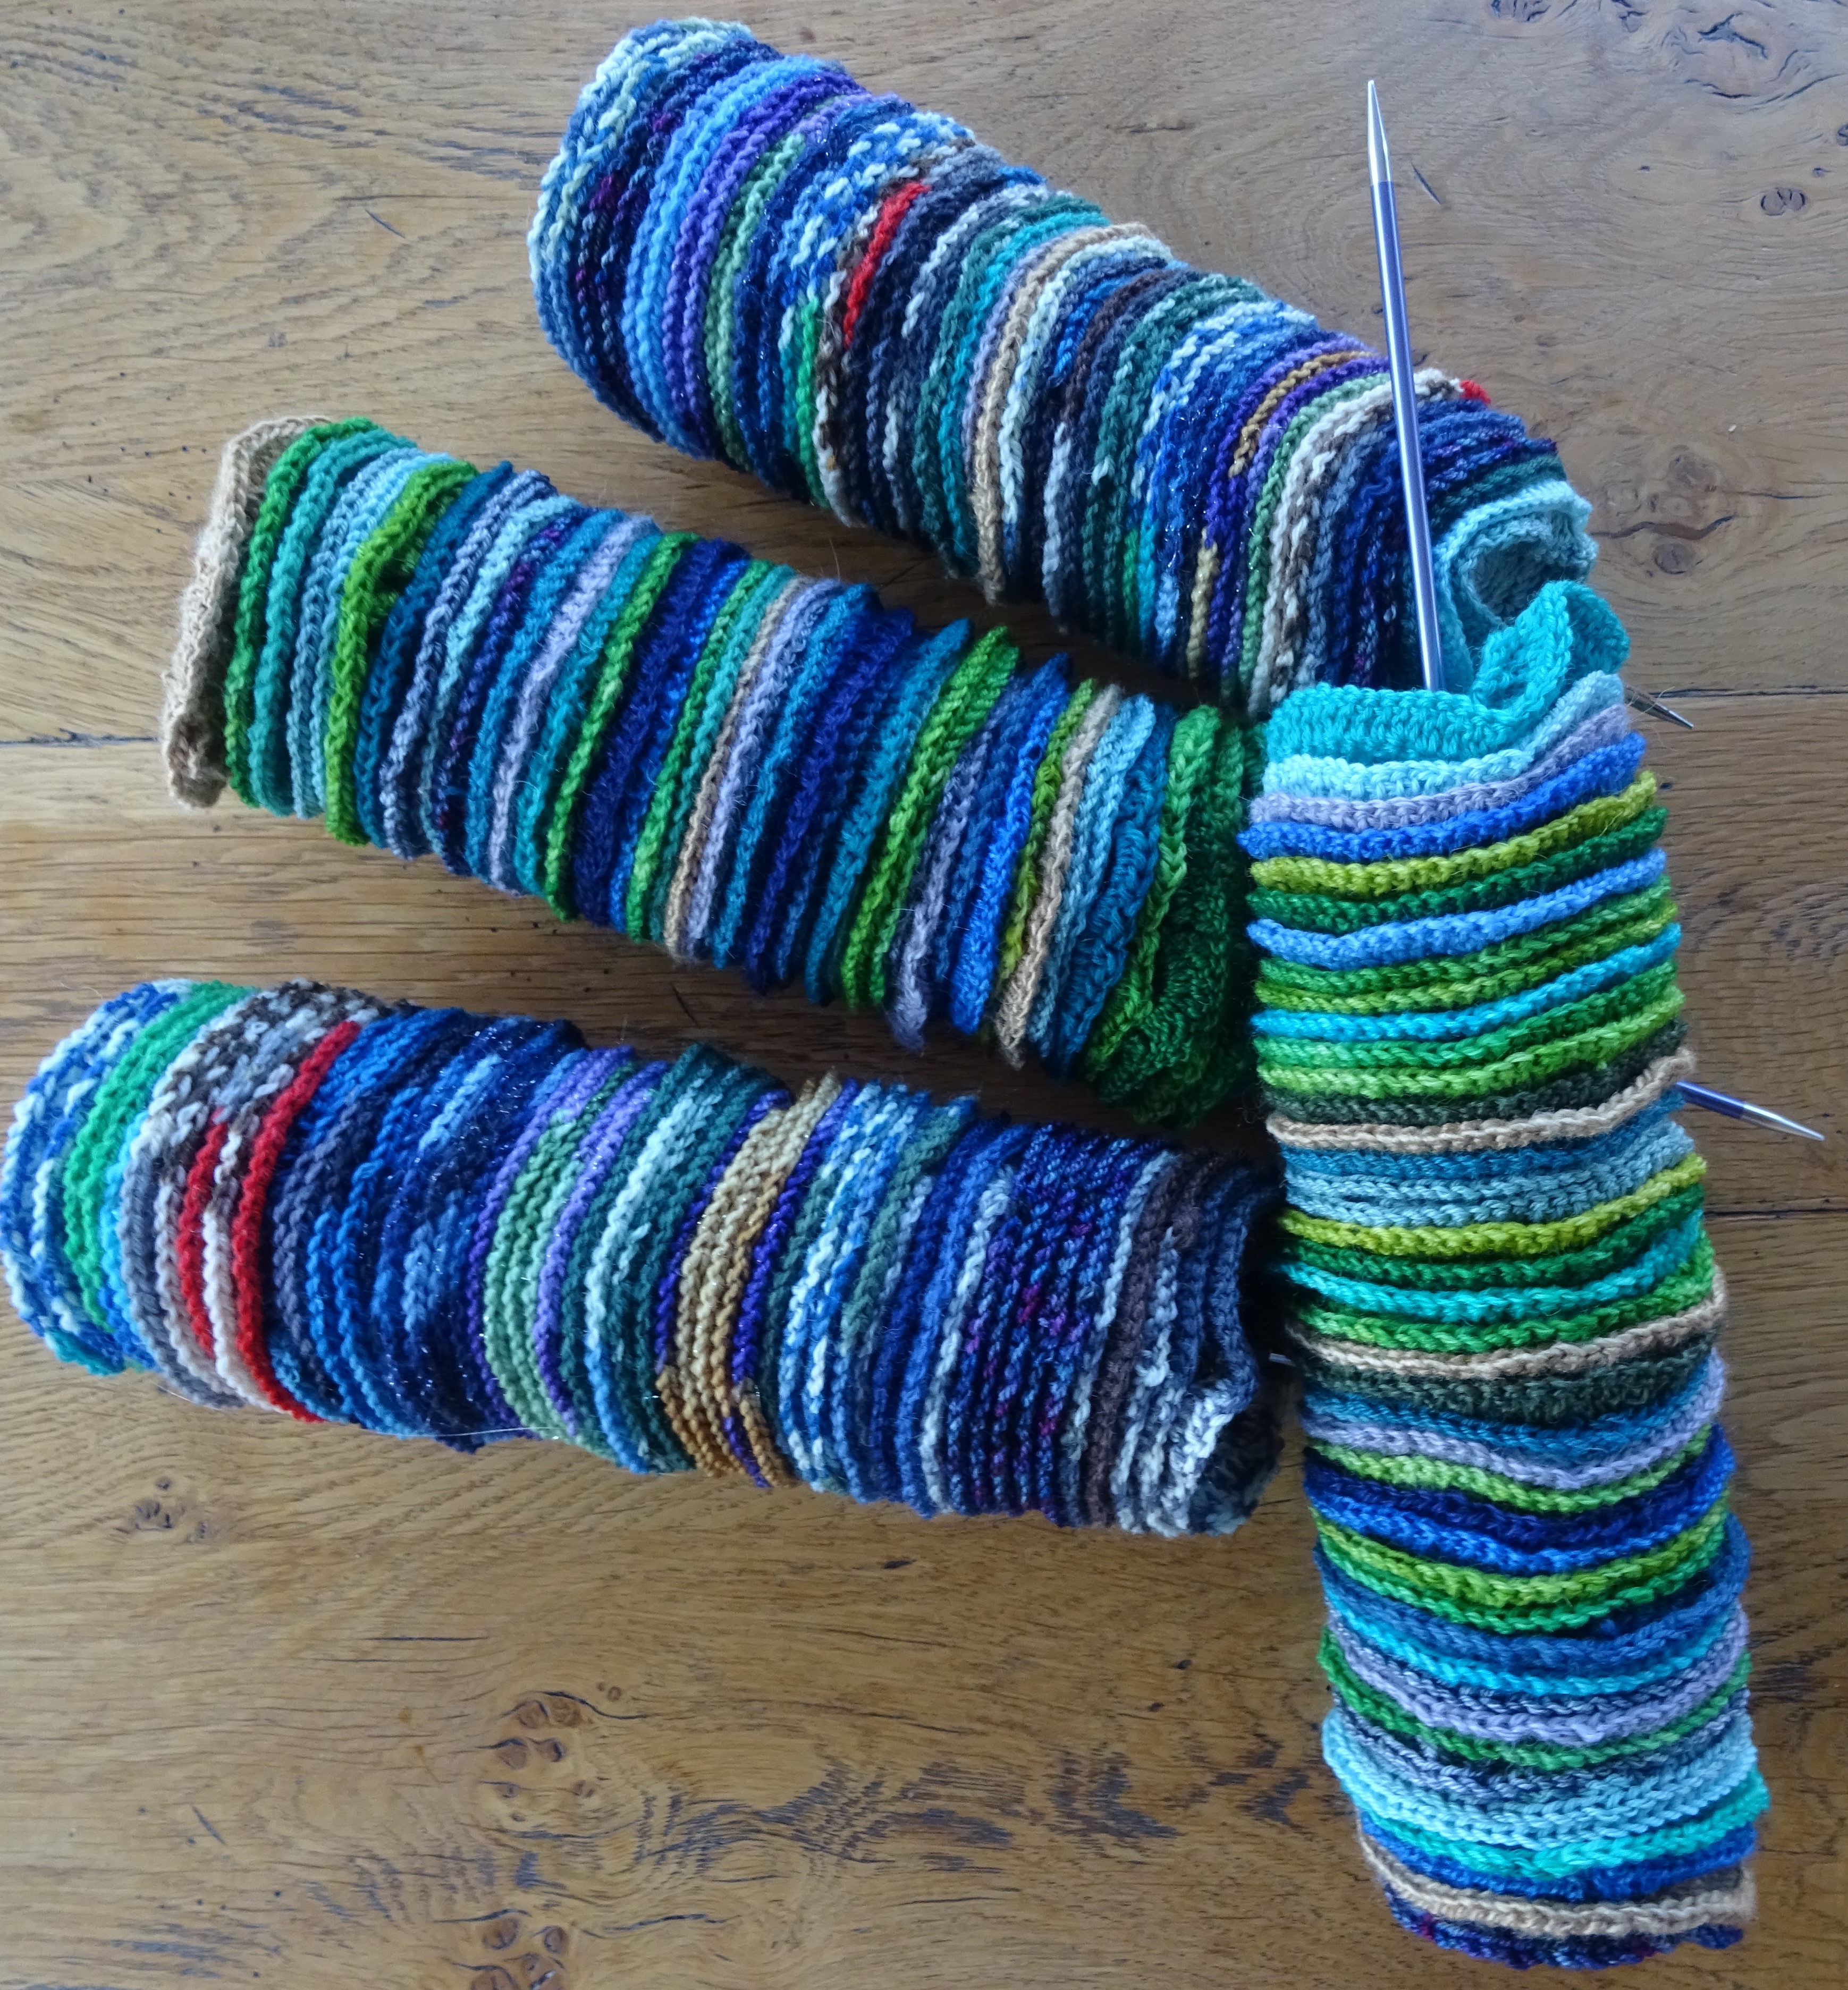
Want a sneak preview? Well these are all my motifs, all lined up ready for the final joining round. They are now all joined and the blanket is almost complete.
The CAL will be free on this blog, although a more detailed paid for pattern will also be available. My next post will give you more details of the CAL start date and timescale, but for now enjoy the sneak preview of all my little circles!
Welcome to the Winter CAL 2015. Today I’m introducing the CAL, providing information on requirements and the pattern for the first square motif, a ‘solid’ granny which should be pretty familiar and which will help you estimate your own requirements if you aren’t using the same yarn.
This post is rather long, so make a cuppa and settle down for a long read !
YARN
First let’s talk about yarn. I’m using a double knit (DK) yarn and I’m making 2 blankets.
My first is a ‘sample’ blanket using 6 bright colours which cheer up winter and the second is also a bright colour palate but will be structured differently. I’m using the second colour set to crochet along with you.
Sample yarn: John Arbon, Knit by Numbers DK, 100% merino, 100g/250m per skein. 2 skeins each of Blue (039), Pink (063), Yellow (052), Green (071) and Purple (029) and 1 skein of Orange (015). This is sufficient for a blanket 7 motifs square, so a total of 49 motifs and a small border.
John Arbon Knit by Numbers
CAL yarn: Stylecraft Life DK, 75% acrylic/25% wool, 100g/298m per ball. I’m using 2 balls each of Teal (2416), Mint (2342), Aqua (2357) and Fern (2311) and 1 ball each of Daffodil (2394), Rose (2301), Melon (2359) and Zing (2356). The blanket will be 7 motifs square also, the same as the sample, but I will put a larger border on this.
Stylecraft Life DK
HOOK
I am using a 4mm crochet hook (US G/6)
MOTIF/TENSION
The motifs are square and each motif is approx. 19cm (just under 8in) square after blocking, using the ‘sample’ yarn.
ADAPTABILITY
You can use any yarn you like, as long as you use a suitable hook size. And you can make it to any size you like. It is a perfect stash buster. Later in this blog I show you how to you estimate your yarn requirements.
COLOUR SCHEME
Some of the motifs in this design work well in just one colour, others work well in up to 5 colours. So whatever you choose, I recommend you have at least 5 colours of yarn. I used 6 colours in my sample blanket and I’m using 8 colours in my CAL blanket.
MOTIF DESIGNS AND TIMINGS
There are 8 motif designs, and you can use as many or as few as you like. The first 2 designs are free and will be published on this blog, so you could use just these 2. The first design is published today, the second design will be published on 26th December.
The other 6 will be published weekly thereafter and will be included in a comprehensive pattern which will be available to buy on Ravelry, it will be published initially on 26th December and updated as each motif is released. Photos of the new motifs will appear on this blog, along with my progress updates.
SIZE
You can make the blanket any size you like. The lap blanket I am making will be 7 motifs square – a total of 49 motifs. It will be just over 1.3m/52in square with a small border.
HOW TO WORK OUT YARN REQUIREMENTS
This is an approximate way to work out your yarn requirement.
First make the motif in this blog. I worked out it uses an average amount of yarn for all the 8 motifs, so is a good guide as to how much each motif will use.
Then measure your motif. Using this measurement work out how big you want your blanket to be – so if the motif is 20cm and you want a blanket 120cm square then it will need to be 6 motifs square – that’s 36 motifs.
I prefer my blankets to have an odd number along each side, as visually I find odd numbers more appealing. So you may prefer to aim for 7 by 7 (49 motifs), or 5 by 5 (25 motifs) or even 9 by 9 (81 motifs).
Whatever you decide, let’s just say the number of motifs you want is N
Now weigh your motif – it doesn’t matter if you weigh in grams or ounces. Let’s just say that weight is W
For the motifs you need yarn with a total weight of N times W, but you need to add a margin for joining, colour matching/changing and a border. I recommend a minimum of 10% (which works for a small border and if you are careful with colour matching) or 20% (which works well with a larger border) or 25% (if you aren’t confident about colour matching and/or don’t really know what you want to do for a border).
So take N by W, add 10%, 20% or 25% and then divide by the size (weight) of skeins/balls for the yarn you are using.
For my bright sample I had 49 motifs, each weighing an average of 20g – so 49 by 20 plus 10% is 1078g and the skeins come in 100g, so I need 10.78 – or 11.
The estimating works if you are using all the same yarn, if you use different brands of yarn then you should look carefully on the ball band to find out how many m or yd are in each brand – they vary quite a lot. If yours vary, then you’ll have to do some more maths to work out your requirements. Essentially you need to work out the meterage or yardage of your motif, rather than just the weight. I’ll provide information on this in my Ravelry group here if you want it – so just join in the discussion and ask!
Now onto the pattern:
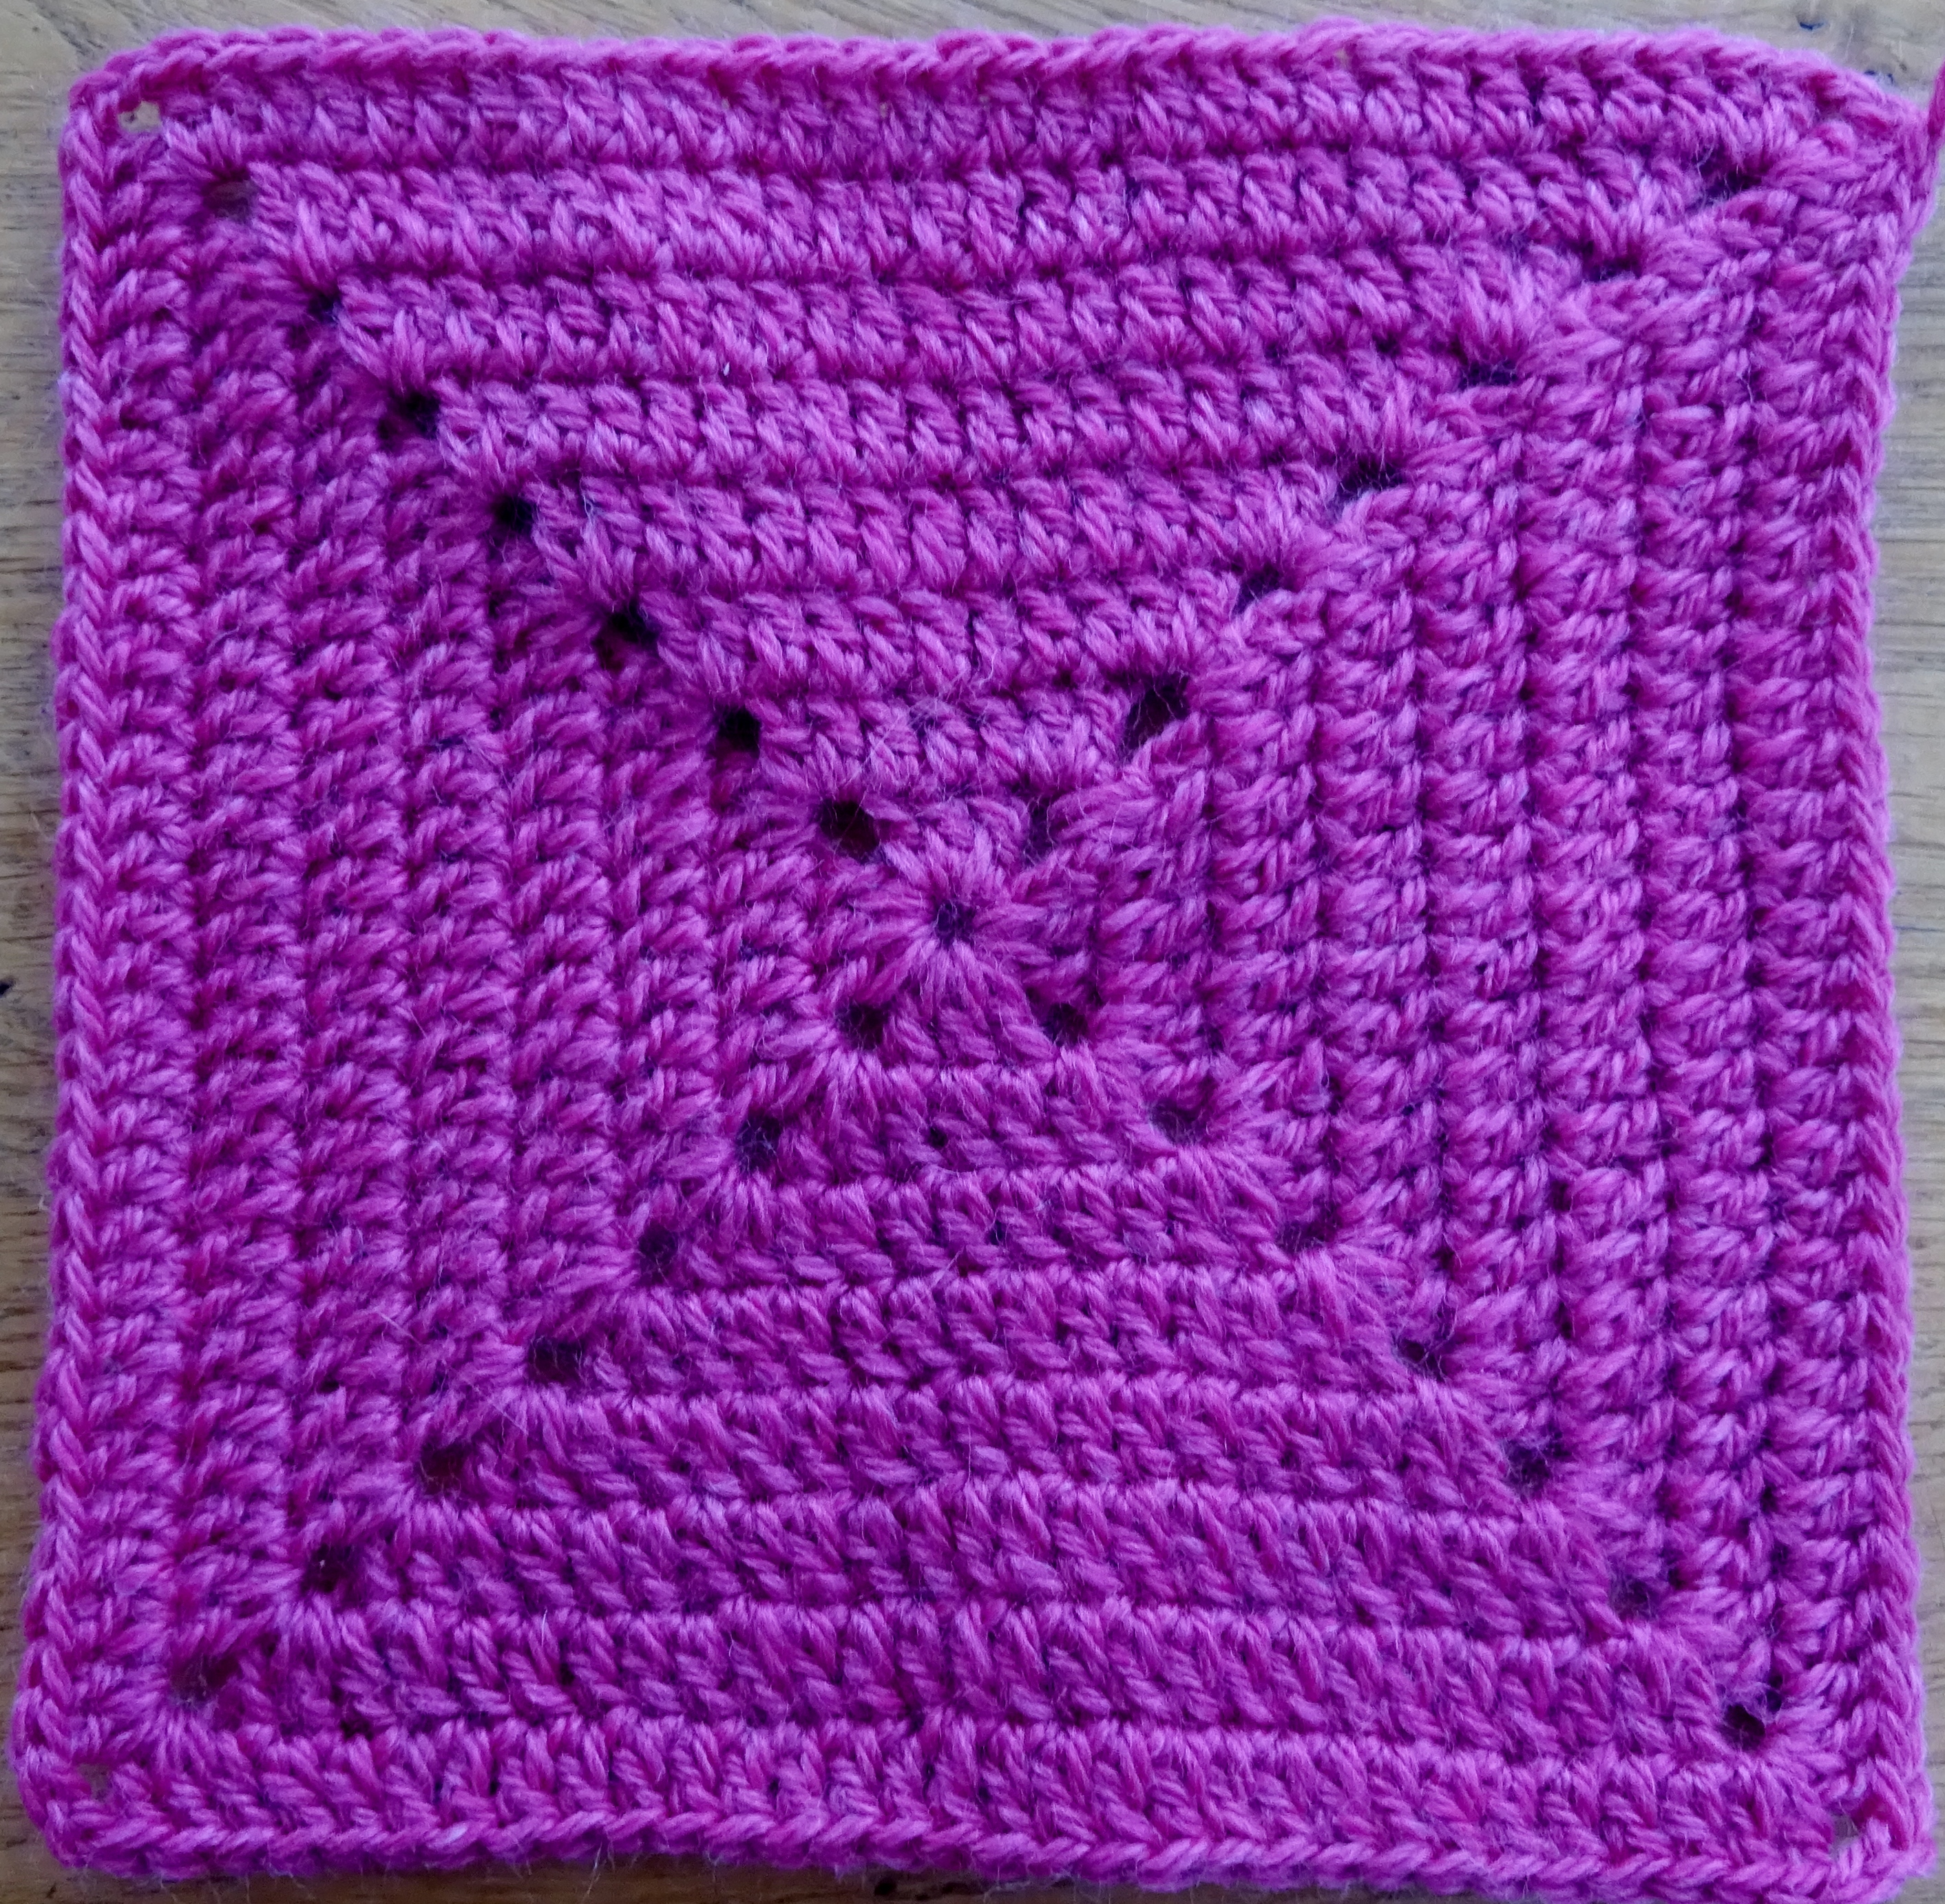
This is the first motif. It is similar to one I used last year but this has more rounds in total, it’s a ‘solid’ granny square.
ABBREVIATIONS:
The pattern is written in English crochet terms.
St = stitch
Ch = chain
Tr = treble (US dc)
Ss = slip stitch
Sp = space
Ch-sp =chain space
Solid motif
I made 8 of these in a variety of colours:
Foundation: Make a 4ch foundation ch and join into a ring with a ss
Round 1: 5ch (counts as 1tr, 2ch), (3tr, 2ch) 3 times into the ring, 2tr into the ring, join to 3rd st of first 5ch with a ss.
Round 2: ss into 2ch-sp, (note for this and each subsequent round: this ss is to position the start of the round in the right place) 5ch (counts as 1tr, 2ch), 2tr into the same 2ch-sp, 1tr into each tr along each side and (2tr, 2ch, 2tr) in each 2ch-sp on the corner, finish with 1tr in the first 2ch-sp where you started the round and join to 3rd ch from start with a ss. You should have 7tr along each side and 2ch in each corner of your motif.
Rounds 3 to 8: Repeat Round 2. Each round the number of tr along each side will increase by 4, so at the end of Round 8 you should have 31tr along each side and 2ch in each corner of your motif.
Break yarn and fasten off leaving a long tail about 3m long for sewing or crocheting together later.
COLOUR
In my sample blanket I made 8 of these motifs in just one colour each. But you can use up to 8 colours, just by changing colour at the start of each round. I will start my CAL blanket later today and I’m planning on using at least 2 colours on each of my 8 motifs. I’ll post progress photos tomorrow.
LAYOUT
The ‘solid’ motifs can be positioned anywhere in the blanket but I thought it would help to give structure to the blanket if I positioned them around the edge of it. So here is where I put them in my blanket (shown as 1):
Solid motif locations
If you want to chat about this, there is a discussion thread on my Ravelry forum here.
Or you could just comment on this post.
I’m looking forward to seeing what yarns you choose 🙂
Last Christmas I hosted a blanket CAL designed to keep your hooks busy during the seasonal holiday. It was a spontaneous decision to do the CAL, and I was happily surprised when so many people joined in at such short notice.
This year I am planning another blanket CAL to keep you busy during Christmas and beyond. The design has 8 different square motif designs and can be made any size you like. My sample blanket uses 6 different colours of DK yarn but you could use as many as you like and, yes, it would be a good stash buster.
My colours:
Yummy Yarn!
My sample blanket isn’t quite finished yet, but the squares are well advanced in design. The yarn is John Arbon’s Knit by Numbers, a lovely soft DK yarn, and I’m using 11 skeins. I’m enjoying making the sample so much that I have just ordered some more yarn to make a second sample, so that I can crochet along with you when the designs are released. This second yarn is Stylecraft Special DK, which is a much more affordable option.
Here’s a brief outline of the CAL plan:
Next weekend, I will provide details and the first motif design here on the blog. The first design is a basic square which many of you will be familiar with. It will show you the size of each motif and uses an average amount of yarn for the all the designs, so will help in showing how much yarn each square uses. You could then estimate your yarn requirements for the size of blanket you want.
On Boxing Day (Saturday 26th December) I will release the next motif design on the blog. You could make a blanket just using these 2 motifs in a checkerboard layout, which I think would look very attractive, so I would love to see someone do this! The first 2 motifs are both straightforward and would suit someone fairly new to crochet.
The rest of the pattern (6 more motifs, layout etc) will be provided in a downloadable pattern on Ravelry. This will be a paid for pattern and each week I will add a new motif to it until it is complete. I will share weekly progress on the blog.
As a reminder of previous blanket CALs on the blog here’s a couple of photos from the last 2:
This time a month ago I was very happy that I had 2 designs feature in 2 different magazines – I blogged about it here.
It felt wonderful! And I really didn’t think it could get better, but it has! My latest design for Inside Crochet (issue 69) has made the front cover. This is Autumn Beaches, a motif scarf that uses just one skein of Yarns from the Plains’ Mobberley DK.
Photo courtesy of Nic, Yarns from the Plain
It is called Autumn Beaches because the colours of the yarn reminded me the shades in the ripples of sand created by the tide going out. It is reminiscent of childhood holidays, playing on the beach (British beaches because we never went abroad for holidays).
However, this colour is called Malted Chocolate and I love chocolate so couldn’t resist! When I saw the yarn originally it wasn’t the colour name that attracted me, it was the yarn base name – Mobberley. Why? Because I live in Mobberley! Nic who owns Yarns from the Plain lives not far from me in Cheshire and all her yarn bases have names of local villages and towns, and when I saw Mobberley I just had to have a skein (mmmmm……maybe I bought more than one!). And when I touched the yarn it was so soft, it is made of 70% Exmoor blueface/30% British Alpaca and is entirely British. So British yarn, dyed in Cheshire, using Cheshire names and reminiscent of British beaches – it all fitted together well for me.
The design of the motif is one I swatched last year, ok I say ‘swatched’ when what I mean is ‘doodled’ because that’s what I do with a hook and yarn in my hand, I make crochet doodles. Originally I was thinking of making a small pincushion and the design was my first attempt at a crochet cover for it……..but it never made it to a pincushion. You see I doodled it in DK, and I loved the look of it in DK, so I set it aside and waited until the right yarn came along.
And it did….and it was perfect. So that’s how Autumn Beaches was created. Whilst it is beautiful in the Malted Chocolate colourway, I think Nic has some fabulous colours in Mobberley DK and I would love to see the design in some of these – I love Libby and Sweeties, and my favourite is Bewitched. What colour would you choose?
A crochet blog where you will find free crochet patterns along with oodles of crochet inspiration. Featured in top 100 crochet blogs and also in Crochet Now Magazine