Hello again!

I can’t believe it has been over 2 weeks since I last blogged, but I have been busy so blogging has been neglected – perhaps I shouldn’t be so surprised. However, sometimes even best laid plans go wrong and this blog post is several hours late!!

When I started typing this I was listening to some party music blasting away from the field behind our house. The sheep that have enjoyed the lush grass in the large field behind us (very lush recently owing to the warm wet weather we have been having) were being sheared and the sheep shearer obviously likes his music loud as he works!  But that was several hours ago, because we had a power cut and have been without electricity for over 3 hours!

Hey, that is a short power cut and didn’t stop me eating or drinking. OK, confession – the eating was some lovely potatoes just lifted and boiled on our (gas) hob for less than 10 minutes.  Oh my. They were so good.  This was my potatoes patch only 3 weeks ago:

DSC01408

It’s hard to believe that it produces some lovely spuds so soon!

Somehow being in the midst of a power cut makes me want to eat more, possibly I feel worried that I may not be able to have a hot meal for hours (but why should I worry about that, so many people in the world don’t even know where their next meal will come from).   It’s sort of inbuilt, a need to know when/where your next meal comes from, and I am so lucky that for me it is never too far way (even if we have no power!).

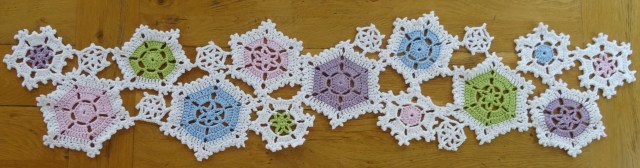
What have I been doing since my last blog?   This week saw my usual monthly Cheshire Crochet Club meeting – we worked on samplers, using all sorts of variations of the most common stitches.   It certainly kept all my crochet club members quieter than usual, you could feel the concentration in the air as we worked!   And then I followed with a much smaller crochet club at my home, 3 ladies who wanted to move from beginner to accomplished crocheters.  We worked on granny squares and I developed a lovely variable cushion cover for them – using different variations of granny squares and granny stitches.   It was a great success – 3 perfect squares left my house after only 2 hours.  They have lots of homework, but when we meet again they should see a cushion developing. Here’s a sneak peek at the cushion:

DSC01446

I enjoyed putting this together and I plan a few kits of the variable design for the Cheshire Fibre Festival on 1st October.

I’ve also been working on my preparation for CFF. I now have some lovely flower bunting kits ready and packed (the first of about 8 kits I plan).  The kit and design for this bunting has been tested (thank you Julie!), and the chart has been made very colourful (thank you Amanda!). When I designed this floral bunting I didn’t realise just how much work would be needed – because each kit has 6 small skeins of yarn and each had to be wound.   My niddynoddy was well used, and I am determined not to produce kits with such small skeins ever again!  The few I’ve made will be rare!  Sorry, I’m not sharing photos yet – I’m saving them until the month before the event.

I have finished a ‘scrap’ blanket. I decided the 2 designs I produced for the Friends Around the World CAL needed to be used, so I made a lap blanket using them plus a couple more – the Agathi square from my Winter Blanket CAL adapted to be larger and a square from my Blog Blanket CAL also adapted to be larger.

In all I used 16 squares (4 of each design), joined them then added a simple edging. I was very pleased with the result and the fact that I could make 2 or 3 large squares in one evening – it really was a case of big squares make quick blankets!

DSC01456

Finally, I can reveal I have been asked to do a crochet workshop at Goosfest this year, so my lovely granny cushion design will be used there also! More deatls to follow.

Meanwhile, happy crocheting xx


Snow in summer

‘Let it snow’ is the name of a pattern which was published in Mollie Makes magazine last November, over 6 months ago.  And that 6 months is a magic timescale because the pattern rights return to me after 6 months.

So today I have uploaded the pattern to Ravelry and Loveknitting/Lovecrochet

DSC01434

The design is a table runner, made with 4 sizes of snowflake motif and some variations so there are actually 7 different sizes/styles of snowflakes to make.  Each of the snowflakes is lovely as a single motif, either as a table mat, a coaster or even a hanging decoration.  My table runner is 1.2m long, but you can make it any size you like.

If you didn’t buy Mollie Makes issue 60, then now is your chance to grab the pattern and make yourself some snow in summer.

Happy crocheting xxx


And the last one…..

…for now!   The last kit I have to share with you from the Yarns from the Plain/Agrarian Artisan Designs collaboration is Swirling Seas Scarf.

The yarn is Knutsford, a 4ply yarn which is 80% Falkland Merino and 20% Mulberry Silk.  There are 2 colours of kit available – each comes with 6 shades.  This is the green colourway:


There is also  a blue colourway, which is equally gorgeous!

Don’t forget, these kits have their first outing at the trunk show at Fluph tomorrow (25th May), 2pm til  8pm.

Happy crocheting xx


And the next one is…..

The second kit in the Yarns from the Plain/Agrarian Artisan collaboration is a design you may be familiar with.

Do you remember this post?

DSC01091.JPG

I designed the lovely Autumn Beaches scarf specifically for Mobberley DK, a luscious yarn made of a blend of 70% Exmoor Blueface and 30% British Alpaca.  One 100g skein of this yarn is enough to make a string of pretty motifs into a warm scarf.

Nic has put together some new colourways for this design, including a two colour version. Here’s a sample:

I love the strawberry colour and that blue/lime combo really zings!

Watch out tomorrow for another sneak peak at the 3rd kit in the range.

Happy crocheting xxx

Kits ahoy!

It’s less than a week until Yarns from the Plain holds a trunk show at Fluph (25th May 2016) and I can now start to reveal the kits that Nic will be selling which combine her gorgeous hand-dyed British yarns with my designs.

There are 3 kits ready for the trunk show (more to come later this year), so I plan 3 separate blog posts to feature each one.

First is Sigrun Scarf.   Sigrun was designed originally as a weather wrap project using 2 strands of laceweight.  It is one of my favourite designs and I often thought it would translate well to a 4 ply scarf.  And that is what Nic and I did.  The Sigrun Scarf is a colourful interpretation of the original design in gorgeous 4 ply, in fact it is very colourful – the kit includes no less than 15 colours of yarn.  The yarn is Stanley Sock, an organically farmed Falkland Merino – so super soft.

IMG_7395

One of the joys of working with so many colours is seeing how they work together, and the best way to do this is choose them totally randomly – throw them in a basket and select each new colour without looking!    It is scary to choose yarn colours this way but it really does work, and I’m sure Nic will agree as that is exactly how she made the Sigrun Scarf.

If you are in or around Dundee on 25th May please do pop into Fluph to see the trunk show, and grab your chance to buy  the first ever kit!

Happy crocheting xxx

My week

I have two exciting things to tell you from my week.

First my Chevron Cowl was published in Inside Crochet magazine, this is one of my favourite makes and flew off the hook.   The yarn is lusciously soft – MillaMia Naturally Soft Aran and just 3 balls is all it takes, plus a few buttons as the cowl is adaptable.

As usual Claire and the team at Inside Crochet presented my design wonderfully – and there’s quite a nice selection of photos on the patten page on Ravelry.  This month’s Inside Crochet has a lovely free gift of a notebook.  I use notebooks a lot whilst designing and crocheting so it was well received by me.  In fact Inside Crochet has had some excellent quality free gifts these last few months – probably the best I’ve seen on a magazine for a long time.

I enjoyed the rest of the issue over a leisurely coffee – plenty to see and several items I want to make:

DSC01368

The second exciting news is to let you know that Yarns from the Plain will be doing a trunk show at fluph, a fabulous yarn shop in Dundee, on 25th May and at that trunk show the very first kits from our joint venture will be on sale!   Yes, for the first time you will see some of my crochet designs in Nic’s scrummy yarn!   Not all the kits will be ready by then, but it will give you a taste of what’s to come.   A lot of work has gone into producing these kits by both Nic and I, choosing the designs was the easy bit and choosing the colours was the fun bit!  But as well as that there was oodles of crocheting and then the photos and packaging, and yarn winding etc.    If you are anywhere near Dundee on the day please go and visit the trunk show, and if you do please let me know what you think of the kits..

As well as that, this week I’ve been doing more preparation for Cheshire Fibre Festival.  Hopefully there will be more to tell you on that soon.

Meanwhile…happy crocheting xxx

A recipe for a satchel

I made the Buxton Satchel as a crochet project that my fellow holidayers might enjoy on our annual knitaway in Buxton.  I now find I am using it a lot – it is a great size for taking magazines, files and patterns, as well as space for yarn and projects.

The satchel is based on granny squares and joined with a ‘gusset’ made of linen stitch.    I didn’t write a full pattern just a recipe giving basic components and steps.  Also, there are no photos showing steps, so rather a lot of words I’m afraid!  Here it is:

Materials
These are what I used, but quantities would vary depending on your tension, what type of yarn you use and how many colours you want.
Scheepjes Cotton 8, 50g/170m/186yds per ball. I used 9 colours, 1 ball of each (actual quantities shown also):
A – Light Purple (651) – 11g
B – Olive (669) – 12g
C – Light Pastel Green (663) – 16g
D – Moors (726) 17g
E – Purple (661) – 18g
F – Light Green (642) – 20g
G – Seagreen (723) – 24g
H – Violet (529) – 26g
I – Dark Green (713) – 50g
3mm crochet hook (US D/3)
4 lockable stitch markers
Tapestry needle for sewing ends
Press stud fastener
Lining material
Stiffening material

Abbreviations
English crochet terms are used.
St(s) = stitch(es)
Sp(s) = space(s)
Ch = chain
Ch-sp(s) = chain space(s)
Ss = slip stitch
Tr = treble
Dc = double crochet
RS = right side

Tension/gauge
This is not important, just aim for a finish you like.

DSC01339

Instructions
First make 2 granny squares approx. 14” square.:
Foundation:  Using Yarn A, make a 4ch foundation ch and join into a ring with a ss
Round 1: 5ch (counts as 1tr, 2ch), (3tr, 2ch) 3 times into the ring, 2tr into the ring, join to 3rd st of starting 5ch with a ss. Break yarn and fasten off.
Round 2: Change to yarn B, ss into 2ch-sp, 5ch (counts as 1tr, 2ch), (3tr, 1ch) into the same 2ch-sp, (3tr, 2ch, 3tr, 1ch) into each of the next three 2ch-sps, 2tr into the first 2ch-sp, join to 3rd st of starting 5ch with a ss. Break yarn and fasten off.
Round 3: Change to Yarn C, ss into 2ch-sp, 5ch (counts as 1tr, 2ch), (3tr, 1ch) into the same 2ch-sp, *(3tr, 1ch) into each 1ch-sp, (3tr, 2ch, 3tr, 1ch) into the next 2ch-sp; repeat from * another 2 times (3tr, 1ch) into each 1ch-sp, 2tr into the first 2ch-sp, join to 3rd st of starting 5ch with a ss.  Break yarn and fasten off.
Repeat Round 3, changing yarn each round until you have your desired size of granny square.

Now make a granny triangle following the same colour scheme, as follows:
Foundation:  Using Yarn A, make a 4ch foundation ch and join into a ring with a ss.
Row 1 (RS): 3ch (counts as 1tr), 4tr in ring. Break yarn and fasten off.
Row 2: Change to Yarn B, ss into top of first st of last Row (note you always want to start on RS), 3ch (counts as 1tr), 3tr in same st, 1ch, miss 3 sts, 4tr in last st. Break yarn and fasten off.
Row 3: Change to Yarn C, ss into top of first st of last Row, 3ch (counts as 1tr), 3tr in same st, 1ch, (3tr, 1ch) in each 2ch-sp, 4tr in last st. Break yarn and fasten off.
Repeat Row 3, changing yarn each row until you have your desired size of granny triangle.

Now you are going to form the strap and gusset:

DSC01340

The photo above shows the base of the bag and the full width of the gusset.

WP_20160501_001

The photo above shows the side gusset, it is narrow at the left (the strap end).

Round 1: Join yarn to any corner of a granny with a ss, make a chain the length of your strap, ss into next corner of the granny (going anti-clockwise), 1dc in each st and along the side, base and opposite side of the granny until you reach your chain, 1dc in each st of the ch, join to 1st dc with a ss.  Break yarn and fasten off.
Round 2: Join next colour to any st with a ss, 1ch (does not count as st), 1dc in next st, 1ch, miss 1 st, (1dc, 1ch, miss 1 st) all around the strap and gusset, join to 1st dc with a ss.  Break yarn and fasten off.. Note you may have to adjust if you find you are one st out at the end, I suggest you dc2tog in one place to make this adjustment.
Round 3: Join next colour to any 1ch-sp with a ss, 1ch (does not count as st), 1dc in same 1ch-sp, 1ch, (1dc, 1ch) in each 1ch-sp all around the strap and gusset, join to 1st dc with a ss.  Break yarn and fasten off.
Round 3 is the pattern for the strap. Continue in this way and changing colour each round until the strap is half the desired width.  Then start short row shaping to create the gusset on the next round/row, starting first about an inch below the top edge of the bag, and moving down an inch each new round/row until your gusset is half the desired width.  Now start increasing the short rows to match the decreasing using the same colours.  Once your short row shaping is complete, continue the strap and gusset until it is your desired width.  Now do a final round using the same colour working dc into each st and 1ch-sp but also joining to the other granny square by working through both sts of the gusset and the granny square, work the dc all round the strap as well and one row along the top of the second granny.
Rejoin yarn to top of the first granny and work a round of dc all along that and around the strap.
Now work a round of dc around the whole of the granny triangle.
Finally join the granny triangle to the top of one side of the bag with a row of dc.
NOTE: when you started the gusset the join to the first granny was flat.  When you join the second granny you end up with a ridge.  If you want a matching ridge on the first join, then simple work over that join with a row of dc.

To finish
Line the bag, stiffening as necessary and use a press stud or other fastener to close it.

If you make a satchel, please do share photos of it either here or on Ravelry

Happy crocheting xxx

Sunny Buxton!

Last week I was away for 4 days with 10 of my knitgroup friends on our annual knitting retreat to Buxton.   It is now almost guaranteed to be glorious sunny weather each time we retreat to Buxton – this was our third retreat and we had wall to wall sunshine again.

Buxton is beautiful in the sunshine (and not too bad when it rains either!) and it feels like a home-from-home.  The hotel we stay at looks after us very well, their hospitality is wonderful and they cater perfectly for a group of knitters.   In fact we have already pencilled in next year’s retreat at the same venue!

We have some favourite shops and cafes that we visit, and always discover something new.  This year 2 of us (Julie and I) took the train to Whaley Bridge to locate a yarn shop – it is Yarnbirds and is situated just a stone’s throw from the station within a lovely café.  The yarn selection is excellent, I came away with a skein each from Peak District Yarns (a sock yarn – merino/nylon/sparkle in ‘Brilliant Boots’) and The Little Grey Sheep (British Stein Fine Wool in ‘My Girl Lollypop’).

We always hold our own workshops at the hotel – this year Sue did an excellent workshop on sock knitting, Margaret and Lorraine did a weaving demonstration (I am holding back the urge to buy my own loom…but it is so hard….) and I had a ‘crochet corner’ for anyone wanting crochet help or wanting to make the Buxton Satchel.

The 4 days flew by, and I can’t wait til next year 🙂

Meanwhile here’s the Buxton Satchel – I have a ‘recipe’ for this (not a full blown pattern) and will share it on this blog next week.

DSC01339

Happy crocheting xxxx


.

Old news!?

I’m sorry I’ve been quiet for  while, I was laid up with a bad cold last weekend and early last week.  Of course, being me I thought I could just carry on as normal but I felt so lousy that I was forced to stop all plans and just recuperate.  So I lost 4 days, I even missed going to Knitgroup, which is RARE.

So it is old news, and I am sure many of you have bought the magazine, but I am itching to tell you about the lovely feature I had in Inside Crochet.  It is called ‘Motifs 3 ways’ and is all about how motifs change as they evolve –  the same motif in 3 evolutions was used in 3 items: cowl, coaster and tablecloth.   The feature was presented very well (not a surprise since Inside Crochet style things beautifully all the time) and I felt very  proud.  It’s a great issue with other gorgeous lovelies, so do buy a copy.

DSC01341

Later in the week I had a meeting with my friend Nic (Yarns from the Plain).  Our meeting was all about the Cheshire Fibre Festival, for which preparation is going well and I’ll have plenty to tell you about in due course.   Nic also has a podcast and you must have a listen, in her latest one she even mentions me!

Tomorrow is my monthly crochet club:  Cheshire Crochet Club, which I hold at the local village community hall.  It is all about mandalas and I love preparing for this particular one, it’s all about colour!  A sneak peek for those who will be attending:

DSC01344

Until next week

Happy crocheting xx