It is in zingy colours and is lifting my mood, making me think of Spring even though we are still in Winter here in the UK. I have seen similar bags but never attempted to design one like this before, it was easier than I imagined it would be! So I thought you might like me to share how I made this with you.
I will be posting 3 blogs on the ‘how to’.
If you want to join in you may wish to start gathering your equipment now.
I made my ‘spring lifter’ in a 4ply/fingering weight cotton in a chosen colour scheme. However this can be made in any yarn weight and would be a fabulous stash buster. Remember if you use a different yarn weight you should use a suitable hook size.
So here is what I used:
YARN
Scheepjes Cotton 8, 50g/170m/186yds per ball. I used 4 colours:
A – 1 ball of Heath (721) – a deep purple
B – 1 ball of Sea Green (723)
C – 2 balls of Canary (714) but I used only about 5m/yd of the second ball
D – 1 ball of Light Pastel Green (663)
HOOK
3mm crochet hook (US D/3)
OTHER
4 lockable stitch markers
Tapestry needle for sewing ends
Ring for Dorset button (optional) for the centre of my simple flower.
Start gathering your equipment and I’ll post part 1 of the ‘how to’ tomorrow.
Meanwhile, I have started a discussion on my Ravelry forum here, if you want to join in this CAL please join in the discussion too. I’d love to see what you make.
Happy New Year! I hope you celebrated the turn of the old year in suitable style.
Today is the big reveal!
First I will explain my edging. I wanted something simple. In fact when I had joined my motifs I liked the look of the blanket so much that I almost didn’t do an edging. But not doing an edging is a crochet sin! All blankets need something firm along the edge to hold the whole shape.
I experimented with several ideas and settled for the simplest. I expect you think I did a double crochet edging, this is simple isn’t it? Well I didn’t. The simplest edging is slip stitch, and I did 2 rounds of slip stitch.
To maintain the same effect that I achieved with the joining of the motifs, the slip stitch edging was done into the back loop only. This leaves the front loop of each motif to ‘frame’ the motif. So the first edging round was done into the back loop of every stitch along the sides (that works out at 25 per motif edge).
Edging first round
Once you have completed the first round you will find the blanket has a nice firm edge. Actually I think this simple round give a good finish, but I wanted a little more.
The second round went into the back loop of the first round. When the second round is complete you’ll see that only the front loop of the first round is showing. So choose your colours carefully as the second round is the predominant colour.
Edging second round
I didn’t do any extra stitches in the corners, I don’t think it necessary when it is just 2 rounds of slip stitch. And it creates a gentle curve at the corner.
Edging corner
Nicely edged
And this is the final blanket in it’s glory, being inspected by @yarnaddictcat :
@yarnaddictcat inspection
No little embellishment have been added (yet!).
If you look very closely you may notice that I didn’t quite follow the layout plan. The colours are the same but the motifs are slightly off plan. This is because, as I mentioned in part 4, I was running out of some colours so adjusted the order of motifs I made a little bit.
Now I’ve shown you mine – please show me yours!
Happy crocheting xxxx
Now for the legal stuff – I designed this, it’s all my own work and is copyright. Please feel free to make as many as you like, but not for commercial purposes, and please credit me with the design. Thank you!
How are you all doing? Did you finish the motifs from part 1?
I didn’t do too much yesterday, I was far too busy eating and drinking! But I did have a flash of inspiration after all that excess, a little embellishment for the blanket – so this will be included in one of next week’s updates.
I have seen some progress on Ravelry, and I know some of you have completed 9 squares and therefore must be ready for this instalment. So here it is:
First a reminder of the ABBREVIATIONS:
The pattern is written in English crochet terms.
St = stitch
Ch = chain
Tr = treble (US dc)
Ss = slip stitch
Sp = space
Ch-sp =chain space
This is the second motif design, I am making 10, 2 in each of my chosen colours. I call it the FULL MOTIF 1:
FULL MOTIF 1
Foundation: Make a 4ch foundation ch and join into a ring with a ss
Round 1: 5ch (counts as 1tr, 2ch), (3tr, 2ch) 3 times into the ring, 2tr into the ring, join to 3rd st of first 5ch with a ss.
Round 2: ss into 2ch-sp, (note for this and each subsequent round: this ss is to position the start of the round in the right place) 5ch (counts as 1tr, 2ch), 2tr into the same 2ch-sp, 1tr into each tr along each side and (2tr, 2ch, 2tr) in each 2ch-sp on the corner, finish with 1tr in the first 2ch-sp and join to 3rd ch from start with a ss. You should have 7tr along each side and 2ch in each corner of your motif.
Rounds 3 to 6: Repeat Round 2. The number of tr along each side increases by 4 with each round. So after Round 3 you have 11tr, after Round 4 you have 15tr, after Round 5 you have 19tr and after Round 6 you have 23tr.
Break yarn and fasten off leaving a long tail about 3m long for sewing or crocheting together later.
Please share your progress on the discussion thread on my Ravelry Group here.
Stay tuned for the next instalment, which I aim to publish on Sunday……..
Happy crocheting xxx
Now for the legal stuff – I designed this, it’s all my own work and is copyright. Please feel free to make as many as you like, but not for commercial purposes, and please credit me with the design. Thank you!
I’ve done all my shopping and only have a few pre-Christmas chores to do before I can relax……..well almost, maybe total relaxation will arrive after the dinner is cooked tomorrow!
When your chores are done, pull up a chair, get yourself a glass of something good (with or without alcohol), have a few nibbles in a dish handy for when you feel peckish and ….put your feet up.
Did I forget something? Ah, yes – grab your crochet hook and a basket of yarn because I’d love you to join me in this Christmas CAL. It should be an easy relaxing project, perfectly manageable for this season.
I’m making a lap blanket and here are the details to get you started:
SIZE
The lap blanket I am making will be 7 motifs square – a total of 49 motifs. The blanket will be about 1m/42in square without border, because I haven’t designed a border yet, and I may have to find some more yarn for that!
YARN
I am using Stylecraft Cotton Classique DK yarn, 100g/184m per ball. I estimate I’ll need about 10 balls.
HOOK
I am using a 4mm crochet hook (US G/6)
MOTIF/TENSION
The motifs are square and each motif is approx. 15cm/6in square.
ADAPTABILITY
You can use any yarn you like, as long as you use a suitable hook size. And you can make it to any size you like. It is a perfect stash buster.
COLOUR SCHEME
I am using 5 colours, and each motif is one colour. But you could use as many colours as you like and change colour each round if you like.
These are my colours.
Christmas CAL colours
So here we go:
ABBREVIATIONS
The pattern is written in English crochet terms.
St = stitch
Ch = chain
Tr = treble (US dc)
Ss = slip stitch
Sp = space
Ch-sp =chain space
The first motif is based on the standard granny square, so you should be able to tackle this easily.
GRANNY 5 MOTIF (I am making 9, 2 in each in 4 of my chosen colours and 1 in the last colour)
GRANNY 5 MOTIF
Foundation: Make a 4ch foundation ch and join into a ring with a ss
Round 1: 5ch (counts as 1tr, 2ch), (3tr, 2ch) 3 times into the ring, 2tr into the ring, join to 3rd st of starting 5ch with a ss.
Round 2: ss into 2ch-sp, (note for this and each subsequent round: this ss is to position the start of the round in the right place) 5ch (counts as 1tr, 2ch), (3tr, 1ch) into the same 2ch-sp, (3tr, 2ch, 3tr, 1ch) into each of the next three 2ch-sps, 2tr into the first 2ch-sp, join to 3rd st of starting 5ch with a ss.
Round 3: ss into 2ch-sp, 5ch (counts as 1tr, 2ch), (3tr, 1ch) into the same 2ch-sp, *(3tr, 1ch) into the next 1ch-sp, (3tr, 2ch, 3tr, 1ch) into the next 2ch-sp; repeat from * another 2 times (3tr, 1ch) into the next 1ch-sp, 2tr into the first 2ch-sp, join to 3rd st of starting 5ch with a ss.
Round 4: ss into 2ch-sp, 5ch (counts as 1tr, 2ch), (3tr, 1ch) into the same 2ch-sp, *(3tr, 1ch) into each of the next two 1ch-sps, (3tr, 2ch, 3tr, 1ch) into the next 2ch-sp; repeat from * another 2 times (3tr, 1ch) into each of the next two 1ch-sps, 2tr in the first 2ch-sp, join to 3rd st of starting 5ch with a ss.
Round 5: ss into 2ch-sp, 5ch (counts as 1tr, 2ch), (3tr, 1ch) into the same 2ch-sp, *(3tr, 1ch) into each of the next three 1ch-sps, (3tr, 2ch, 3tr, 1ch) into the next 2ch-sp; repeat from * another 2 times (3tr, 1ch) into each of the next three 1ch-sps, 2tr into the 1st 2ch-sp, join to 3rd st of starting 5ch with a ss.
Round 6: ss into 2ch-sp, 5ch (counts as 1tr, 2ch), 2tr into the same 2ch-sp, 1tr into each tr and 1ch-sp along each side and (2tr, 2ch, 2tr) into each 2ch-sp on the corners, finish with 1tr in the first 2ch-sp and join to 3rd ch from start with a ss.
Break yarn and fasten off, leaving a long tail of about 3m for sewing or crocheting together later.
You should have 23tr along each side and 2ch in each corner of your motif.
I have a discussion thread on my Ravelry Group here. Please join in and share your progress or, if you prefer, add comments on this blog.
Stay tuned for the next motif pattern, which I aim to publish on Friday…..or is that too soon?
Merry Christmas xx
Now for the legal stuff – I designed this, it’s all my own work and is copyright. Please feel free to make as many as you like, but not for commercial purposes, and please credit me with the design. Thank you!
I have been busy for the last 2 weeks, a little bit of designing but mainly ‘stashing down’. What is stashing down? For yarn-aholics like me, stash is the stock of yarn I have acquired over the years. So stashing down means using up lots of yarn so that my yarn ‘stash’ reduces. Now my stash is huge, so large that I keep a spreadsheet to help me manage it and I know how many balls/skeins I have. But it is so embarrassingly large that I can’t even bring myself to tell you what that number is! It does fill a tall built in double width wardrobe and overflow into numerous baskets in my yarn room. Did I ever mention I have a yarn room? Perhaps the less said the better – but it gives you an idea of how much stash I have!
I need to reduce this stash considerably and I decided to use quick simple crochet stitches (such as granny square stitches) that I can do with my eyes shut, and therefore speedily stash down. So I have used these simple stitches and crocheted like the wind. So far I have used 17 balls of my stash and made no fewer 8 gift bags (destined for Christmas wrappings).
The bags are varied, and mainly just improvised. I did start a couple of patterns but changed then, and after that I decided I could just make them up as I went. So here’s a selection:
Market style bagsGranny style bags
You can tell from the photos that I haven’t used the best of my yarn stash for these bags. But there is a little glitter and silk in some of the yarns I used.
I have also started on some simple but luxurious cushion covers in pure silk. These are a simple granny square design – one for the back and 4 for the front. I plan to fasten them with buttons, so I will need to design a granny-style button flap.
I love the yarn and the colours complement each other well. Unfortunately this photo just doesn’t show the colours in all their glory, nor the beautiful sheen of the silk.
Granny cushion pieces
I’m also working on a few WIPs – one a second cushion cover to match this one:
In the next couple of weeks my stash down will be finished (for now) and hopefully I will have used more than 30 balls/skeins of yarn. Perfect for creating more storage space …….because at the end of September I am going here: http://www.yarndale.co.uk
And I am sure to buy lots more yarn – I guess that’s called stashing up!!!
How is your summer going? Here in the UK it is warm, probably the warmest summer we have had for a few years. So evenings have been balmy, wine has been quaffed and a gentle calm fills the air (inbetween the hayfever sneezes!).
My knitting and crochet normally slows in warm weather, warm hands and wool do not mix well. But this July has been different, maybe because one of my long term projects has been in cotton – the Jane Crowfoot mystery blanket CAL. The last clue for this was published a few days ago – I had one large flower motif to make, then a lot of joining and edging. The flower motif is blocking and I have a plan to slowly sew the pieces together rather than get bogged down in too much sewing – I will share the finished project in due course..
I have also completed the July clue of Amanda Perkins’ Kaleidoscope mystery blanket CAL – I’ve told you before that I love this pattern and the yarn, it seems to flow off the hook easily. Here is July:
My plans for my own mystery CAL are well advanced. I have made a sample and started pattern writing. Just as well, because the first clue will be released on 24th July. The CAL will be hosted on my Ravelry forum here: http://www.ravelry.com/discuss/agrarian-artisan-designs/2967692/26-50#33
Anyone joining the forum and signing up for the MCAL before 1st August will receive all clues free. It is motif based, and can be a scarf, wide scarf/wrap or even a blanket. Suggestions for yarn quantities for 4 ply/fingering and double knit will be provided. It is all about colour, which I am sure everyone will love, and the motif basis is slightly different to normal, which I love but I await response to the final design!
Also I have published my July Scarf which is made in silk. Following the June theme, this scarf is a row of granny squares made in one long piece:
Somehow I set myself a challenge, I don’t know how or why I did it – it was one of those happy accidents. The challenge is to design one crochet scarf a month and it is very much a personal challenge. But whatever the how or why, it is rolling along nicely. At the end of last week I published my May crochet scarf and I am already well advanced with June.
I‘ve been thinking a lot about colour recently. Perhaps because I’ve been making colourful hexagons for a few weeks ahead of the launch of The Hexagon Project 2014 which I blogged about yesterday here: https://agrarianartisan.com/2014/01/31/the-hexagon-project-2014/
I like to think I use a subtle colour palette in what I do. If you saw my home youwould see it is fairly modern with plenty of oak and neutral shades everywhere – just odd splashes of colour for accent. But I do love colour in many things, just as long as it isn’t glaring out at me from every corner. So I am not afraid to use colour provided it fits in my world.
You won’t find much multi colours in anything I make or design – just look at my Ravelry project and design pages to see how I use colour!
However, my thoughts have made me reflect on the blankets I have made over the years.
The first blanket I ever made was a granny in shades of blue, mainly pale blue. It served me well at uni. It was thrown out years ago – so I don’t have a photo of it. Believe me when I say it was subtle, not glaring.
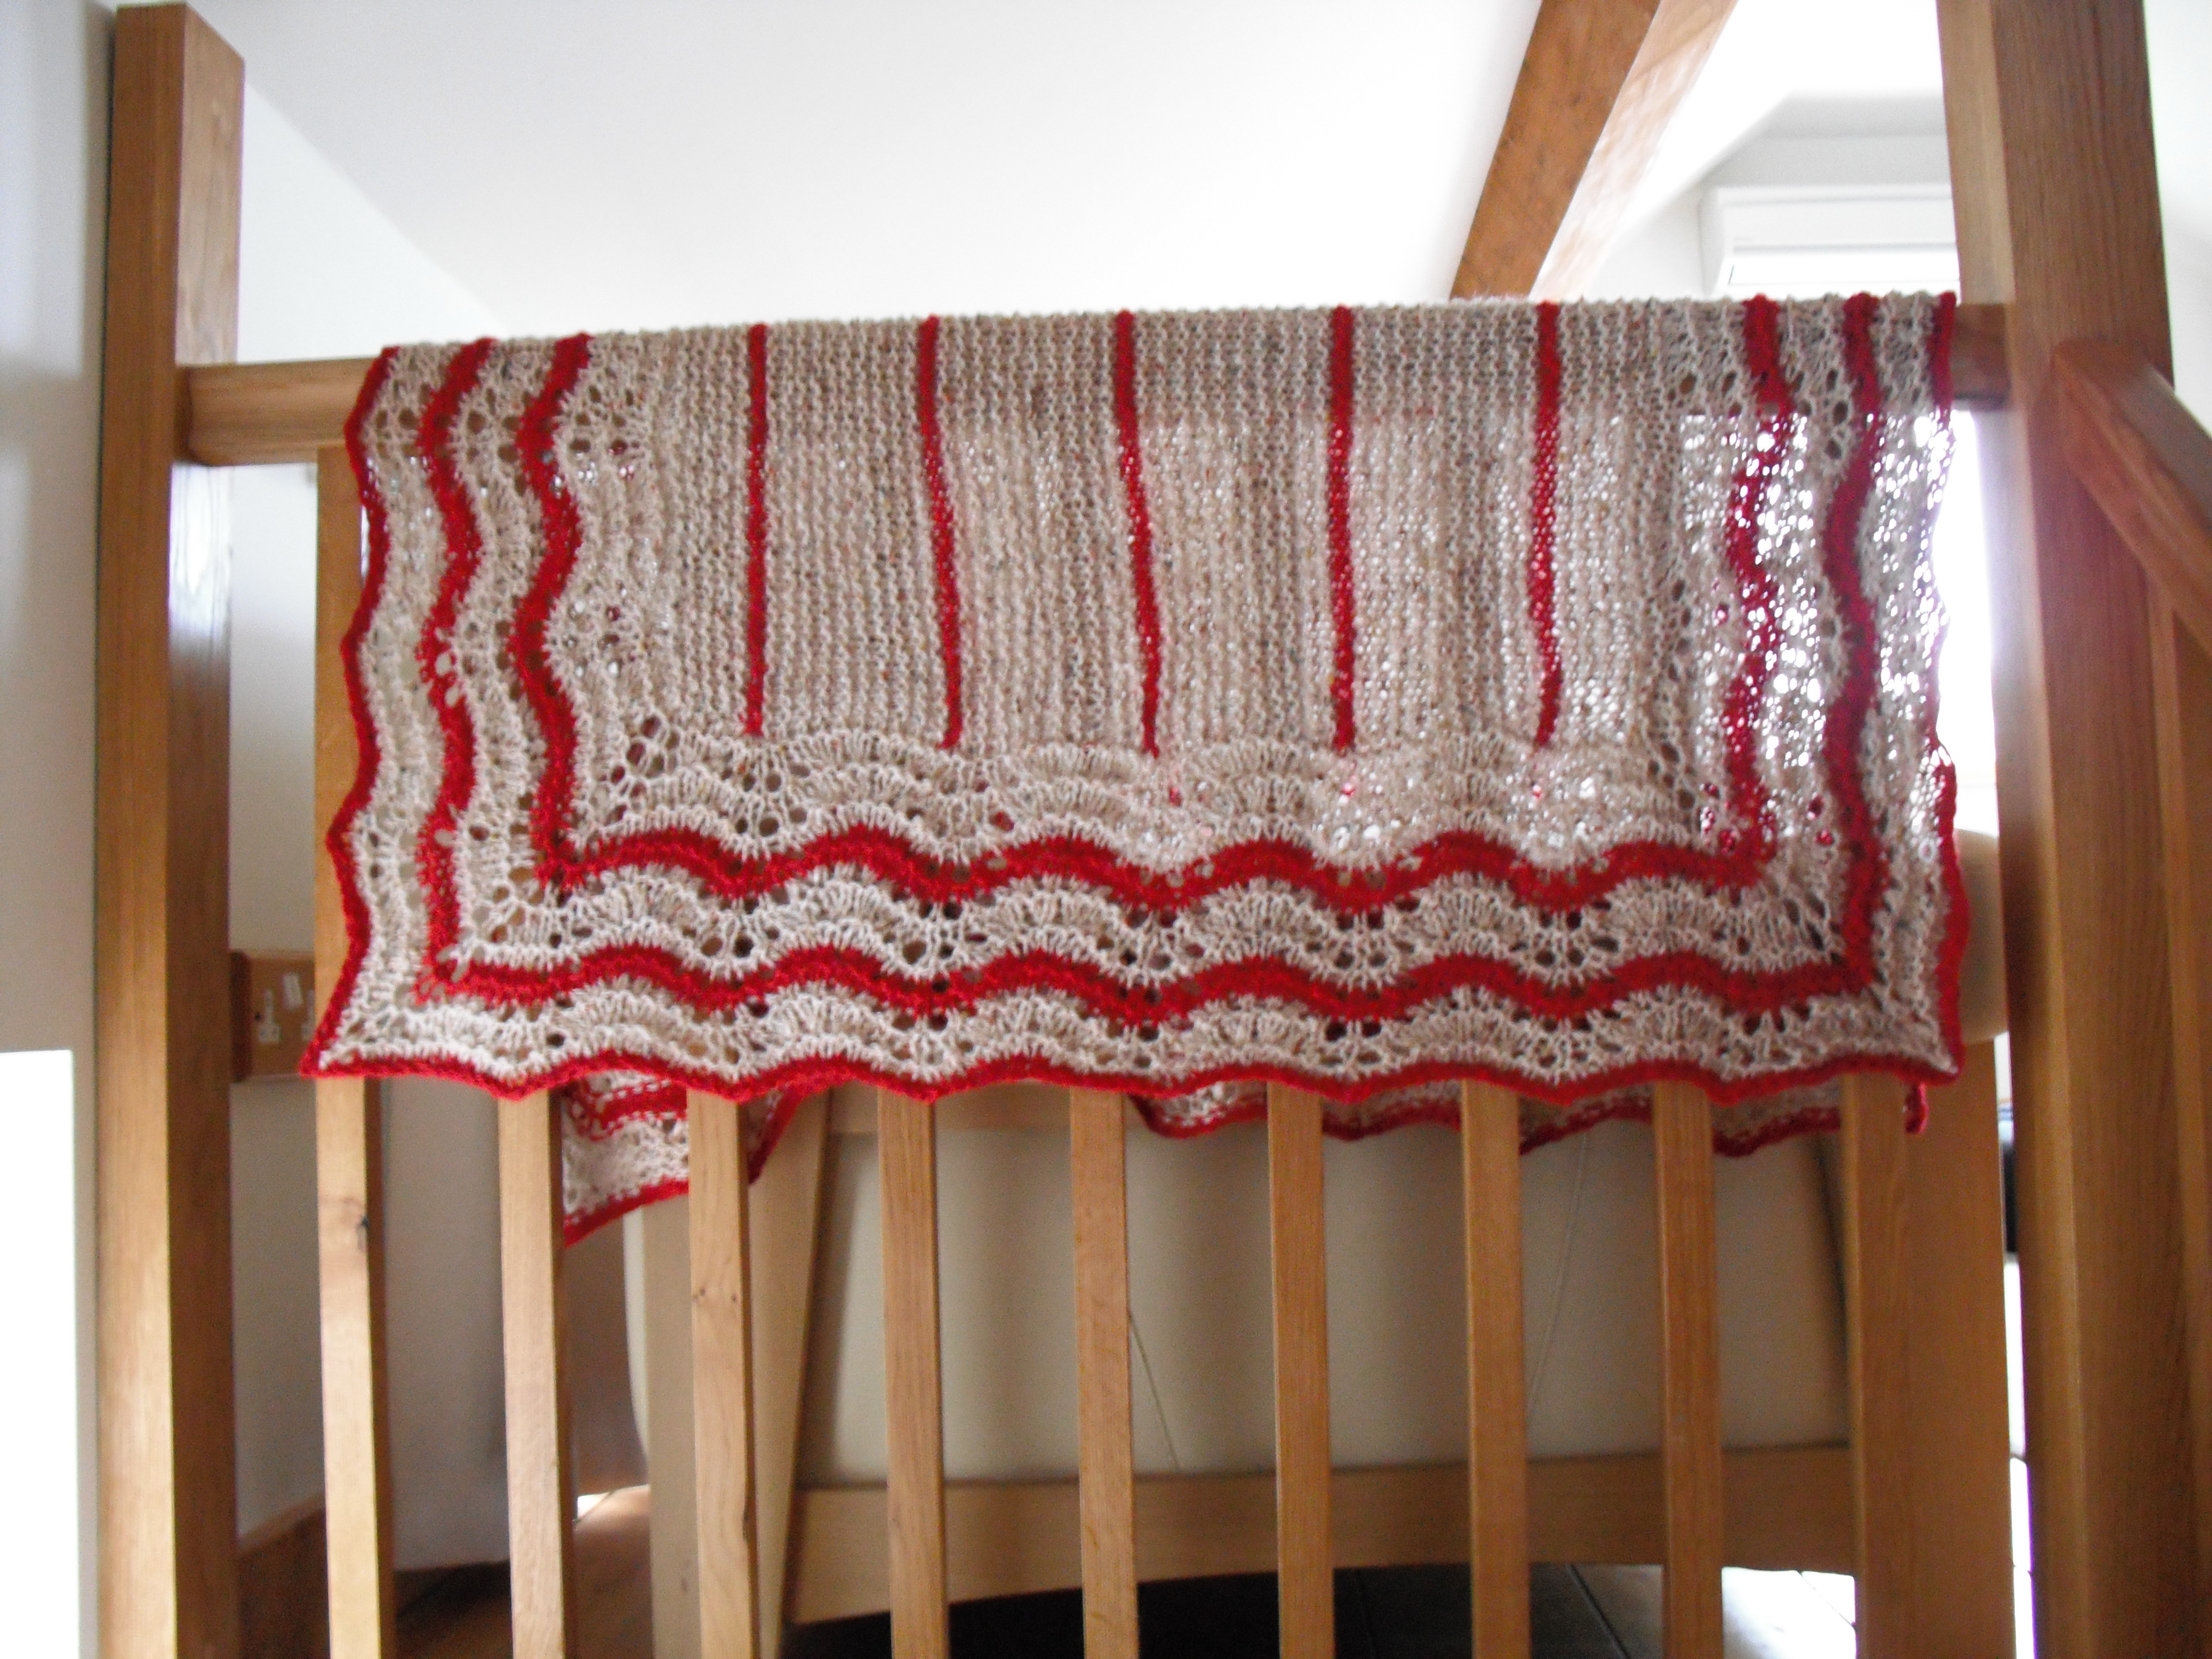
The second blanket I made was a small knitted hap blanket – beige with red highlights.
Hap blanket
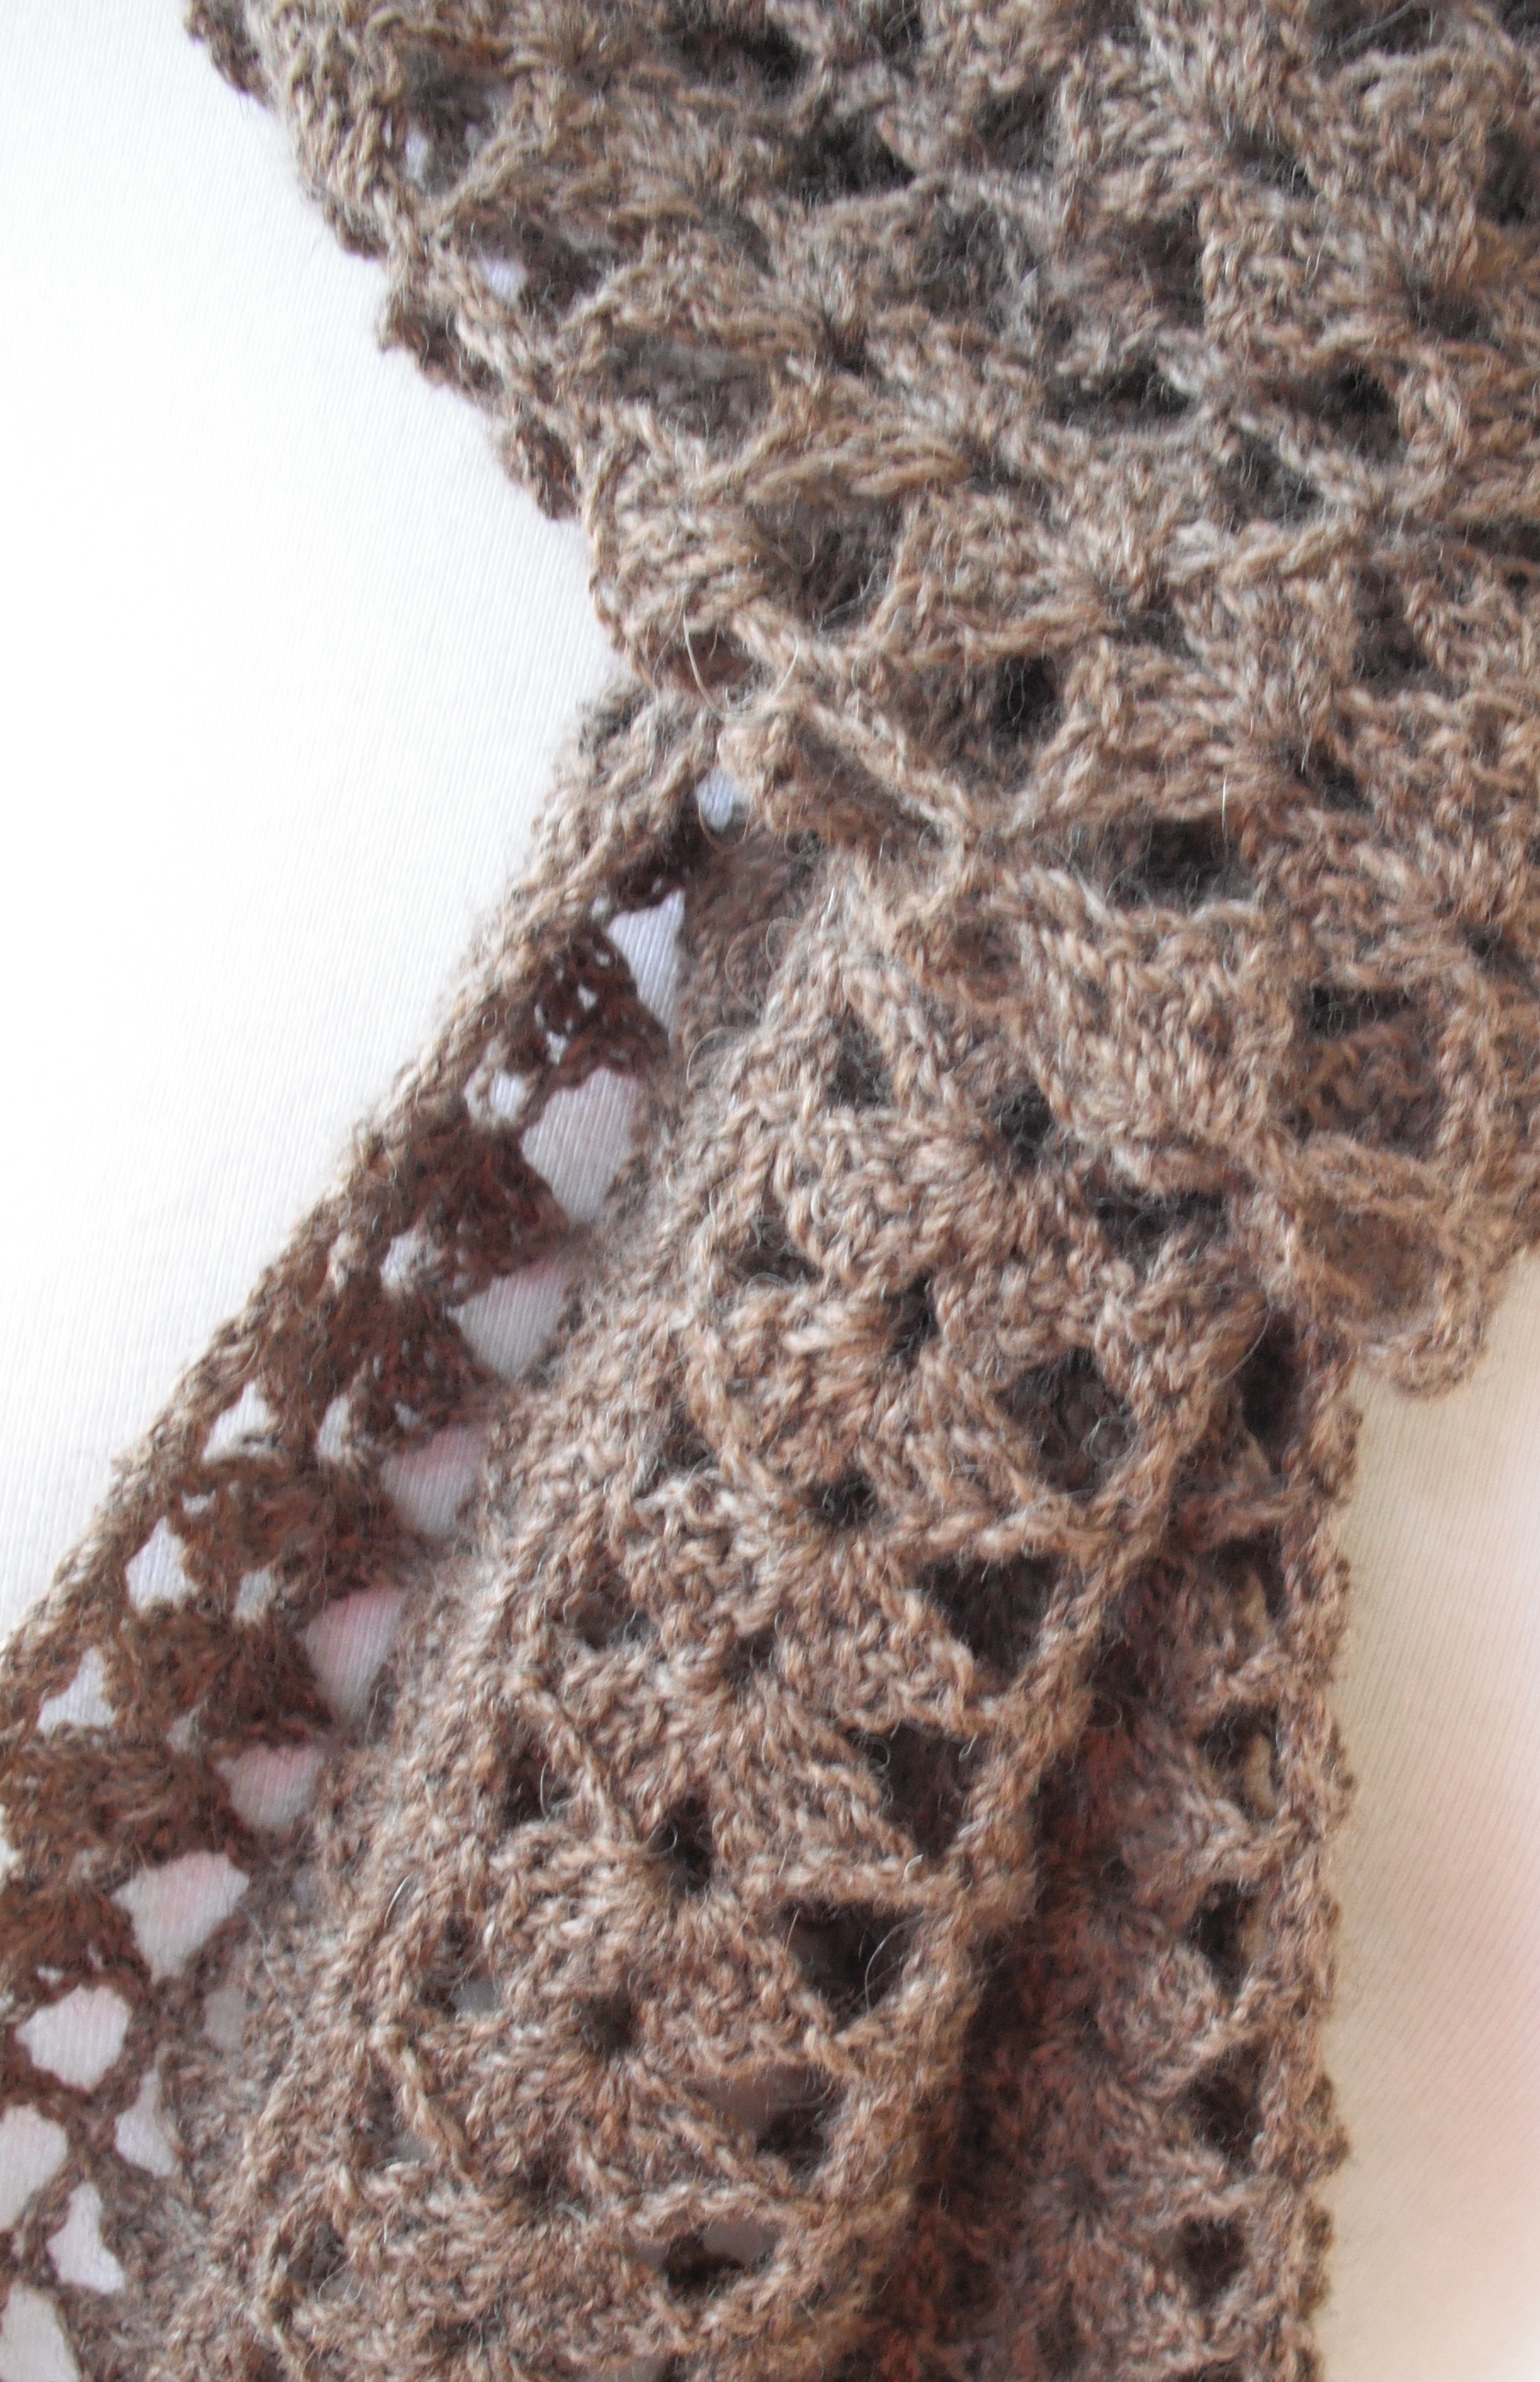
Then came Starry Night by Amanda Perkins, I made it in grey, silver and 2 shades of dark blue.
Starry Night
The fourth blanket I made was another design by Amanda Perkins called Lily. This time I started to use more colour – I wanted lots of red – and that is what I got!
Lily
The next blanket (knitted) was back to my neutral shades.
Heike’s afghan KAL
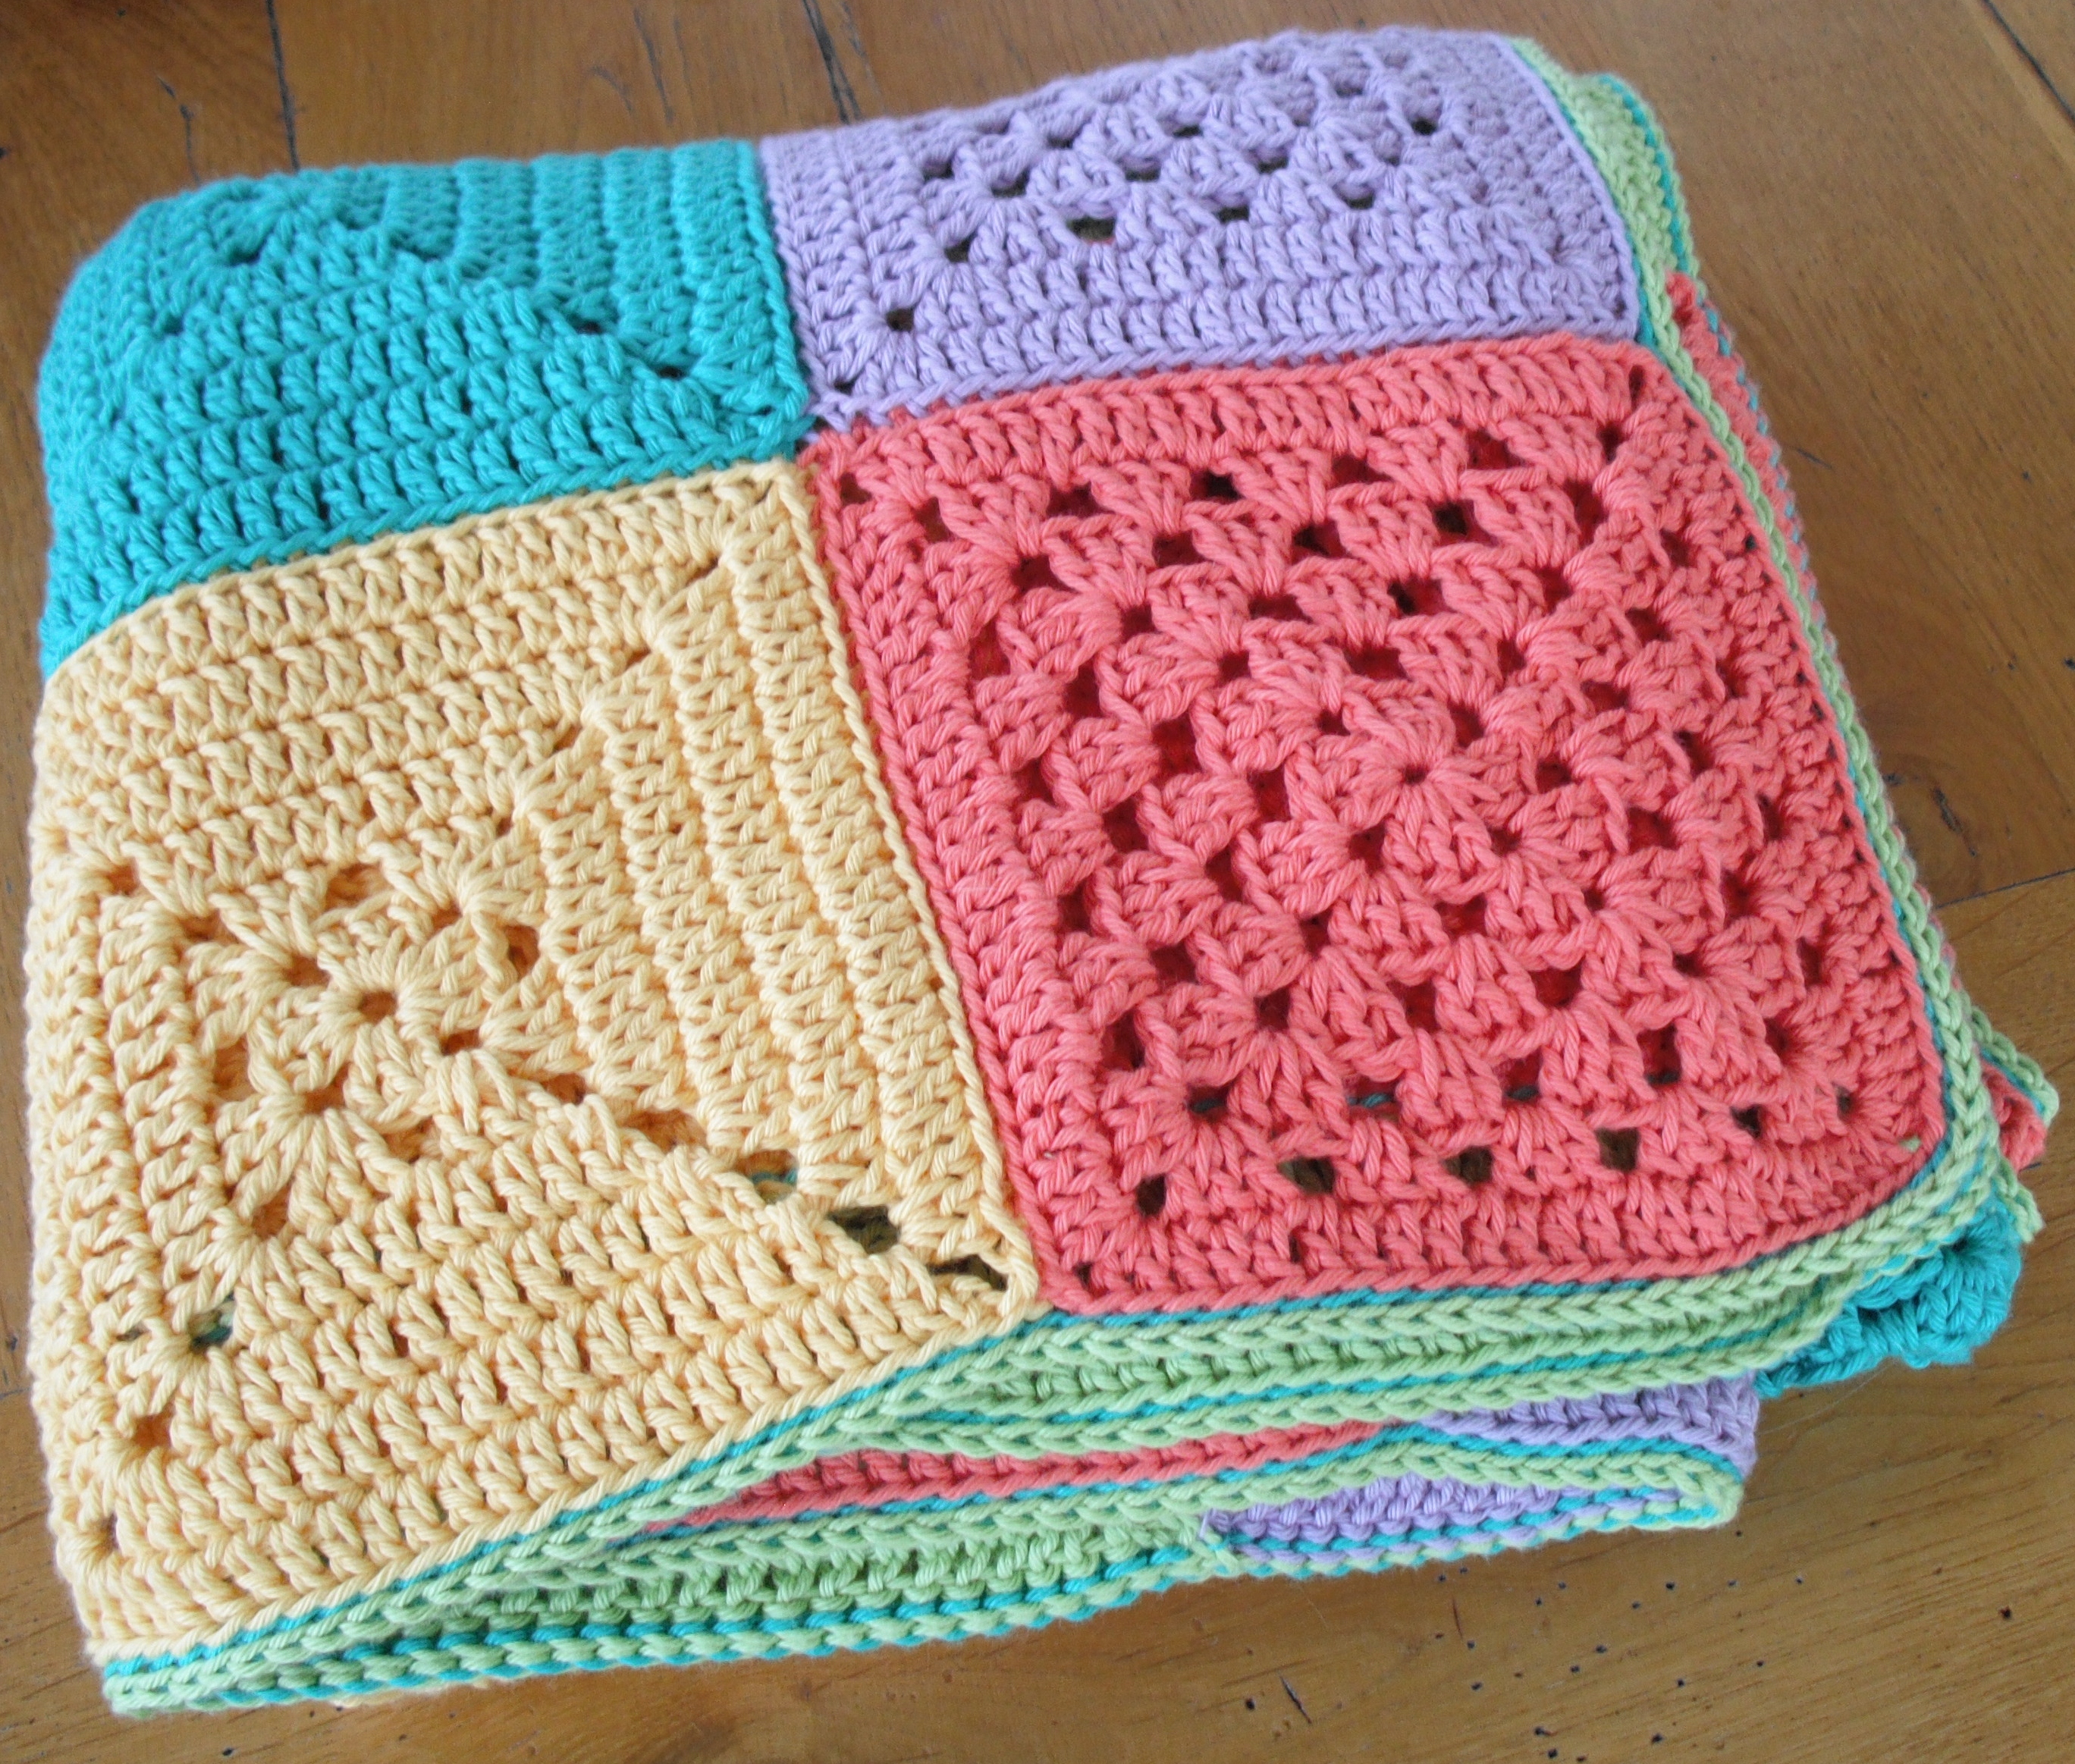
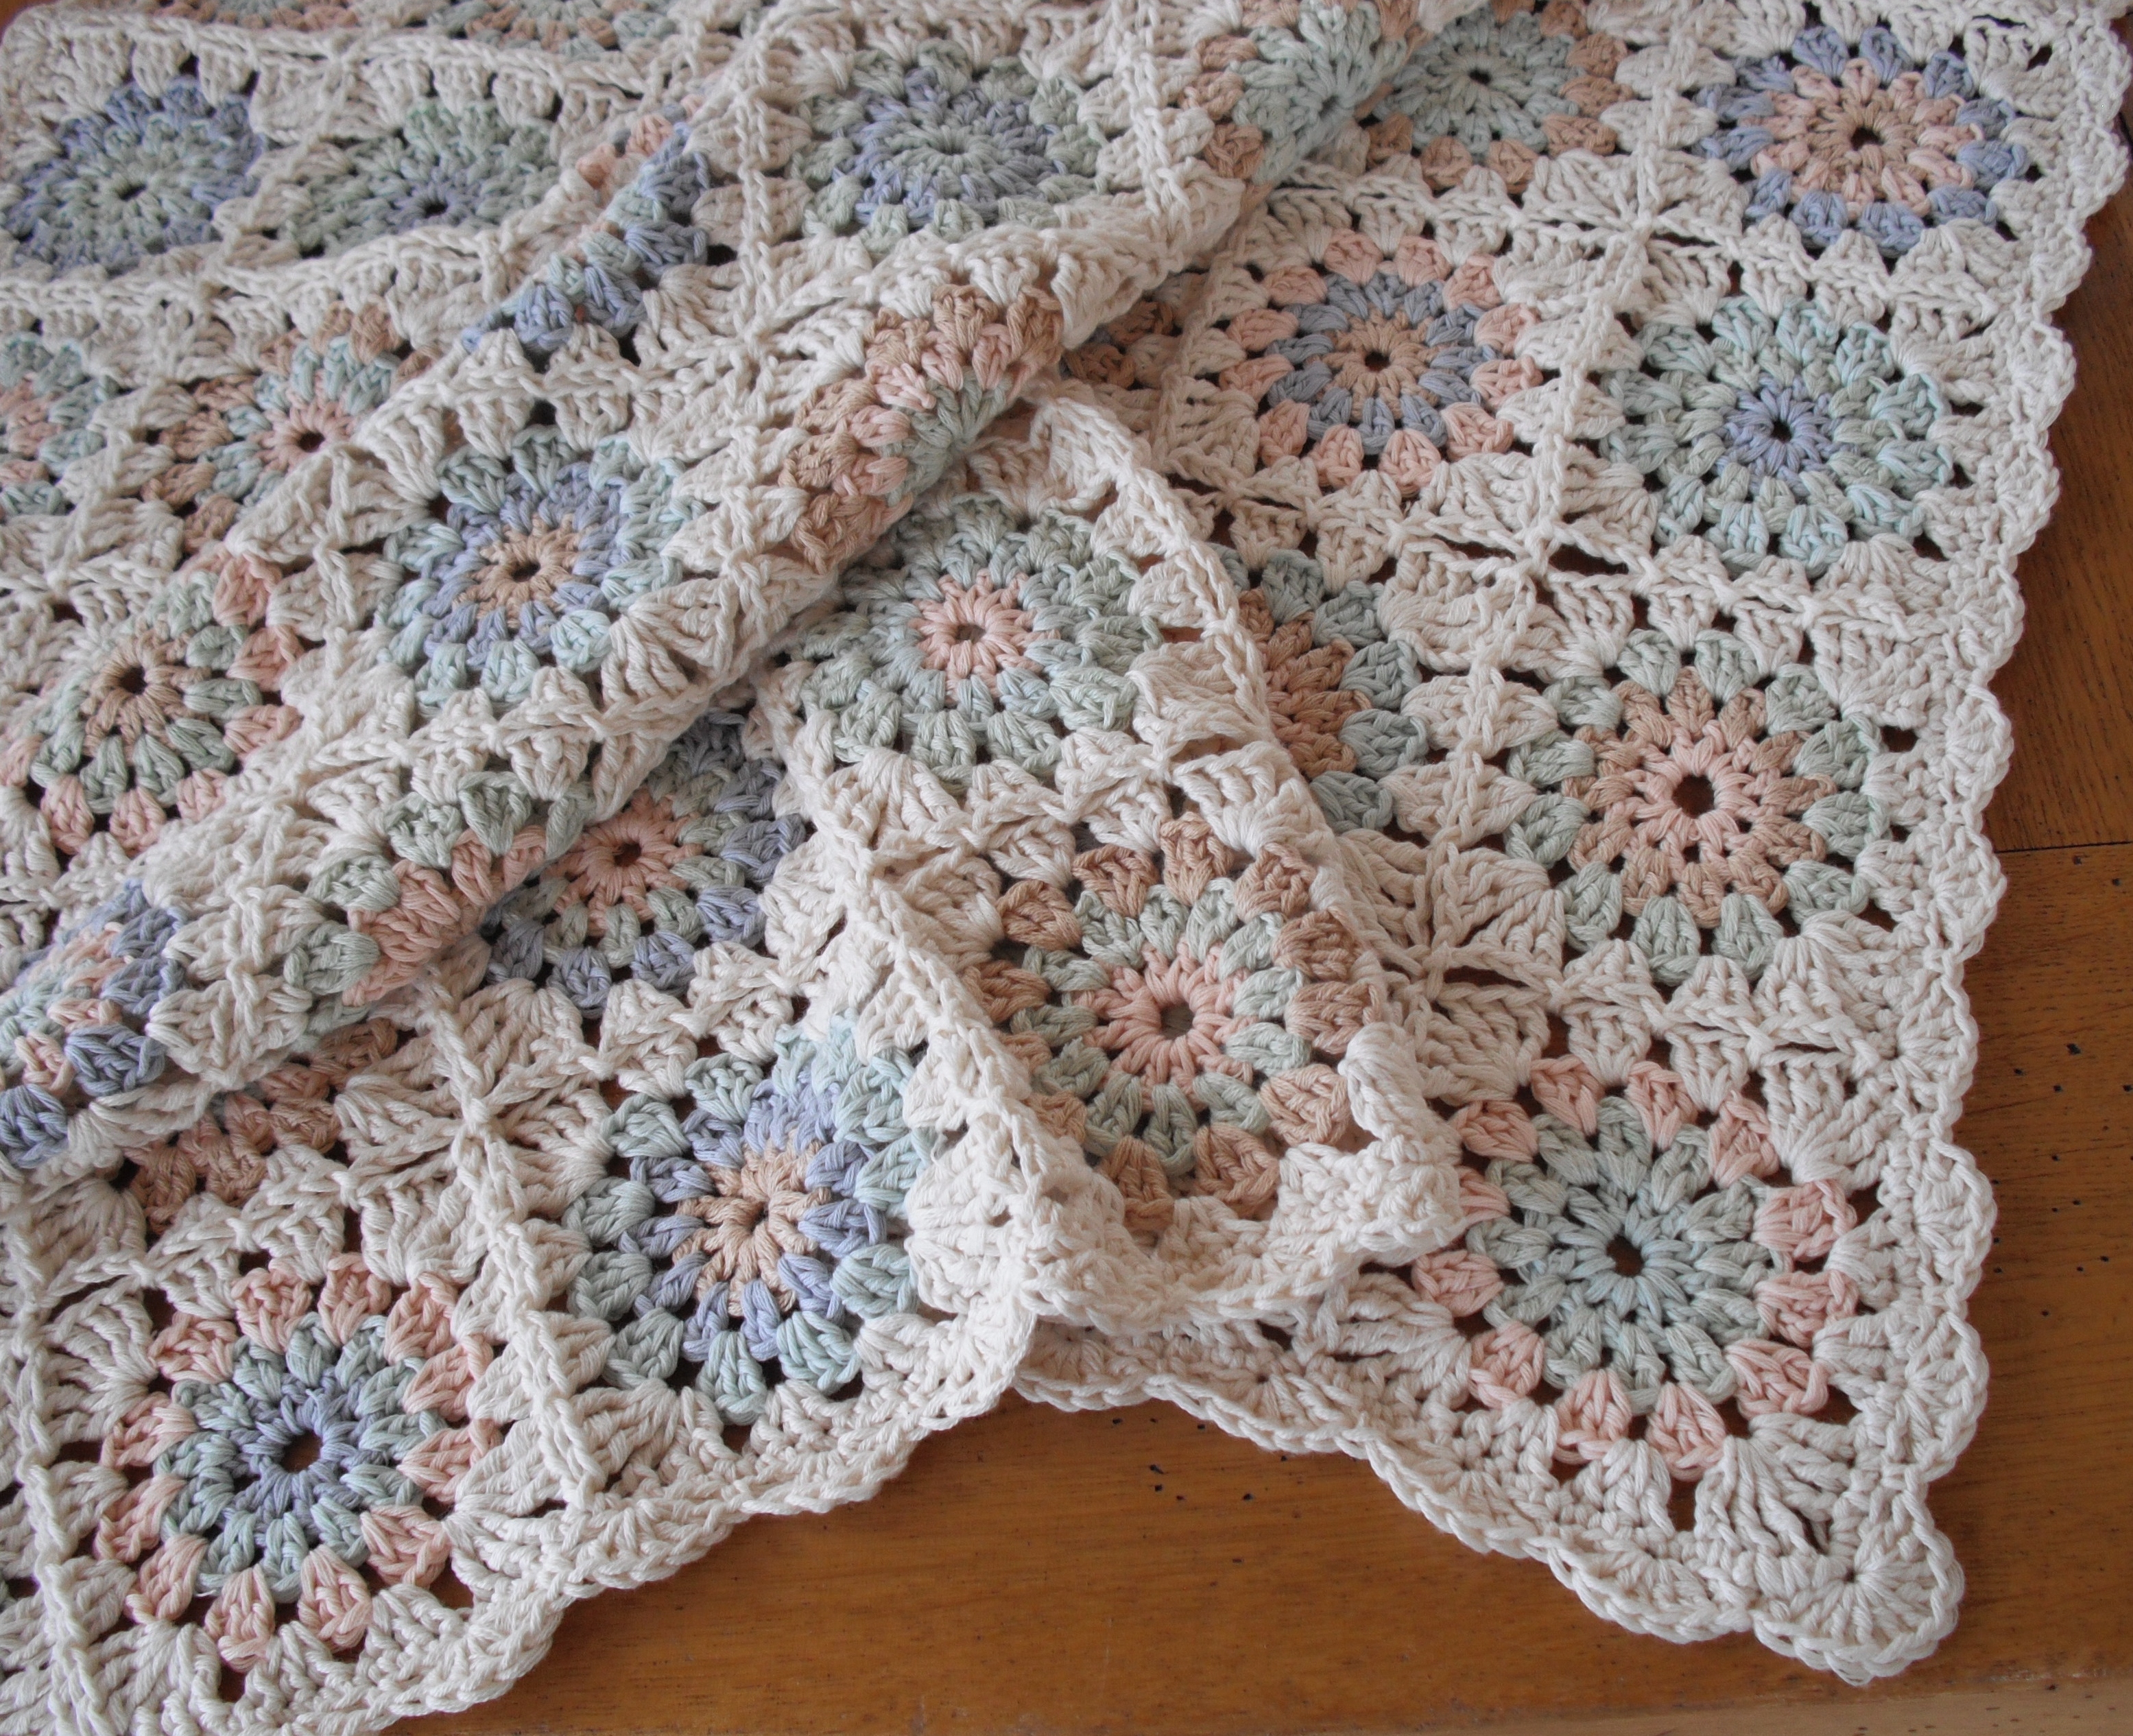
Then no 6 was a baby blanket in ice cream colours
Baby blanket
And then a small lap blanket in soft blue, green, cream.
Little Hearts
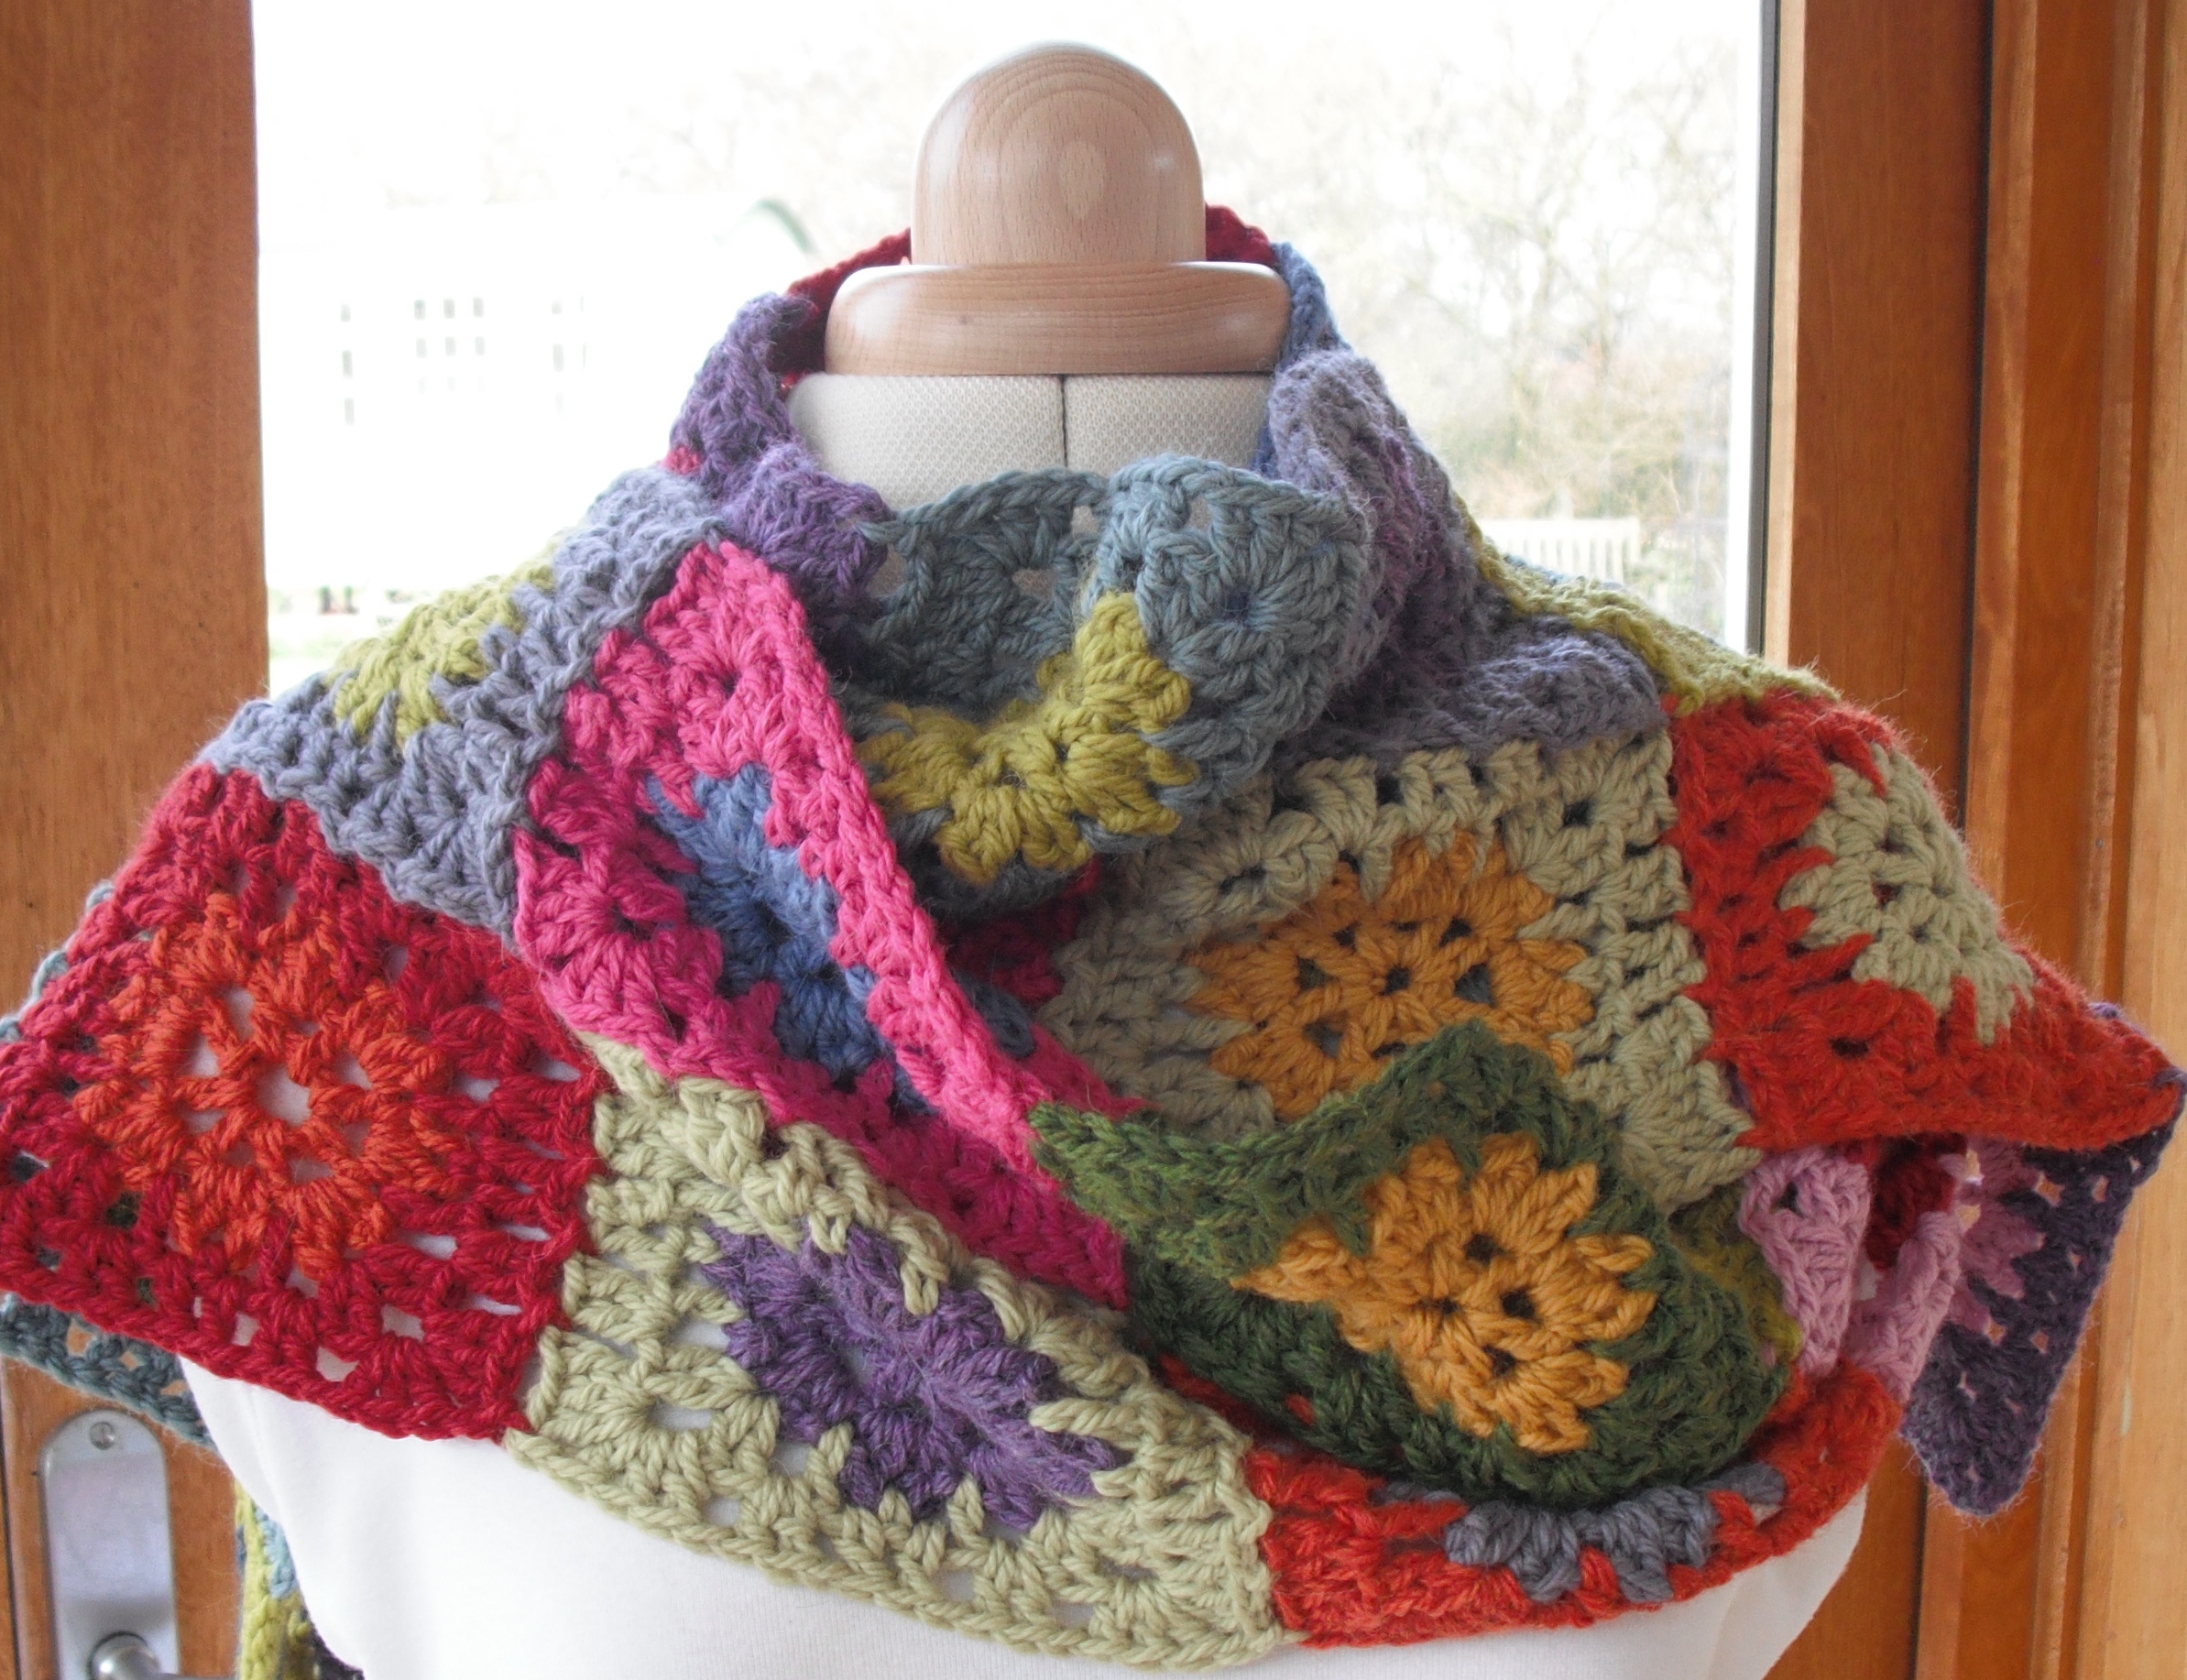
Then I made a granny style blanket in lots of colour – quite a change for me! It is confined to the spare bed and is very practical. But I do quite like the colour pick-me-up as I walk in that room.
I have also made 2 other blankets recently, I’m not going to tell you about them yet, other than to say one is ‘nicely’ colourful and the other is back to my more subtle colour palette.
Now all of this has made me think about the world of crochet. There are so many fields of crochet in the world from the delicate old Irish crochet used frequently in crisp white doillies to the bright colourful world of simple but effective granny squares, with a myriad of styles, taste and colour inbetween. The recent growth in the crochet world has been predominantly in the colourful granny area – after all it is easy to see the impact of colour and grannies are quite quick and easy to make when you are just getting going.
Just recently I have started to sense a slow change in that colourful granny world, maybe, just maybe, it is growing closer to my preferences of subtlety. I think it is about time it should.
Personally, in the world of colourful crochet my preference is always in the direction of Amanda Perkins, her use of colour is exceptional. It is so much more sophisticated than the granny world. If we are to use colour in the world of crochet it is much better to do with sophistication don’t you think?
Yes, I would dearly love to know what you think, so please share your thoughts with me.
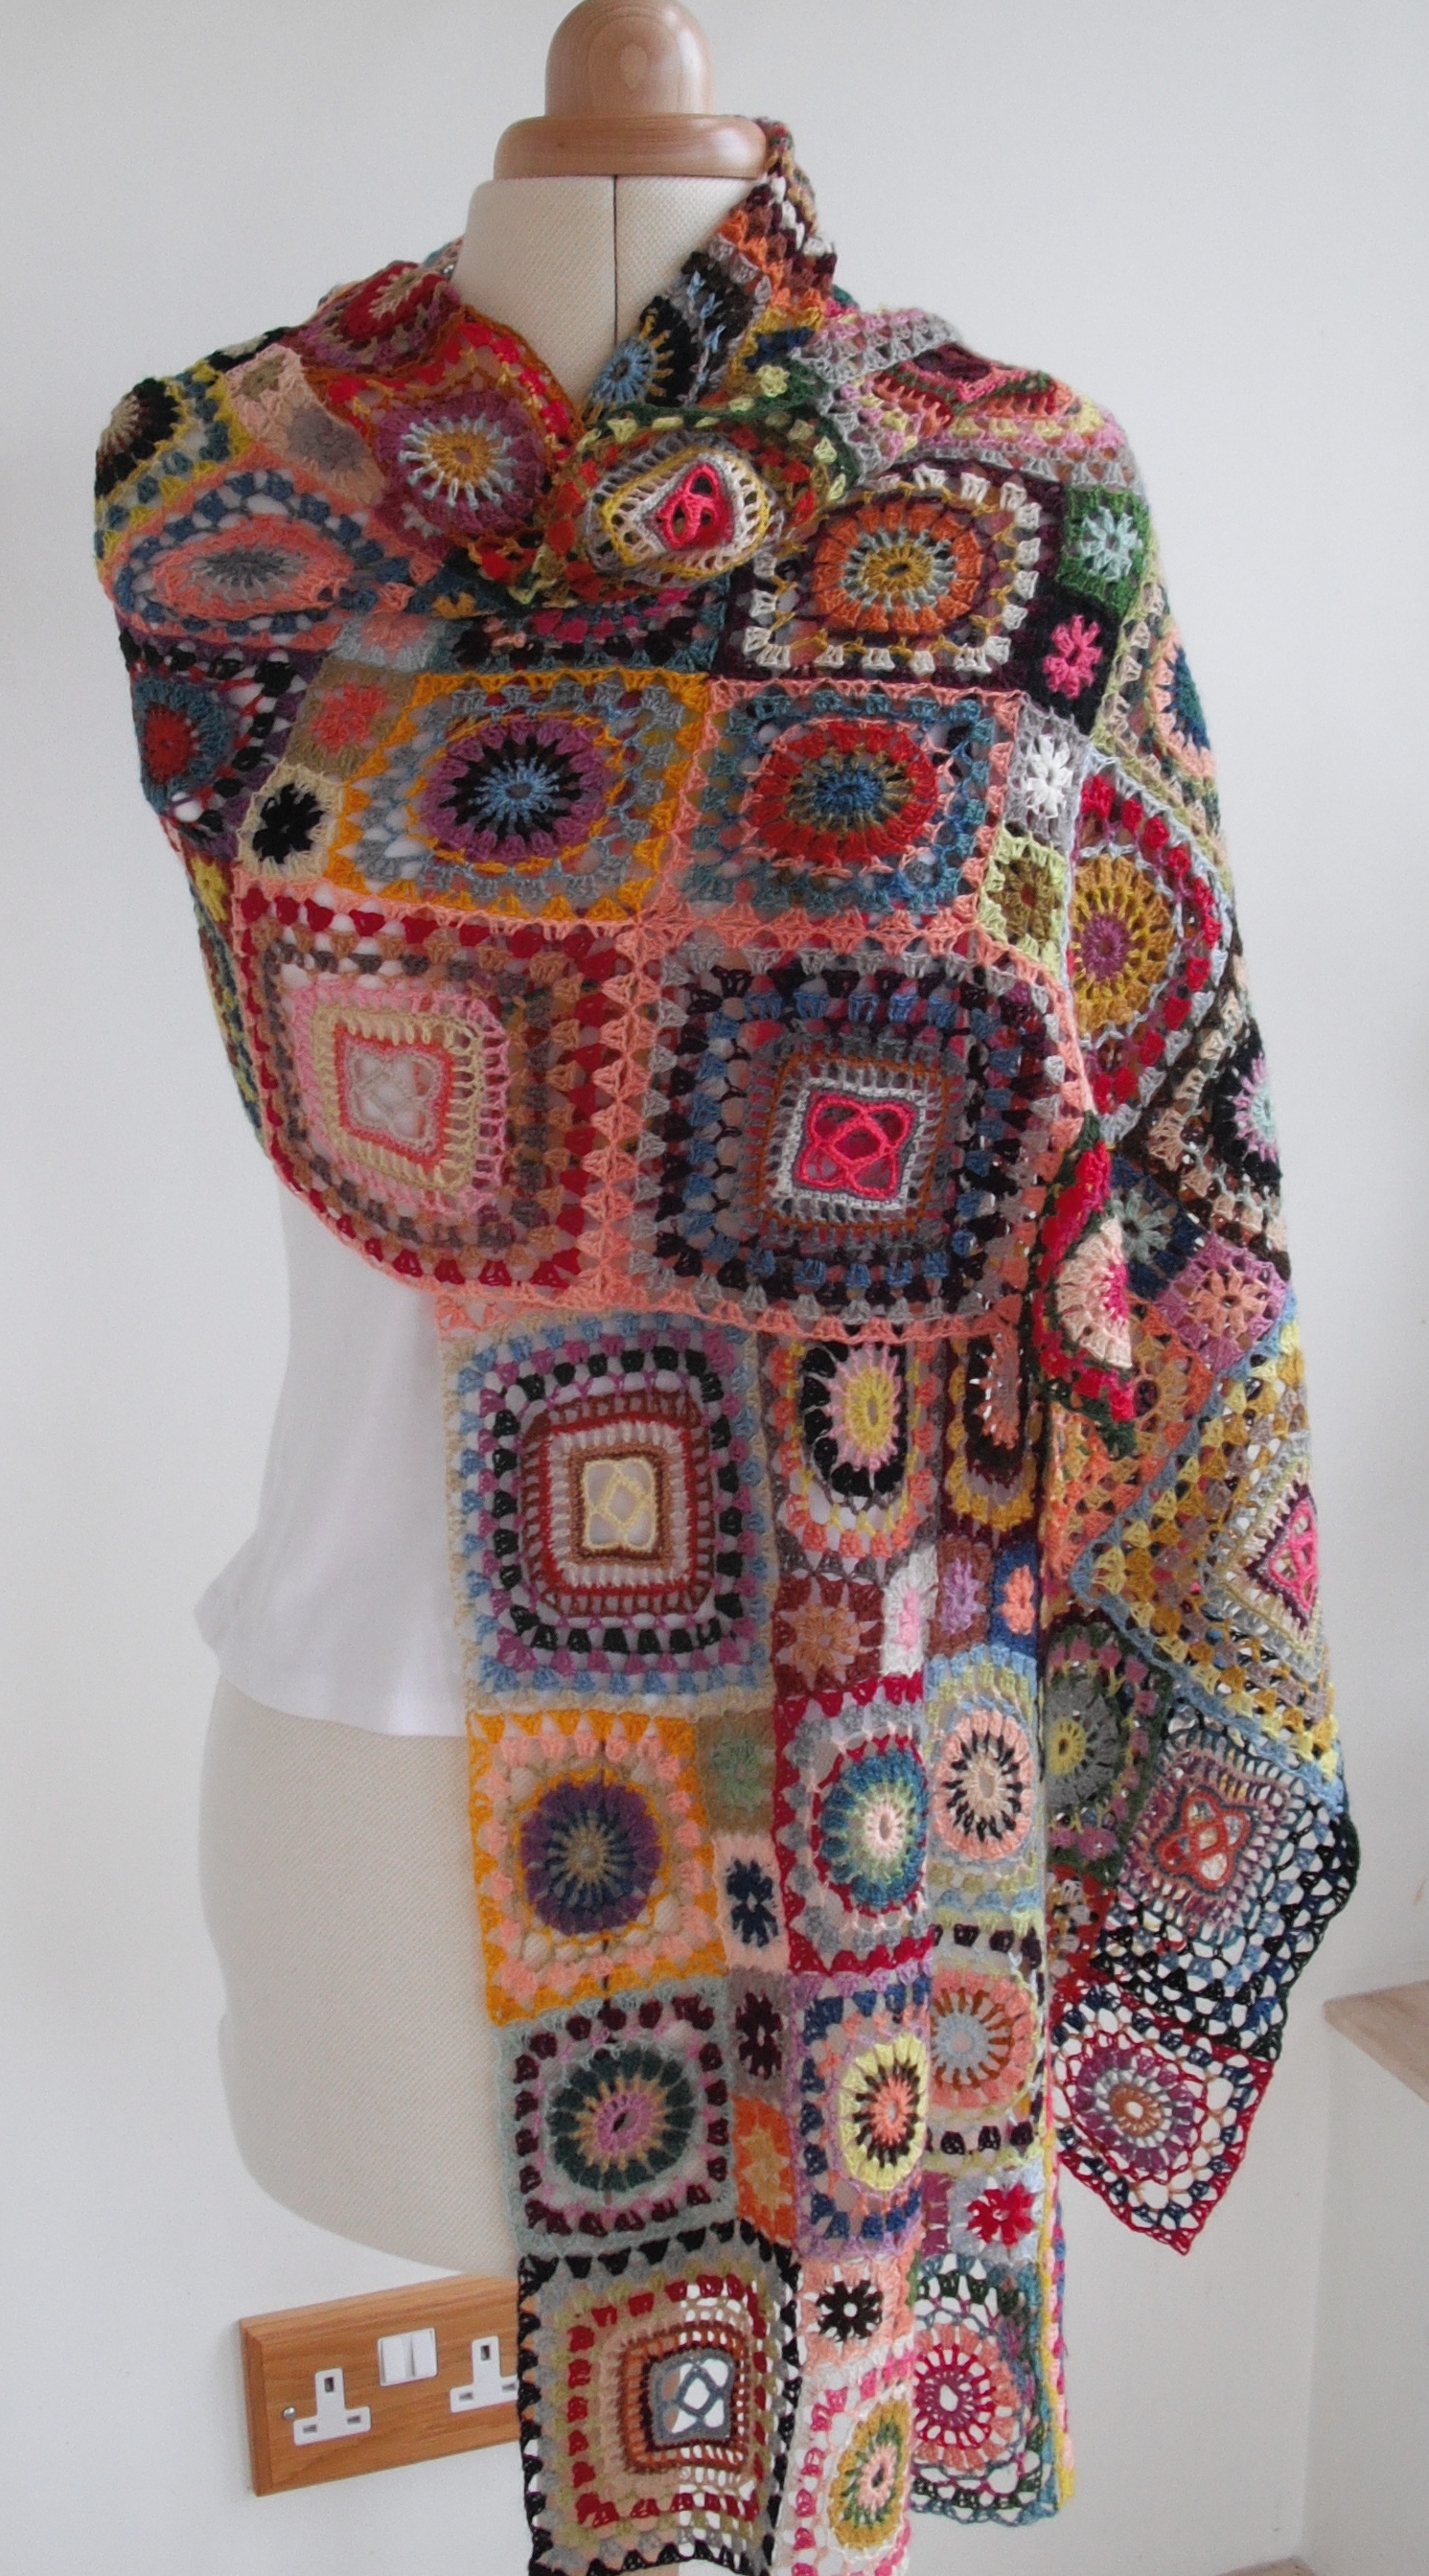
Bohemian Rhapsody; a kit with 144 squares to make. I bought it because of the colours – 75 different colours. For me it was an experiment in colour.
I find squares boring (I’m a hexagon girl) so I decided to do a little every so often rather than bore myself with 144 squares. So I set a deadline – 8 squares every 2 weeks. Last week I decided to speed up – I had only 16 squares to go, the end was in sight – so I just raced away, worked fast so the squares didn’t bore me.
And this is the result:
Definitely Bohemian!
Do I like it? Yes, I love it – the colours are quite spectacular.
Did I learn from it? Yes, I will be more daring with colour in future!
Did I enjoy it? Yes and no, like I say – I’m a hexagon girl! But now I do feel a little bohemian….
I am sure you are wondering if I met the WIP challenge I mentioned in my last blog. Well I am pleased to say I did – but only just! So for the last 10 days I have had the luxury of starting some new projects.
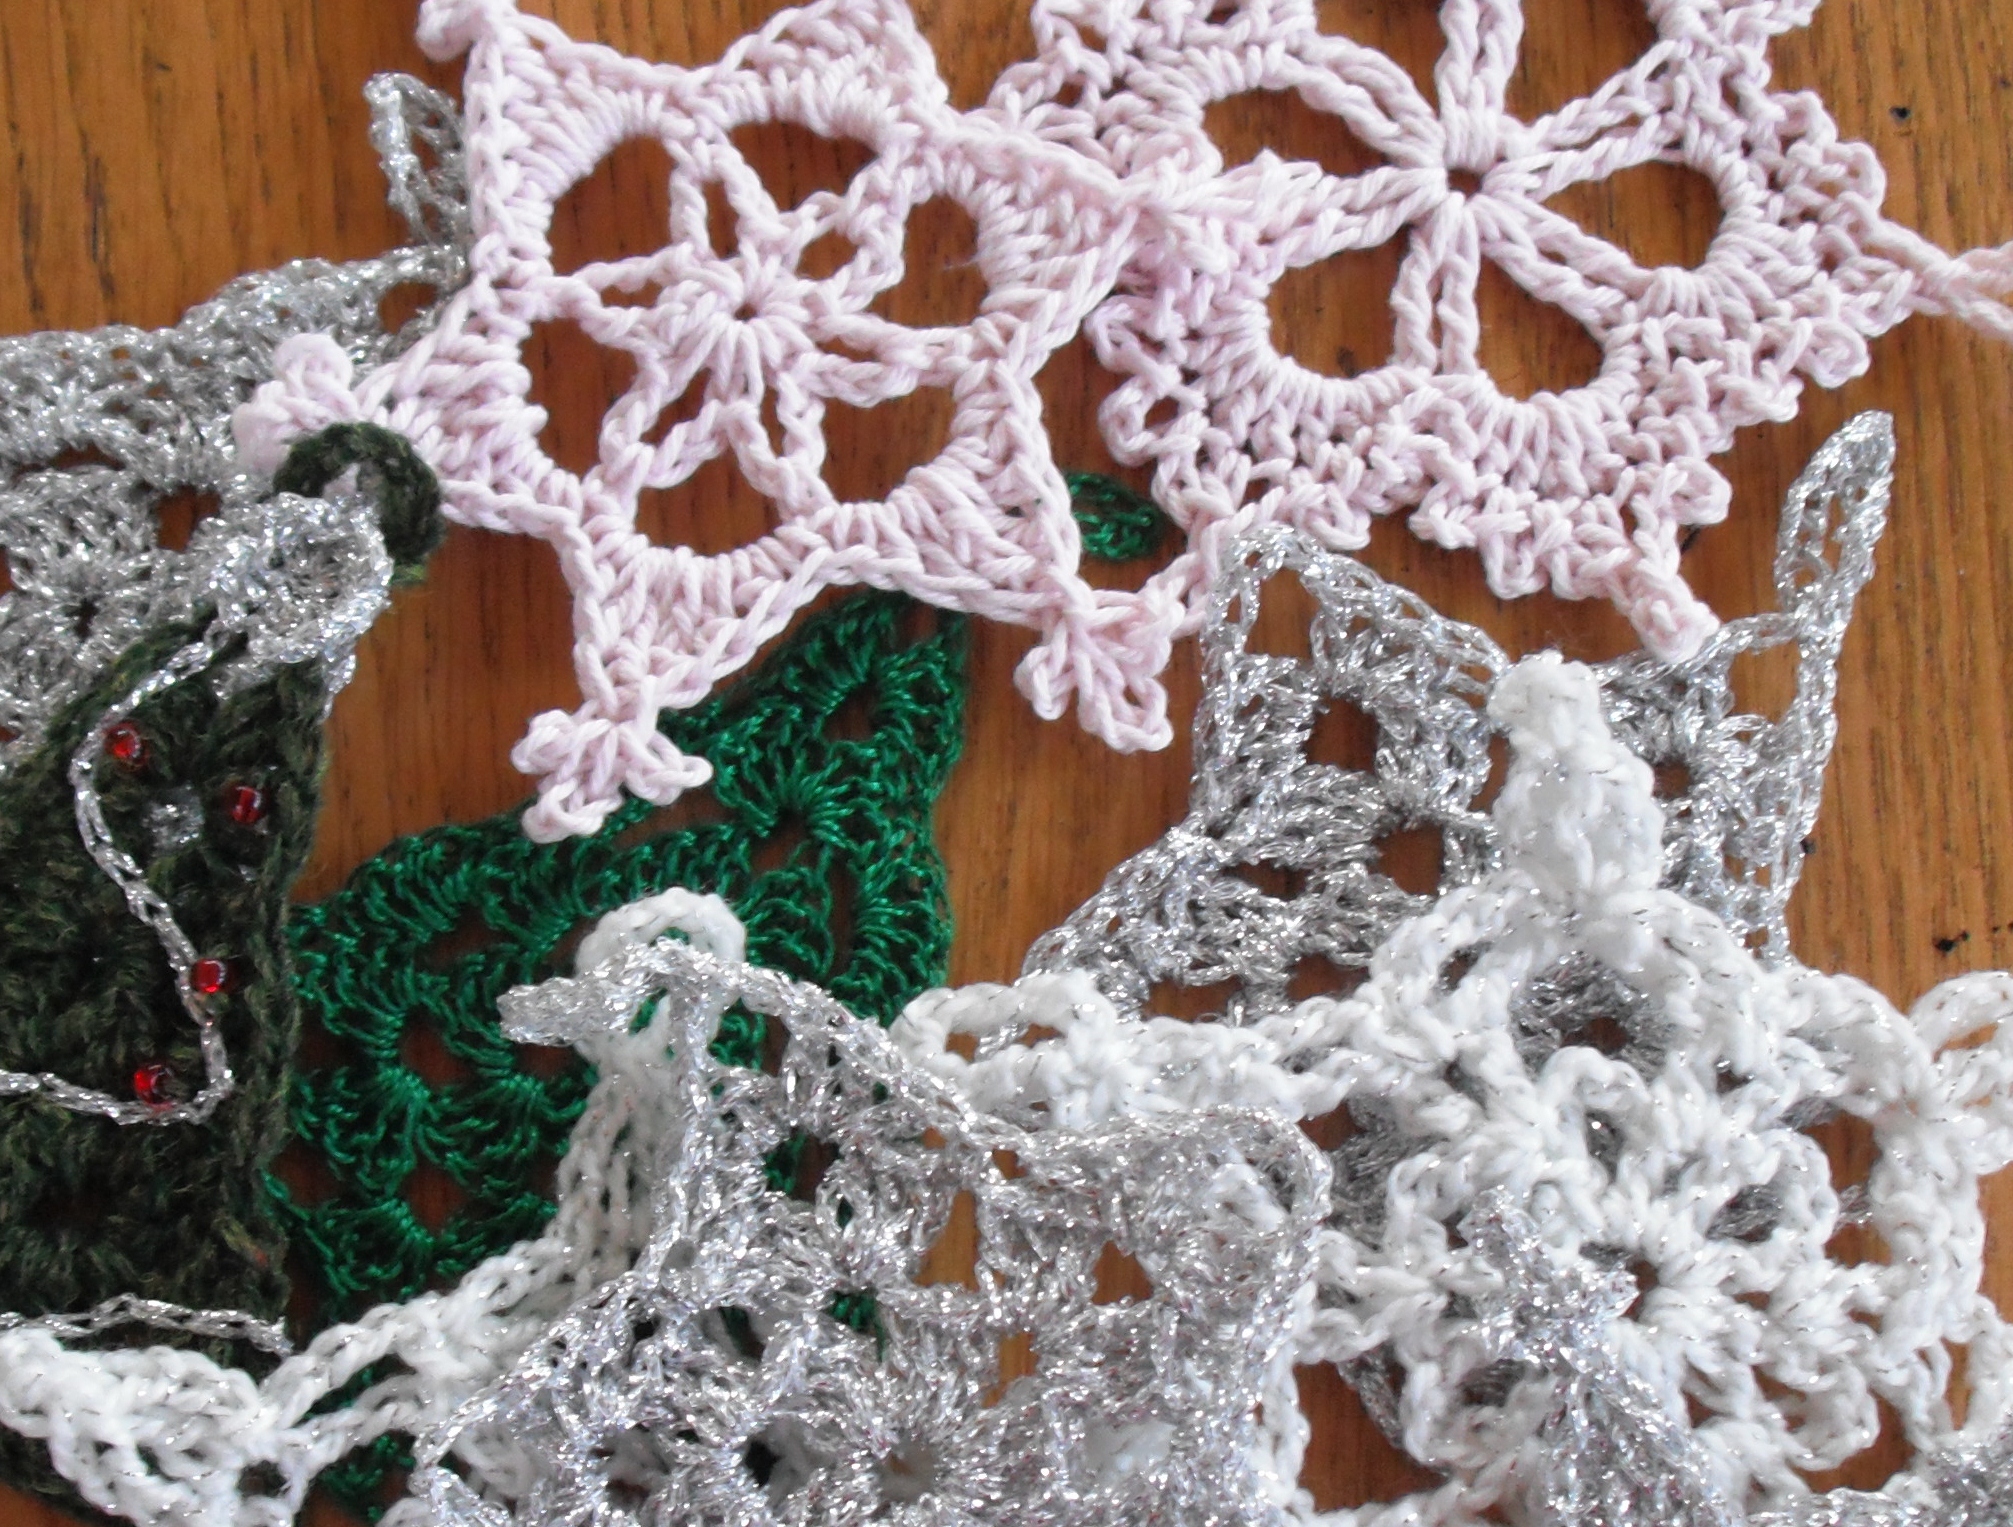
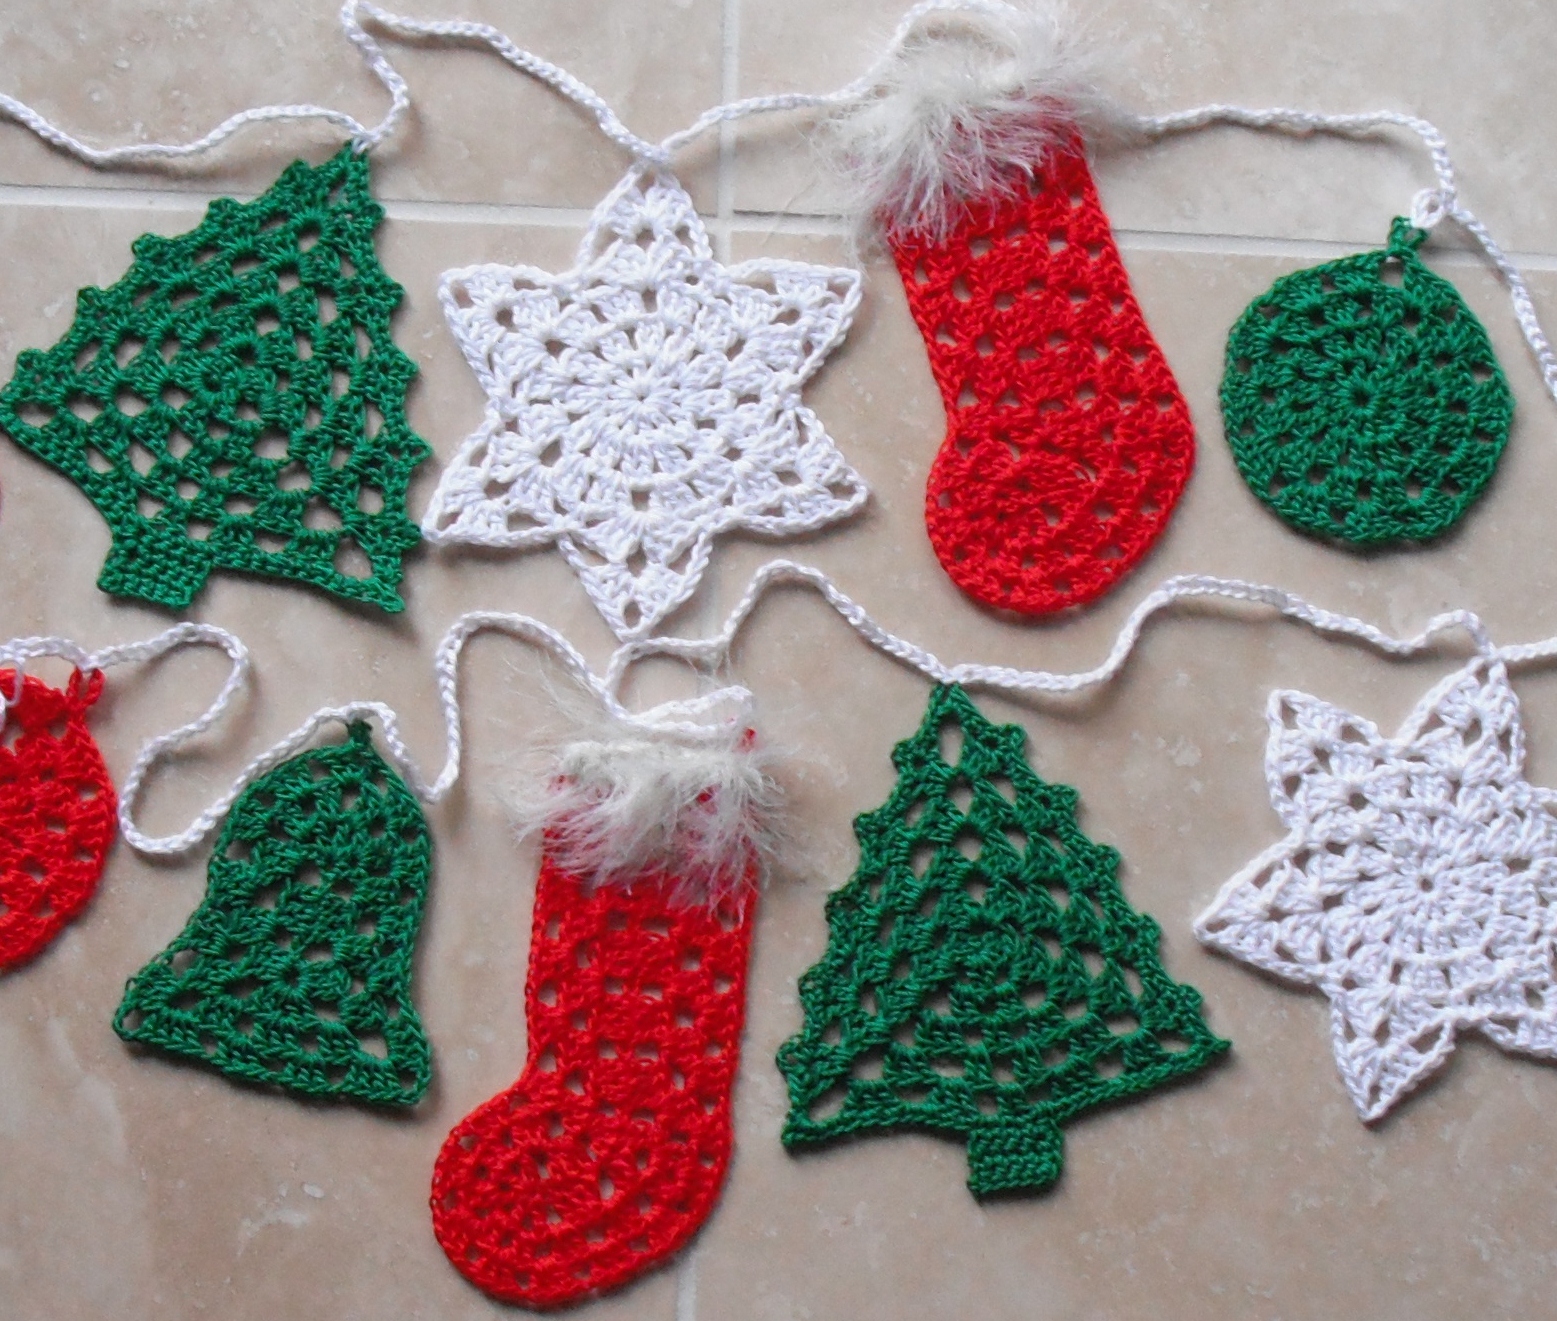
This year I have not made many Christmas presents, I decided it would be good to take a year off making them and I am sure it will be a relief to my family and friends as they have already received hat, mitts and scarves over the last 3 years! But I still feel the need to make something for Christmas. So my new projects have been festive – I have thoroughly enjoyed making some decorations to adorn the parcels I will wrap:
I also found time to design a new snowflake for Kerry. I am calling it Snowflake 2013 and I think I may have set myself a new challenge – to design a new snowflake each year! This snowflake features on Kerry’s blog. You will find the chart for it there as well as a video tutorial – and it’s free. So pop over and have a look, I am sure you’ll be crocheting your own snowflakes soon!
A crochet blog where you will find free crochet patterns along with oodles of crochet inspiration. Featured in top 100 crochet blogs and also in Crochet Now Magazine