I have finished my first project using the Meadow Farm Wool project yarn. It is a cushion:
Meadow farm cushion
I wanted to use both colours of yarn in the cushion but the cream was dk and the brown was 4ply, not easy to use in the same project. So I improvised – as you can see the front is in cream DK and I joined 9 of the Meadow Farm motifs together, all made using a 4mm hook. For the back I used a 3mm hook and the brown yarn – I started with a Meadow Farm motif and then continued it as one large granny square. Then I joined back to front and added a shell edging in cream, finally a row of shell buttons (bought at a The Harold Porter Botanical Gardens enroute to Hermanus in South Africa almost 5 years ago).
The back
I do need to line this cushion with some fabric, probably in a light brown that will show off both sides properly. But I was eager to share the finished project with you 🙂
I used 3 balls of yarn in this project – so I still have 7 balls left 🙂
There is still time to rent a sheep from the Meadow Farm Wool Project, and support 2 charities. What will you make with yours?
Do you remember this post when I promised to share more of my mandala designs when they had progressed further?
Here is the Buxton Mandala which I have just published.
Buxton Mandala
This is the ‘prototype’ I made in Buxton. It is made in Drops Muskat which is a mercerised cotton dk with a lovely sheen. I didn’t have many colours of this yarn with me at the time so I used only 5 colours.
When I reworked the design I used Stylecraft Classique Cotton DK of which I had a much wider range of colours. I loved the original design so much that the only thing I changed as I reworked it was the colours and I added one more colour.
Buxton number 2
There is quite a difference in the yarns – Stylecraft being softer with less of a sheen and giving less stitch definition. This photo shows the difference a little more clearly:
2 Buxtons
Which do I like? Well both – I love the colours of the Stylcecraft version and I love the sharp stitch definition of the Drops version.
Which do you like?
The pattern it is on special sale on Ravelry until midnight GMT Sunday 10th May 2015 – 50% off the original price if you use coupon code BUXTON at checkout (with apologies to EU purchasers where the coupon code will not work as EU sales are currently diverted to LoveKnitting – something that will be remedied in future).
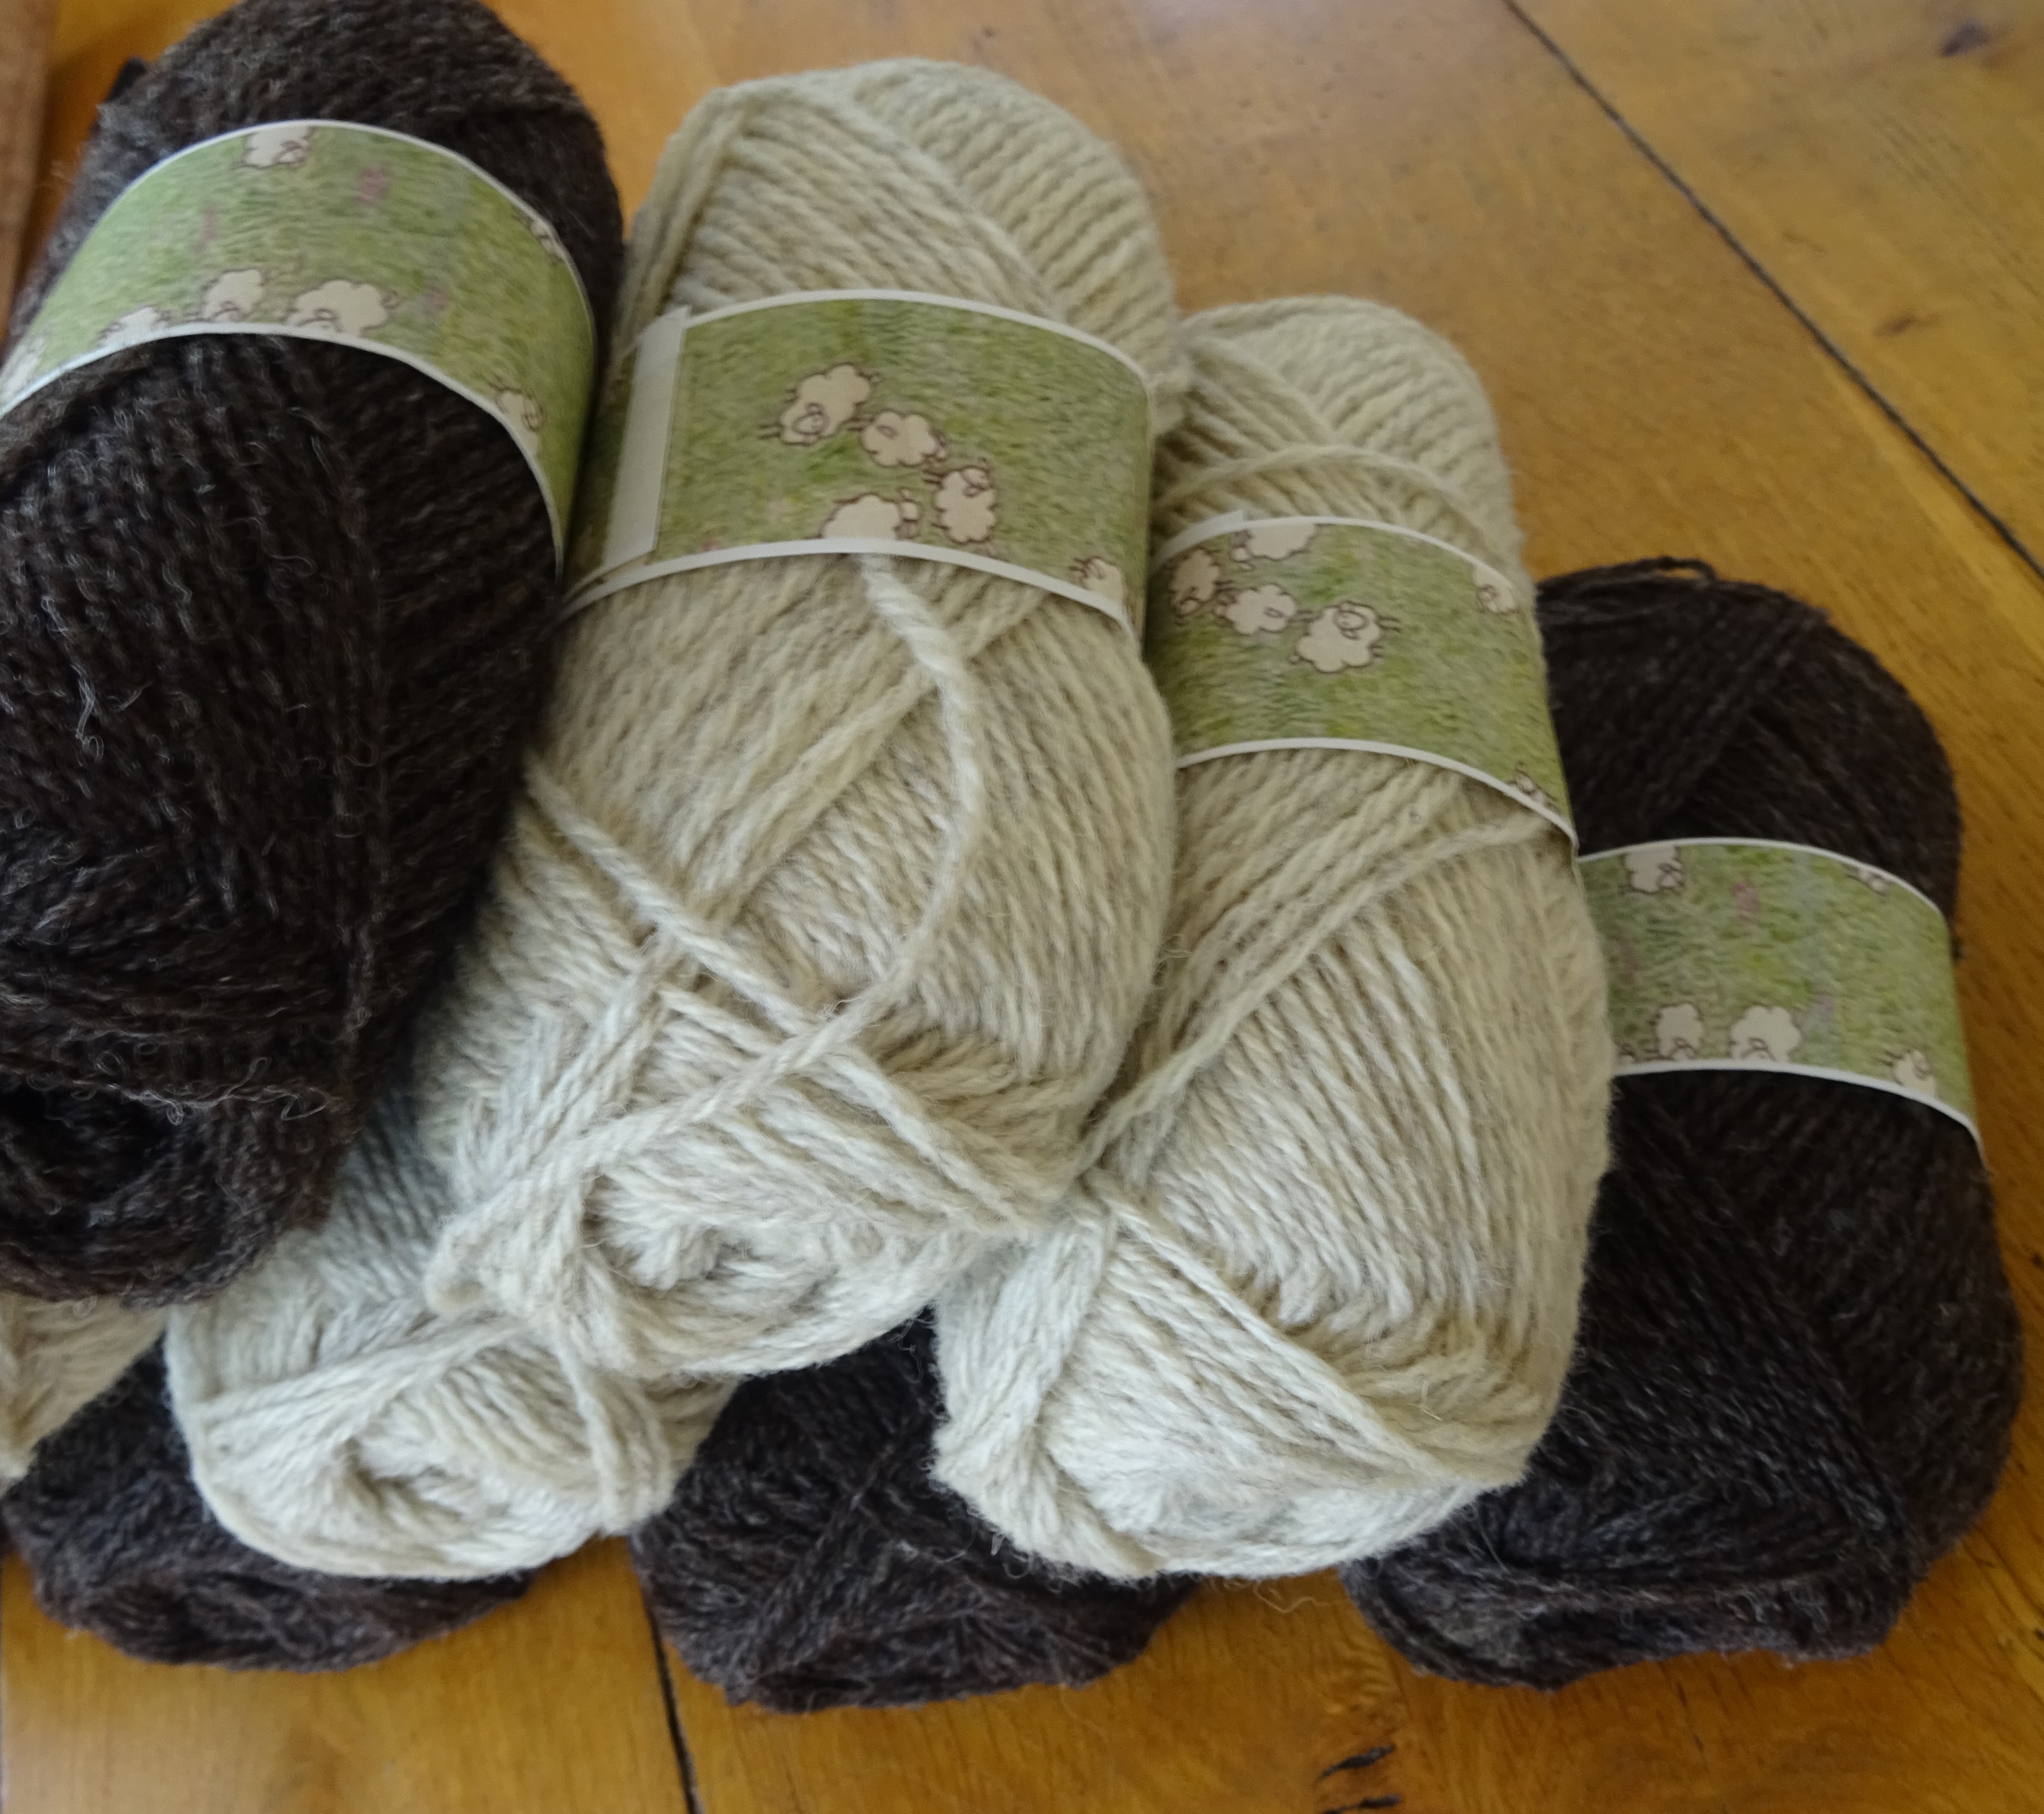
Mr Postie delivered something very special this morning – my yarn from the sheep I have rented from The Meadow Farm Wool Project.
The yarn
Two weights of yarn had been spun – the cream (which has lovely grey speckles in it) is a double knit and the dark brown is a thinner weight called 2ply but makes up like 4ply/fingering/sock yarn. They both smell deliciously of newly spun fleece 🙂
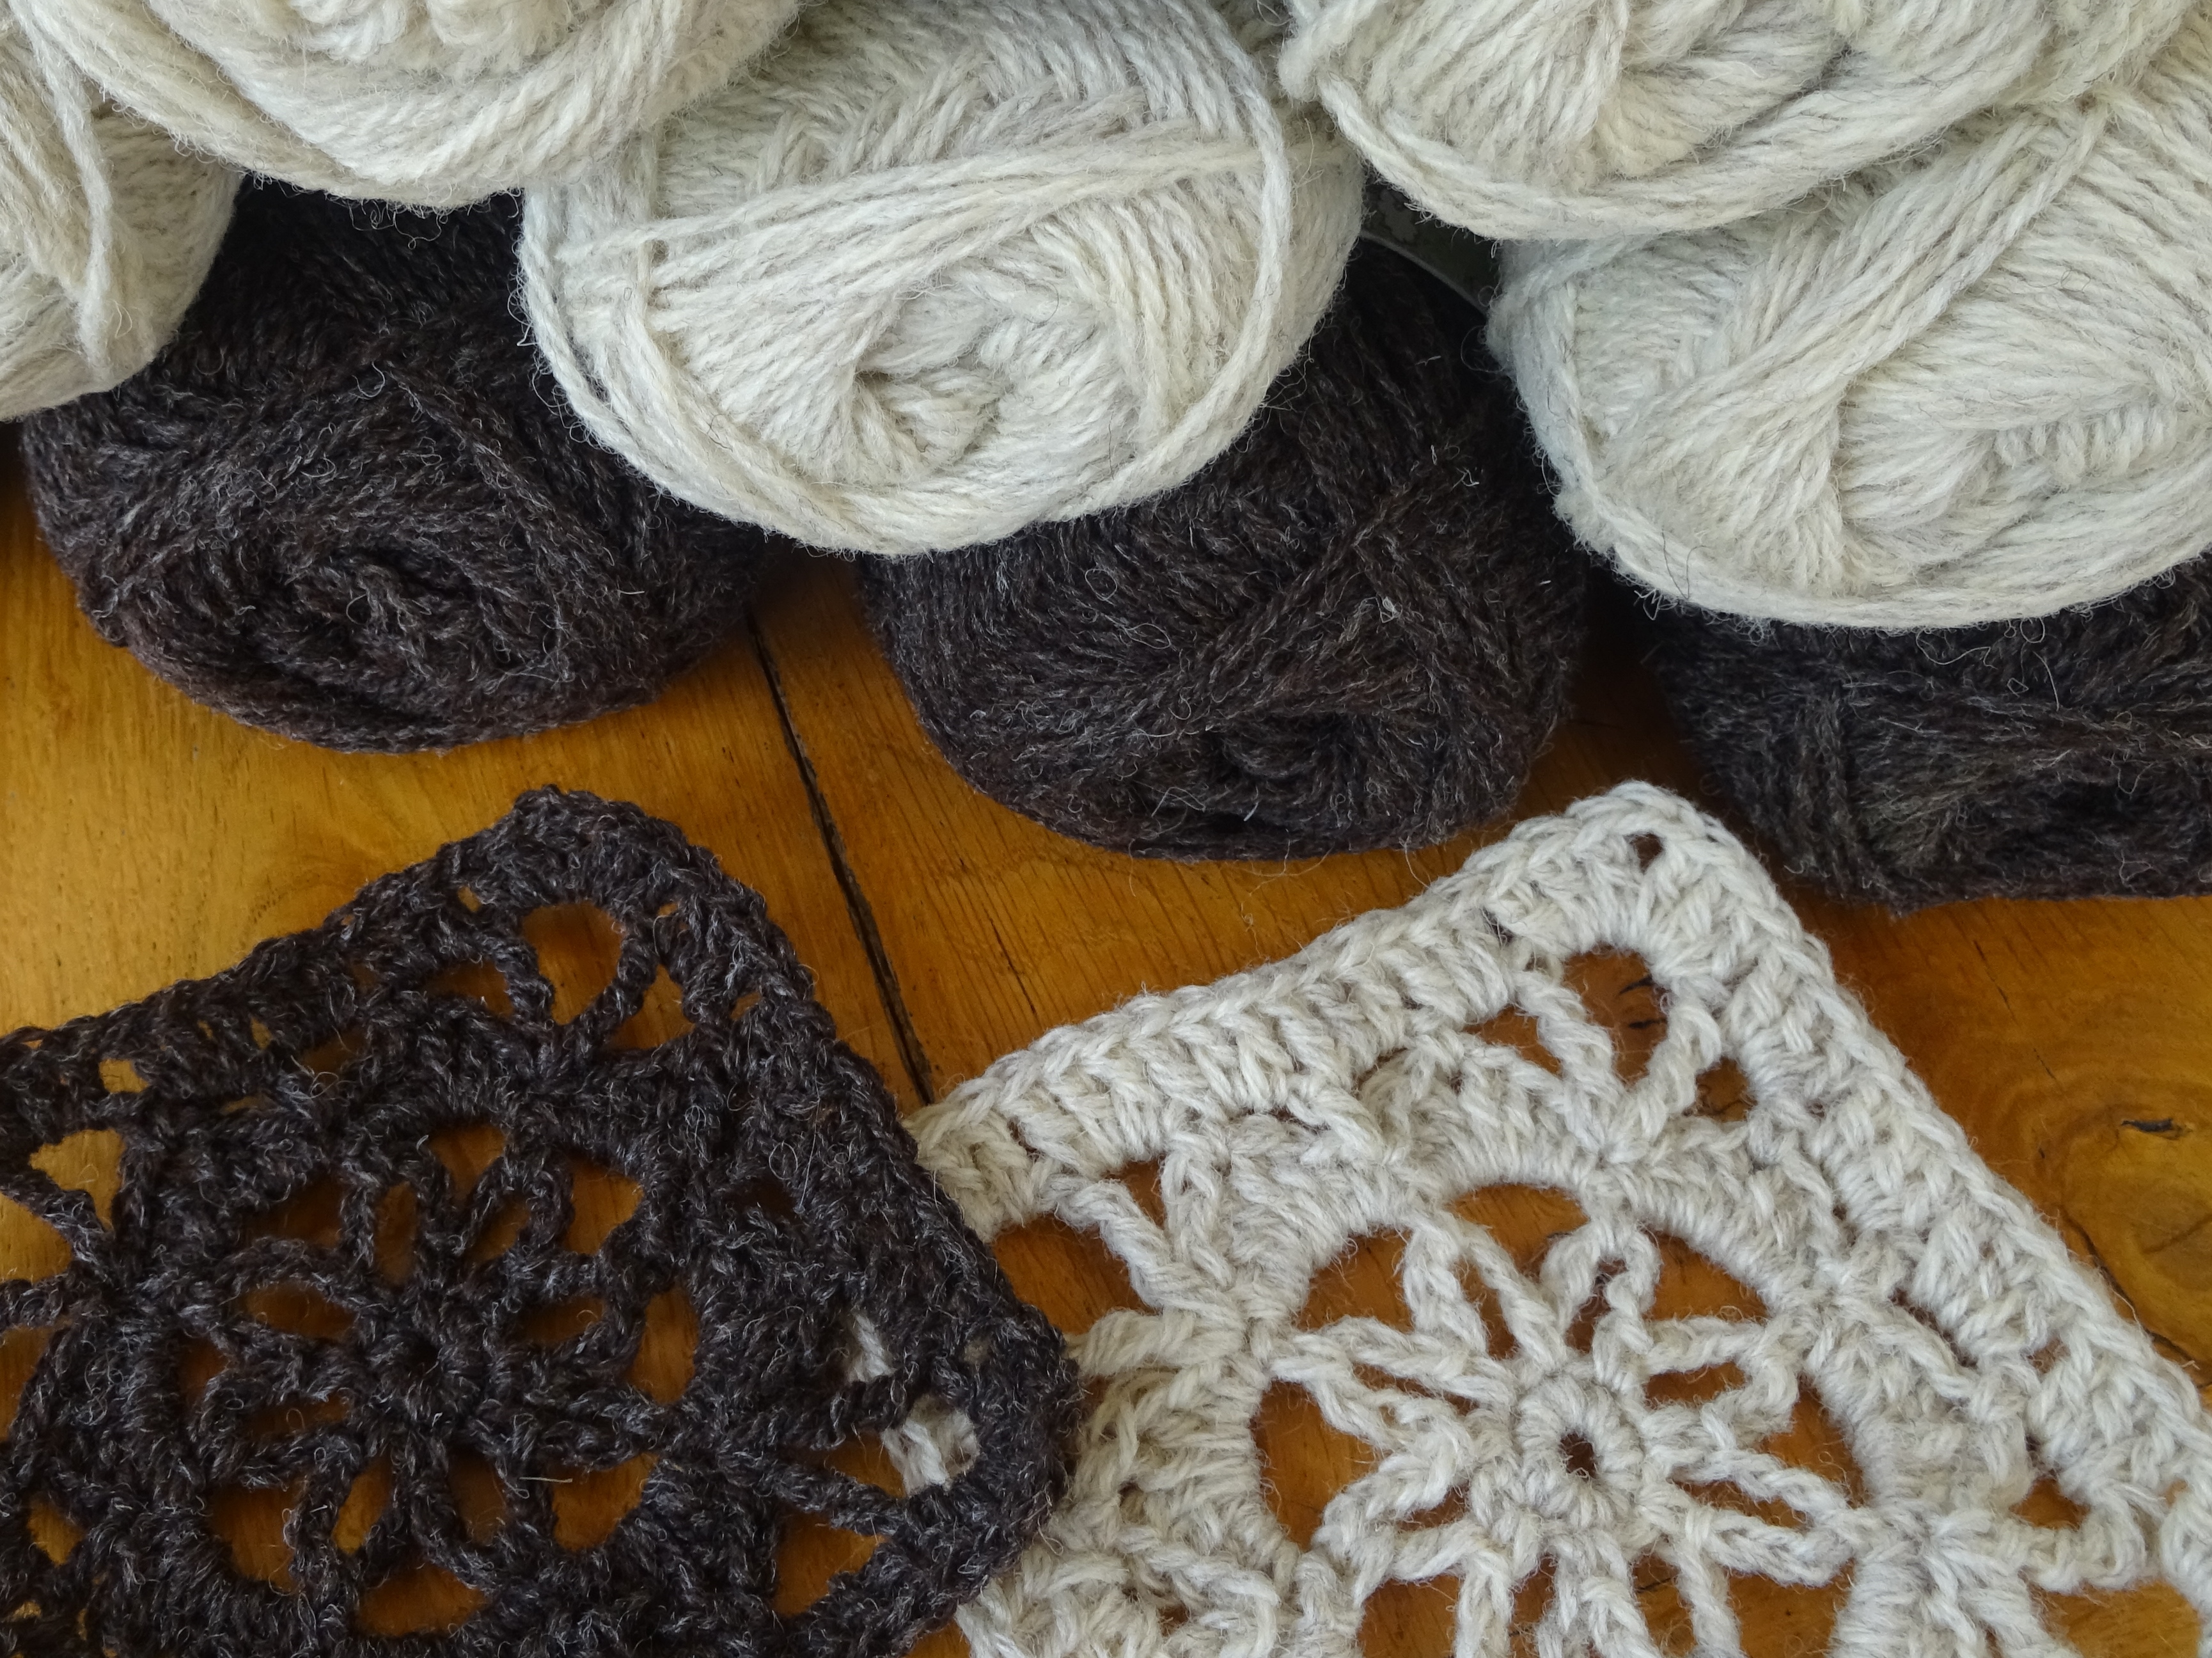
So I wasted no time – my hook came out and I made a couple of motifs:
One of each
This motif is the one I designed especially for the project and is available to sheep renters only. The cream one came out just the right size for a 9 motif square cushion – so that is what I am making. The brown motif is a bit smaller but I will make a large granny square backing to the cushion using the brown, I may just add a few interesting stitches to it.
Here’s a photo of the cream motif which shows the design well.
Meadow Farm Motif
There is still time for you to rent a sheep for this year and choose your selection of yarn – I opted for half and half. In due course, once all renters have their yarn, you will be able to buy the yarn at £6.50 per ball. And all rentals and purchases help go towards 2 fabulous charities – Teenage Cancer Trust and Headway. This is quite a new project and one I hope will grow, so please support it if you can.
Meanwhile, I know which project I will be working on at knitgroup tomorrow!
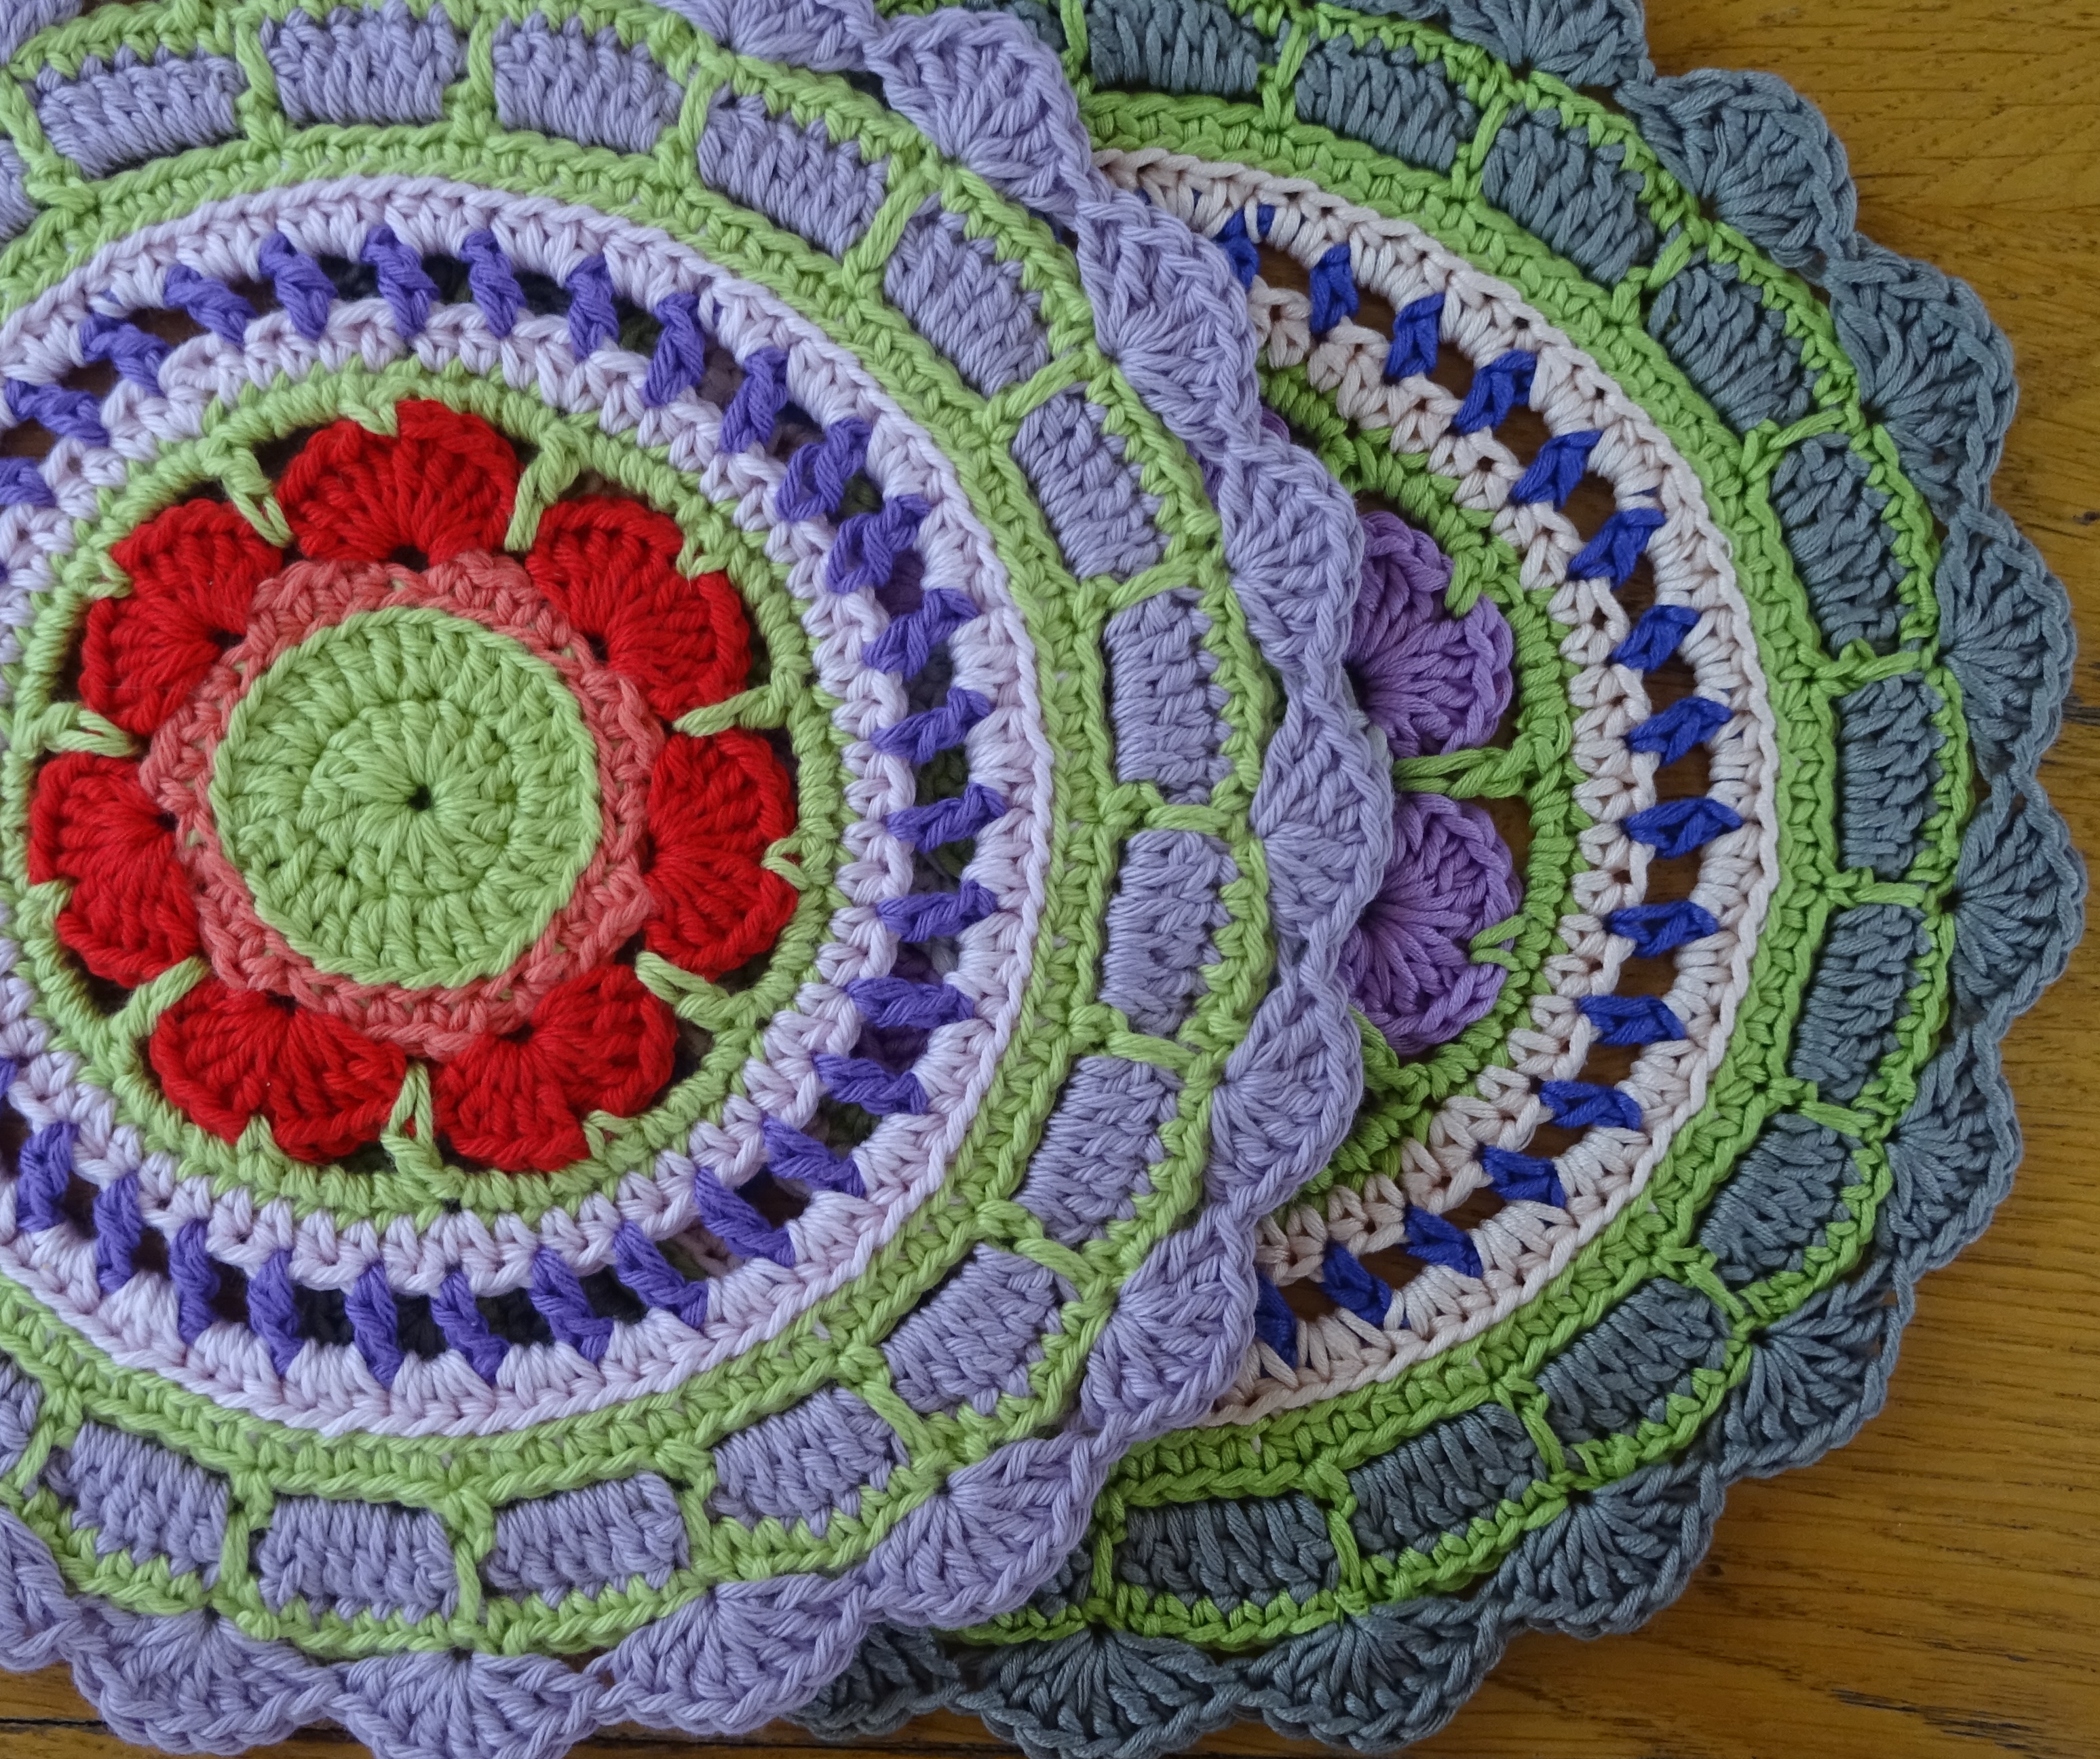
It is a selection of mandalas. This is a new obsession for me. But I didn’t realise just how many people are also obsessed or at least love mandalas; that is until I saw my facebook hits – they rocketed off the scale!
So I thought I should at least tell you more about the mandalas in the photo (and yes, test how far my blog hits go!).
In no particular order – there is the Sunshine Mandala which I published the pattern for a few weeks ago, the two I designed on my Knitaway holiday, one which was a bit of a test (or what I call a crochet doodle!) and a couple I designed very recently that will feature in a new workshop (design your own mandala). You see I love designing these so much that I thought I should share how I do it 🙂
I have a few more little joys to share with you from my Buxton holiday!
First the visit from Nic who is YarnsfromthePlain, she brought a sweet shop full of yarn to Buxton. Yes, I know I mentioned this before – but I didn’t show you which sweets I bought! So here they are:
Plumley
They are both the same yarn base called Plumley – a single spun yarn, 100% Blue Faced Leicester Roving DK, approx 200m per 100g skein.
Have I ever told you I love single spun yarn? It is so smooth to work with. So I was overjoyed to see Nic had started dyeing some. I will be back for more!
The second Buxton ‘extra’ is my mandala obsession – I did some crochet ‘doodling’ and designed 2 new ones! Here’s a sneaky peek:
Buxton mandalas
I will share more when the designs are more advanced, or closer to publishing. My mandala obsession is only just beginning!
Whenever I design anything I always swatch various ideas and some of them are changed or discarded altogether before I settle on a design. This is not unusual, I am sure most, if not all, designers do something like this.
When designing the squares for the Blog Blanket CAL, I swatched one square which I decided wouldn’t be appropriate – I needed it to finish on a solid round and the 8 round version would end on a granny round. But it wasn’t discarded, I liked it so I just put it aside waiting for some other use.
This is my original swatch and……………there’s an error in it, but I won’t tell you where!
The one that got away
That other use just came up. I am making a small blanket and I thought a huge granny square using the design would be perfect. It would be quick to make but also have just enough interest to avoid being boring to make.
The blanket was started yesterday, and I have already completed 15 rounds. I decided to swap colour every 2 rounds because the pattern changes then (which is what I did intuitively on my original swatch). But when I got to Round 6 I thought it looked familiar. And then I realised it is similar to Attic24’s cosy stripe blanket. Of course, it wasn’t planned and it does have 2 significant differences – firstly it is a granny-style square not a stripe and second I use some chain sts in this square.
If you wanted to make an Attic24 cosy stripe-style granny blanket then it would be easy to adjust the pattern by removing the chain sts and adjusting the number of trebles along each ‘granny’ round – but I wanted to continue with my own design.
So here’s the pattern for you (with a sneaky peek at a part made blanket that I don’t really want to reveal):
Sneaky peek
ABBREVIATIONS
The pattern is written in English crochet terms.
St = stitch
Ch = chain
Tr = treble (US dc)
Ss = slip stitch
Sp = space
Ch-sp =chain space
I changed colour every 2 rounds, simply joining the new colour where I started each round with a ss.
Foundation: Make a 4ch foundation ch and join into a ring with a ss Round 1: 5ch (counts as 1tr, 2ch), (3tr, 2ch) 3 times into the ring, 2tr into the ring, join to 3rd st of starting 5ch with a ss. Round 2: ss into 2ch-sp, (note for this and each subsequent round: this ss is to position the start of the round in the right place) 5ch (counts as 1tr, 2ch), (3tr, 1ch) into the same 2ch-sp, (3tr, 2ch, 3tr, 1ch) into each of the next three 2ch-sps, 2tr into the first 2ch-sp, join to 3rd st of starting 5ch with a ss. Round 3: ss into 2ch-sp, 5ch (counts as 1tr, 2ch), 2tr into the same 2ch-sp, 1tr into each st around (working into the 1ch not the 1ch-sp), (2tr, 2ch, 2tr) into each 2ch-sp, and work a final 1tr into the first 2ch-sp, join to 3rd st of starting 5ch with a ss. Round 4: ss into 2ch-sp, 5ch (counts as 1tr, 2ch), 2tr into the same 2ch-sp, 1tr into each st around, (2tr, 2ch, 2tr) into each 2ch-sp, and work a final 1tr into the first 2ch-sp, join to 3rd st of starting 5ch with a ss. Round 5: ss into 2ch-sp, 5ch (counts as 1tr, 2ch), (3tr, 1ch) into the same 2ch-sp, miss 3 sts, [*(3tr, 1ch) in next st, miss 3 sts; repeat from * to next 2ch-sp, (3tr, 2ch, 3tr, 1ch) in 2ch-sp, miss 3sts] 4 times but on the last repeat of this just work 2tr into the 2ch-sp at the start of the round, join to 3rd st of starting 5ch with a ss. Round 6: ss into 2ch-sp, 5ch (counts as 1tr, 2ch), (3tr, 1ch) into each 1ch-sp around and (3tr, 2ch, 3tr, 1ch) into each corner 2ch-sp, 2tr into the first 2ch-sp, join to 3rd st of starting 5 ch with a ss.
Repeat Rounds 3 to 6 until you have a blanket the size you want. I plan to finish on a Round 4 so I have a nice edge.
If you decide to make a blanket using this design, please share a photo 🙂
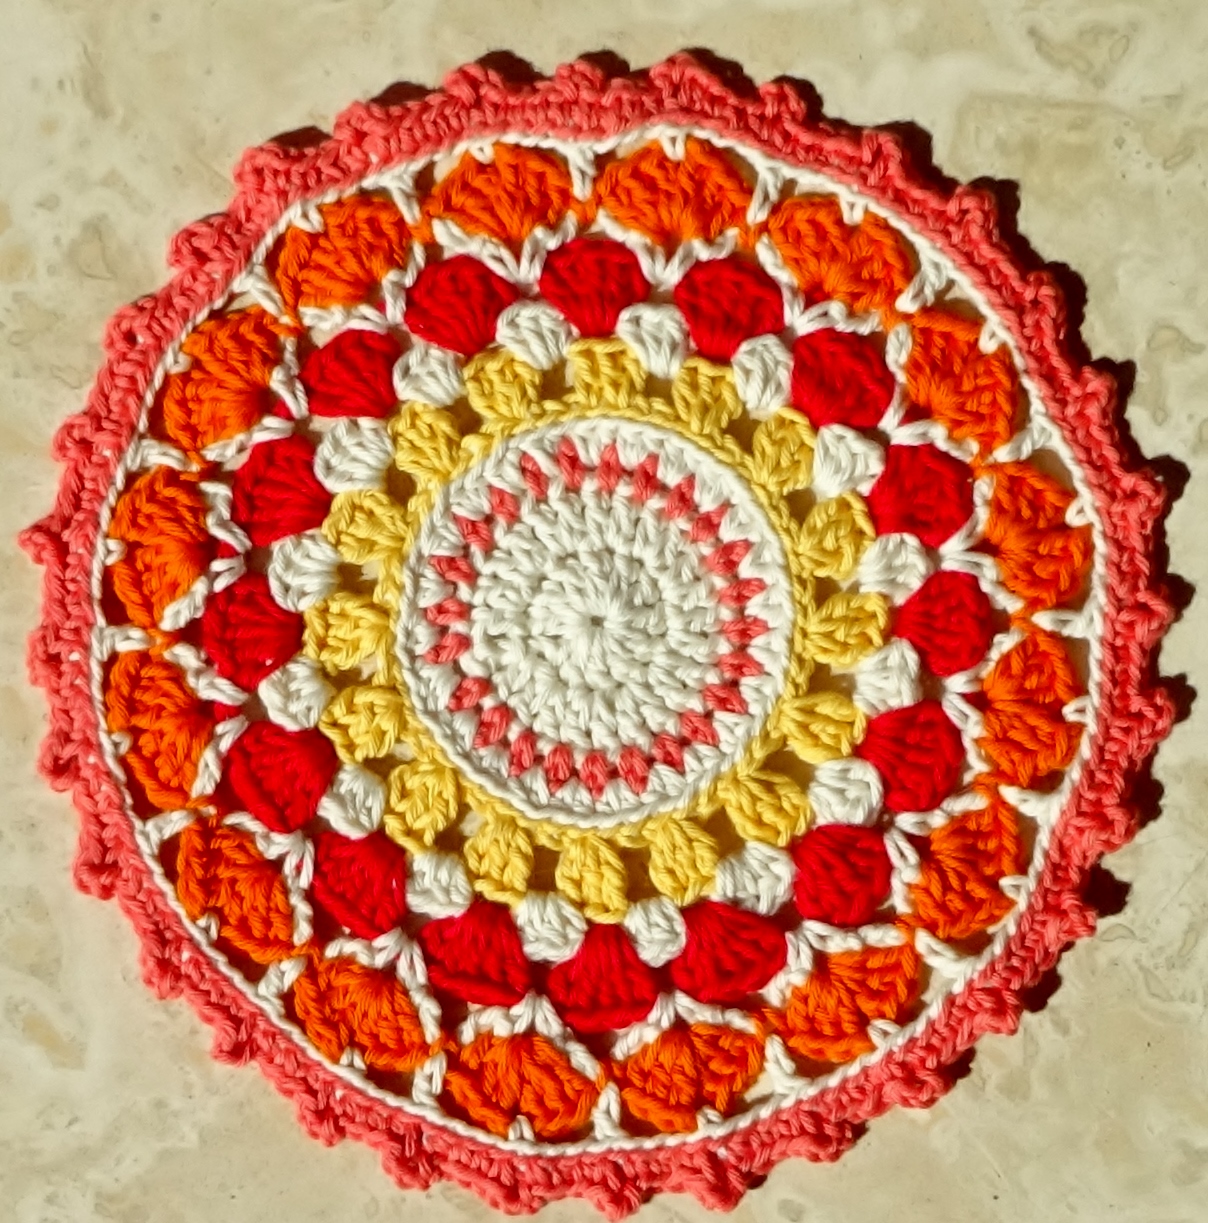
I wanted to brighten up a corner and I decided there was no better way than with a little crochet. However, I wanted something small not as big as a blanket or cushion. After some thought I decided to try a mandala. I have never made a mandala before let alone designed one but it is only a large round motif and I have lost count of the number of motifs I have designed……..
So here is my bright sunshine mandala:
Sunshine Mandala
I enjoyed making it, which came as a surprise to me because I hadn’t even imagined that mandalas had a use, nor that I would design or like one! But I did enjoy it, and now I am thinking about making another……….
Oh, and when I dropped it I discovered that yarnaddictcat also liked it – well, I’m not surprised really!
This is the sixth and last design in the Hooking Up! ebook. It is the Starry Night Blanket, another design by special permission of the designer Amanda Perkins. I think it is the perfect first large blanket for a new crocheter.
Starry Night – smaller version
Many people make a granny square blanket as their first major blanket project. I am no different – my first blanket was a granny square design (in shades of blue). But I have found so much more enjoyment out of making a more unique blanket. I first saw this design in 2011 and I fell in love with it; it had been many years (too many to confess!) since I had made a blanket and I knew this was the one that would set me on the path of making them again.
The photo is the Starry Night I made; it is a smaller version of the blanket design. Why? Well, Amanda’s blanket is a lovely shade of blue and uses variegated yarn to highlight the design but I decided I wanted a midnight blue and a sparkly star highlight for mine. Unfortunately I had difficulty finding the yarn I wanted in the quantity required – but I improvised with the quantity of yarn in the colours available and that is why mine a smaller version. I love the final effect I achieved, but I also love the original colours. So it seemed perfect to fit this in the book because I could show you how to make 2 sizes. Those of you who are less confident may wish to go for the smaller size (approx 110cm square), or maybe you just want something a little smaller. The original large design is approx 140cm by 150cm. So the choice is yours – large or small.
Another reason this is a perfect fit for the book is that it builds on the techniques you will have learnt as you work through the book. The motif is hexagonal like the Cassia Cowl and joining is the ‘as you go’ method. And it really does make up quickly once you have made a few motifs.
Amanda is the queen of crochet blankets, she has some beautiful designs in glorious colours. Quite coincidentally she is running a mystery blanket club this year for a star themed design – Zodiac. This club is now closed for those who want the complete package of yarn and design, but she has released the design (in monthly instalments) in her Etsy shop. I will be blogging about my progress on this in another post – meanwhile if you want to learn more have a look in her Etsy shop.
I hope you have enjoyed following the designs in the Hooking Up! ebook. If you have just learnt to crochet, then I hope it will help you grow your craft and I would love to see what you make.
Happy crocheting xxx
PS Starry Night is also available as a single pattern here.
This is the fifth design in the Hooking Up! ebook.
It is included in the book by special permission of the designer Amanda Perkins. You can read all about Amanda on her blog, she creates the most beautiful crochet designs and has a brilliant eye for colour. I am proud to call her my friend and I am probably one of her biggest fans!
This design is the Cassia Cowl.
Cassia
The photograph is the cowl I made for the ebook. I used a different yarn to the one Amanda used originally, to show that it is adaptable and because I wanted to! It is made with motifs that are joined as you go. If you have followed the ebook through you will understand how to join as you go by the time you reach this pattern. I love working with motifs, especially those that are hexagonal (six-sided or six-pointed) and this one is straightforward to make yet looks so beautiful.
This is a Mobius Cowl, so it needs careful attention when joining into the cowl shape. The ebook provides detailed instructions of 2 ways in which you can do this.
This is not exclusive to the ebook, you can buy Amanda’s individual pattern here.
Tomorrow I will share the last design in the ebook, another by Amanda Perkins.
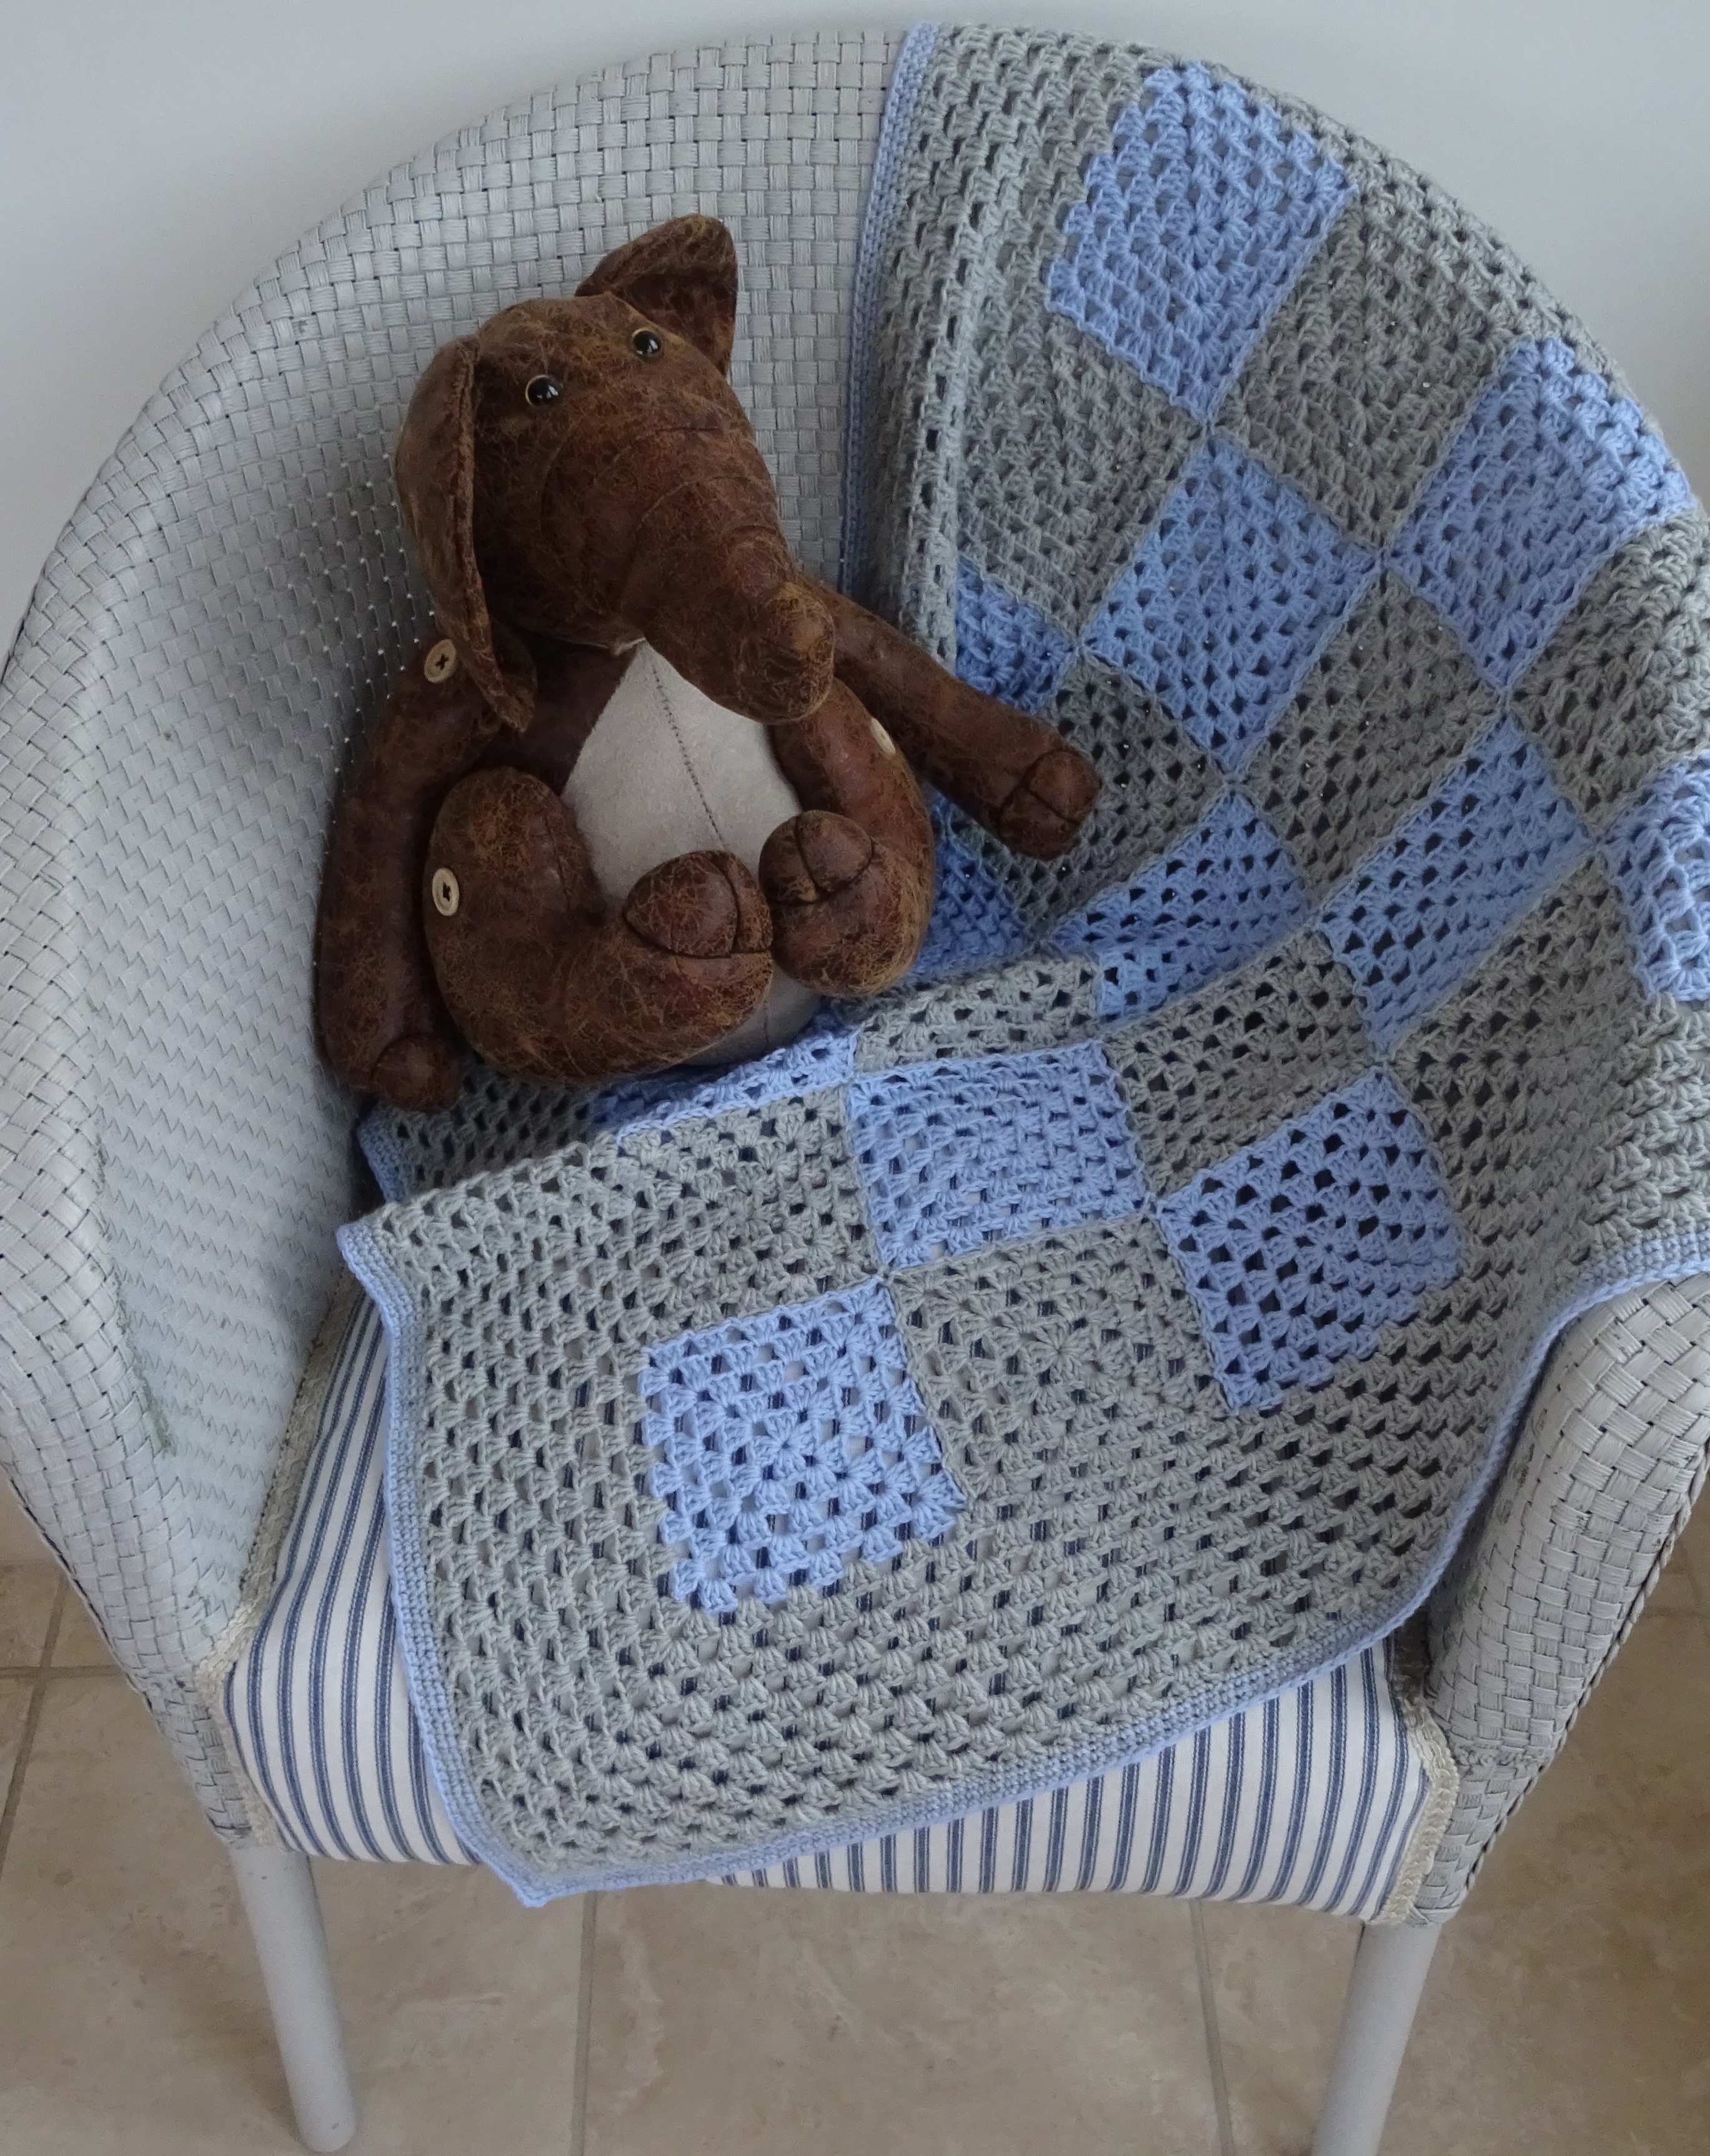
The next design in the Hooking Up! ebook is a baby or lap blanket.
Granny Blue Lap Blanket
Again this design is exclusive to the ebook. I love this blanket, it was a joy to make and it is a perfect size for the chair, and is an ideal size for a baby!
It is included because it teaches some important techniques. The first is how to join motifs as you go (rather than crochet them together or sew them together later); this is a technique which is used in many motif projects. To help you there are a few photos showing the technique.
The second technique is how to do a ‘granny’ border that lies flat. Too often I see granny blankets with a ‘granny’ edging that looks wavy rather than flat and it is very easy to avoid this if you know how.
Finally it has a nice final edging which is firm and very practical.
If you haven’t made a granny blanket before then this is a good one to try, provided you want to learn a few new techniques.
A crochet blog where you will find free crochet patterns along with oodles of crochet inspiration. Featured in top 100 crochet blogs and also in Crochet Now Magazine