
This week I’m going to show you how to turn the motifs into the bag shape. Here’s a reminder of the bag, so you know the shape you are aiming for:

First you need to block them. If you leave it until you finish the bag you may find it a bit tricky.
Then you need to decide how you are going to join them. I recommend joining in one of these 4 ways:
- By slip stitch holding the motifs right sides together, as I did for the Christmas CAL here.
- By double crochet (US single crochet) holding the motifs wrong sides together.
- By sewing.
- By slip stitch holding the motifs side by side, this is the method I used and I worked into the back stitch only. You may find this a bit tricky if you haven’t done it before, but I think it gives a good effect and is worth that extra effort. This shows you the technique:

And the finish:

I joined my bag using the same yarn that I used for the last round of my motifs – the Pastel Green.
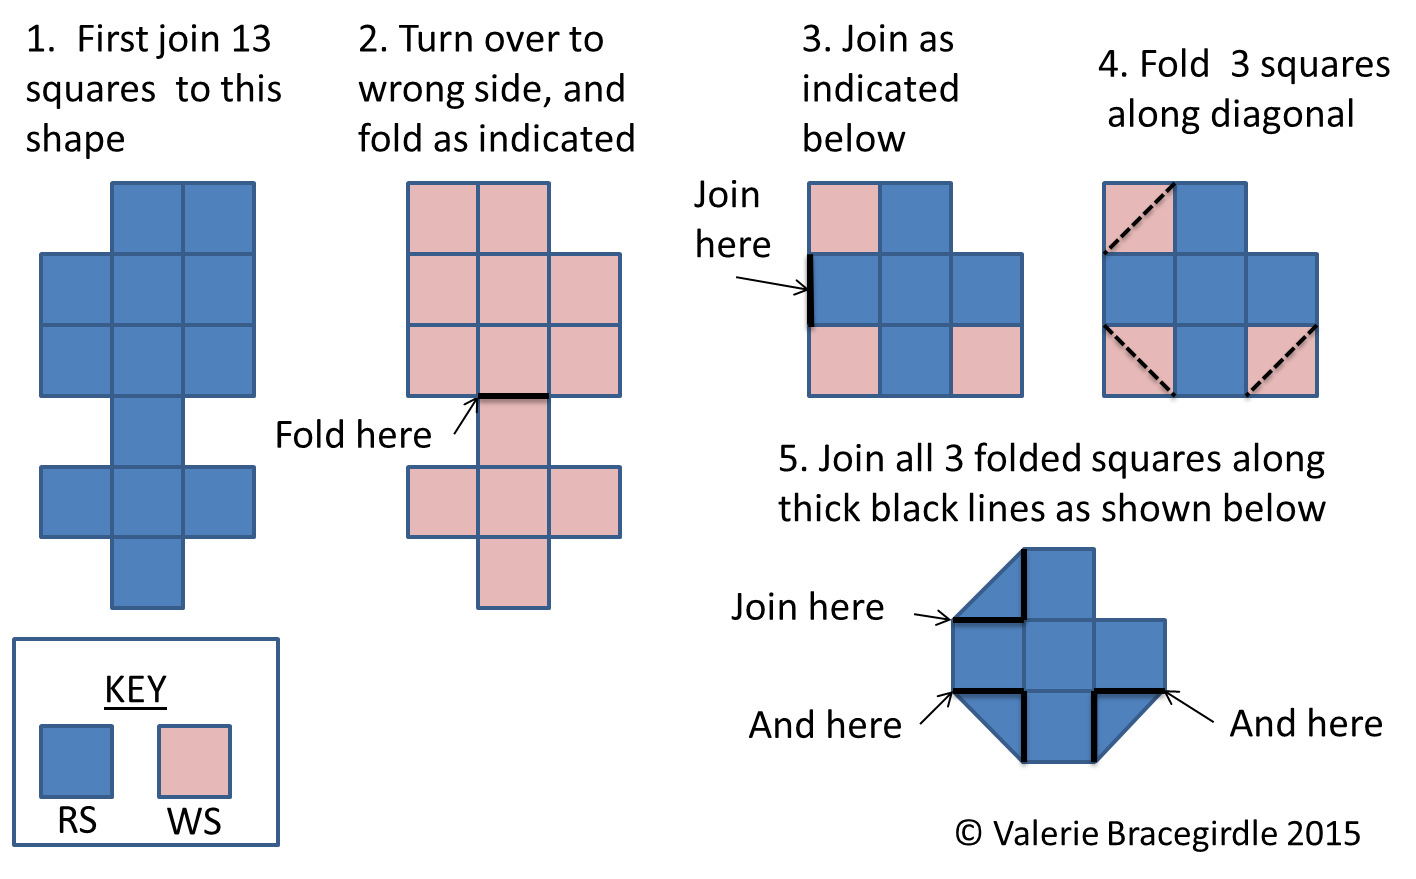
To form the bag shape you need to join them in a particular order. And I have illustrated this in the following diagrams:
It will take a while for you to make you bag shape, and you may find the last bits a little tricky. So I will share how to finish your bag next week.
Keep posting progress and asking questions on my Ravelry forum.
Happy crocheting xx

Wow! I love this!!
Thank you! You must make one – mine is now a handy yarn storage bag, and it brightens up my day 🙂
I can see that it would brighten a day.